How to create a multilingual email campaign using Smart Translations
Learn how to create and send an email campaign in multiple languages, depending on the language preferences of your audience. Klaviyo can translate a campaign’s content into 70+ languages.
Sending each recipient an email in their preferred language helps you reach an international audience and can increase engagement. You create 1 campaign, and Klaviyo sends each recipient the version that matches their language. You don’t need a separate campaign for each language.
Before you begin
Smart Translations is available for paid Klaviyo accounts. Before you translate a campaign, set up Smart Translations for your account.
If you haven’t already, learn the basics of how to create and send an email campaign. This article mainly covers translation features for campaigns.
Translate a campaign
Make sure your email is fully edited and ready to send in your original language before translating. Otherwise, you’ll have to go through the translation process again if you make edits to the original content.
- Create a campaign or edit an existing draft campaign.
- On the Recipients step of the campaign wizard, make sure to add lists or segments to your campaign’s audience that you know have multiple language preferences.
- If you haven’t already, add an email template to your campaign.
- On the Message step, click Edit to open the template editor.
- Click the Translate icon in the upper right corner of the editor.
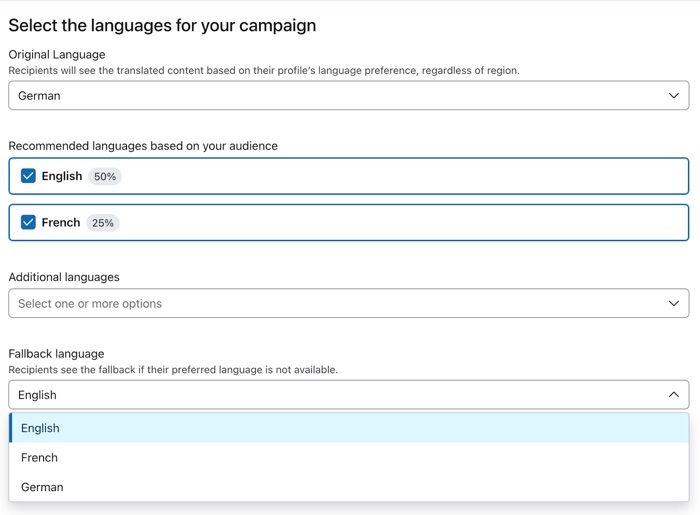
- Under Written in, select the original language of your email.
- Select the checkbox next to each language you want to translate your campaign into. Recommended languages are based on the preferred languages of your campaign’s audience. Languages from your translation settings are selected by default. Some of them may appear under Additional languages.
- (Optional) Click the dropdown under Additional languages to view and select languages that aren’t recommended.
- Select a Default language for recipients whose preferred language is unknown or unavailable. This can be the original language or one of the languages you selected.
- Click Translate.
- Review the translated email elements. If a Translations list appears first, click Open next to a language to open its editor. You can manually edit any of the elements if needed. You can also click the edit button next to listed images to change them to ones appropriate for the selected language.
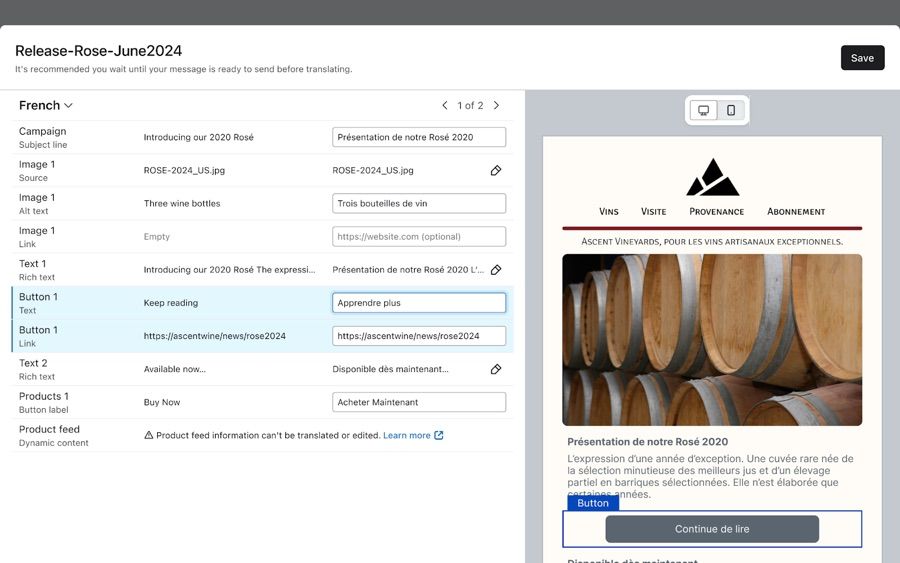
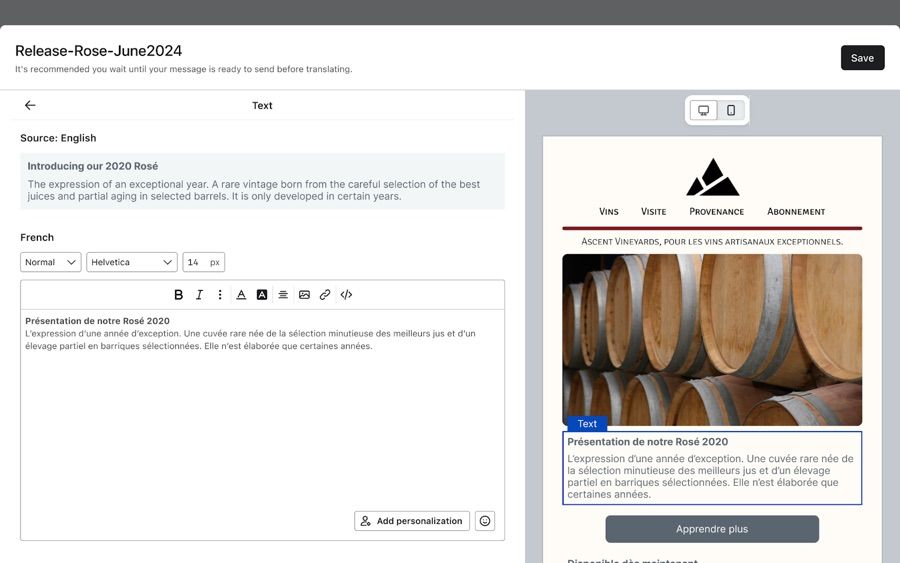
- Click the edit button next to a listed text block to review and edit the full text. Click the back arrow labeled Close to return to the list of elements.
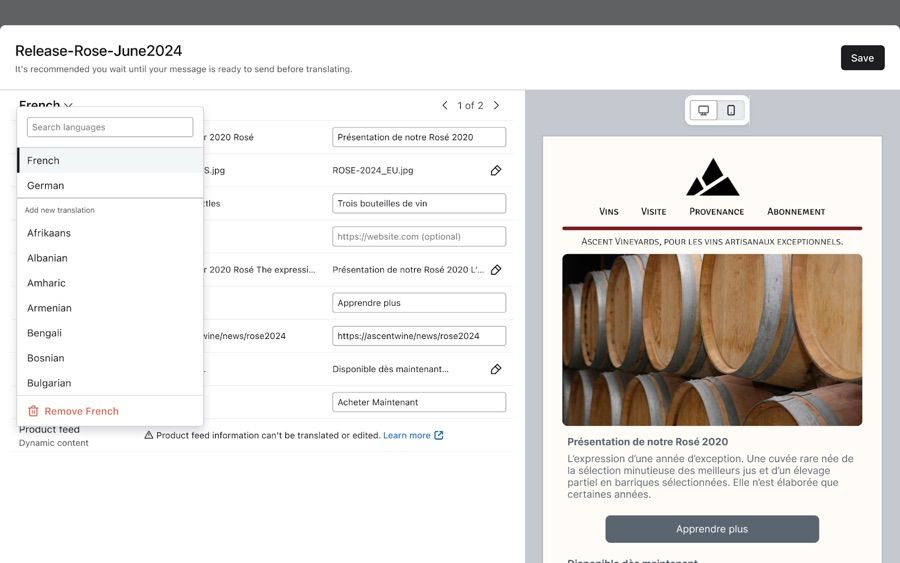
- If you selected multiple languages to translate into, click the arrows at the top or use the dropdown to switch between languages.
- If you want to add more languages or remove the currently selected language, click the name of the language. If you remove a language, click Remove to confirm. If it’s your default language, select a replacement before you confirm.
- Once you’re done, click Done. Your translation edits save as you make them.
When you’re ready to send, return to the campaign wizard and complete the Review step. Click Schedule or send and follow the campaign scheduling instructions to set your send time and confirm.
Regionalizing product content
Regionalizing product content allows your customers to see your product information, currency, and pricing that match their preferences.
Dynamic product blocks
Regionalizing product content is available for the Shopify integration when Shopify Markets is enabled.
Dynamic product blocks in Smart Translations use your customer’s language and country to select localized product information, currency, and pricing. If the matching catalog locale is unavailable or returns no products, Klaviyo tries the configured fallback catalog locale, then the base catalog. Because of these fallbacks, recommendations are not guaranteed to exclude every product that is unavailable in the customer’s country.
- Within the Smart Translations editor, select a Fallback catalog locale for the dynamic product block. This is used when the customer’s country is unknown, a matching catalog locale is unavailable, or that locale returns no products.
- You can set a default Fallback catalog locale for each language in your account settings.
- If you selected multiple languages to translate into, click the arrows at the top or use the dropdown to switch between languages. Select a fallback catalog locale for each language, then click Done when you’re finished.

Static product blocks
Static product blocks used in Smart Translations can be manually configured for each language following the instructions in Translate a campaign above.
Editing original content after translating
If you edit the original content of the email after you translate it, a warning appears at the top of the editor. It tells you that your edits affect the translations.
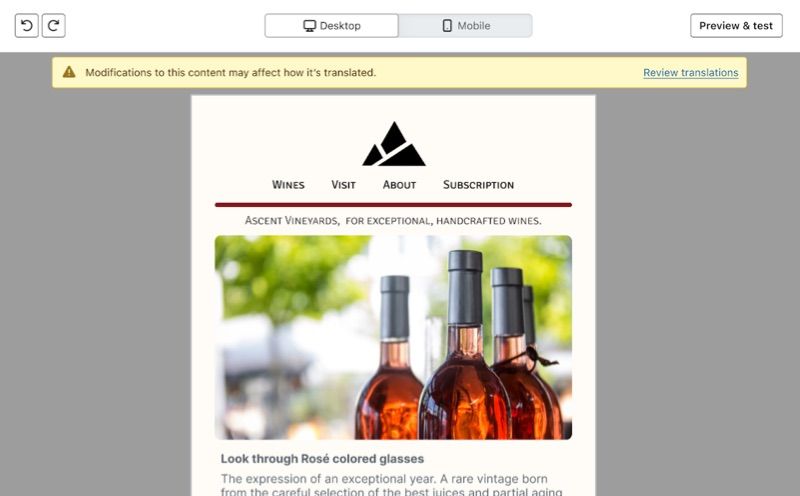
To correct any potential translation errors:
- Click Review translations next to the warning message. If the Translations list appears, click Open next to the language you want to review.
- To update all out-of-sync blocks for the selected language, click Update translations. The affected blocks are highlighted in yellow.
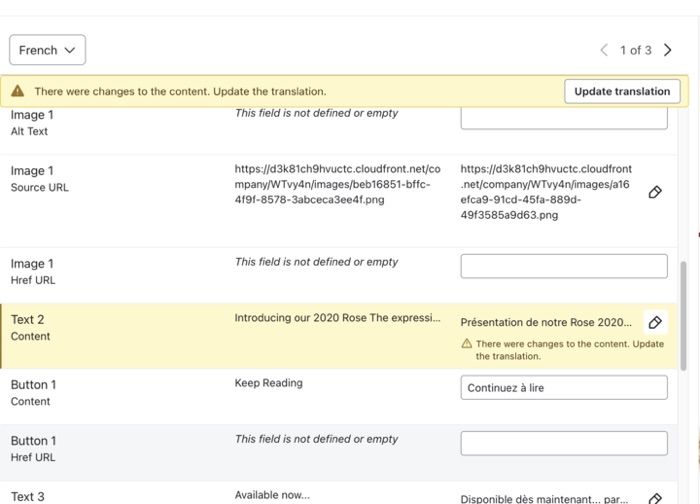
- Alternatively, to handle an out-of-sync element individually, open its 3-dot menu and select an available action:
- Re-translate - translate any changed text.
- Match source - match image or URL to the original source.
- Edit - manually modify the element.
- Ignore - keep element as is.
- Switch to each remaining language and review any out-of-sync elements. Once you’ve finished, click Done.
Translations for cloned messages and A/B tests
If you clone a campaign with translations within the same account, the new campaign keeps all translations from the original, and you can edit them. If you clone it to another account, sender-name translations are not copied, so review the sender name in each language. Learn how to clone a campaign.
When you create an A/B test, new variations keep the translations from the original email.
Additional resources
Additional resources
Learn more about editing and scheduling campaigns:
- How to edit or reschedule a campaign
Learn how to edit or reschedule a scheduled campaign. You can edit both scheduled and draft campaigns.
- How to cancel a scheduled or sending campaign
Learn how to cancel a campaign that has been scheduled or partially sent. Campaigns that have already been fully sent cannot be cancelled. If you don't see the option to cancel a campaign by following the steps below, then sending is already complete and it can no longer be cancelled.
- Understanding campaign schedule and send options
Learn what sending options are available for campaigns and how you can use them. When you schedule or send a campaign, you can choose things like your send time, send strategy, timezone, and other details.