How to migrate from Listrak
You will learn
Learn how to migrate from Listrak to Klaviyo. While Klaviyo does not have a built-in integration with Listrak, you can export your data from Listrak and upload it into Klaviyo. Listrak contacts and related data are exported from Listrak in CSV format. CSV files can be easily formatted to ensure successful import to a Klaviyo list. While this is not a complicated process, exporting each individual Listrak list may be a bit tedious depending on your volume of data. With consistency and thoroughness, your migration will be successful.
Before you begin
This guide will walk you through migrating your data from Listrak to Klaviyo. As you migrate your Listrak lists, keep in mind that the main objectives for migrating data are to ensure that all relevant contacts and fields are represented in Klaviyo, and that any opted-out contacts are treated as such in Klaviyo.
Below we provide a recommended approach that will allow you to upload your Listrak contacts to Klaviyo and keep unsubscribed and suppressed contacts from receiving email marketing. We recommend that you also review how Listrak defines these statuses so you can ensure data quality on the Listrak side and also ensure that this approach of uploading contacts aligns with your intended use of Klaviyo.
This guide gives you general guidelines for migrating your data from Listrak to Klaviyo. Contact Listrak Support for the most up-to-date instructions on exporting your Listrak data.
Checklist
Migrating from Listrak to Klaviyo requires several key steps:
- Export Listrak Subscribed Contacts list
- Format CSV files
- Import CSV files to a list in Klaviyo
- Export Listrak unsubscribed contacts and suppression lists
- Import unsubscribed and suppressed contacts to your Klaviyo suppression list
- Migrate your email templates from Listrak to Klaviyo
- Sunset your Listrak account
Export your Listrak subscribed contacts list
Each Listrak account is set up uniquely. The following instructions are guidelines for exporting your Listrak data. Contact Listrak support and consult their documentation for the most up-to-date export instructions.
Follow these steps to download each of your Listrak lists.
- From your Listrak Home Menu, navigate to Contacts.
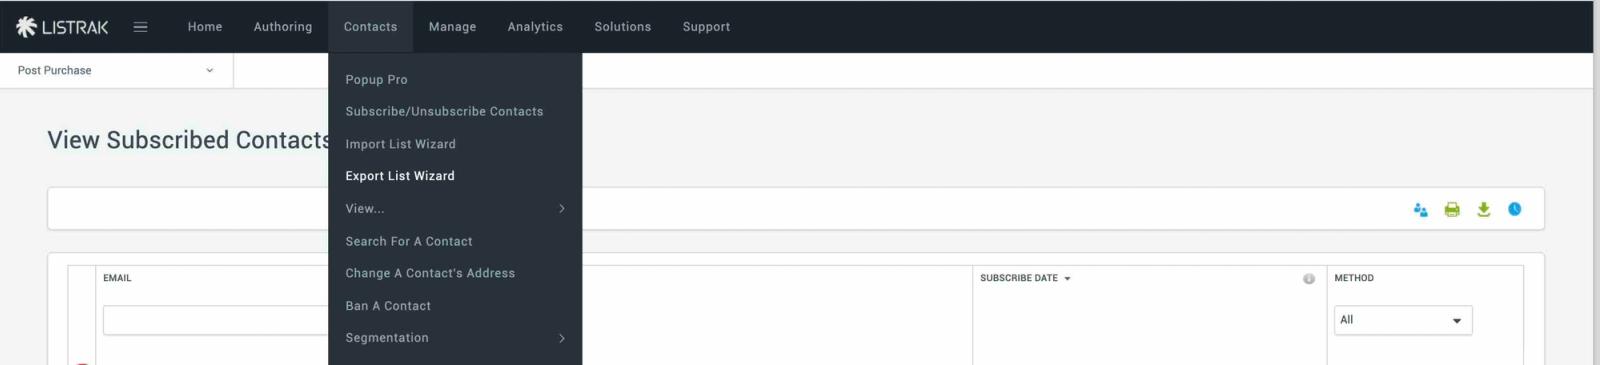
- Click Subscribed Contacts > Export List Wizard.
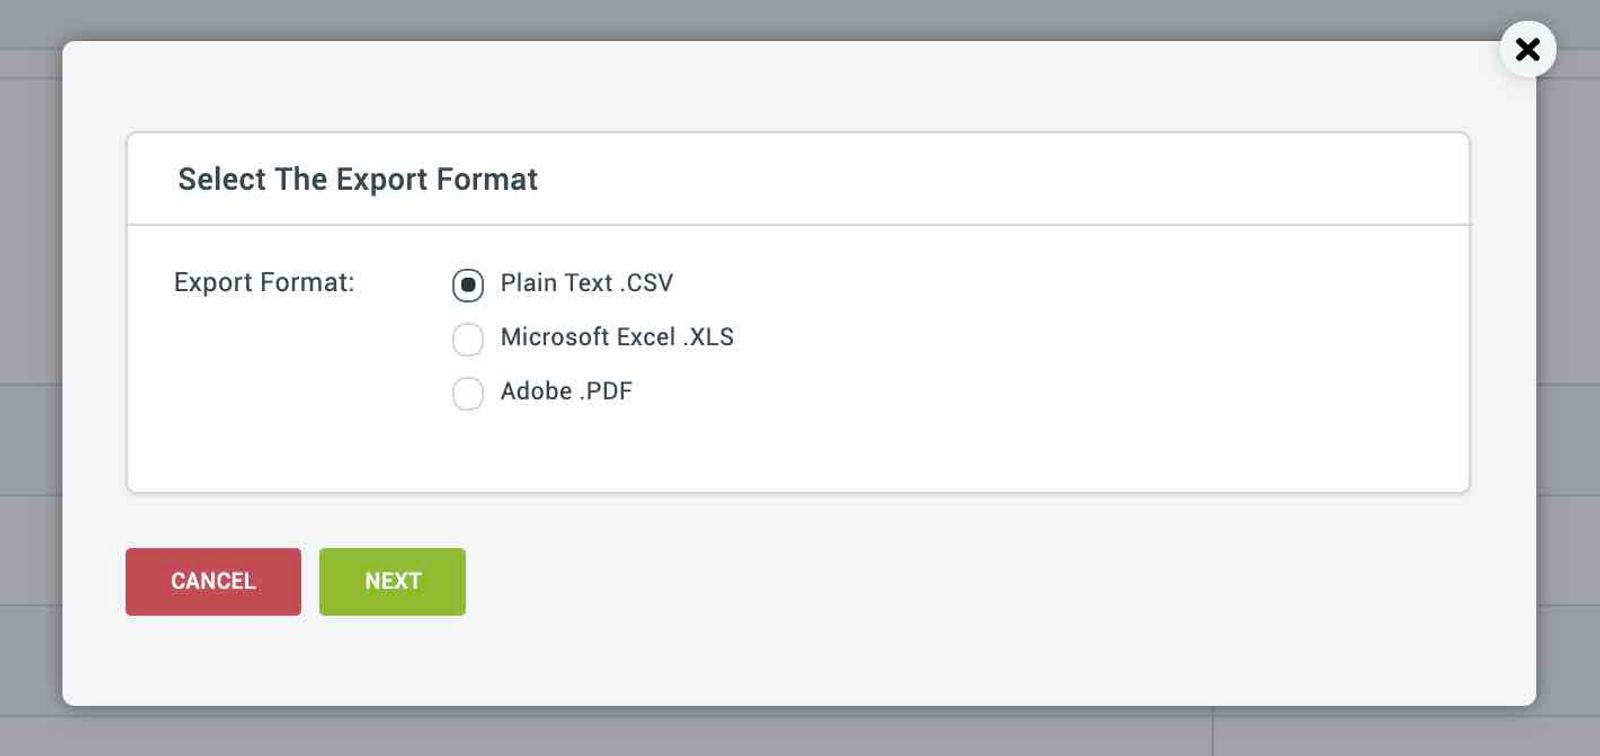
- Choose Plain Text .CSV as your export format, and click Next.
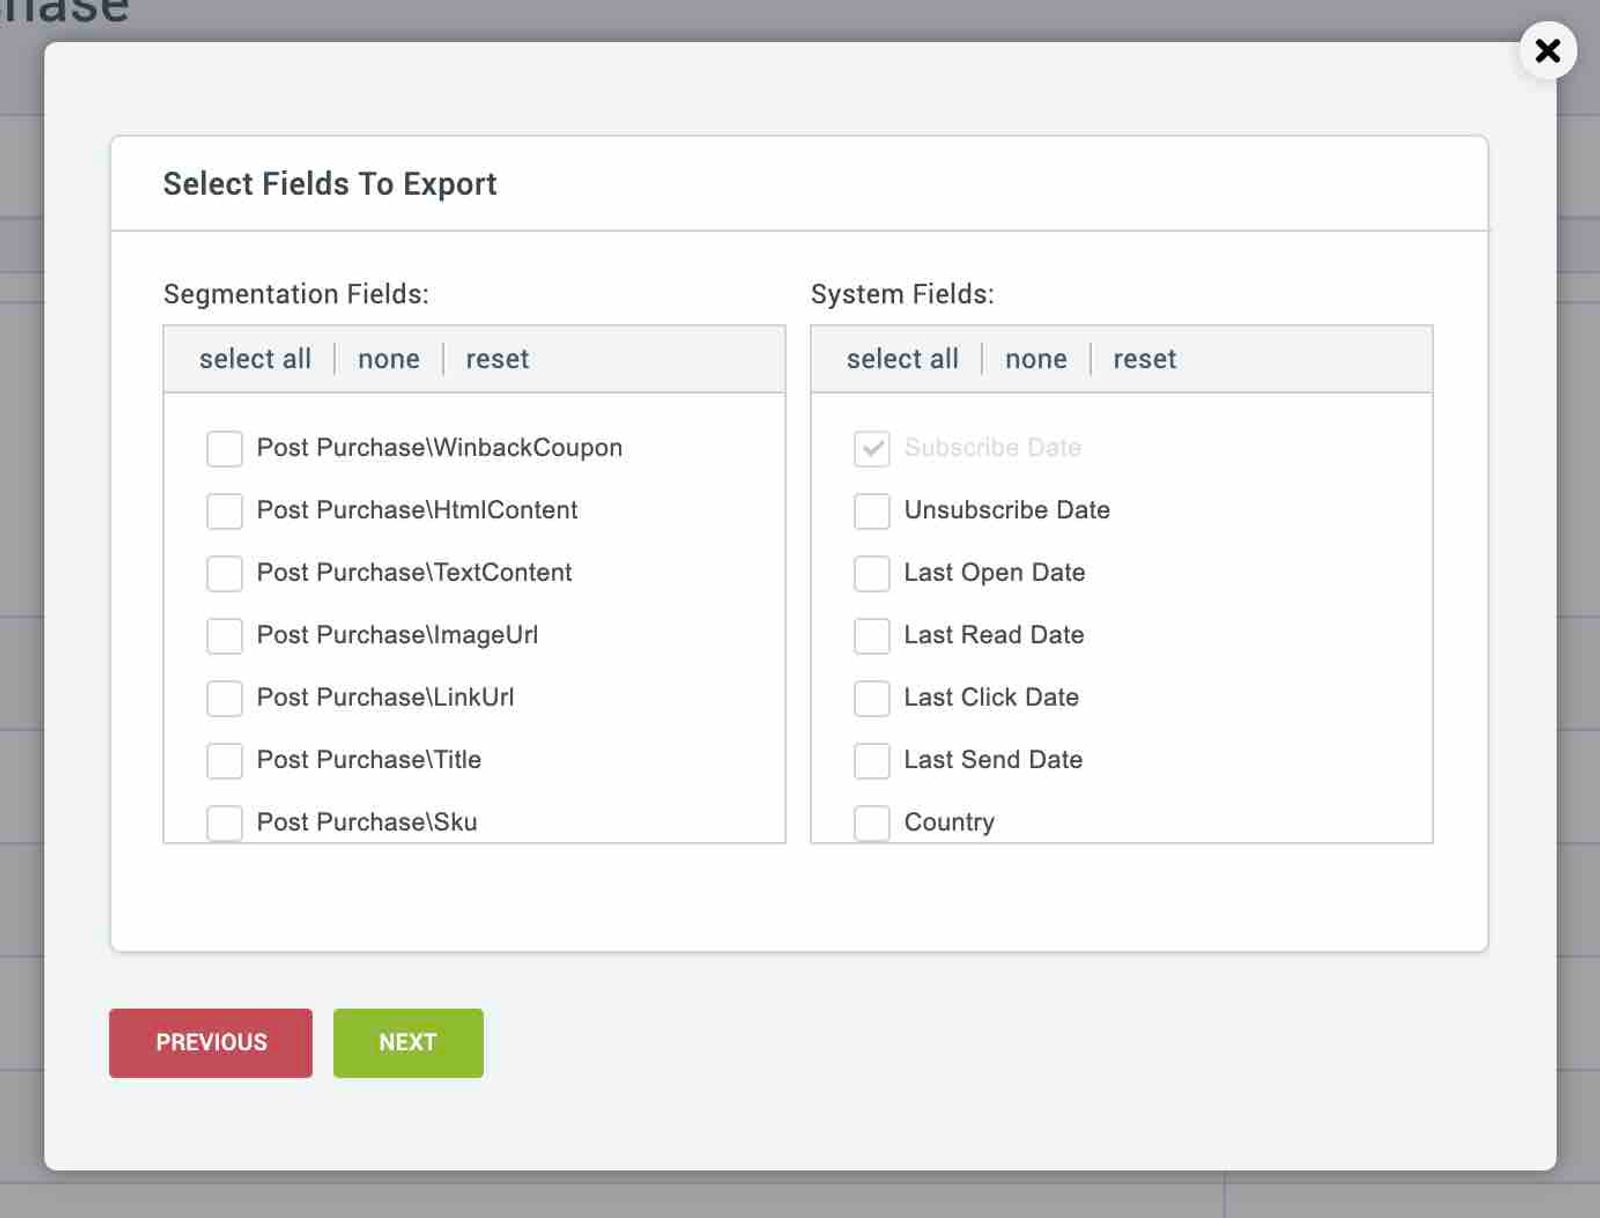
- Now choose any segmentation fields and system fields to include with your CSV export. Email, Subscribe Date, and Method are automatically included with each export.
- When you're finished, click Next.
- Choose a delivery method, and then click Next. Choosing Email as your delivery method is best if you are exporting a large list (over 500K) because uploading a large amount of data into a browser may take some time.
- If you chose the Web delivery method, click Finish. Your results will display in your browser.
- If you chose the Email delivery method, set email options by selecting recipients. The default email displayed is the email address tied to your Listrak account. Enable the Attach to Email checkbox to download the file as an email attachment. Then, click Finish.
- You'll be notified by email when your CSV file is ready for download.
You can view instructions on exporting your entire Listrak list from Listrak.
Format CSV files
You'll need to format each CSV file before importing it into Klaviyo. To do that, open the CSV file and comb through the list, paying special attention to the column headings:
- Column headings should be in the first row of the CSV file. If Listrak adds additional rows before the column headings, delete these extra rows.
- Keep each CSV file at 50 MB or less. Split larger exports into separate files before uploading.
- Your CSV file must include an "Email" or an "Email Address" column.
- You may want to include a "First Name" and "Last Name" column.
- Include any custom profile properties such as "Gender" that you'd like to upload to Klaviyo.
- Listrak exports a Method field, indicating the method of subscription. This field can be left intact on the CSV upload file and later mapped to Klaviyo's Source field when you upload the CSV to Klaviyo.
- Timestamp fields such as "date added," "last opened," and "last clicked" need to be specifically formatted or Klaviyo will not recognize them as timestamp fields. Make sure timestamp data is formatted in one of these formats:
YYYY-MM-DD HH:MM:SS
MM/DD/YYYY HH:MM:SS
MM/DD/YY HH:MM:SS
MM/DD/YYYY HH:MM
MM/DD/YY HH:MM
YYYY-MM-DDTHH:MM:SS
Import dates such as last opened and last clicked as custom profile properties with the Date data type. You can use these properties to segment your migrated contacts; they do not recreate past email open or click events in Klaviyo.
Below is an example of how your CSV file should be formatted.
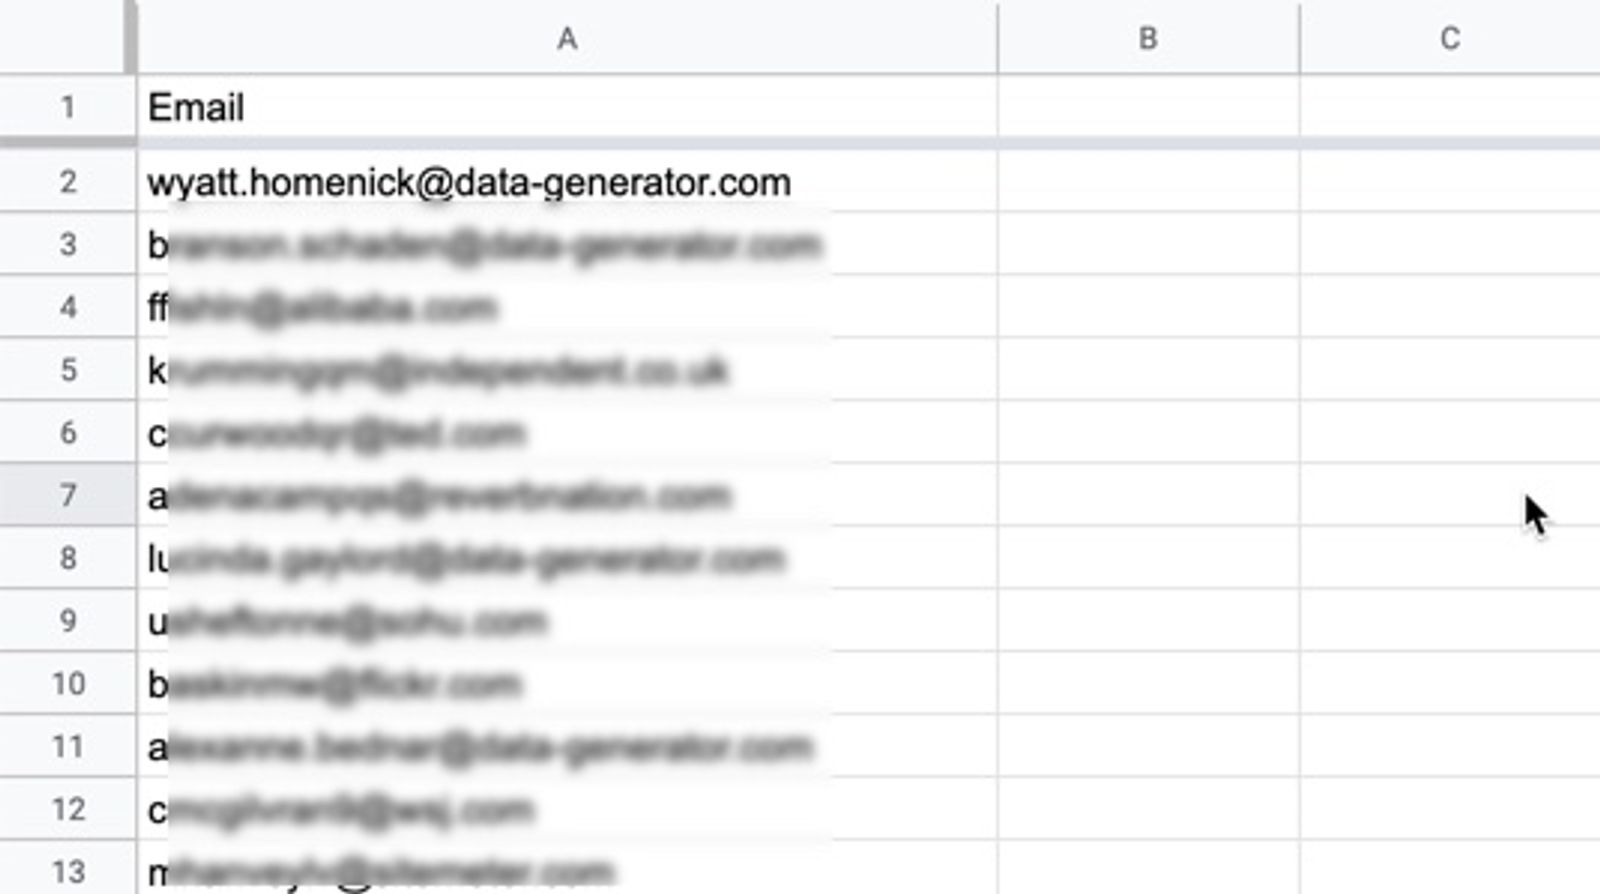
Review your CSV file carefully, editing and deleting column headings and contact entries as appropriate.
Remember, it's much easier to parse and edit data within a CSV file before it is uploaded into Klaviyo.
For more detailed instructions on formatting CSV files, head to our article on importing subscribers to a list.
Import CSV files to a Klaviyo list
After you've formatted your exported data, you can import it to a list in Klaviyo. Some Klaviyo flows are triggered by an email address being added to a list. Before you begin uploading contacts to a list, make sure these related flows are turned to draft or manual mode.
CSV imports do not send double opt-in confirmation messages. Confirm that your consent records are accurate before importing, even if the destination list uses double opt-in.
- Log in to your Klaviyo account, click the Audience dropdown, and select Lists & segments.
- Select the list where you would like to add your contacts. For this example, we're going to add subscribers to the Newsletter list.
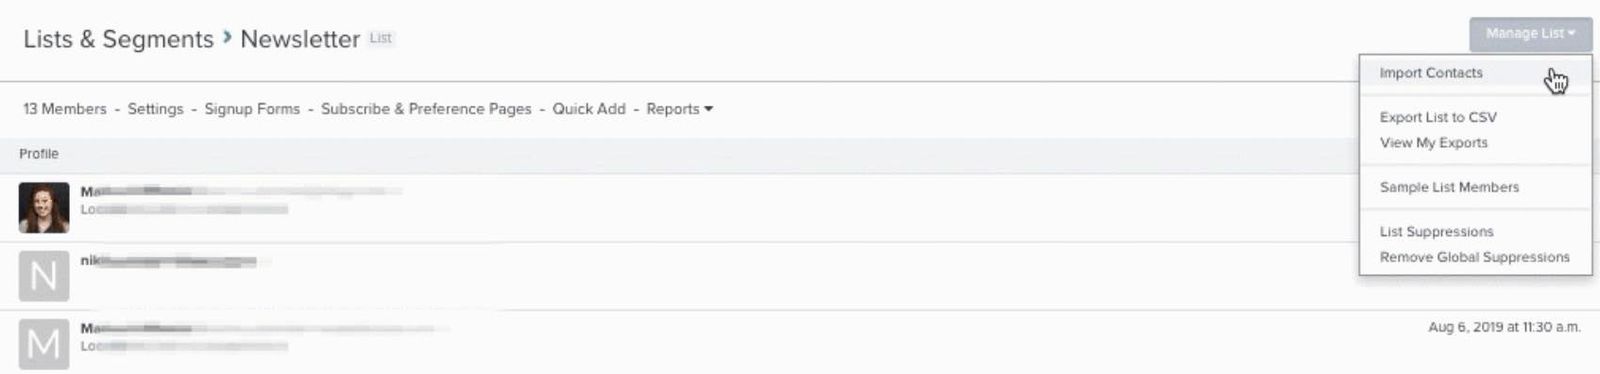
- Open Manage list in the upper-right corner and select Import contacts.
- Drag and drop your CSV file, or click Upload to select it. Klaviyo will open the field-mapping step.
- Review each CSV column and its corresponding Klaviyo profile property. Fields that Klaviyo recognizes are selected for import. To leave out a column, clear its checkbox in the Import column.
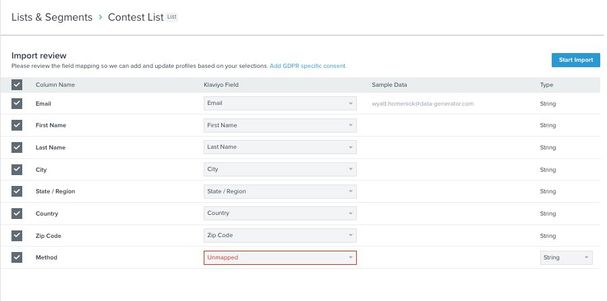
- By default, Listrak includes a Method column, denoting the method of subscription. We recommend mapping this field into Klaviyo's Source field.
- For an unmapped column you want to import, select an existing property or choose Create new field from the property dropdown. Enter a Profile property name, choose a data type, and click Create. Custom properties support Text, Boolean, Number, Date, and List. You can also change the data type of a mapped custom property in the Data Type column. If you're unsure which type to use, read about data types in Klaviyo. Map or deselect any remaining unmapped columns before continuing.
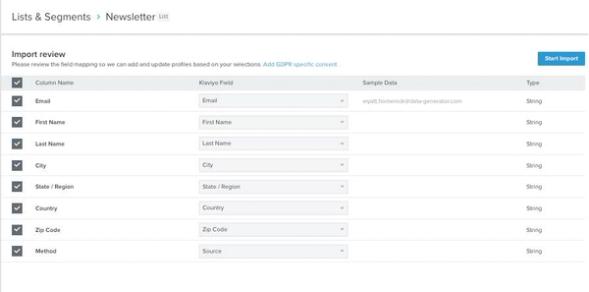
- When you finish mapping, click Next to review consent. If Klaviyo shows Import instead, your mapped fields already cover consent; review those fields and proceed to the final import step below.
- If the consent screen appears, select Apply bulk consent only if every contact in this file has explicitly consented to email marketing. If channel choices appear, select Email for marketing messages. To use only the consent information already mapped from your CSV, select Only import the consent in my file. This option does not add consent when the file has no consent fields.
- Click Import. On the import history page, wait for the import to finish and review any skipped records. Repeat for each CSV file.
For a deeper dive into importing contacts, head to our article on migrating existing subscribers and unsubscribes into Klaviyo.
Export Listrak unsubscribes and suppressions
It is important to add your Listrak unsubscribes to Klaviyo's suppression list to ensure compliance with spam laws and keep your deliverability high. These are general guidelines for exporting your Listrak unsubscribe list and suppression list. For the most up-to-date instructions reach out to Listrak support and review their documentation.
- Go to your Listrak Home menu > Contacts.
- Go to View and then select Unsubscribed Contacts > Export List Wizard.
- Choose Plain Text .CSV as your export format, and click Next.
- Follow the rest of the Wizard instructions for downloading your unsubscribes.
If you maintain a separate suppression list in Listrak, export it too. Select your suppression list by its name in Listrak, then follow the export steps above to download it as a CSV.
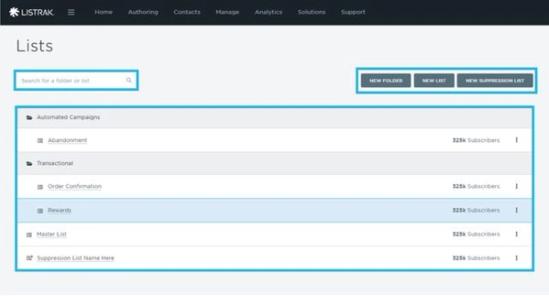
Format each file of unsubscribed or suppressed contacts so that it contains a single column of email addresses.
Import unsubscribes and suppressions into Klaviyo
- Navigate to Audience > Profiles and click View suppressed profiles.
- Open the More actions menu and select Import suppressions. If your page has an Import button instead, click that button.
- Drag and drop your CSV file, or click Upload in the file area to select it. Then click the final Upload button to start importing the suppressions.
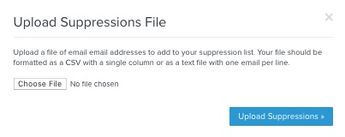
- Wait for confirmation that the suppression upload has finished. Repeat for each file of unsubscribed or suppressed contacts before sending email marketing from Klaviyo.
Uploading these addresses suppresses the profiles from email marketing without changing their consent status.
Migrate email templates from Listrak to Klaviyo
Klaviyo offers an intuitive drag-and-drop template builder that you can use to recreate your Listrak email templates. We highly recommend using this method to rebuild your templates because it will ensure that they are mobile-optimized, responsive, and easy-to-edit moving forward.
Check out our guide to using Klaviyo's template editor.
If you don't have time to recreate your Listrak templates, you can export them as HTML and import them into Klaviyo. Save the template as an .html file, replace Listrak-specific tags with Klaviyo tags, and include a Klaviyo unsubscribe tag for marketing emails. Follow the steps for importing a custom HTML template.
Sunset your Listrak account
After you've moved all your data over to Klaviyo, there are 3 key steps you can take to ensure that you no longer need your Listrak account:
- Ensure that your sign-up forms and list growth tools point to Klaviyo, not Listrak
- Recreate your Listrak workflows as Klaviyo flows
- Discontinue use of Listrak
Sign-up forms and list growth tools
Recreate any Listrak sign-up forms in Klaviyo so that your list continues to grow in Klaviyo, rather than in Listrak. You can:
- Use the Klaviyo sign-up form builder to re-create your forms from scratch
- Use a third-party list growth tool that integrates with Klaviyo
- Integrate your custom form through your ecommerce platform
If you are using third-party list growth tools, make sure that these sync to Klaviyo. Klaviyo integrates with a number of tools for list growth and landing pages. Check out our app marketplace to find the tool that you're using. If you don't see it listed, consider using Klaviyo's native Sign-up Form Builder to create your forms, or try switching to a different third-party tool.
New email lists use your account’s default opt-in setting, so check the setting for each list connected to a sign-up form. To change a list to single or double opt-in, follow our guide to the double opt-in process.
If you’re using a custom-coded form, ensure your contacts sync to Klaviyo by having your custom form sync new subscribers directly to your ecommerce platform, and make sure your ecommerce platform is integrated with your Klaviyo account.
After switching or syncing all your sign-up forms to Klaviyo, wait a few days and watch your lists in Listrak. If you notice subscribers are still being added to these lists, there's probably at least one form that still needs to be swapped out.
Next, you'll want to turn off your Listrak sign-up forms. Contact Listrak support for information on how to turn off your Listrak sign-up forms.
Flows
Klaviyo refers to automated workflows as "flows," which allow for more advanced and targeted sequences. It is important to recreate these in Klaviyo so that you don't need to continue to use Listrak to send triggered emails.
As you move from Listrak, it may be a good time to refresh and update your automated messaging. Prioritize your welcome series and abandoned cart flows: a welcome series helps you engage new subscribers, and abandoned cart messages remind shoppers about an unfinished purchase. Complete your contact and suppression imports before turning these flows live.
Once your Klaviyo flows are live, you'll want to turn off all of your workflows in Listrak to ensure that you're not double-emailing people. Contact Listrak support for more information about turning off your Listrak workflows.
Discontinue Listrak use
Once you’ve pointed all of your list growth tools to your Klaviyo account, paused your Listrak workflows, and turned your Klaviyo flows live, you can discontinue using Listrak. Before you close your Listrak account, double-check that everything is working as expected. Enter a test email into your sign-up form and other list growth tools, abandon a cart, and sign up for your newsletter to trigger a welcome series. Go to the Profiles tab in your Klaviyo account (found under Audience) to make sure that the information in the profile reflects all of the correct communication. If the list you sign up to is double opt-in, be sure to confirm your email first.
After you've taken these steps and are fully migrated to Klaviyo, you can close your Listrak account.
Next steps with Klaviyo
Once your Klaviyo account is integrated with your store and all of your data is ported over from Listrak, you can work toward your first Klaviyo send by following our Getting started with Klaviyo course.
If you have questions about transitioning from Listrak or getting started with Klaviyo, please reach out to our Support Team.
Outcome
You've now migrated from Listrak to Klaviyo and have learned best practices for migrating email providers.
Additional resources
- Troubleshooting list imports
Learn how to troubleshoot errors that occur when uploading a CSV of contacts to a new or existing list in Klaviyo. Uploading reviews? Head to our article on how to import reviews.
- Understanding email deliverability
Learn about email deliverability, including the steps you can take to establish a strong sender reputation so that your emails are delivered to the inbox.
- Profile properties reference
Learn about the difference between custom and Klaviyo properties, how to use them to track information about your subscribers, how to remove them, best practices, and more.