How to set up the Add to Cart Widget in Customer Hub
You will learn
Learn how to display an interactive Add to Cart Widget on your Product Detail Pages. The customizable widget encourages shoppers to make a purchase or save a product for later when they have scrolled below the top of the Product Detail Page when the traditional Add to Cart button is no longer visible.
Customer Hub for Shopify currently supports standard storefronts and Shopify Headless. For WooCommerce, navigate to https://help.klaviyo.com/hc/en-us/articles/47792369863451
For feedback about Customer Hub functionality, email customerhub@klaviyo.com.
Before you begin
This guide covers how to enable the Add to Cart Widget on your site. Before proceeding, ensure that you have the Customer Hub feature enabled in Klaviyo and the Favorites Extension enabled.
Learn more about Customer Hub.
Overview
The Add to Cart Widget provides a consistent CTA to purchase when shoppers scroll below the fold on product detail pages, guiding customers through their purchase journey. It captures shopper attention by animating from a minimal widget icon into an expanded description of the current product with an "Add to Cart" callout. The widget displays only on product detail pages and can be customized to appear based on scroll depth and shopper attributes, ensuring it complements your existing site experience.
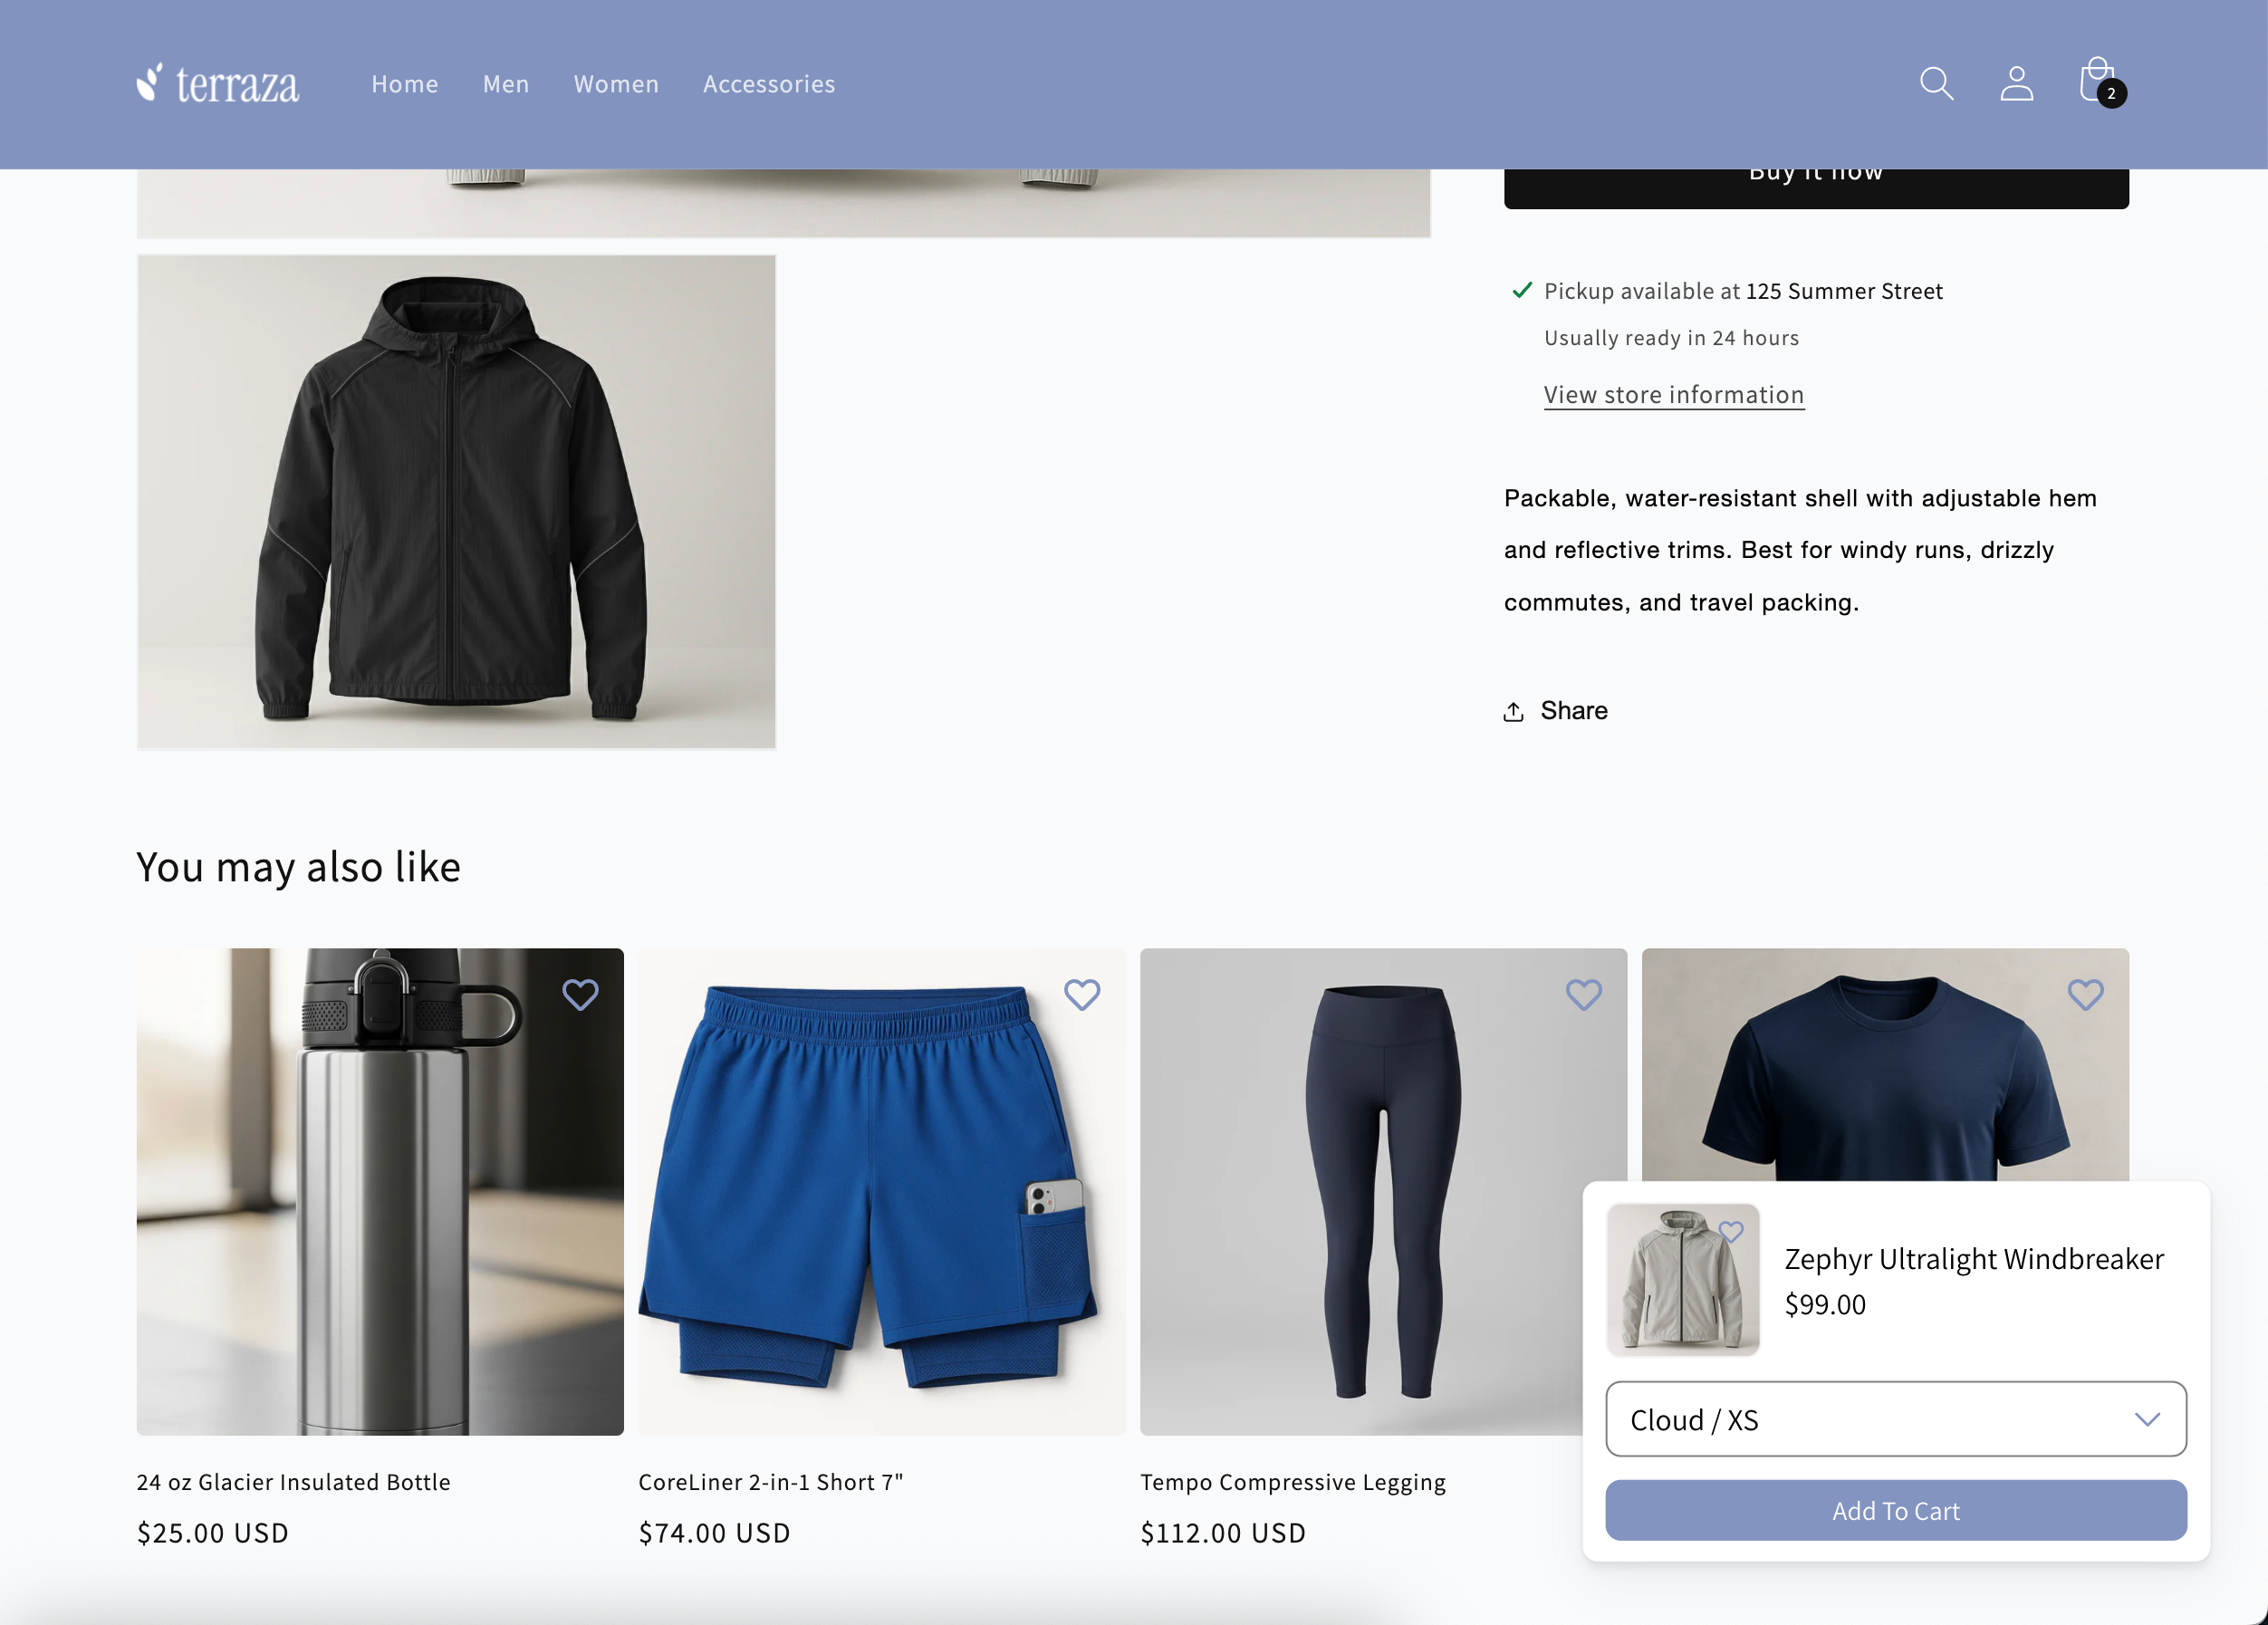
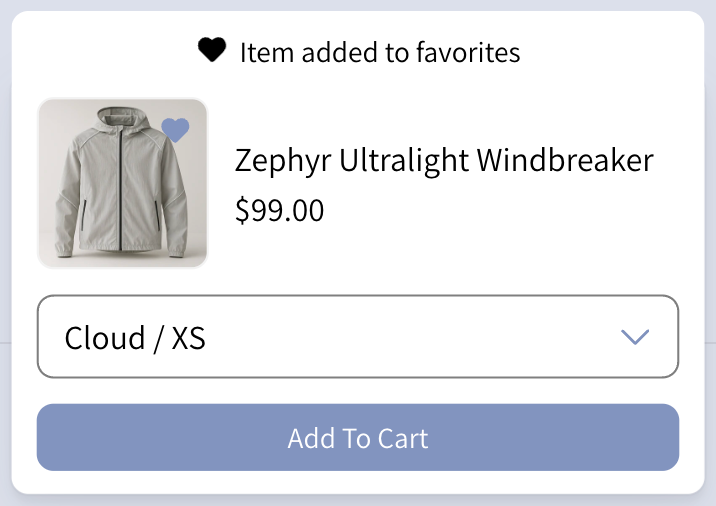
When Favorites is enabled, shoppers can also save items to their favorites list directly from the widget.
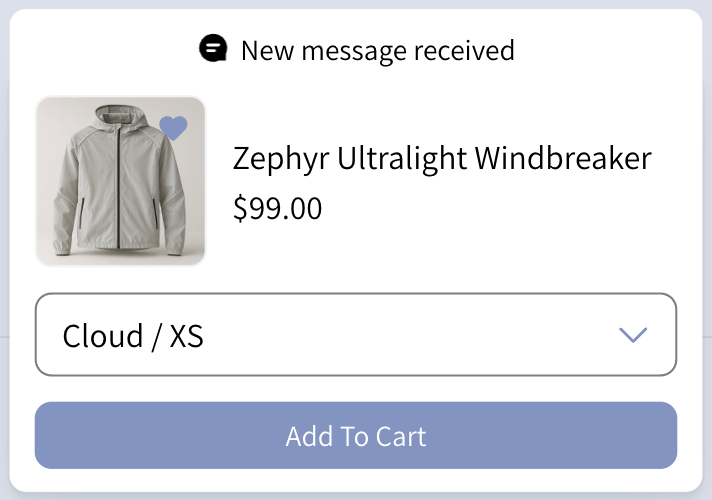
When the widget is enabled, Web Chat notifications will still be accessible in a minimal notification bar, ensuring the shopper only sees the most important information at any given time.
How to set up Add to Cart Widget
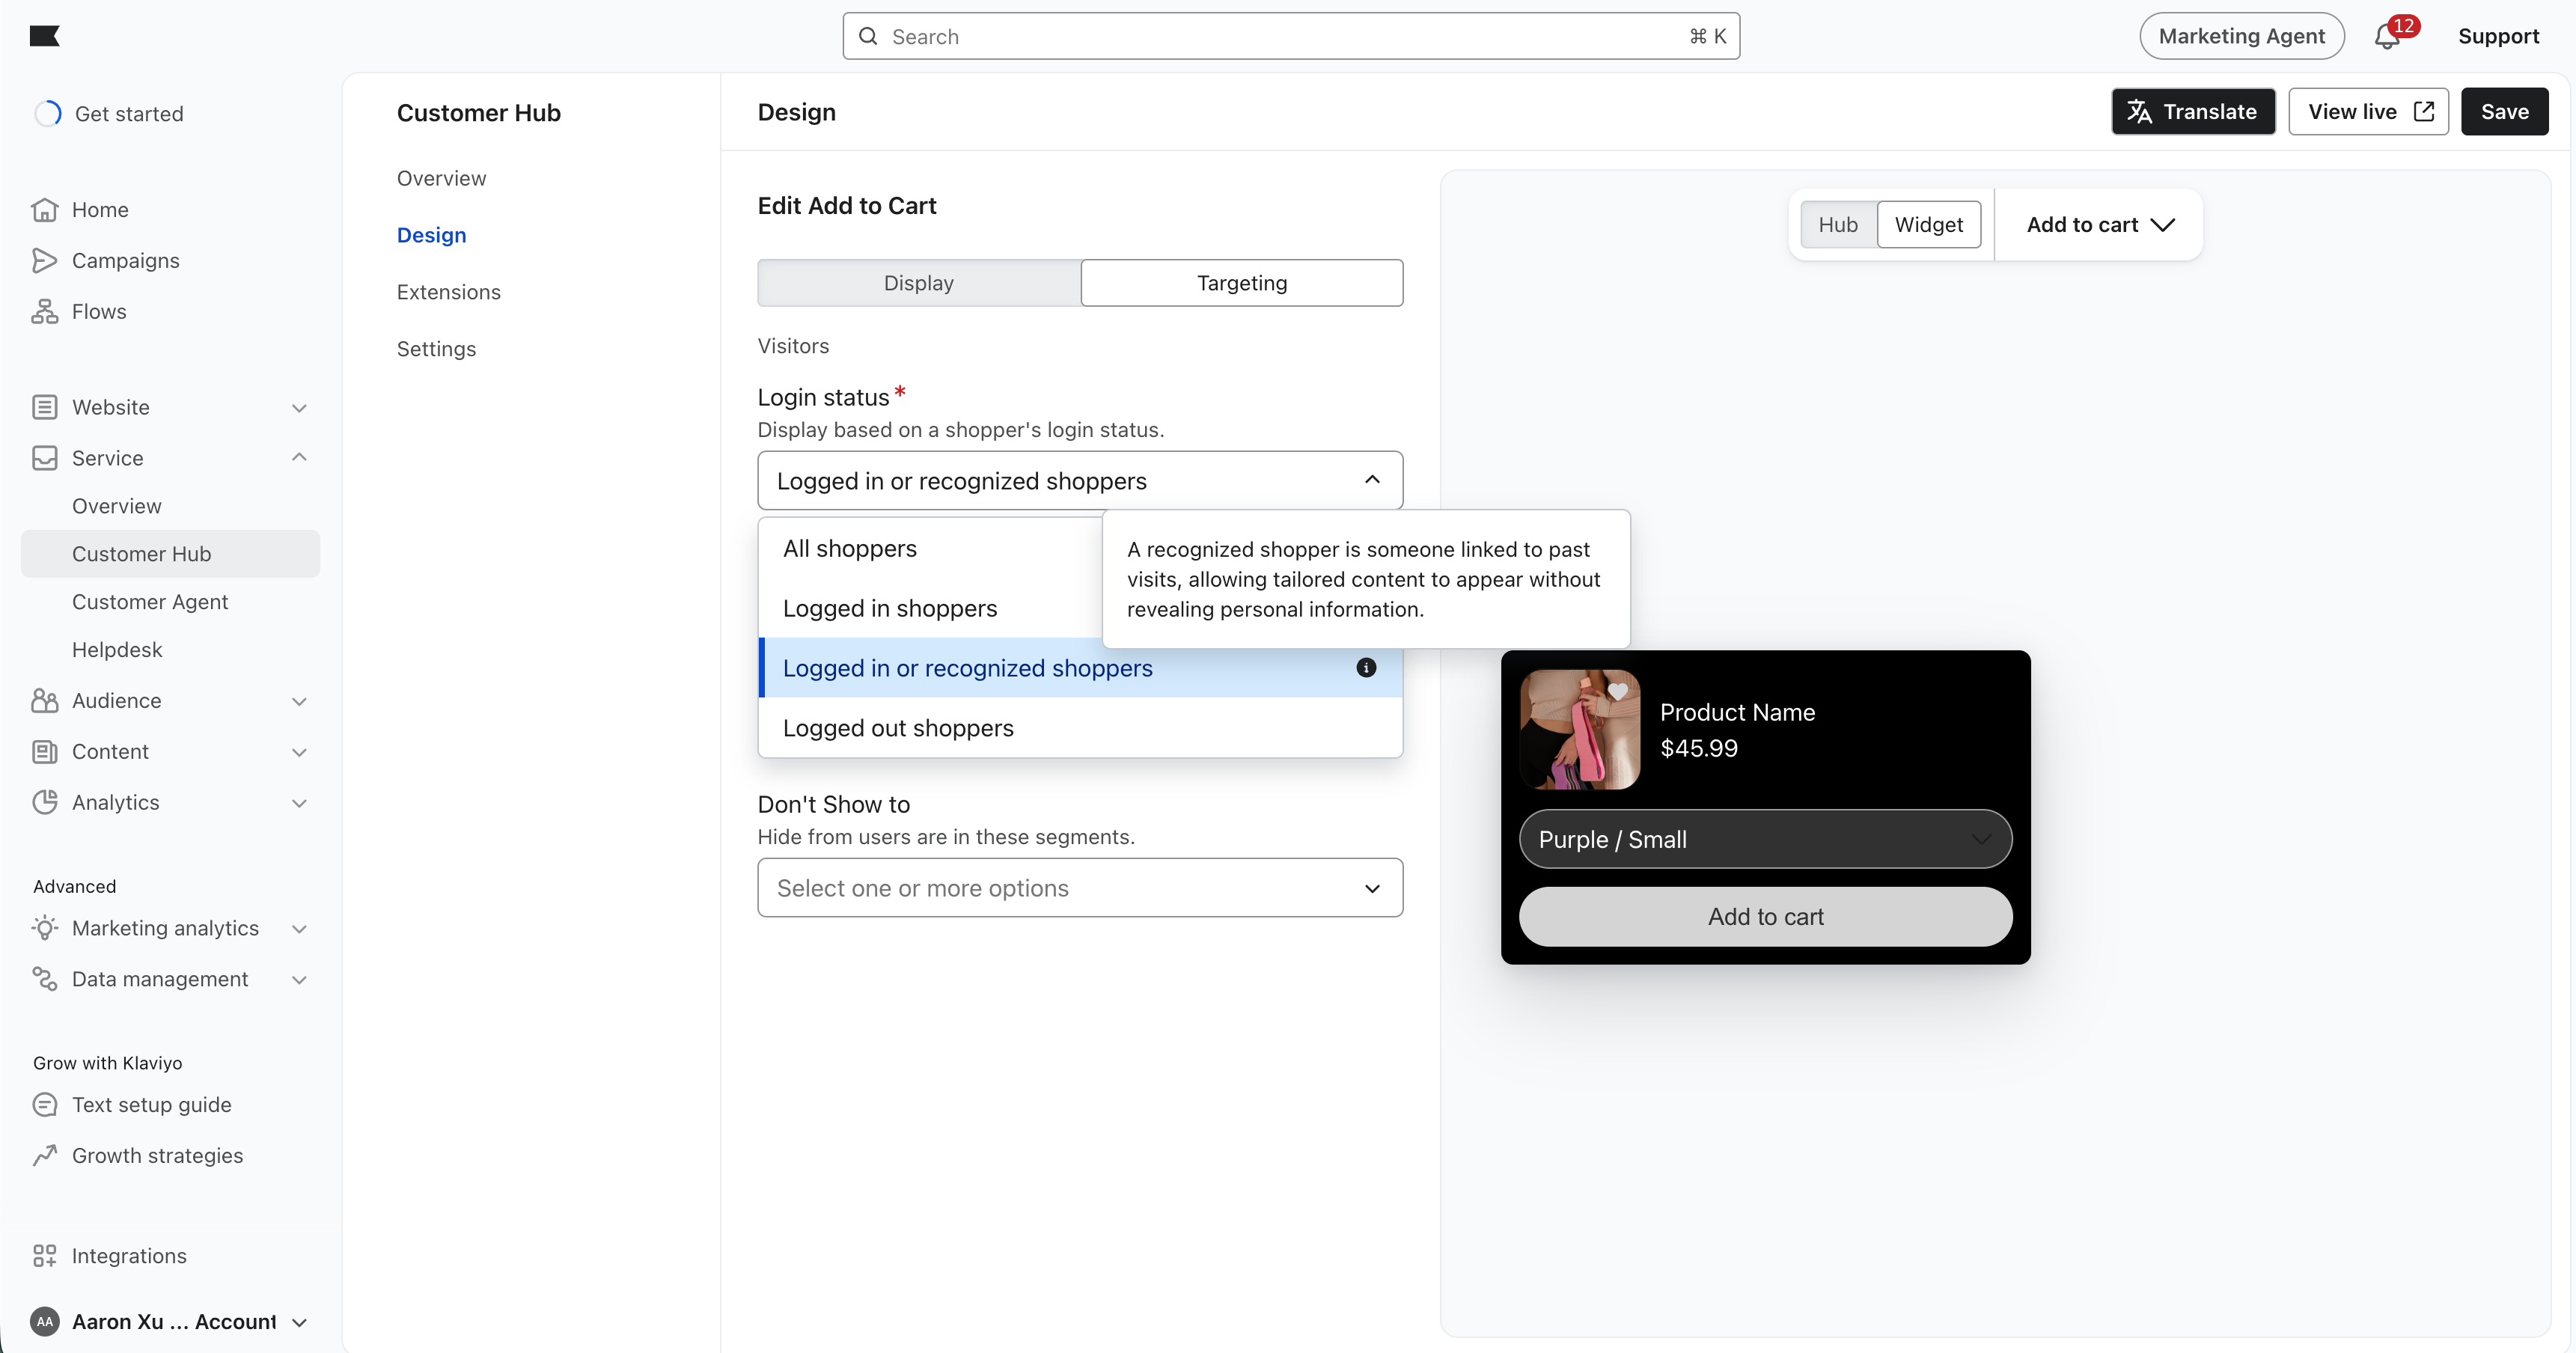
- Navigate to Customer Hub in Klaviyo's left-hand navigation.
- Select Design.
- Select Edit Your Hub.
- Select Widget, then the Add to Cart view at the top of the preview.
- From the Display menu, toggle on the Add to Cart banner and select how far down the page a shopper must scroll before the widget appears (measured as a percentage of page height).
- From the Targeting menu, you can control which shoppers see the Add to Cart Widget based on their relationship with your brand:
- All shoppers (recognized, logged in, and logged out) – show the widget to everyone who visits a product detail page.
- Recognized or Logged in shoppers – show the widget to shoppers recognized by Klaviyo (via a
_kxtoken) or those fully logged into their account. This is the recommended setting to provide a personalized experience while excluding first-time anonymous visitors. - Logged in shoppers only – restrict the widget strictly to users who have completed a full account login.
- Logged out/Anonymous shoppers – First-time visitors or those with no tracking history will see the widget but will be prompted to identify themselves or log in to save items to a profile.
- Specific-shopper groups – target the widget to shoppers who belong to designated groups (e.g., VIP customers, newsletter subscribers).
- Click Save to set your changes live.

How to disable the Add to Cart Widget
- Navigate to Customer Hub in Klaviyo's left-hand navigation.
- Select Design.
- Select Edit Your Hub.
- Select Closed, then Add to Cart.
- Select Targeting.
- Set visibility to Hidden.
- Click Save to apply your changes.