How to show favorite buttons on your site and in Customer Hub
You will learn
Learn how to allow shoppers to save their favorite items on your site. By adding favorite buttons alongside your products, you can display shoppers' saved items in the Customer Hub drawer and send follow-up flows to drive conversions.
Customer Hub for Shopify currently supports standard storefronts and Shopify Headless. For WooCommerce, navigate to https://help.klaviyo.com/hc/en-us/articles/47792369863451
For feedback about Customer Hub functionality, email customerhub@klaviyo.com.
Before you begin
This guide covers how to enable the Favorites setting from the Customer Hub settings in Klaviyo, and add favorite buttons across different pages of your website. Before proceeding, ensure that the Customer Hub feature is enabled in Klaviyo.
Learn more about Customer Hub.
About favorites
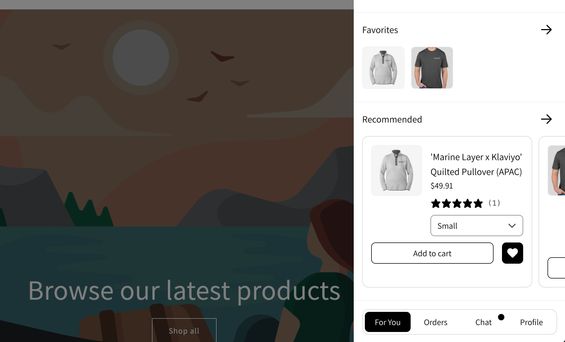
Favorite buttons allow shoppers to save products they're interested in. A shopper's favorited items display within the Customer Hub drawer, and can be used in flows to drive additional conversions.
When you activate the Favorites feature in your Klaviyo Customer Hub settings, a favorites button appears with all products shown in the Customer Hub interface. When a shopper clicks this button, the item is added to their Favorites section and saved to their Klaviyo profile.
To increase their visibility and encourage use, you can also add favorites buttons to:
- Product detail pages
- Collections pages (also called “product list pages”)
Items favorited from either of these pages also save to shoppers' Favorites section in the Customer Hub drawer. Note that any visitor can add products to their favorites list, regardless of whether they are logged into a customer account. When they log in, any favorites they've saved will sync to their Klaviyo profile.
Enable favorites to display in Customer Hub
To display favorites in the Customer Hub drawer, you must first enable the Favorites setting in Klaviyo.
Note that if your Customer Hub is live, saving this change publishes it on your site. If not, you’ll need to set your Customer Hub to live in the General settings menu to see this change.
- In Klaviyo’s main, left-hand navigation, select Service - Customer Hub.
- Click the Extensions tab.
- Under Favorites, check the box to Enable favorites.
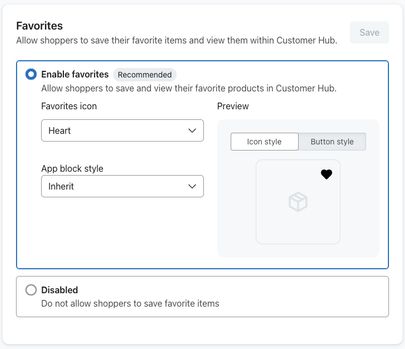
- In the Choose icon dropdown, select which type of favorite icon to display under your products (i.e., a heart or a plus sign).
- By default, the preview shows the unselected (i.e., not favorited) version of the icon. Click on the icon in the preview to see it change to the favorited state.
- Click Save.
A favorite button will now appears beneath any products showcased within the Customer Hub interface. Clicking it adds the item to the Favorites section.
Continue on to the next section for guidance on adding favorites buttons to product details pages.
Import existing wishlists to Customer Hub
If you are transitioning to Klaviyo's Customer Hub from another wishlist application, you can seamlessly migrate your customers' saved items with reasonably lossless data migration. Klaviyo offers a standard workflow to import historical favorite and wishlist data so your shoppers don't lose their saved products.
Native app imports
Klaviyo provides native, out-of-the-box support for importing data directly from popular wishlist apps, including:
- Swym
- Wishlist King
Import via CSV
If you are migrating from a different wishlist provider, you can import your data directly in Klaviyo. Navigate to the Customer Hub favorites settings and drop your CSV file into the upload area — no template required. The importer will automatically recognize the format of your file and map the data accordingly to populate your shoppers' Customer Hub profiles.
Add favorite buttons to product detail pages
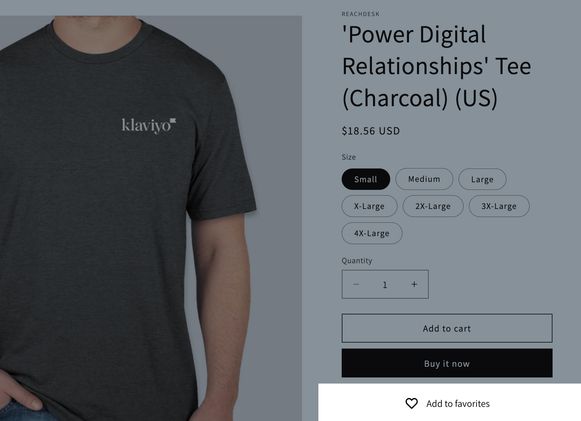
Drive significantly higher engagement by adding "add to favorites" buttons to your product detail pages.
If you use a vintage Shopify theme, or a custom setup that doesn’t support app blocks, see our instructions for manually installing the favorites button.
- On the Favorites setting in Klaviyo, select Add app block.
- Doing so launches your Shopify theme editor in a new window, showing a modal indicating that the Klaviyo Favorites app block was added to your default product page template. Click Got it.
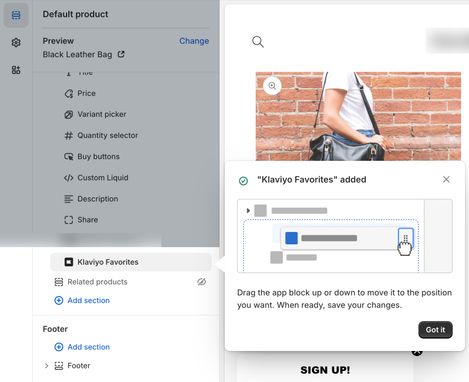
- Click and drag the app to adjust its positioning on your product details page as needed.
- When ready, click Save to save your changes in Shopify. At this point, favorite buttons will display beneath products on your product pages.
- Optional: For additional styling, navigate back to Klaviyo. Using the App block style dropdown, you can customize the look of the favorites button on product pages. Choose either:
- Inherit to sync your site’s button styles (default).
- Custom to select a certain button font and text color.
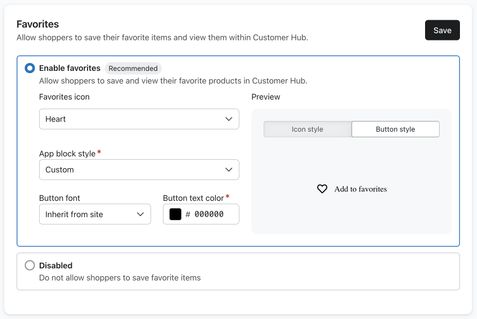
- Save any changes.
Navigate back to your website. You should see favorites buttons populate beneath products on your product detail pages.
Next, skip ahead to the Add favorites buttons to your collections pages section.
Manually install favorite buttons (vintage themes or custom set up)
If you use a vintage Shopify theme, or a custom setup that doesn’t support app blocks, you may need to manually install the Klaviyo Wishlist app to the pages where you’d like favoriting actions (e.g., product pages).
To do so:
- Open your Shopify store admin.
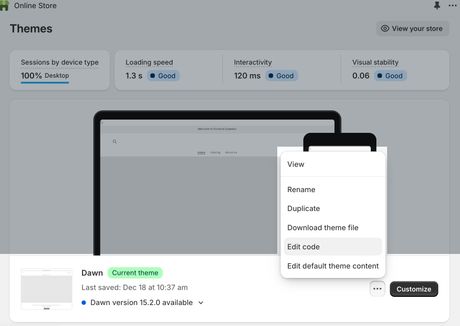
- Under sales channels, select Online store.
- Click the three dots menu on your current theme, then select Edit code. If you would rather test it on a draft theme, duplicate your current theme first and then edit the code of the duplicate theme.
- Find the file for your product details page. This varies by theme, but typically has the word “product” in its name. For example, in the Dawn theme, this is called “main-product.liquid.”
- Paste the following code snippet wherever you want the favorites button to appear:
<div class="klaviyo-wishlist-slot" data-product-id="{{ product.id }}"></div> - Click Save.
- Click Preview store.
- Navigate to a product page within your store preview. The added favorites button should be visible in the designated location.
Add favorite buttons to your collections pages
Install a small snippet of code on your Shopify site to add favorite buttons to your collections pages so shoppers can quickly save items while browsing your products. This is especially useful for shoppers on mobile devices.
To do so:
- Open your Shopify store admin.
- Under sales channels, select Online store.
- Next to your current theme, click the three dots menu, then select Edit code.
- If you want to test on a draft theme, duplicate your current theme first and then edit the code in the duplicate theme.
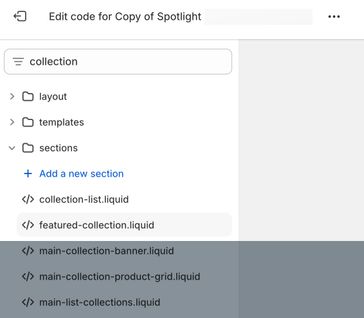
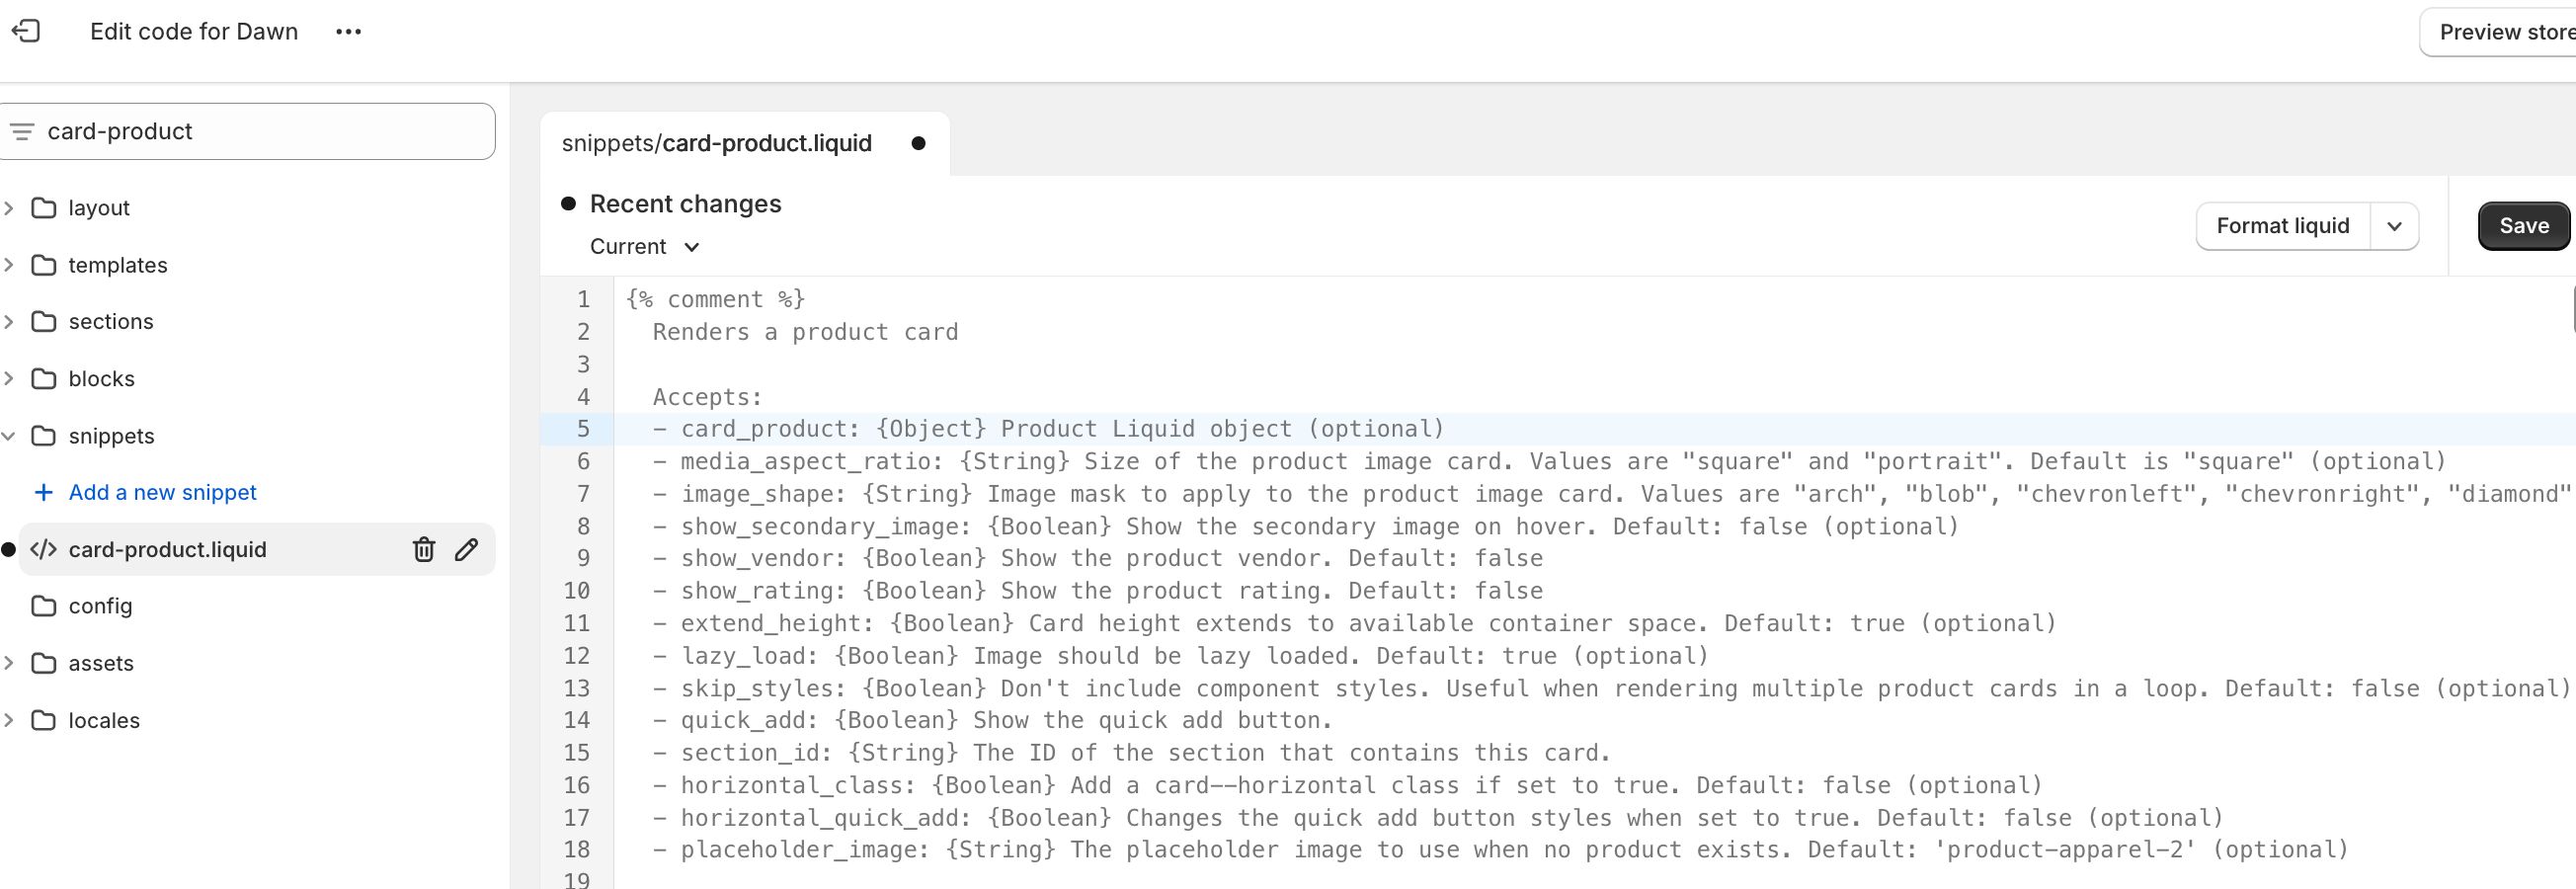
- In the left-hand sidebar, search for and open your collections file. We’ll use the featured-collections.liquid file for this example, however your theme may use a different file.
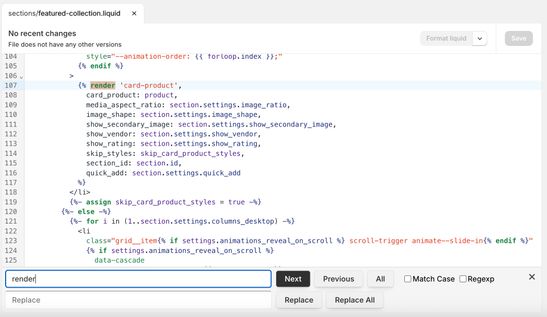
- Within the collections file, use the find shortcut (Command+F on Mac or Control+F on Windows) to search the word “render” within the file. This helps you identify the snippet name containing your product grid.
- The snippet will likely appear in a format similar to: {% render 'snippet-name'%}, where 'snippet-name' is the name of the relevant snippet file (e.g., card-product).
- The snippet will likely appear in a format similar to: {% render 'snippet-name'%}, where 'snippet-name' is the name of the relevant snippet file (e.g., card-product).
- In the left sidebar, search for and open the snippet file identified in the previous step (e.g., card-product.liquid).
- At the top of this file, note the object value listed under “Accepts” (e.g., “card_product”).
- Copy the following code and paste it into the snippet file:
- Tip: Look for the first instance of the price rendering in your file and paste the code above it.
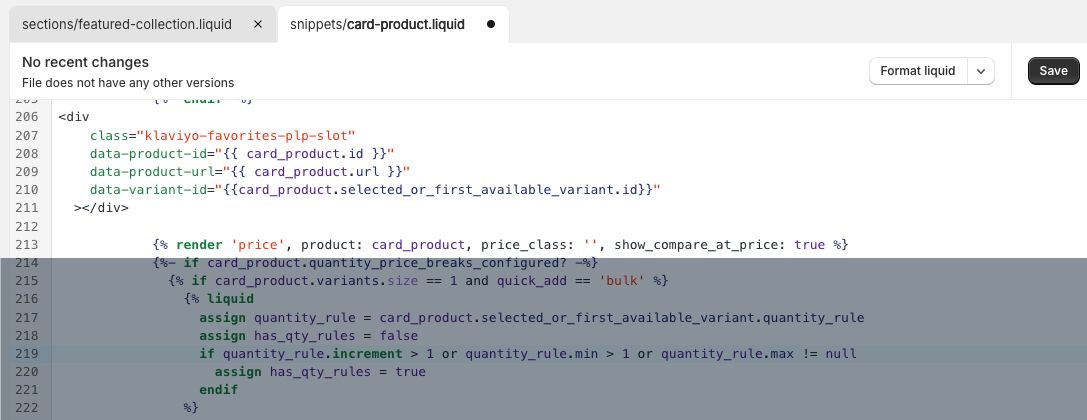
<divclass="klaviyo-favorites-plp-slot"data-product-id="{{ OBJECT.id }}"data-product-url="{{ OBJECT.url }}"data-variant-id="{{OBJECT.selected_or_first_available_variant.id}}"></div>
- Tip: Look for the first instance of the price rendering in your file and paste the code above it.
- Within the code you pasted, replace
OBJECTwith the object value you noted earlier.- For example, if your file’s object value is “card_product,” the code will look like this when pasted into the file above the price.
- For example, if your file’s object value is “card_product,” the code will look like this when pasted into the file above the price.
- Click Save in Shopify.
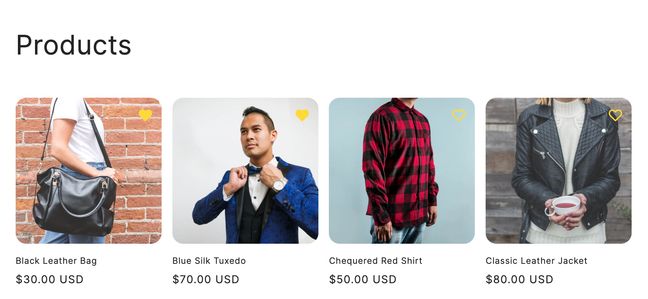
- Go to your site’s collections page and refresh.
You should now see the favorite buttons appear on each product. Note these may take a few seconds to load. By default, these are positioned in the top right corner. If you wish to change the positioning, consult your developer for assistance with custom CSS.
If the favorite buttons still have not appeared, try these troubleshooting steps:
- Confirm that you’ve replaced
OBJECTin the code snippet with your file’s object value. - Try pasting the code elsewhere in the file.
- Verify that you’ve pasted the code in the correct snippet file.
If they still don’t appear, seek assistance from a developer. Klaviyo's support team is not able to directly edit your theme files.
Next steps
Now that you've added favorite buttons to your site, set up a favorites reminder flow to drive conversions by reminding shoppers about their recently saved items.
Additional resources
- Getting started with Customer Hub on Shopify
Learn about Customer Hub, a unique personalized experience for online store visitors that guides them from product discovery through purchase and post-purchase support.
- How to display product recommendations in Customer Hub
Learn how to display personalized product recommendations in the Customer Hub drawer to tailor shopping experiences for your customers and drive conversions. By showing products that appeal to customers, you can improve conversion rates and provide cross-sell opportunities to increase average order value.
- How to style your Customer Hub
Learn about design options for styling your Customer Hub drawer, and how you can design it to match your brand. Because the Customer Hub interface is ingrained in the customer experience, it’s best practice to style it to appear as an extension of your website.