Getting started with Guesty
Learn how to integrate Klaviyo with Guesty, a property management platform for short term rentals. Klaviyo syncs guests, booking, and messages from Guesty, which allow you to personalize your messaging to guests.
Integrate Klaviyo with Guesty
First, you’ll need to obtain an API key from Guesty:
- Log in to your Guesty admin.
- Select Integrations > Marketplace.
- Search for Klaviyo, then select the Klaviyo listing.
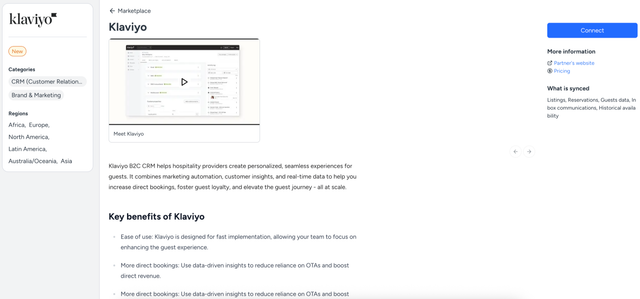
- Click Connect.
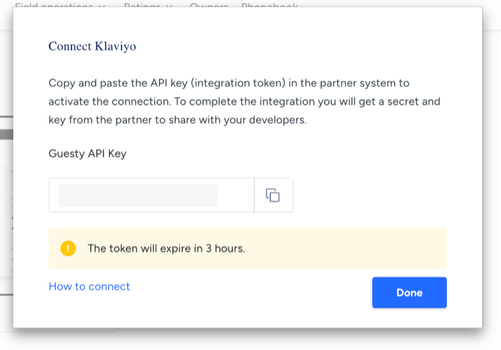
- Copy the newly generated Guesty API Key.
Then, you’ll need to set up the integration in Klaviyo:
- Log in to Klaviyo.
- Select the Integrations tab.
- Click Explore apps.
- Search for Guesty and select the card.
- Click Install.
- Paste the Guesty API Key you copied in the box.
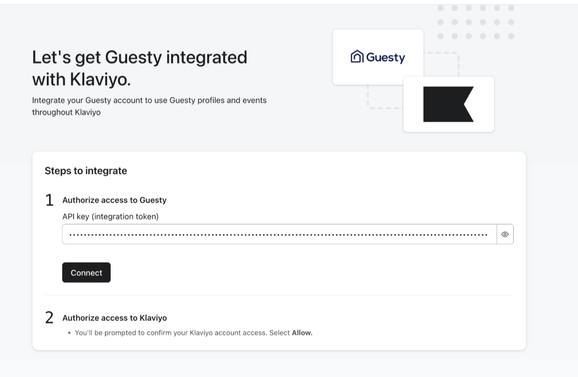
- Click Connect.
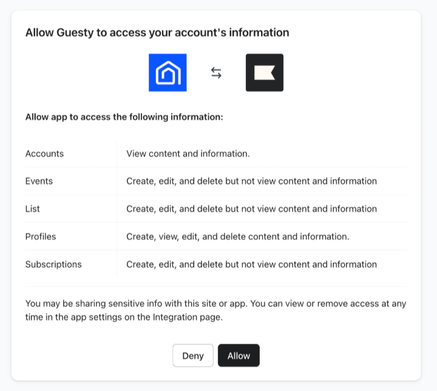
- Review the permissions in Klaviyo and click Allow.
- On the next page, check the box Sync your Guesty email subscribers to Klaviyo if you’d like to do so.
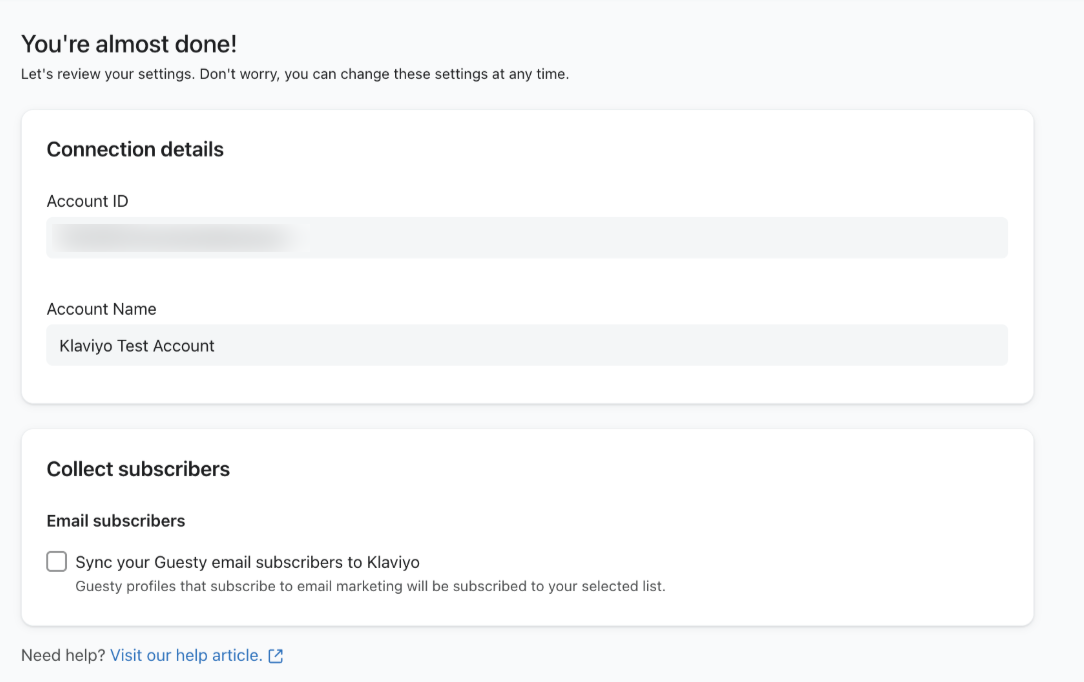
- If you selected the setting above, select a list from the dropdown to add Guesty email subscribers to. Make sure that this list is set to single opt-in to avoid triggering opt-in emails to guests syncing from Guesty.
- When you’re done, click Complete setup.
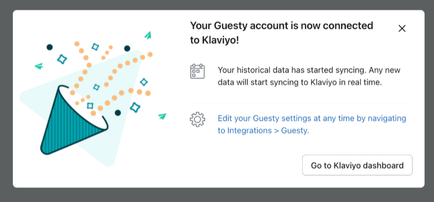
- You’ll receive a success message confirming that your Guesty integration is now connected.
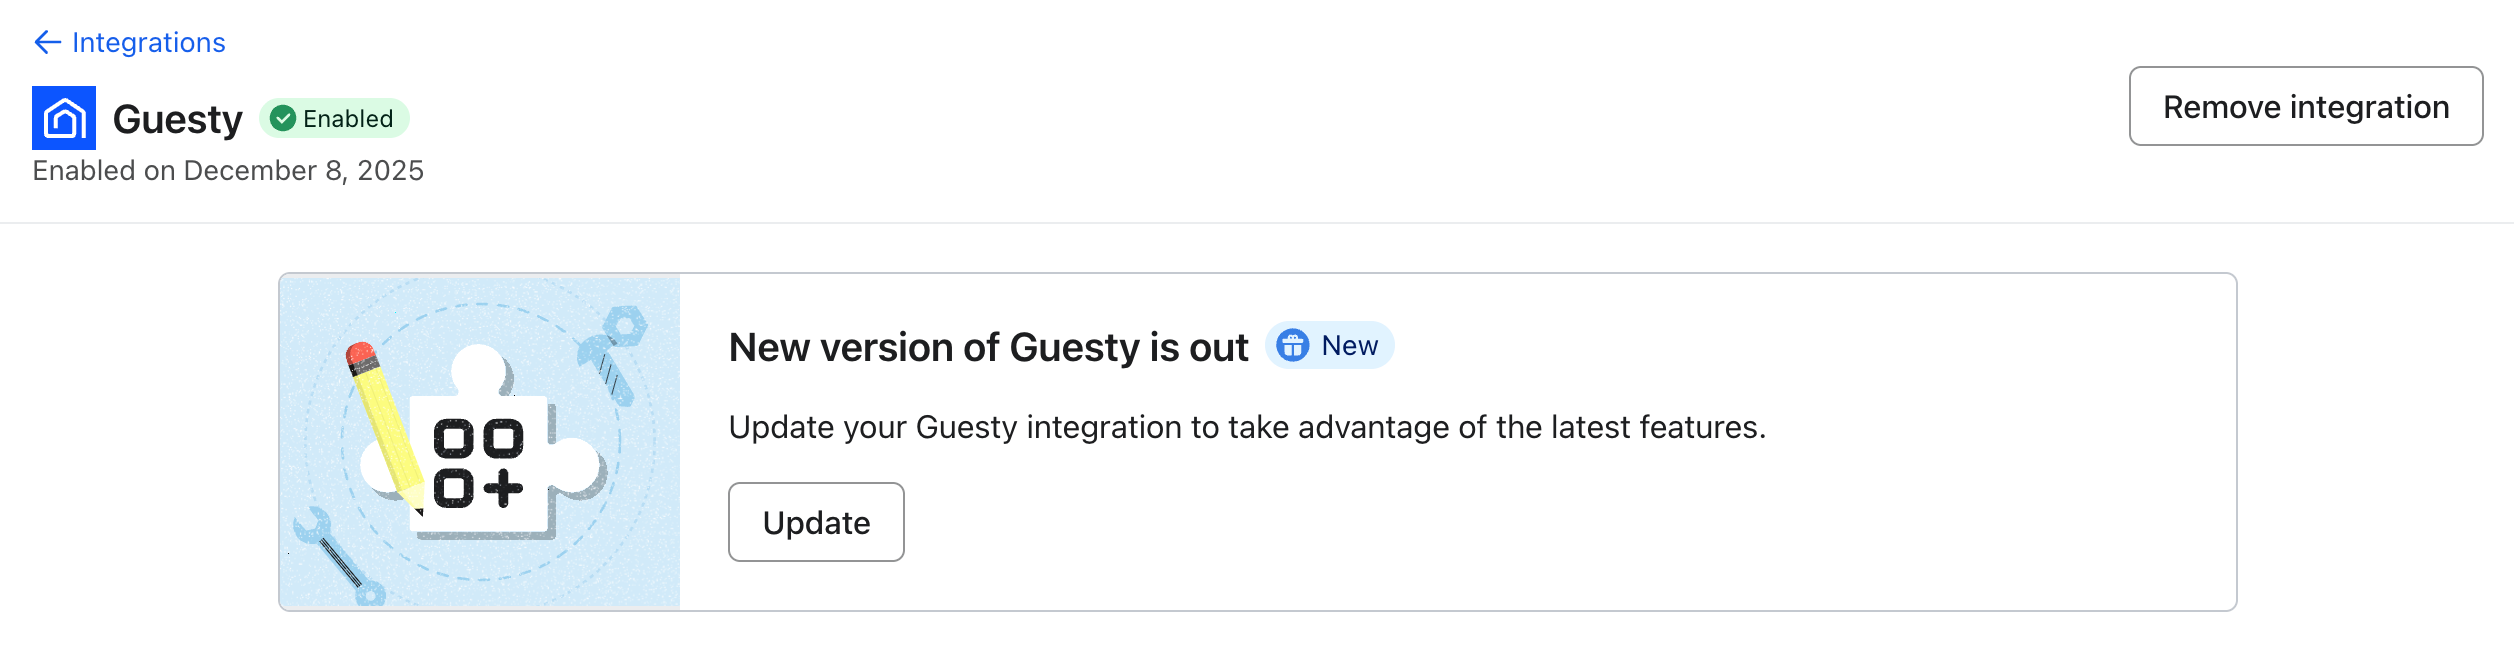
Update your Guesty integration
To update your integration:
- Log in to Klaviyo.
- Select the Integrations tab.
- Click Guesty.
- Click the Update button in the banner.
- Click Connect.
- Review the permissions in Klaviyo and click Allow.
- On the next page, check the box Sync your Guesty email subscribers to Klaviyo if you’d like to do so.
- If you selected the setting above, select a list from the dropdown to add Guesty email subscribers to. Make sure that this list is set to single opt-in to avoid triggering opt-in emails to guests syncing from Guesty.
- When you’re done, click Complete setup.
- You’ll receive a success message confirming that your Guesty integration is now connected.
Add Onsite Tracking to the Guesty Booking Engine
Klaviyo onsite tracking is a JavaScript-based tool that monitors visitor behavior on your booking engine. This allows you to see when potential guests return to your website, view a listing, or add a hotel room to their cart. With these event metrics, you can set up browse abandonment and abandoned cart flows as well as enhanced segmentation.
Follow our guide to add Klaviyo onsite tracking to your Guesty booking engine.
View your Guesty data
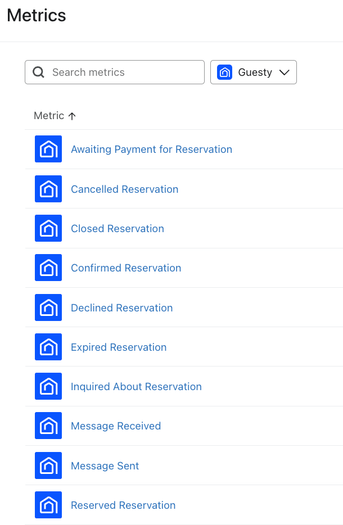
To view your Guesty data:
- Navigate to Analytics > Metrics. Here, you can view all of the metrics in your account. The metrics with a Guesty icon represent all of the metrics synced from your Guesty integration.
- Use the All integrations dropdown and select Guesty to view only Guesty metrics.
To view your Guesty objects (note: requires the latest version of the integration):
- Navigate to Content > Objects. Here, you can view all of the objects in your account. The objects with a Guesty icon represent all of the objects synced from your Guesty integration.
Learn more about your Guesty data.
Segment guests using Guesty data
You can use Guesty metrics to segment guests. Using metrics, for example, you can create a segment of guests who have confirmed a reservation at a specific location:
- Navigate to Audience > Lists & segments.
- Click Create New and choose Create new segment.
- Name your segment and select tags if desired.
- Select the following definition and filter:
- What someone has done (or not done) > Confirmed Reservation (Guesty) > at least once > over all time
- where > Listing Title > equals > (Your Title)

- Click Create segment.
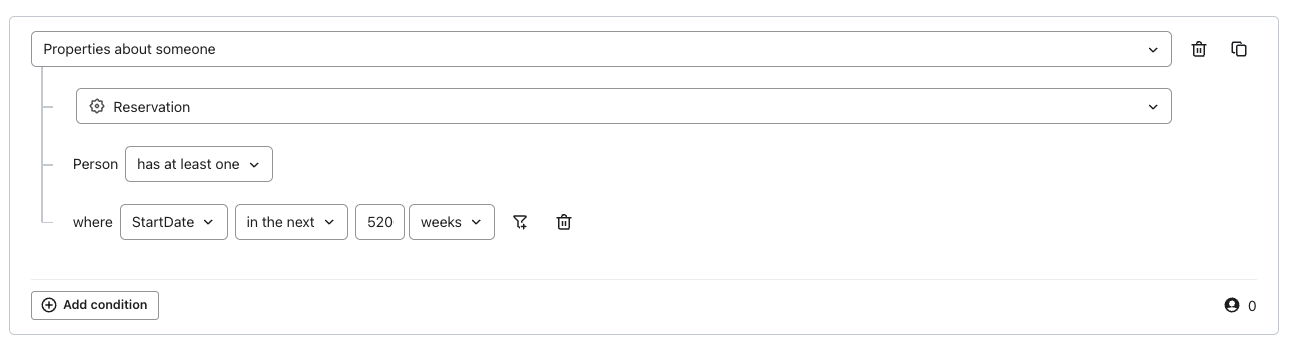
Using objects, you can create a segment of guests who have a reservation start date from tomorrow onwards:
- Navigate to Audience > Lists & segments.
- Click Create New and choose Create new segment.
- Name your segment and select tags if desired.
- Select the following definition and filter:
- Properties about someone > Reservation (Guesty) > has at least one
- where > StartDate > in the next > 5200 weeks
- Click Create segment.
Use Guesty data in flows
You can use Guesty metrics to trigger flows, or sequences of automated actions. Klaviyo offers multiple pre-built flows using Guesty data. These flows include booking confirmations, pre-stay flows, and more.
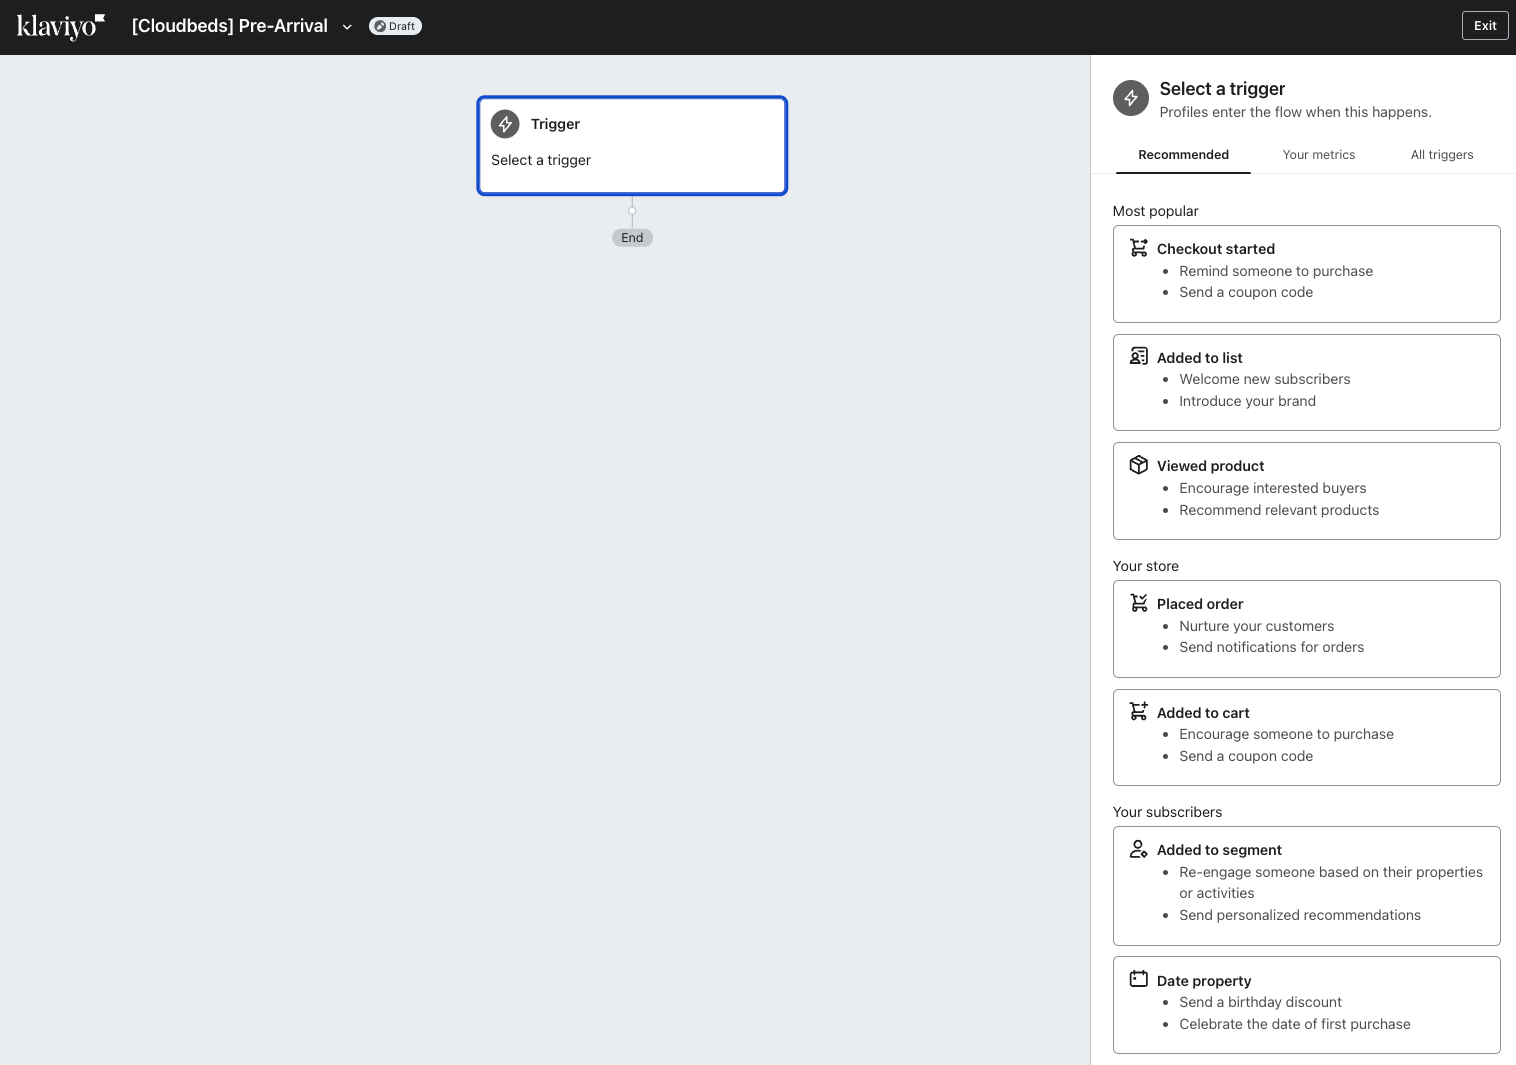
To view these pre-built flows:
- In Klaviyo, select the Flows tab.
- Click Create flow.
- Filter by Guesty to see all Guesty flows.

You can also create a flow with Guesty objects. To create a pre-arrival flow, for example, you can:
- Navigate to Flows > Create flow > Build your own.
- Name the flow and select tags (optional).
- Select the Date property trigger.
- Select Guesty, Reservation: CheckInDateAndTime from the Date property dropdown.
- Choose the time you'd like to start the flow.
- Add the relevant messages in.
You can also create your own flows from scratch.
Additional resources
- Guesty data reference
Learn what data syncs from Guesty to Klaviyo and where to view it. This includes reservation, guest, and message information. If you have not already, read our guide on getting started with Guesty for step-by-step instructions on integrating, before continuing with this article.
- How often integrations sync reference
Learn what data syncs from a particular Klaviyo integration and how often the sync runs. We've organized these integrations by ecommerce platforms, email service providers, and other data integrations.