Understanding the default account, email, and list settings
You will learn
Learn about the default settings for your Klaviyo account, emails, campaigns, flows, and lists, and where to change them to fit your business's needs.
For information on SMS default settings, please read Understand your SMS settings.
General account defaults
- Time zone: Your account uses Eastern Time unless a different time zone has been set. Accounts created through Shopify can use the store's time zone. To check or change yours, go to Settings > General > Account, select your preferred Time zone, and click Save.
- UTM tracking: To configure the UTM parameters appended to links in Klaviyo, go to Settings > Other > UTM tracking. You can add custom parameters and edit Klaviyo's defaults. Turn on Automatically add UTM parameters to links to make UTM tracking the default for campaign and flow messages, then click Save. You can override this setting for an individual message.
Email account defaults
Sender information
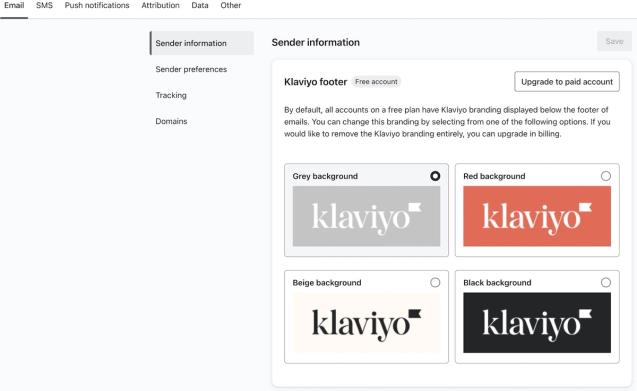
On a free plan, Klaviyo branding appears below the footer of your emails by default. To change its appearance, go to Settings > Email > Sender information, choose a branding option, and click Save. Upgrade to a paid email plan to remove the default Klaviyo branding.
Sender preferences
Go to Settings > Email > Sender preferences to change the settings below. Click Save after making your changes.
Smart Sending Period (email)
Smart Sending helps prevent over-emailing. When it is turned on for a marketing email, Klaviyo skips profiles whose email Smart Sending window is still active. The default window is 16 hours: after you send a marketing email to a profile, another email with Smart Sending turned on is skipped during that window.
Transactional emails are not skipped by Smart Sending and do not start the Smart Sending window.
Preview emails
Choose to set a default prefix for the subject lines of all of your preview emails. This makes it easier to distinguish preview emails from actual campaign or flow sends. By default, there is no prefix appended to preview emails.
CSS optimization
Leave Enable embedded styles checked to use embedded styles instead of inline CSS. While inline CSS can allow your emails to render better in lesser-known inbox providers or places with regional requirements, it adds length to your emails, making them more likely to be clipped. Only uncheck this box if you know that a large part of your customer base is either using a lesser-known inbox provider or is in a region that requires it.
Tracking
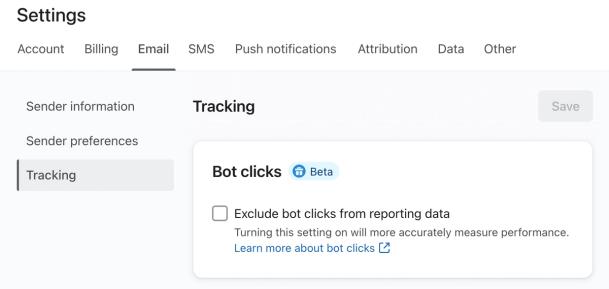
Bot clicks
Changing bot-click filtering can affect click-based A/B test results and the winning variant. Avoid changing it while an A/B test that uses clicks as its winning metric is running.
Bot-click filtering excludes automated clicks from click rate, total clicks, and unique clicks across most reporting surfaces. You can filter clicks for email, text messages, or both. In Settings > Attribution, review the bot-interaction options under Tracking and reporting data and click Save after changing them. Accounts that still show Exclude bot clicks from reporting data under Settings > Email > Tracking can change the email reporting filter there and click Save. Learn more about excluding and monitoring bot clicks in your account.
Email-to-website tracking
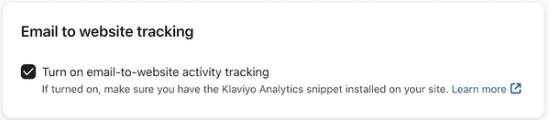
Email-to-website tracking helps identify people who click from your emails to your website and track their website activity. You must have the Klaviyo Analytics snippet installed on your website. To use it, leave Turn on email-to-website activity tracking checked in Settings > Email > Tracking, then click Save after making changes.
Email tracker position
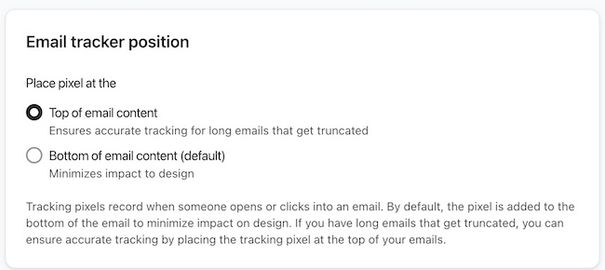
In Settings > Email > Tracking, select Top of email content or Bottom of email content (default) under Email tracker position, then click Save.
When open tracking is on, a tracking pixel records an open when it loads. Clicks are tracked through links separately. By default, the pixel is added to the bottom of the email to minimize its impact on the design. Placing it at the top can help it load in long emails that get clipped, but does not guarantee that every open is recorded.
Domains
Sending domain
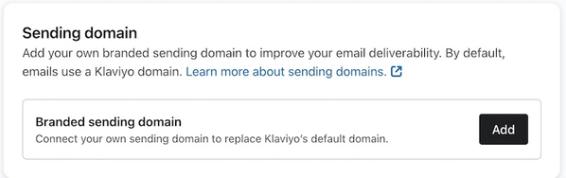
Here, you can set up or manage your dedicated or branded sending domain. Sending from a branded sending domain can improve your deliverability performance, helping you reach your audience's inboxes more often.
For setup requirements and activation steps, see how to set up a branded sending domain.
Default sender name and email address
When you first sign up, the name and email you use to create your account are set to your default sender name and your default sender email address. When you create a new campaign or flow, these values auto-populate.

To change these defaults, go to Settings > General > Account, edit Default sender name or Default sender email address, and click Save.
Changing your defaults does not automatically update existing emails. You can update existing sender email addresses in bulk; sender names must be changed in each existing message. For the bulk-update options and limits, see how to change your sender email address and sender name.
To apply your default sender email address to existing messages:
- In Settings > General > Account, click Apply sender email to all messages. If saving a new address has already opened Update existing addresses, continue in that dialog.
- Review the campaign and flow choices separately. Choose which addresses to update, or leave existing addresses unchanged.
- Click Confirm choices to apply your selections.
Flow defaults
To edit a flow email's settings, select the email in the flow builder, adjust the controls under Settings, and click Save. Review each email in a pre-built or cloned flow, since its settings can differ from those of a newly added email.
- Smart Sending: Smart Sending is on by default for newly added flow emails. Review this setting in pre-built abandoned cart emails before activating the flow. Learn more about Smart Sending.
- UTM tracking: UTM tracking for Google Analytics is off by default for newly added flow emails unless you turn it on in your account's UTM tracking settings. You can change it for each email.
- Additional filters: Newly added flow emails have no additional filters. Pre-built or cloned emails can retain filters, so review each email before activating the flow.
Campaign defaults
You configure campaign settings as you create and schedule a campaign.
- Smart Sending: For campaign emails, Smart Sending is always on by default. It is recommended that you leave Smart Sending on for campaigns to avoid over-emailing subscribers. Learn more about Smart Sending.
- UTM Tracking: UTM tracking for Google Analytics is OFF by default for campaigns, but this can be adjusted in your account-level settings, as outlined above.
- Subject line: Enter a subject line before scheduling your campaign. A campaign cannot be scheduled with an empty subject line.
- Date & Time: When scheduling a campaign, the default date/time value will be the soonest half-hour in your time zone.
- Determining recipients: For single-channel campaigns, the default is At time of scheduling. To change it, go to Settings > General > Messaging, choose At time of scheduling or At send time under Campaign sending defaults, and click Save. Omnichannel campaigns determine recipients at send time.
- Sending Strategies: When scheduling a campaign, Klaviyo will default to sending to everyone at the time you specify, regardless of where they live.
List defaults
To change a list's unsubscribe or opt-in settings, open the list and go to Settings > Consent. Click Save after making changes. Consent-page content and language are managed separately.
- Unsubscribes: New lists created from the Lists & Segments page inherit your account's global-unsubscribe setting. When Unsubscribe from all email marketing is checked, unsubscribing from that list unsubscribes the profile from all email marketing. An account-wide global-unsubscribe setting also applies, even if the list checkbox is unchecked. Use Manage global setting to review the account setting.
- Double opt-in: New email lists inherit your account's default opt-in setting, which is double opt-in unless you change it. New SMS lists start with double opt-in. Select Double opt-in or Single opt-in to change the list's setting. Learn more about double opt-in.
- Language: Klaviyo's default consent-page templates are in English. Lists use your account-default consent pages unless you customize pages for the list, so new lists can inherit content you have already changed or translated. Learn how to change the language of your consent pages.
Additional resources
- Understanding your Text message settings
Learn about your SMS settings and how to edit them to fit your business needs.
- How to create and manage multiple accounts
Learn about multi-accounts in Klaviyo, which allow you to access and switch between different accounts with a single login. This is particularly helpful for brands that have multiple websites (e.g., for different countries) or have several brands under a single parent company.
- Getting started with Klaviyo