How to test your email content to identify spam triggers
You will learn
Learn how to find the content in your emails that is causing them to go to the spam folder or be blocked.
You should go through the content process only when you have ruled out all other factors for emails going to spam, or it is only occurring on a specific message and no others.
How to test content to identify spam triggers
To identify the content that is causing emails to go to spam, you can iteratively construct your email with a test send in between each piece of content to see what causes it to go to spam.
Testing content and its impact on delivery requires a test email account with the mailbox provider you are testing with. Preview emails count toward your account’s preview sending limit for the billing cycle. Learn about preview emails and limits.
Preview emails can differ from live emails in their subject prefix and link tracking. A preview’s inbox placement does not guarantee the same result for your audience. If only previews are going to spam, see Understanding why some preview emails go to spam.
Keep an unchanged copy of your original email template so you can restore content as you test. Keep the subject line, sender details, and test mailbox the same while comparing versions.
You can use the email’s header to see information about the network path for the email and what may be causing it to go to spam. All emails have an email header and all email clients pull some key information from the header and display it in a user-friendly way. Here you can see whether email authentication issues may be causing it to go to spam, or if there are issues with the sender or recipient email itself.
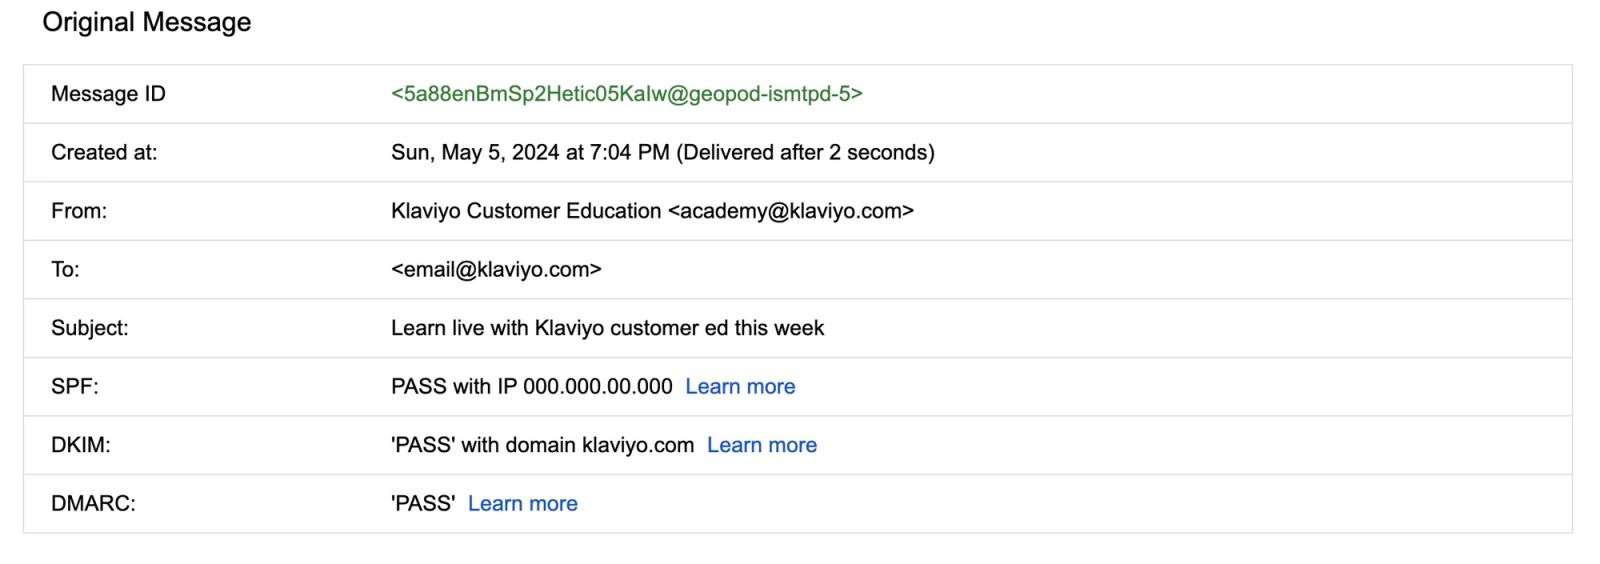
If you don’t see any issues in your email header, take the following actions:
- Remove the message text, links, images, and ads from your test email, keeping the unsubscribe link and required footer information. This creates a starting point for comparing versions; it does not isolate HTML as the only possible cause.
- In the drag-and-drop editor, click Preview, enter your test mailbox address, and click Send test. Check whether the email reaches the inbox or spam folder. If it does not arrive or still goes to spam, revisit the other factors for emails going to spam before continuing. Use these controls for each test below.
- If the stripped-down email reaches the inbox, start adding content paragraph by paragraph, with test sends in between. This allows you to iteratively check for words or phrases in your email that may be triggering inbox providers’ spam filters.
- Once you have added all your desired text without any spam issues, add in your links one by one, with a test send after each link. This way you can see if any of the URLs are considered suspicious by the inbox provider and are causing the email to land in spam.
- Finally, add in all of your images and ads one by one, with a test send after each addition. This allows you to check whether any image repositories or third-party ads are affecting your placement.
- If you have identified a piece of content that is causing emails to go to spam, remove that section from future tests and continue testing. Once you have checked all your desired content, send a final test of the complete email with the problematic content removed or revised.
Third-party tools
You can also use a third-party tool like Litmus for content testing. Tools like Litmus let you preview your campaigns in different email clients and check for potential spam issues. To check authentication, test an email sent from Klaviyo; an HTML export alone does not include the email headers.
See how to export the HTML for an email template in Klaviyo.