How to create a multilingual push notification flow with Smart Translations
Learn how to set up a flow to send in multiple languages, depending on the language preferences of your audience. Klaviyo can translate push notification content to 60+ languages.
Localizing flows is great if you have or plan to expand to an international customer base. Sending push notifications in each subscriber’s preferred language allows you to reach a wider audience which can increase overall engagement.
Before you begin
Enable Smart Translations from your account settings.
If you haven’t already, learn the basics of getting started with flows. This article mainly covers translation features for flows.
Translate a flow
Make sure your push notification is fully edited and ready to send in your original language before translating. Otherwise, you’ll have to go through the translation process again if you make edits to the original content.
- Create a flow or edit an existing flow.
- Click on a push notification you want to translate.
- In the Content section of the sidebar, click Edit.
- In the editor, click Translate in the top right.
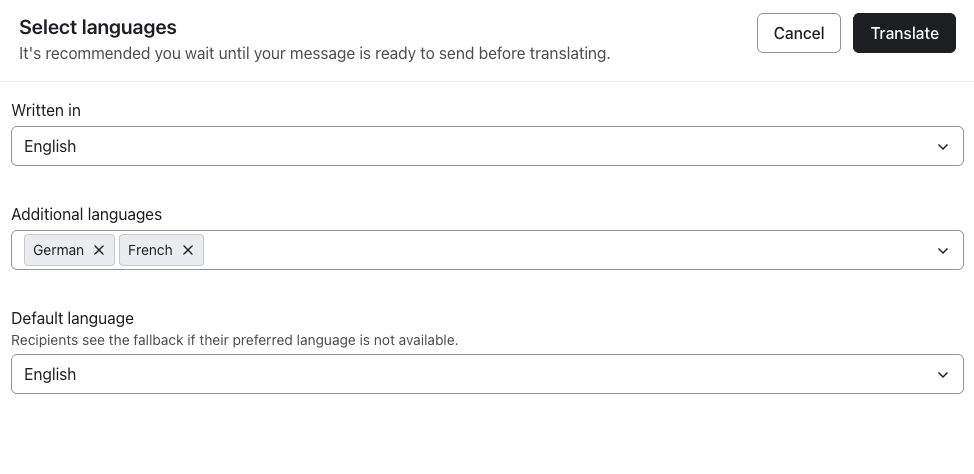
- Choose the Written in language that the content was originally created in.
- Select what languages you want to translate your content into by checking the box next to each language. This section will include any languages you chose in your translation settings.
- If desired, click the dropdown under Additional languages to view and select languages that aren’t recommended.
- If desired, choose a Fallback language for when a customer’s preferred language is unavailable. This can be different from the original language.
- Click Translate.
- On the next step, review all the push notification elements that will be translated. You can manually edit any of these elements if needed. You can also click the edit button next to listed images to change them to ones appropriate for the selected language.
- Click the edit button next to a listed text block to review and edit the full text.
- If you selected multiple languages to translate into, click the arrows at the top or use the dropdown to switch between languages.
- If you want to add more languages or remove the currently selected language, click the name of the language.
- Once you’re done, click Save.
Editing original content after translating
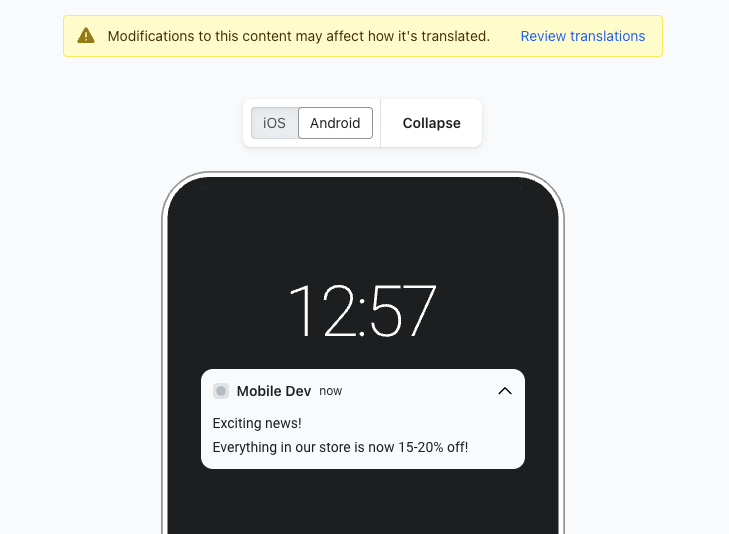
If you edit the original content of the push notification after you’ve already translated, a warning will appear at the top of the editor notifying you that your edits will affect translation.
To correct any potential translation errors:
- Click Review translations next to the warning message.
- Click Update translation to update all out-of-sync blocks which are highlighted in yellow.

- To individually edit an element, click the pencil icon and choose from the following:
- Re-translate - translates any changed text
- Match source - matches image or URL to the original source
- Edit - manually modify the element
- Ignore - keep element as is
See which messages are translated
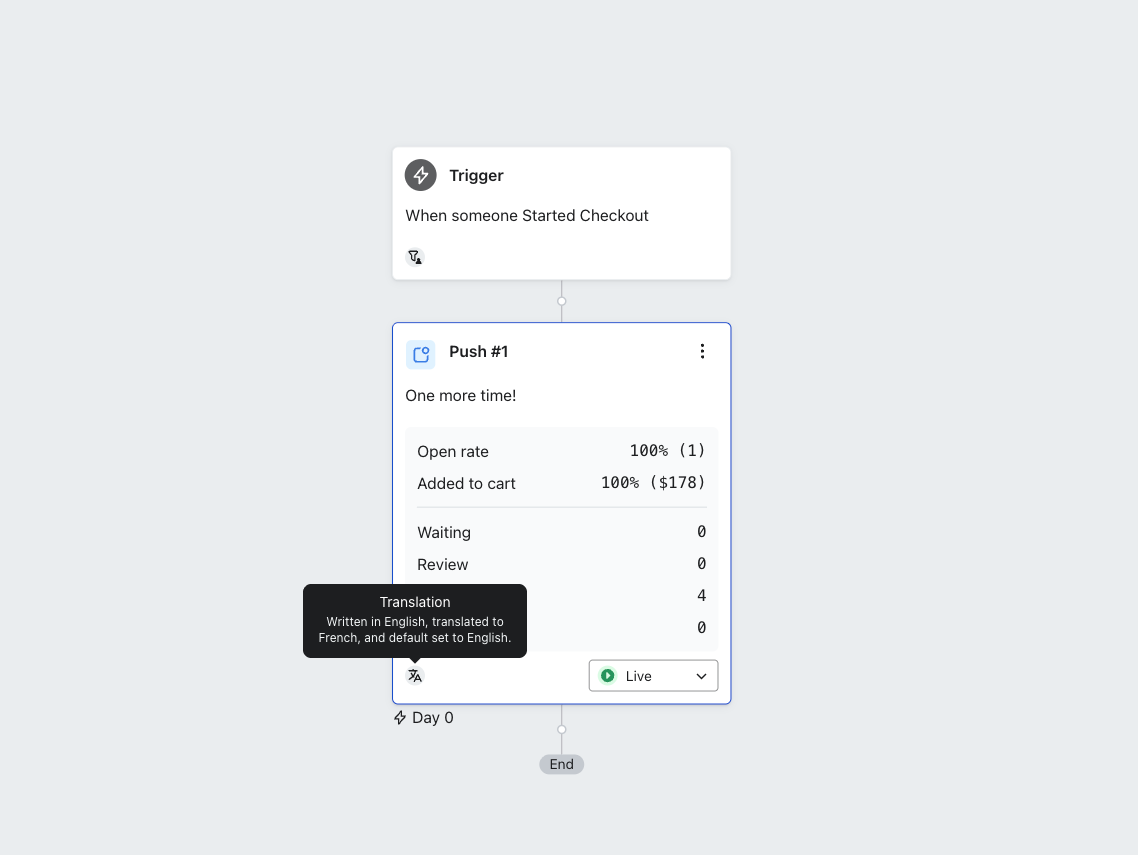
In the flow canvas, you’ll see an icon on the message card for messages that have translations. Hover over the icon to see the translation settings.
Translations for cloned messages and A/B tests
If you clone a flow push notification with translations, the new push notification will keep all translations from the original which you can freely edit. Learn how to clone a flow.
When you create an A/B test, new variations will keep translations from the original push notification.
Additional resources
Learn more about editing flows:
- How to edit a flow
Learn how to edit the details and configuration of a flow in Klaviyo.
- How to change a flow trigger
Learn how to create a copy of a flow in order to create a new version with a different trigger. A copy of the original flow must be created because once you have set the trigger for a flow, you cannot change it. Trigger filters, profile filters, additional email filters, and dynamic content in emails are all reliant on the specific trigger you set for a flow. Most likely, if you change the trigger for an existing flow, this will cause conflicts with your filters and content that are challenging to identify and correct.
- How to use Flows AI to build a flow
Learn how to use Klaviyo's Flows AI to build a flow from scratch. The option to create with AI accepts natural language inputs (i.e., normal phrases and sentences) and helps you choose a trigger and flow structure before you start editing the fine details.