How to add or delete users and manage permissions
Owners and Admins can add or remove users and change their roles. Users with a custom role that includes permission to edit user management can also perform these actions.
Learn how to add new users to a Klaviyo account and set their roles.
This article is specific to adding or removing users who are not the Owner in a regular Klaviyo account. If this is not what you're looking for, you might want our articles on transferring account ownership or adding or removing users in a portfolio.
Video overview
Add users
- Click your account name in the bottom left corner.
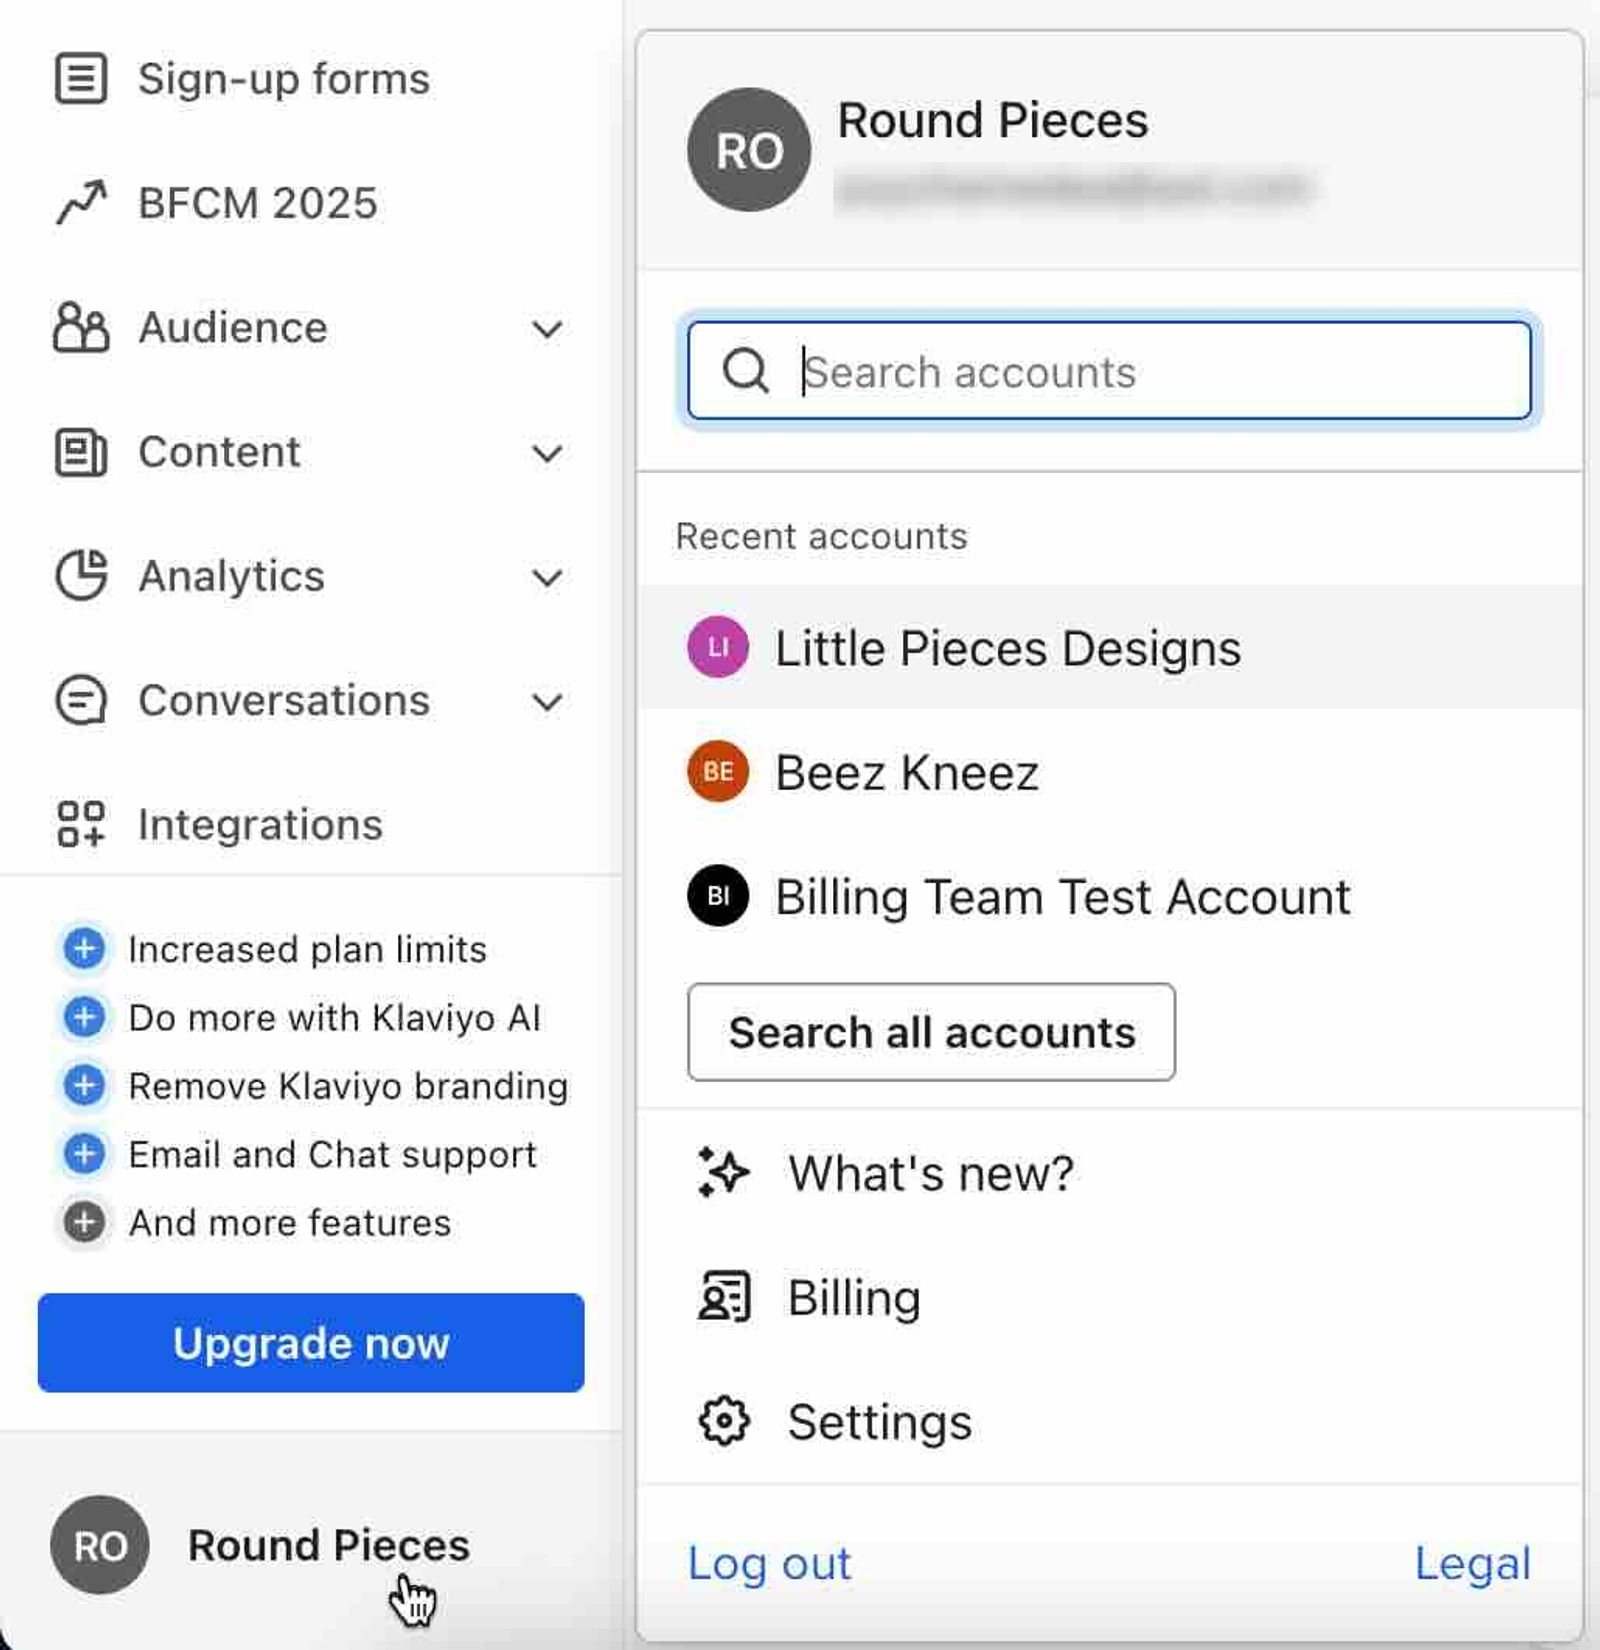
- Navigate to Settings > Users.
- Click Add new user.
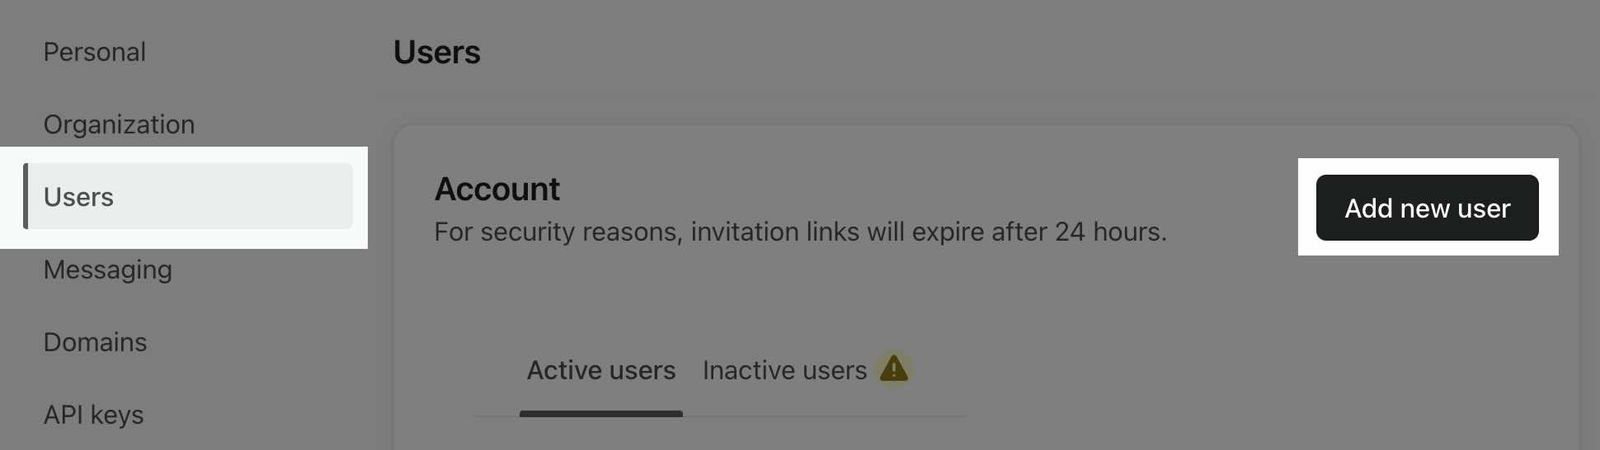
- Type in the email address of the new user.
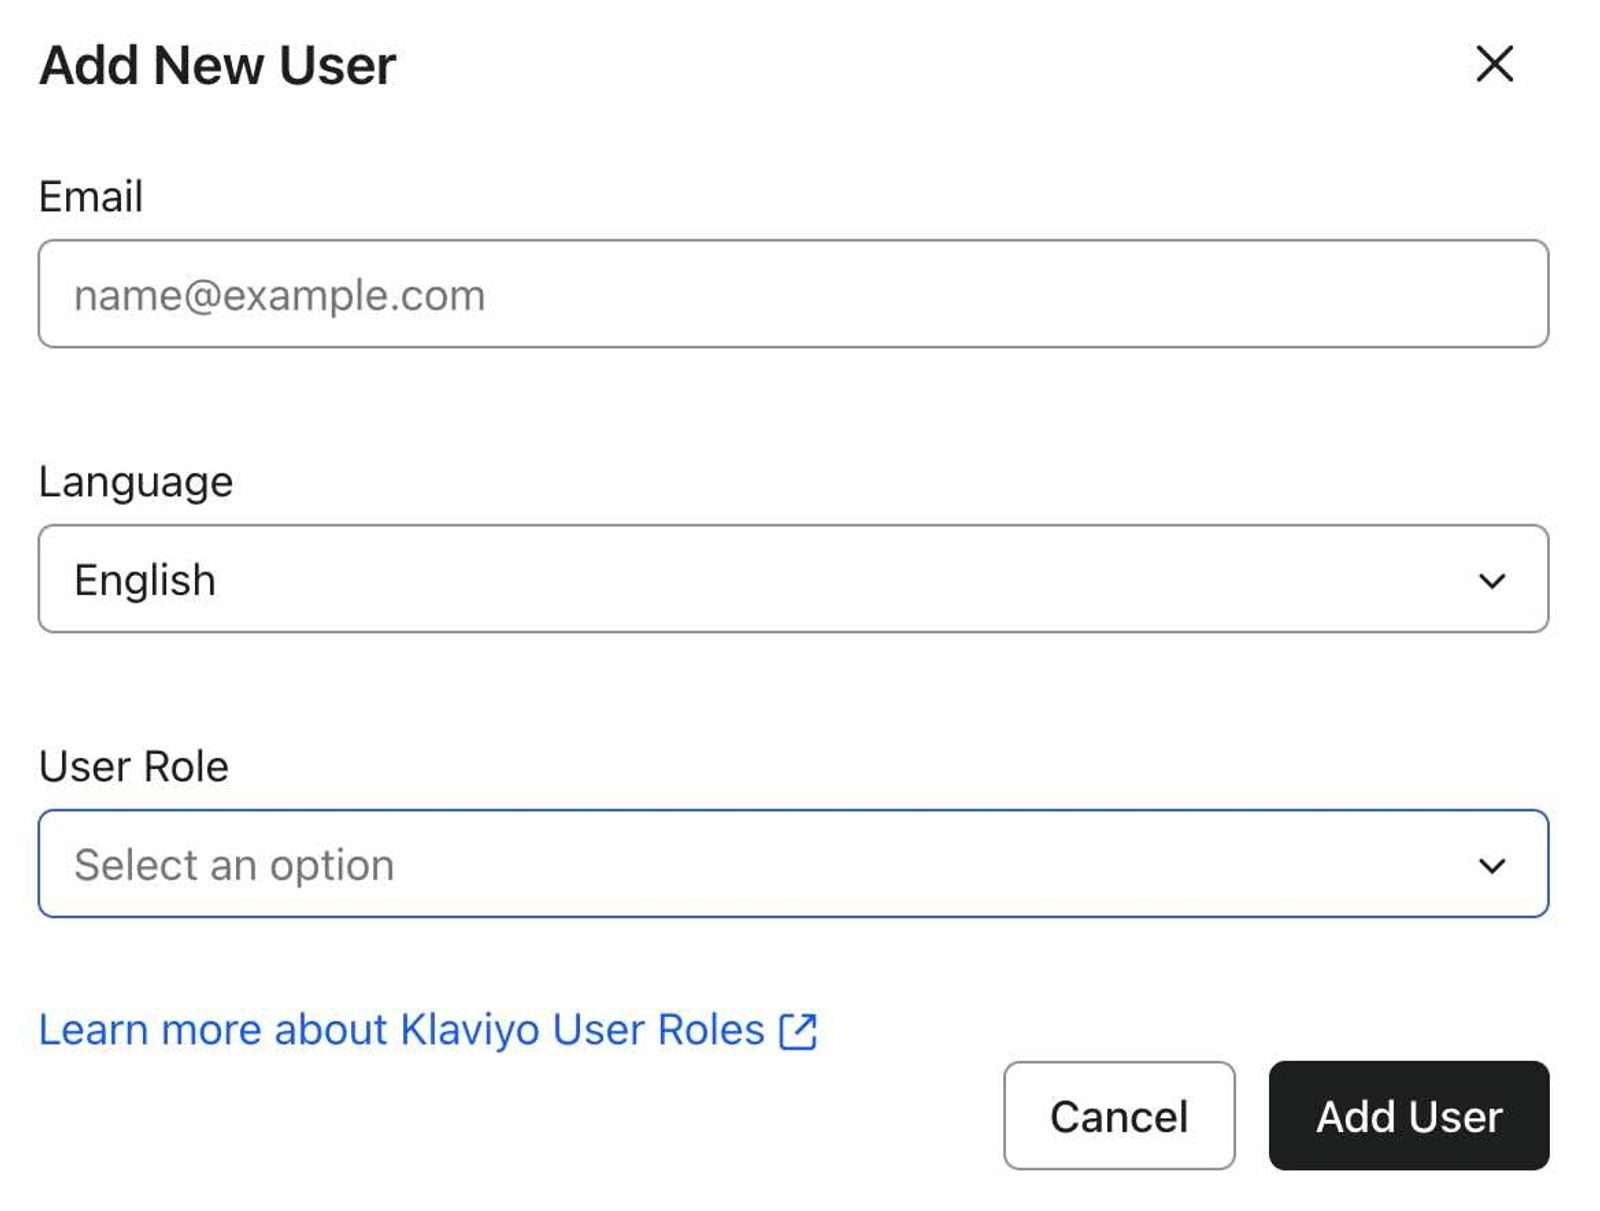
- Under Language, select a preferred language from the dropdown. For someone new to Klaviyo, this sets the language for their invitation and personal account experience. It does not change an existing Klaviyo user's personal language setting. Learn more about communication and personal language settings for your account.
- Under User Role, select a custom role created for your account or 1 of these standard roles:
- Admin
- Manager
- Analyst
- Support
- Campaign Coordinator
- Content Creator
- Social Media Manager
- Click Add User.
Once you add your new user, they will receive an email from our Support team with instructions to access the account. They can change their personal language preferences if needed.
Set up your account or accept access
- Open the email from Klaviyo about your account access. If you already use Klaviyo, look for the subject New Klaviyo Account Invitation or its translation in the email’s language.
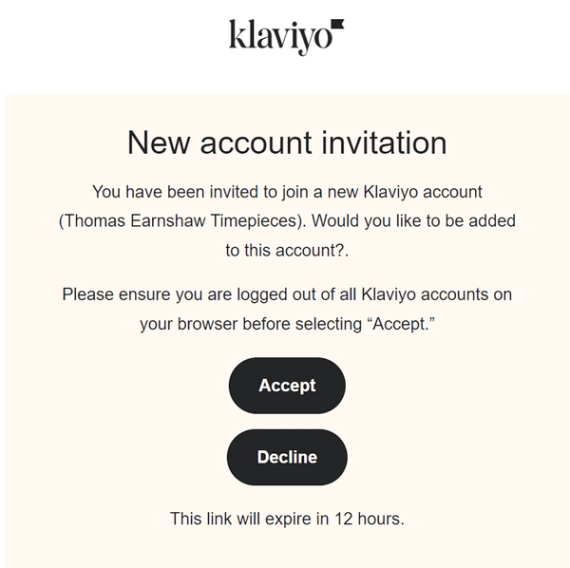
Before accepting the invitation to join the account, be sure to log out of any other Klaviyo accounts to ensure that the button in the email functions properly.
- Follow the instructions for your situation:
- If you are new to Klaviyo and the account does not require single sign-on (SSO), click ACCOUNT SETUP and complete the form to create your password.
- If you already use Klaviyo, click Accept to join the account or Decline to reject access.
- If you are new to Klaviyo and the account requires SSO, follow the access email to sign in with SSO.
Resend a new user invitation
Invitation links expire after 24 hours. If a link expires before the user completes setup or accepts access, resend the invitation.
- Click your account name in the bottom left corner.
- Navigate to Settings > Users.
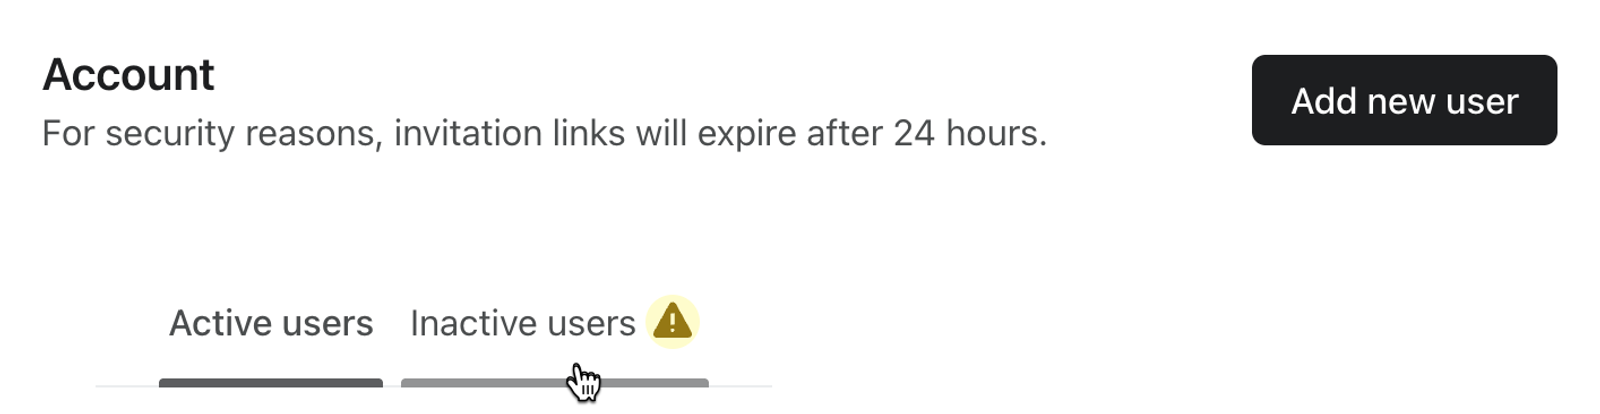
- If the page shows tabs, select Active users. Pending invitations appear here; Inactive users is for users who last logged in more than 1 year ago.
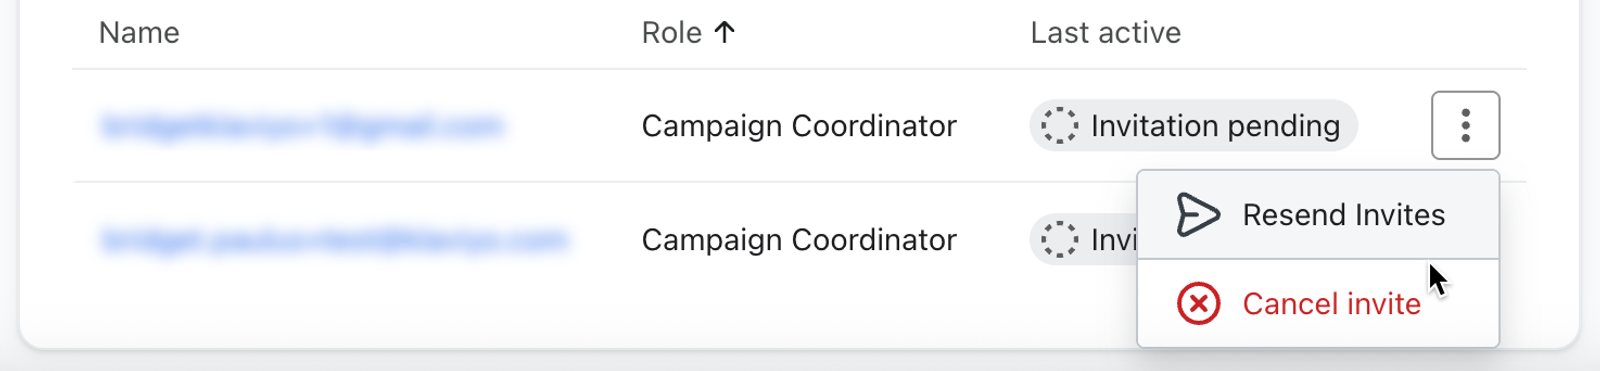
- Click the 3 dots next to the user that you want to resend the invitation to.
- Select Resend Invites.
- Check the box next to the user's email address.
- Click Send. You'll see a confirmation that the invitation has been resent.
Remove or delete users
You cannot delete yourself or the Owner of an account. To remove an Owner, you must first transfer account ownership to someone else.
If your account uses SCIM to manage users through an identity provider (IdP), remove the user from your IdP before deleting them in Klaviyo.
- Navigate to Settings > Users.
- Click the 3 vertical dots next to the user you want to remove.
- Select Delete user for a user who has completed setup, or Cancel invite for a pending invitation.
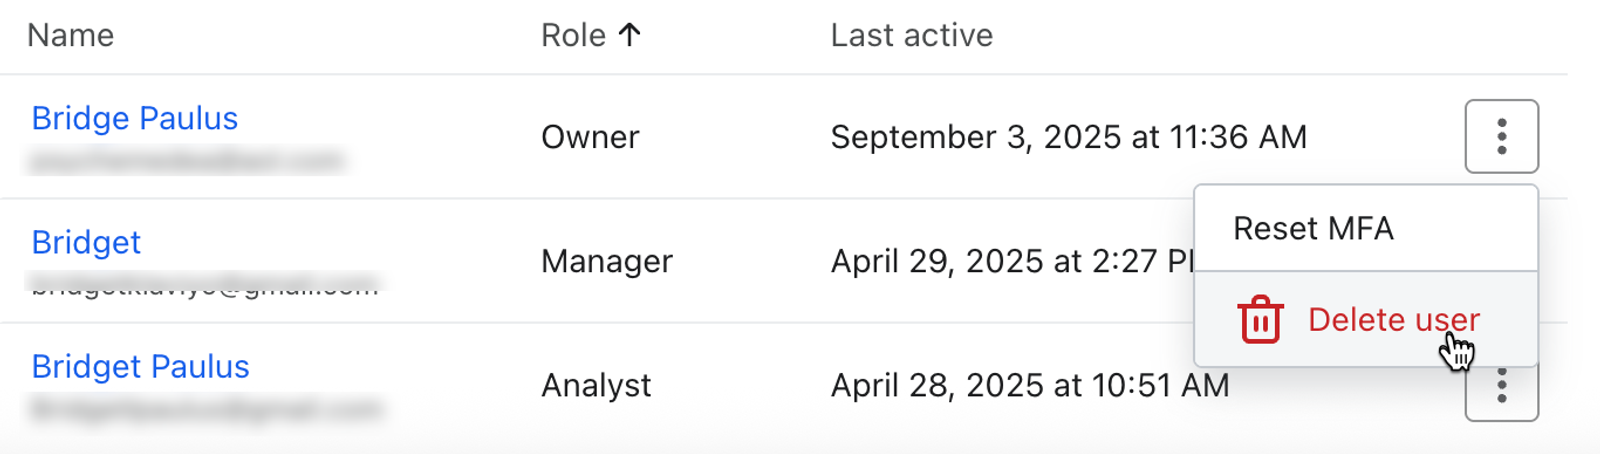
- In the modal that appears, click Delete user.
Manage permissions
If your account uses SSO with just-in-time provisioning or SCIM, change the role in your identity provider. Users on the SSO exception list can have their roles changed in Klaviyo.
To change an existing user’s role:
- Navigate to Settings > Users, then click the user’s name (or their email address if no name is shown).
- Select the new role under User Role.
- Click Update to save the change.
On the Users page, you can also:
- See which users have set up their accounts and which still have their email invitation pending.
- Resend invitation emails to users who have not completed setting up their accounts.
- Click on a user to view their details, which include:
- Name
- When they were added
- When they last logged in
- Their current role
Additional resources
- User management and privileges reference for Static User Roles
Learn about the different Klaviyo user roles, their account permissions and access, as well as their potential restrictions inside the platform. Depending on your role, the view of Klaviyo may look different. For instance, Owners see different account setting options than Admins do.
- How to transfer account ownership
Learn how to transfer ownership of a Klaviyo account to a new Owner.
- How to update your account email and password in Klaviyo
Learn how to change the email address and password for your account.
- How to add or remove a portfolio user
Learn how to add or remove users from a portfolio.