How to send a push notification campaign
You will learn
Learn how to use Klaviyo to send push notification campaigns via your iOS or Android app.
Just like in SMS and emails, you can use emojis, variables, and personalization tags to personalize push messages.
Before you begin
Before you can send push notifications, note that:
- You have to set up push notifications in your Klaviyo account.
- Only app users that consent to notifications will receive push notifications from you. When an app user opts in to receive notifications, they will be assigned a push token that allows you to target them with notifications through both campaigns and flows in Klaviyo.
Push notifications use the same conversion window as your emails.
Common use cases
Push notifications via campaigns are frequently used for the following reasons:
- Sales and discounts
- Product releases
- Time-sensitive offers (e.g., limited-time items, flash sales)
- App-only offers (e.g., buy in-app, pickup in store)
- Highly segmented campaigns based on browsing behavior
- Local popup shops and events
- In-app minigames
Want to request a feature for Klaviyo push notifications? Fill out this Google form to tell us about it!
Send push notifications in campaigns
- Navigate to the Campaigns tab in Klaviyo.
- Click Create campaign in the upper right.
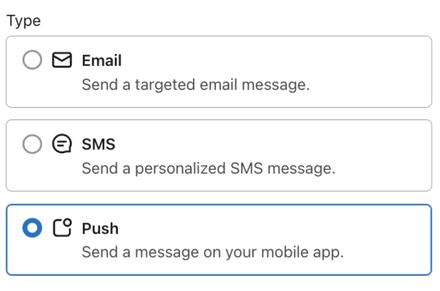
- Name the campaign and select Push as the type.
- Add any tags you want.
- Click Continue.
- Choose the list(s) or segment(s) to send to.
- Note: only subscribers who have downloaded your iOS or Android app and enabled push notifications will receive the message, not every person in a list or segment.
- In the Content tab, select the type of push notification you want to send:
- Standard
Display a push notification on users’ devices. - Silent
Send a hidden notification to your user’s mobile app.
- Standard
- For both standard and silent push notifications:
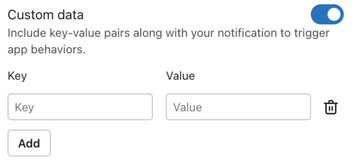
- Select the Behaviors tab.
- Under Custom data, you can include key-value pairs along with your notification to trigger app behaviors from both standard and silent push notifications. You can add up to 10 key-value pairs per push. Learn more about key-value pairs.
The following push settings only apply to standard push notifications:
- In the Content tab, configure your message’s title and content. The character limit for push notifications is 178 characters.
- Optional: add an image, GIF (iOS only) or video (iOS only).
- Click into the Behaviors tab to adjust the following message settings:
- Open action
Choose whether you want subscribers to go to your app's home page (open app) or to a specific page (deep link). - Show badge count (iOS)
Decide if you want the badge count to increase by 1, be set to a certain number, or be set to the value of a specific property. - Sound (iOS)
Choose if you would like subscribers to hear a sound when they receive the push notification.
- Open action
Once you've crafted your message, you can either schedule your push notification or send it immediately.
Additional resources
- How to use deep links in push notifications
Learn how to use deep linking in Klaviyo push notifications so that you can direct customers to a specific in-app screen. Deep links make it easy for your profiles to access the content they want with a simple tap.
- How to add a push notification to a flow
Learn how to use Klaviyo to send push notifications from your iOS or Android app via flows.
- Understanding your push notification settings
Learn about the push notifications settings page, where you can set up push notifications for your mobile app and adjust the Smart Sending window.