How to use go-to-inbox buttons in forms
You will learn
Learn how to streamline the email sign-up process for your subscribers. With the Go to inbox button action, you can direct site visitors from your form’s success step to their inbox so they can easily confirm their subscription.
About go-to-inbox buttons
When creating a Klaviyo sign-up form or subscribe page that collects email consent, you must link it to a list so those who complete the form are added to that list. If you choose a list with double opt-in settings, then the site visitor who fills out the form must confirm their subscription via a confirmation email in their inbox before they are actually added to the list.
While you can add messaging on the form's success step reminding visitors to confirm their subscription in their email, some people may forget or get distracted and never confirm. By adding a button on the success step of your form with the Go to inbox action, you can make it easier for shoppers to locate the opt-in confirmation email in their inbox so they can easily complete the double opt-in journey and join your marketing list.
To include a go-to-inbox button, your form must collect email consent and submit to a list with double opt-in enabled. You can also use a multi-step form that collects email first and then uses a traditional SMS opt-in method. This feature is not compatible with single-step forms that collect both email and SMS consent.
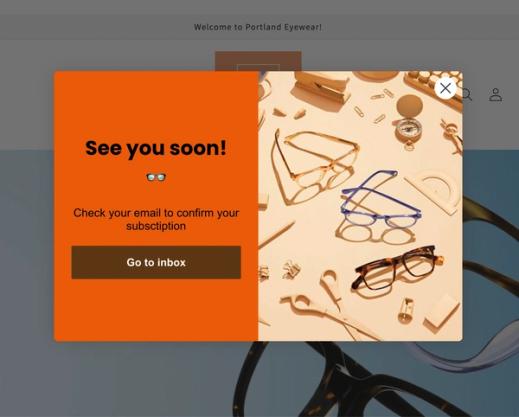
How do they work?
When a new site visitor fills out the form on your site and lands on the success step, clicking the go-to-inbox button opens their email provider in a new tab. For Gmail, Yahoo Mail, and Proton Mail, the link searches using your sender address and the confirmation email’s subject line. This helps the subscriber locate the opt-in email and minimizes distractions from other messages. Outlook and iCloud Mail open without these search filters, so the visitor must locate the confirmation email themselves.
When the button doesn’t appear
The go-to-inbox button only appears for email addresses from supported email service providers (ESPs). If a subscriber’s email address domain is not supported, Klaviyo automatically hides the button; however they will still receive the confirmation email. See supported providers below.
If, at any point, you change the form’s submit list to single opt-in, the button will also be hidden from subscribers; however, you may still see it on the form preview in the editor.
Add a go-to-inbox button to a sign-up form
- Select the Website > Sign-up forms tab in Klaviyo’s left-hand navigation.
- Open the editor for one of your existing email opt-in forms, or create a new one.
Your form must collect email consent and submit to a list with double opt-in enabled to include a go-to-inbox button.
- Click Success in the top menu bar to edit the form’s success step. Note that you cannot configure go-to-inbox buttons on other form steps. Only the success step is supported.

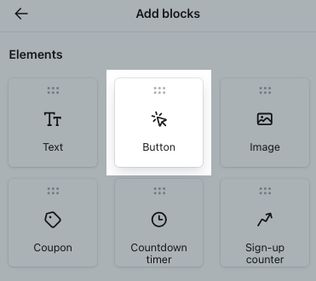
- Select the Add content icon in the left sidebar to open Add blocks.
- Click and drag a new button block into your success step preview wherever you’d like it to appear.
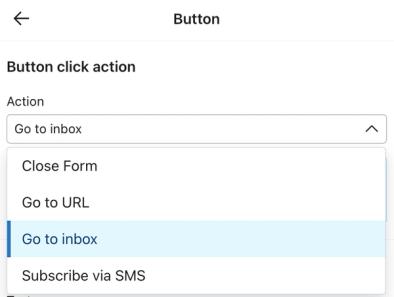
- In the left sidebar menu, verify that the Action is set to Go to inbox.
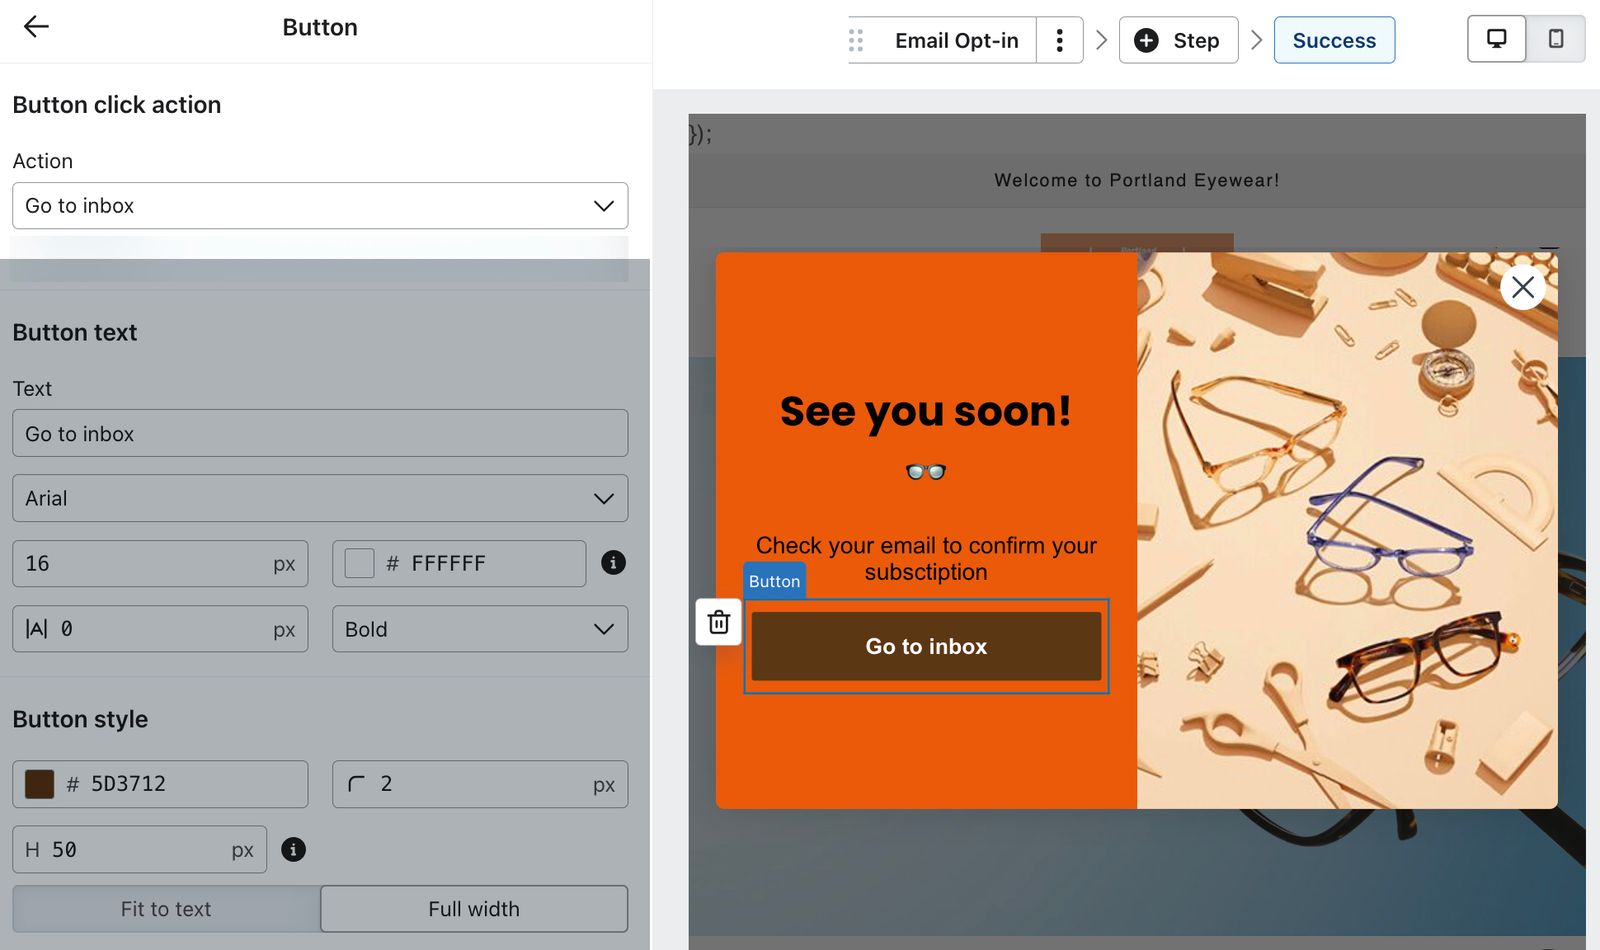
- Adjust the button text and styling as needed; "Go to inbox" is the default button text. It is recommended to keep the default text or use something similar so that subscribers know what action will happen when they click on the button.
- If you haven’t already, add text on the success step instructing subscribers to check their email and confirm their subscription (e.g., “Head to your inbox to confirm your email”). This gives additional context to the button, as well as accounts for visitors with unsupported email providers. The message should not directly reference the button, as it will not appear for everyone.
- When satisfied with your form’s appearance and functionality, click Publish or schedule. Choose the Publish now option, then click Publish now to make your changes live.
When clicked, the go-to-inbox button opens a new tab to the visitor's email provider. Gmail, Yahoo Mail, and Proton Mail use search filters to help locate the confirmation email; Outlook and iCloud Mail open without these filters.
Add a go-to-inbox button to a subscribe page's confirmation step
You can also add go-to-inbox buttons to a subscribe page's confirmation step. The confirmation step is used for double opt-in, so make sure the list uses double opt-in before you begin. To add the button:
- Navigate to the consent pages for the subscribe page you'd like to edit:
- To edit your account-level subscribe page, select Settings > Other > Consent pages.
- To edit a subscribe page that's tied to a specific list, navigate to Audience > Lists & segments, select the list, then click Consent pages in the top menu bar. If the list uses the account’s default pages, click Customize for this List to create pages for that list.
- On the Email confirmation page, click Edit Page.
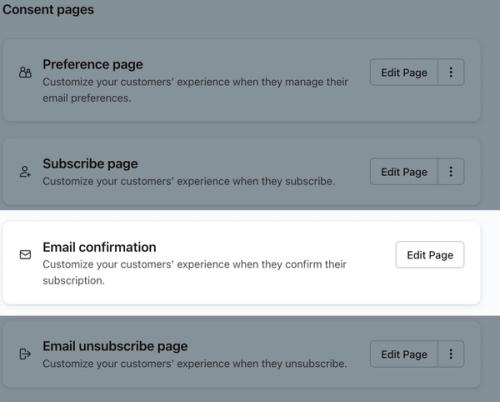
- Select the Confirmation page step in the top menu bar.
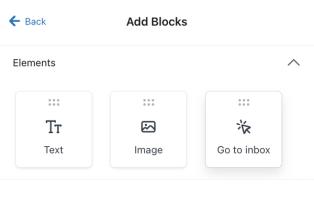
- Click Add Blocks.
- Click and drag a Go to inbox button block into your confirmation page wherever you’d like it to appear.
- Adjust the button text and styling as needed; "Go to inbox" is the default button text. It is recommended to keep the default text or use something similar so that subscribers know what action will happen when they click on the button.
- If you haven’t already, add text on the Confirmation page instructing subscribers to check their email and confirm their subscription (e.g., “Head to your inbox to confirm your email”). This gives additional context to the button, as well as accounts for visitors with unsupported email providers. The message should not directly reference the button, as it will not appear for everyone.
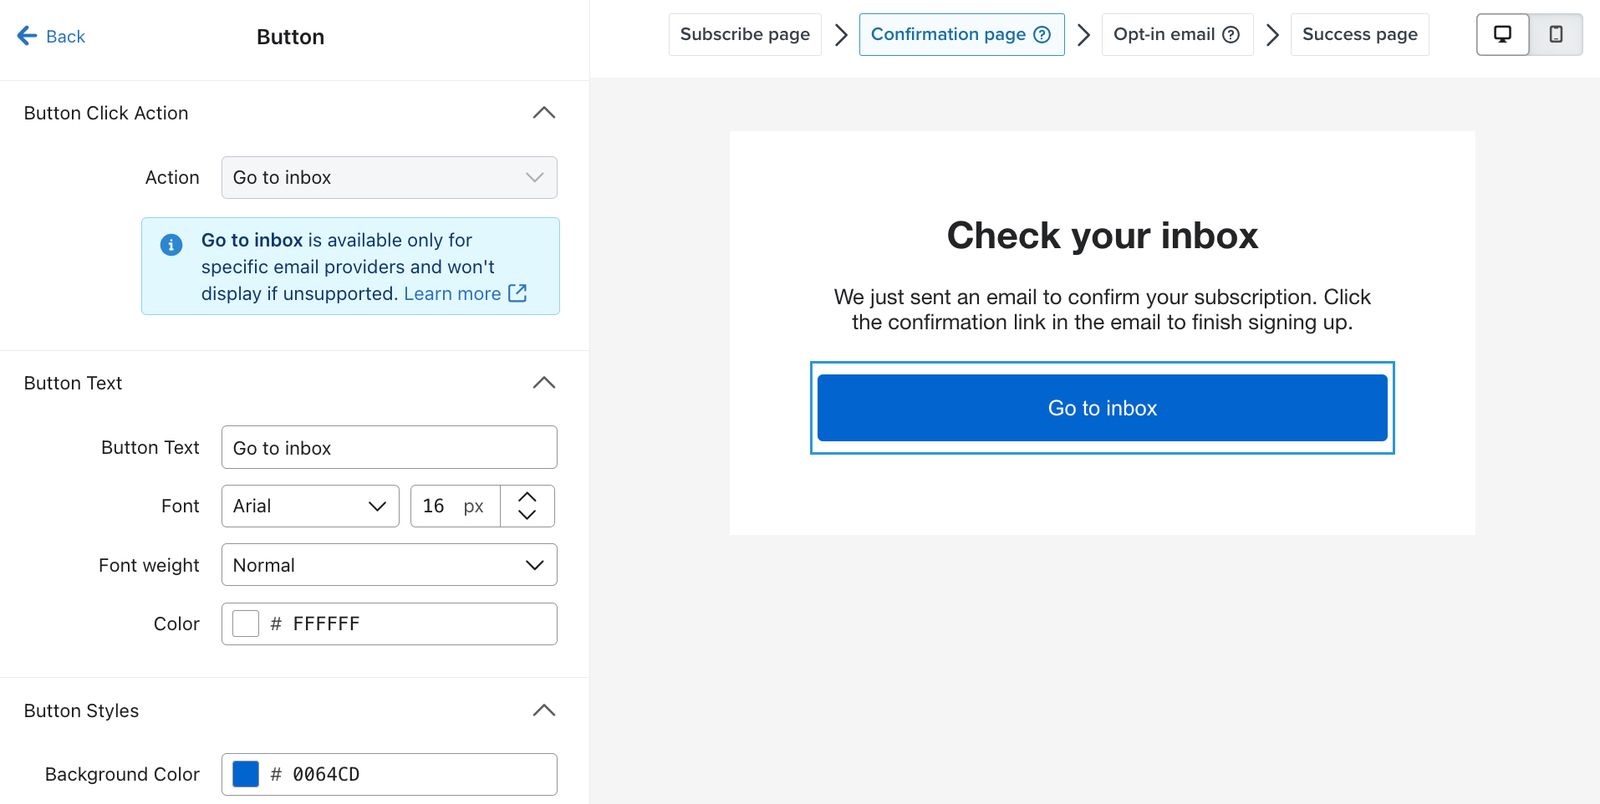
- Click Publish to make your changes live. If a publishing confirmation appears, review it and confirm publishing.
When clicked, the go-to-inbox button opens a new tab to the visitor's email provider. Gmail, Yahoo Mail, and Proton Mail use search filters to help locate the confirmation email; Outlook and iCloud Mail open without these filters.
Supported mail providers for go-to-inbox buttons
The following email providers are supported with the Go to inbox button action, on both desktop and mobile devices.
- Gmail: gmail.com, googlemail.com, google.com
- Yahoo Mail: yahoo.com, yahoo.co.uk, yahoo.fr, yahoo.it, ymail.com, rocketmail.com, yahoomail.com
- Microsoft Outlook: outlook.com, live.com, hotmail.com, msn.com, passport.com, passport.net
- Proton Mail: proton.me, protonmail.com
- iCloud Mail: icloud.com
If a site visitor enters an email address with an unsupported domain, including a custom business domain, the button will not appear on the form's success step.
Each email provider has different search capabilities, which can change. Gmail, Yahoo Mail, and Proton Mail support searches by subject line and sender address, including the spam folder. Gmail’s search is limited to messages from the past day. Outlook and iCloud Mail open without search filters, so visitors need to find the confirmation email themselves, including checking spam or junk if necessary.
To account for this, maintain a strong sender reputation so that your emails are delivered to the inbox. Learn more about email deliverability.
Additional resources
- How to manage your sign-up forms
Learn tips for managing your existing sign-up forms so you can ensure they are aesthetically pleasing and functional for customers interested in engaging with your brand.
- Understanding the double opt-in process
Learn the difference between single and double opt-in, why double opt-in is important for both SMS and email, and how to update the opt-in settings for a list or keyword in Klaviyo.
- Understanding form blocks and fields
Learn how to use various content blocks from the form editor (i.e., elements and input fields) in your sign-up form to customize its appearance and the type of information you collect from subscribers.