How to create a nurture flow for recent RFM customers
You will learn
Learn how to create a nurture flow for customers in the Recent RFM group. This flow can help to turn one-time shoppers into recurring customers by automatically contacting them at key moments, and help to boost your repeat purchase rates and increase customer lifetime value.
Before you begin
Advanced KDP and Personalization are not included in Klaviyo’s standard marketing application, and a subscription is required to access the associated functionality. Head to our billing guide to learn about how to purchase these plans.
Make sure your RFM analysis report has data before creating the segment. See the RFM report’s data requirements.
Create a segment for recent RFM customers
If you have not already done so, you will first need to create a segment that includes your Recent customers. To create this segment:
- Navigate to Personalization > Customer insights > RFM analysis.
- Scroll to find the RFM segments card and select Create segment. If you see Generate segments instead, select it. Use the generated RFM - Recent segment and skip to Set up your flow.
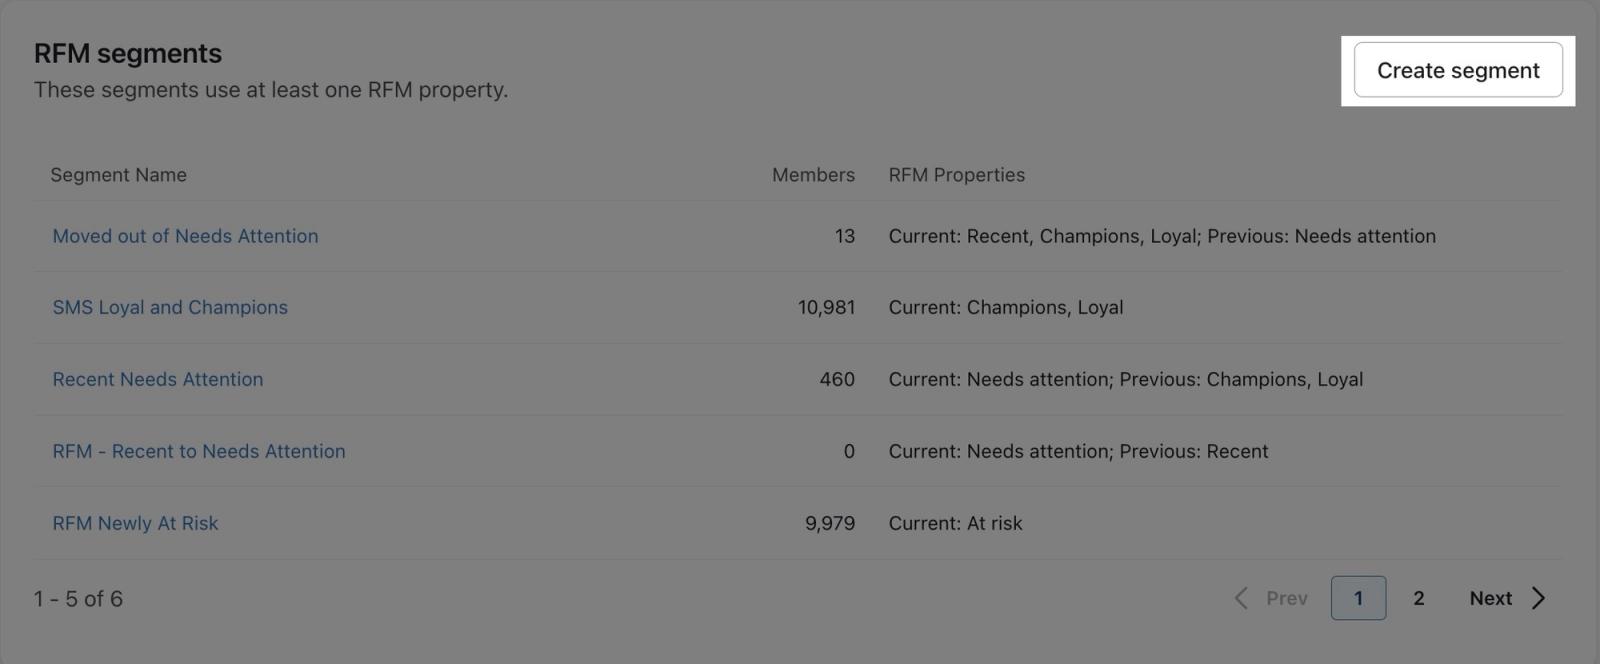
- Name your segment and apply any tags if relevant.
- Set the following definition for your segment:
Properties about someone > Current RFM group equals Recent
If the property includes an RFM model name in parentheses, select the property for the model you want to use.
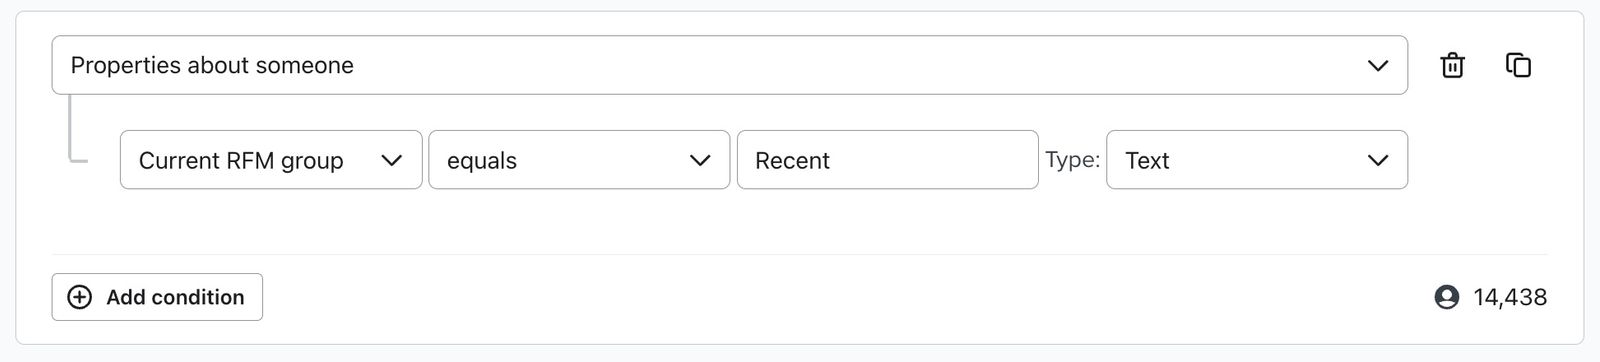
- Click Create segment to save your segment.
Set up your flow
You can quickly create a nurture flow for Recent RFM customers using the prebuilt flow in the flow library.
- Navigate to the Flows tab.
- Click Create flow.
- Search for Nurture recent customers in the flow library and select the template that uses a segment trigger.
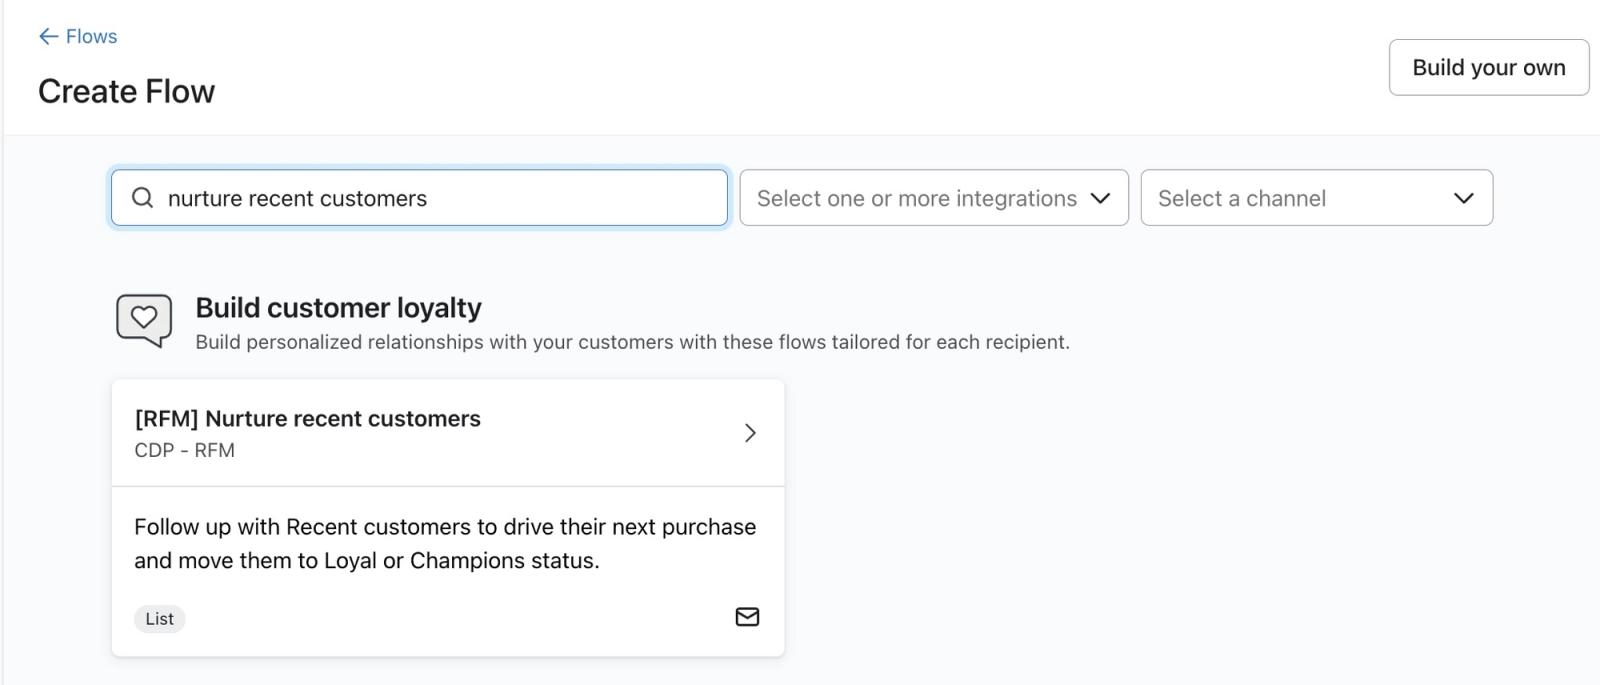
- Name your flow and select the segment you just created for profiles in the RFM Recent group.
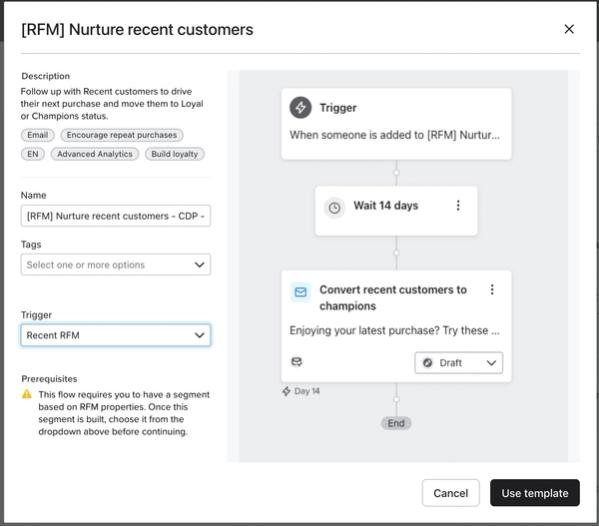
- Select Use template.
- Customize your flow emails.
- Optional: if you want to add additional messages to your flow, add another time delay between them. Make sure this is at least 2-3 days after your last message.
- When you are done creating your flow, click Review and turn on (or Update status, if shown) in the upper right and select Live. If you’d like to manually approve sends to each profile that enters the flow, select the Manual status.
- Once you have set your flow status, click Save.
Once the flow is live or manual, profiles can enter when they newly qualify for the segment. Profiles already in the segment are not added automatically. To include eligible existing members, follow the steps to add past profiles to a flow.
Additional resources
Getting started with Advanced KDP
Getting started with the recency, frequency, and monetary (RFM) analysis report