How to create a churn prevention flow using RFM properties
You will learn
Learn how to build a churn prevention flow based on RFM properties to target customers who are extremely lapsed. Retention flows are useful drivers in helping to win back customers, reaching them at the right time with the right message. You can automatically reach these subscribers at the point in which their customer group changes, potentially decreasing revenue and churn risks.
Before you begin
Advanced KDP and Marketing Analytics are not included in Klaviyo’s standard marketing application, and a subscription is required to access the associated functionality. Head to our billing guide to learn about how to purchase these plans.
Create a churn risk prevention flow
To create a churn risk prevention flow, you'll first need to create a segment of profiles in the Inactive RFM group to use as the trigger for your flow.
Create your segment
If you have not already done so, you will first need to create a segment that includes your Inactive customers. To create this segment:
- If you are an Advanced KDP customer, navigate to Advanced KDP > Intelligence > Customer insights > RFM analysis. Alternatively, if you are a Marketing Analytics customer navigate to Marketing Analytics > Customer insights > RFM analysis.
- Scroll to find the RFM Segments card and select Create segment.
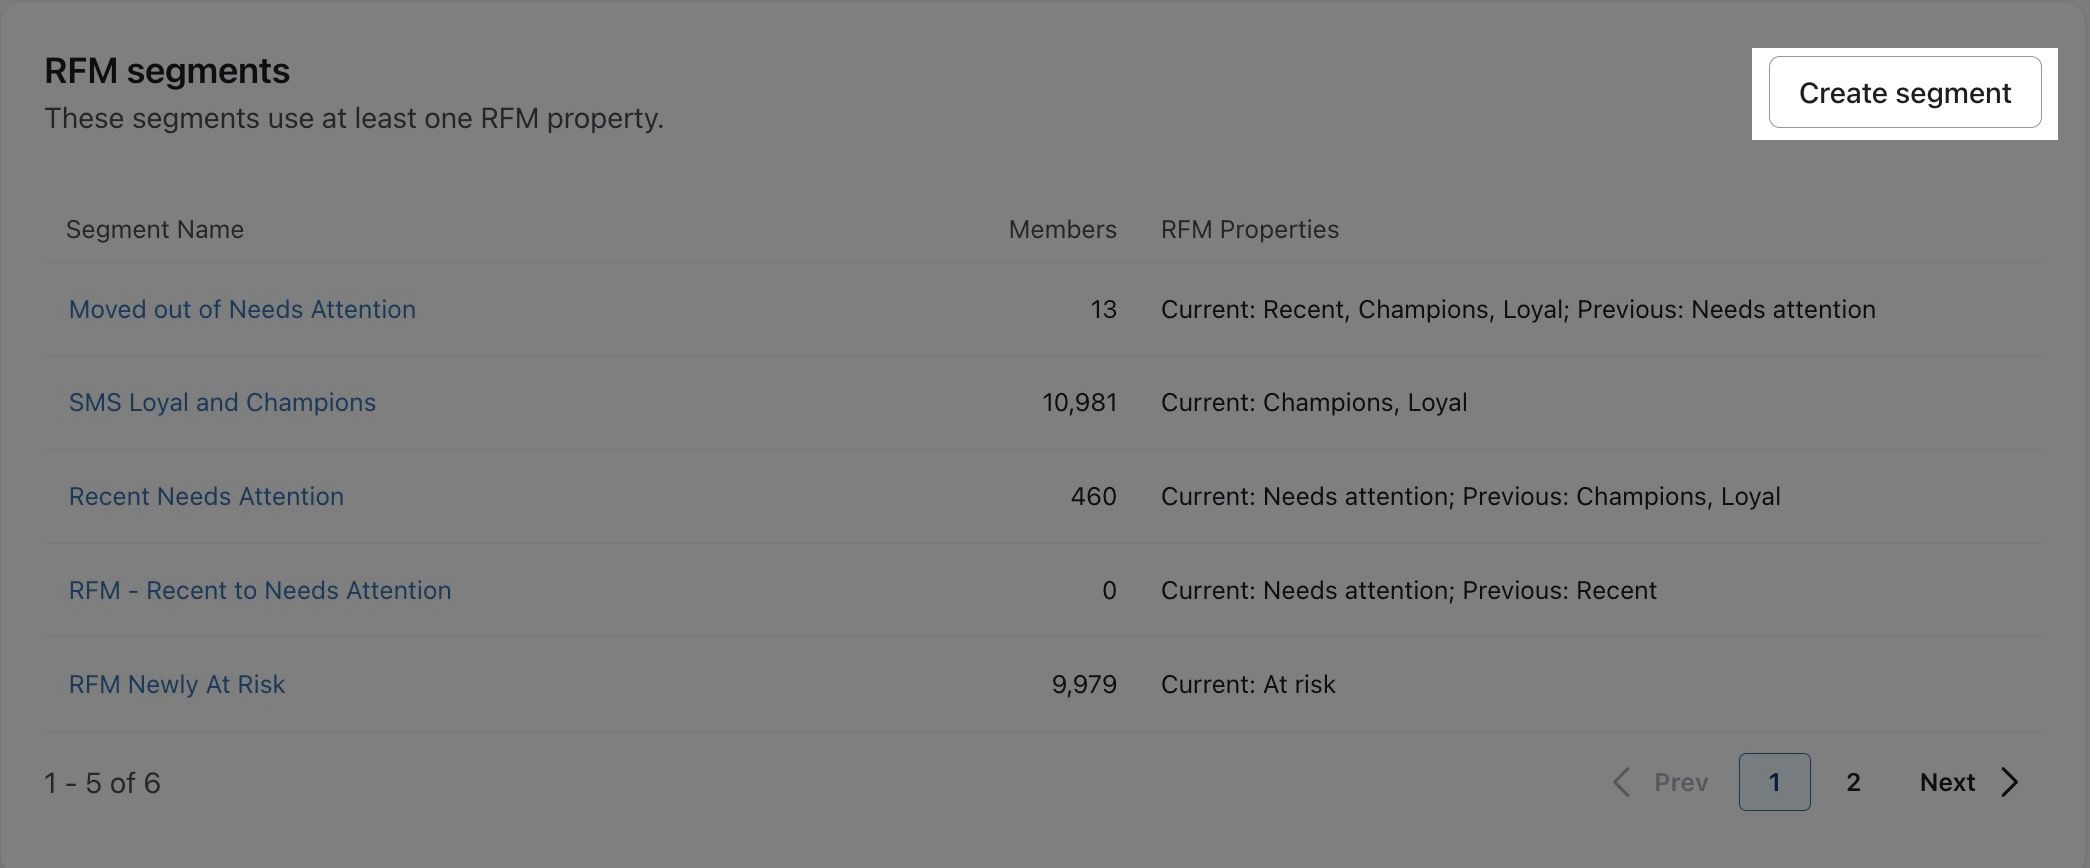
- Name your segment and apply any tags if relevant.
- Set the following definition for your segment:
Properties about someone > Current RFM group equals Inactive
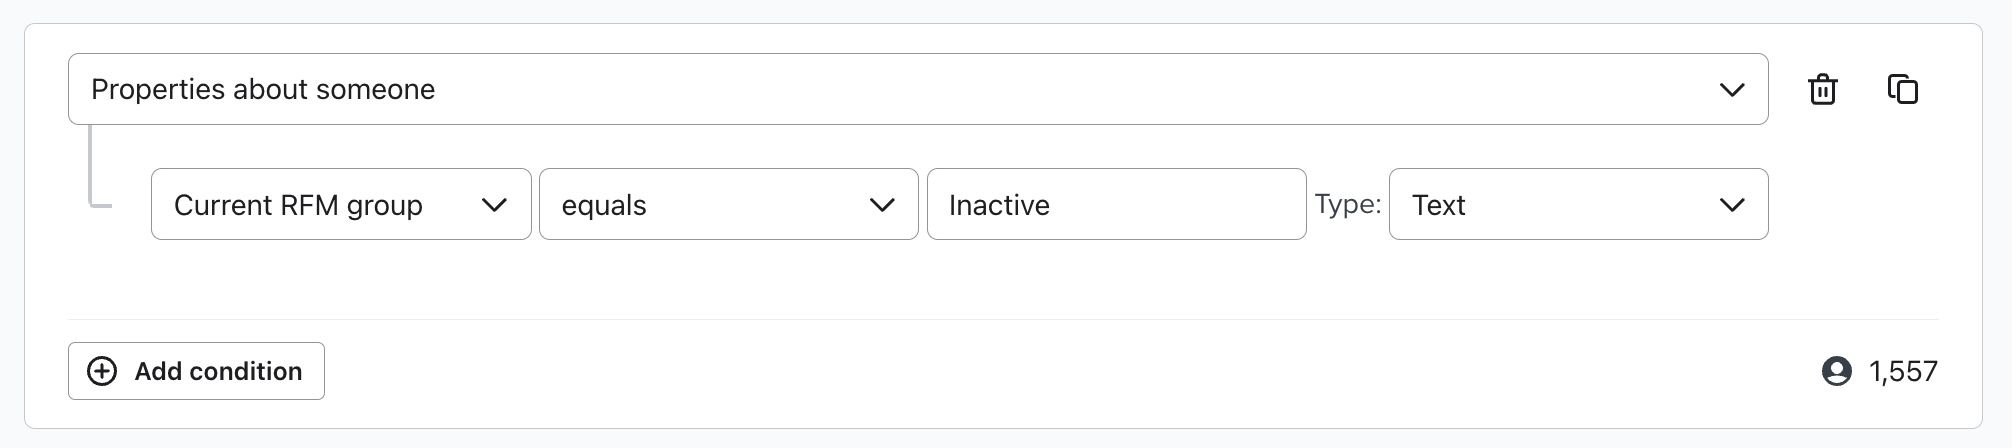
- Optional: The Inactive RFM group includes profiles that have made at least 1 purchase in the past. If you’d like to target customers who have purchased a specific number of times in the past (e.g., only one-time buyers), but are now in the inactive group, you can add the following condition to your segment:
What someone has (or has not done) > Person has Placed Order equals X over all time
Set up your flow
You can quickly create a churn prevention flow using the prebuilt flow in the flow library.
- Navigate to the Flows tab.
- Click Create Flow.
- Search for and select Churn Prevention in the flow library.
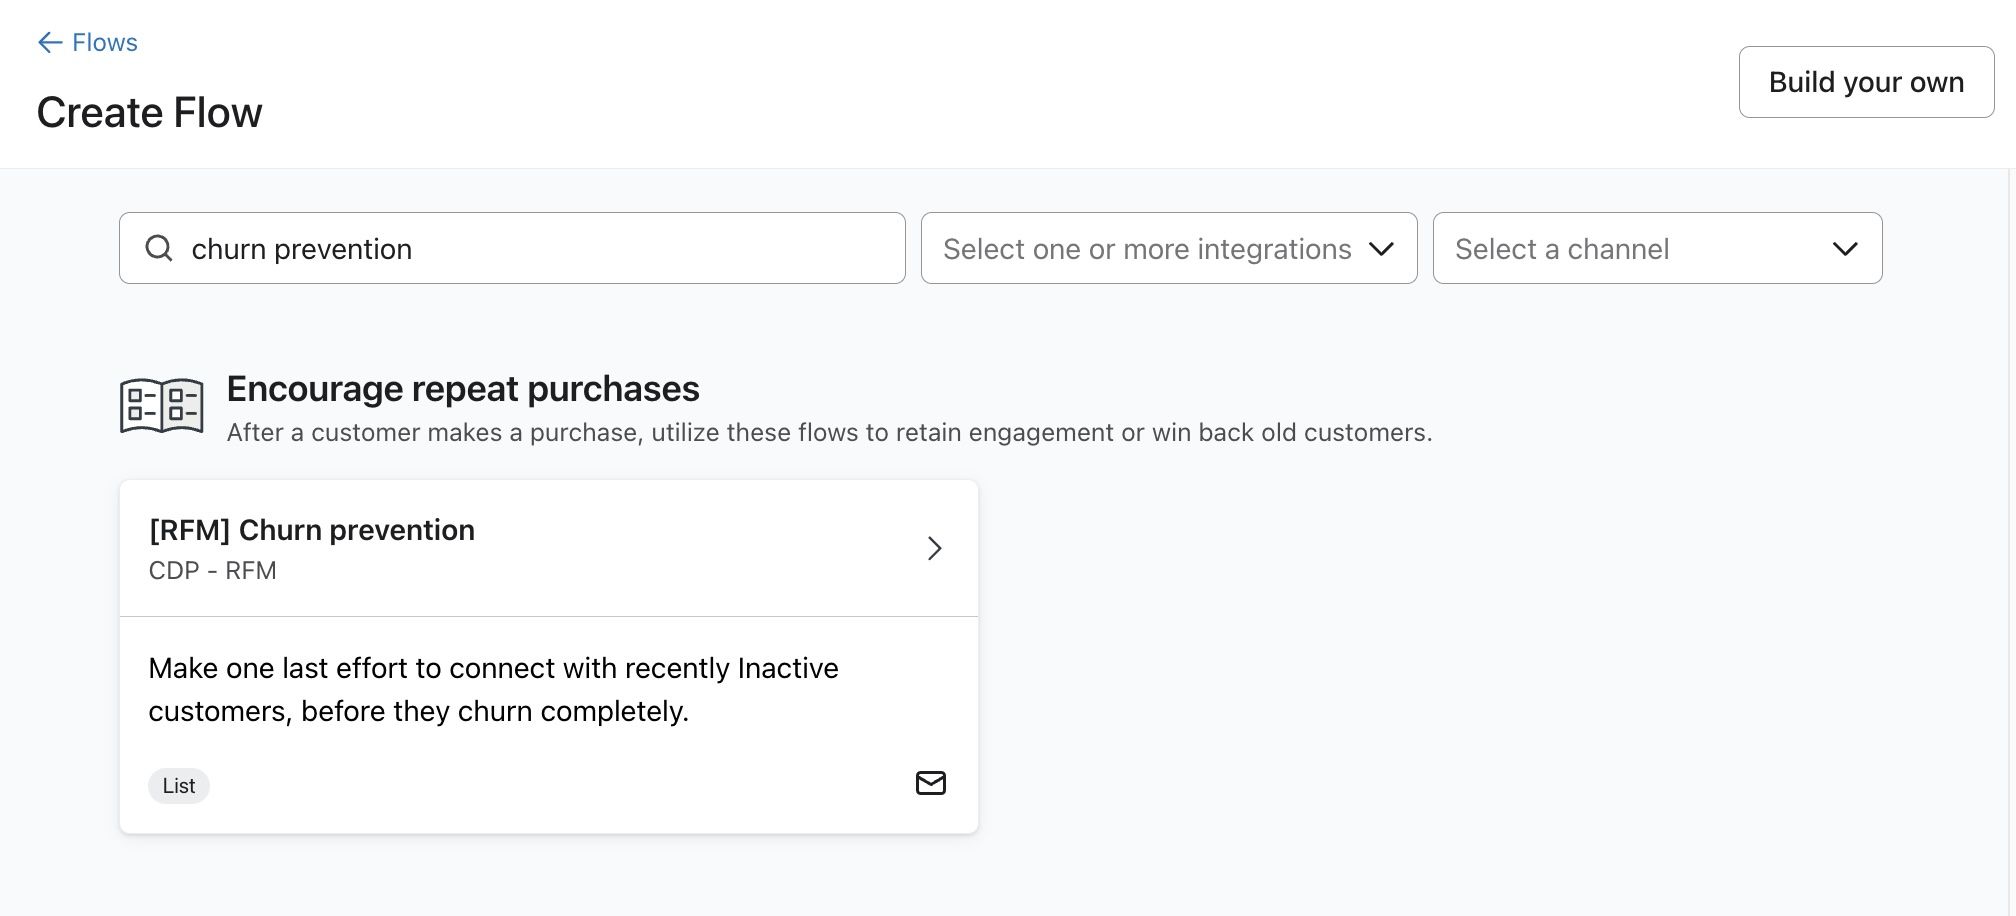
- Name your flow and select the segment you just created for inactive RFM profiles.
- Select Create flow.
- Customize your flow emails.
- Optional: if you want to add additional messages to your flow, add another time delay between them. Make sure this is at least 2-3 days after your last message.
- When you are done creating your flow, click Update status in the upper right and select Live. If you’d like to manually approve sends to each profile that enters the flow, select the Manual status.
- Once you have set your flow status, click Save.
Additional resources
- Getting started with Advanced KDP
Learn more about using Advanced KDP (Klaviyo data platform) to gather robust customer insights across all your marketing initiatives. Advanced KDP enables more advanced data management, manipulation, and analysis. It also provides actionable strategies to employ across each of your individual audiences and your business as a whole.
- How to strategically use RFM properties in campaigns and flows
Learn how to use RFM (recency, frequency, and monetary) properties to target specific types of campaigns and content to your customer groups. Either by using the profile properties themselves or by using a segment with the RFM properties, you can tailor your marketing even further.