Getting started with OpenTable
You will learn
Learn how to integrate with OpenTable, a real-time online reservation network for restaurants. Klaviyo syncs guests, email subscribers, reservations, and reservation spend from OpenTable, so you can personalize your messaging to diners.
Before you begin
To integrate with OpenTable, you need:
- Access to your OpenTable account, with permission to connect third-party integrations for each restaurant you want to sync.
- An OpenTable Pro account. This integration does not support “Basic” or “Core” plans. For further questions, please contact OpenTable support.
- (Optional) Klaviyo lists for subscribers. If you plan to sync OpenTable email subscribers, create the lists you want them added to before you start.
- Set each list to single opt-in so guests syncing from OpenTable don't receive an opt-in confirmation message.
Integrate OpenTable with Klaviyo
To integrate with OpenTable:
- In Klaviyo, click Integrations > Explore apps.
- Search for OpenTable, and click on the card. Then, click Install.
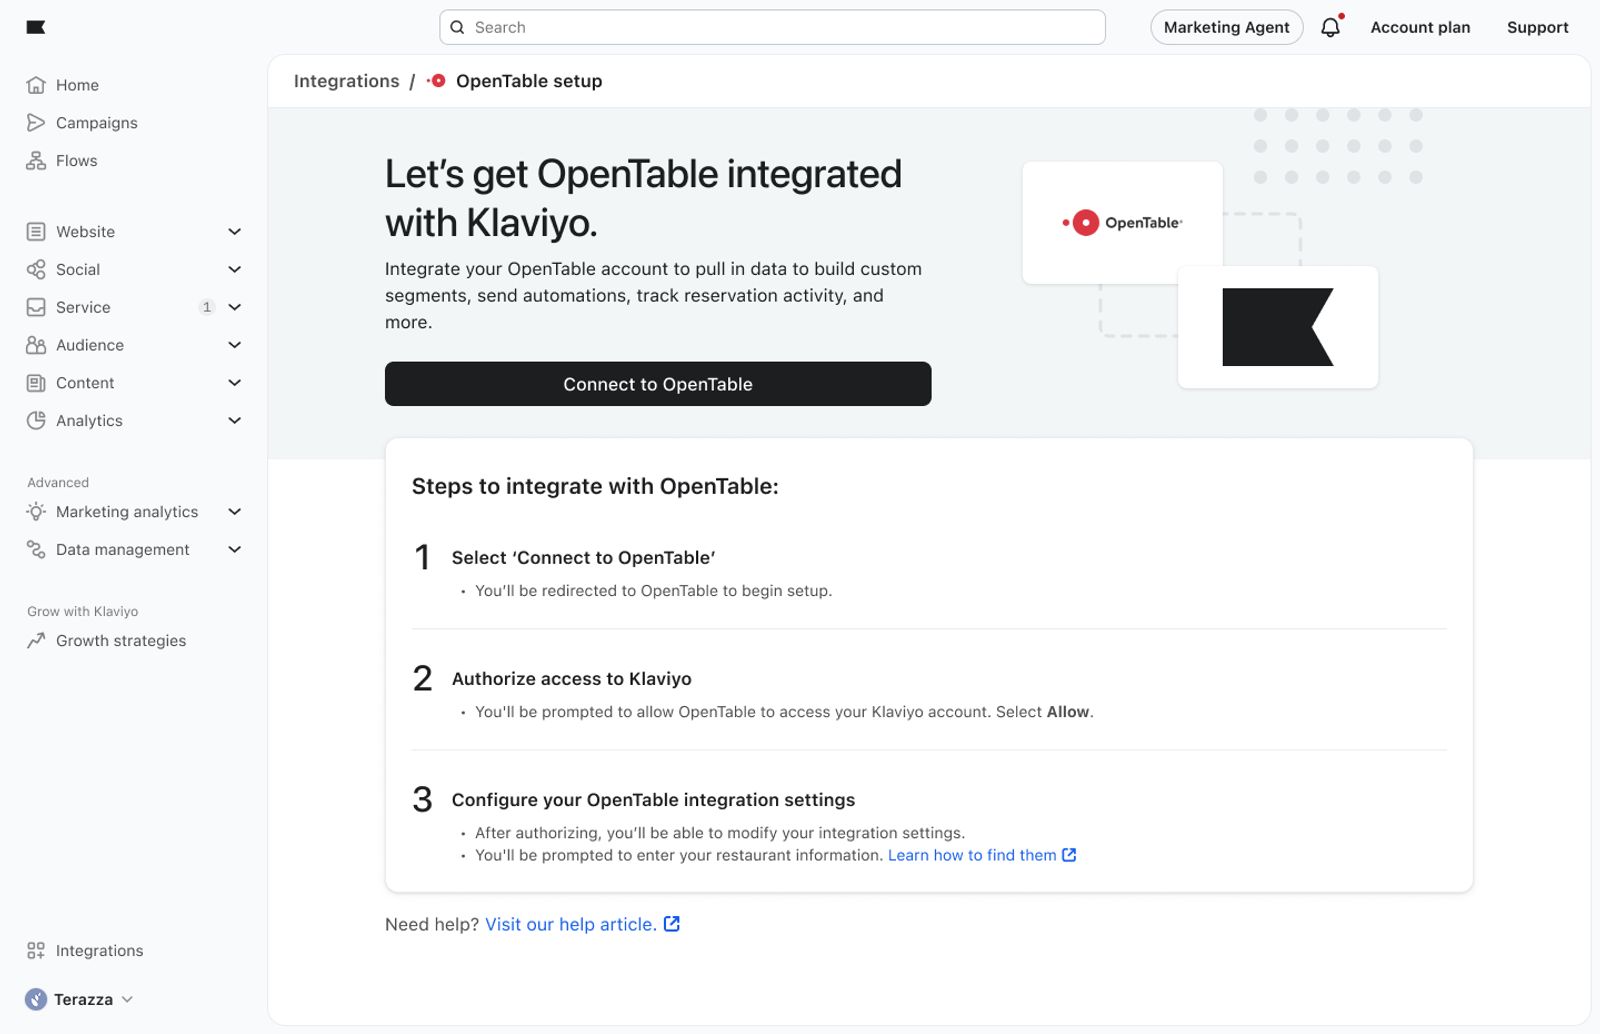
- Click Connect to OpenTable. You'll be redirected to OpenTable to begin setup.
- In OpenTable, click Integrations > Explore apps.
- Search for Klaviyo, and click Get Started. Then, click Install.
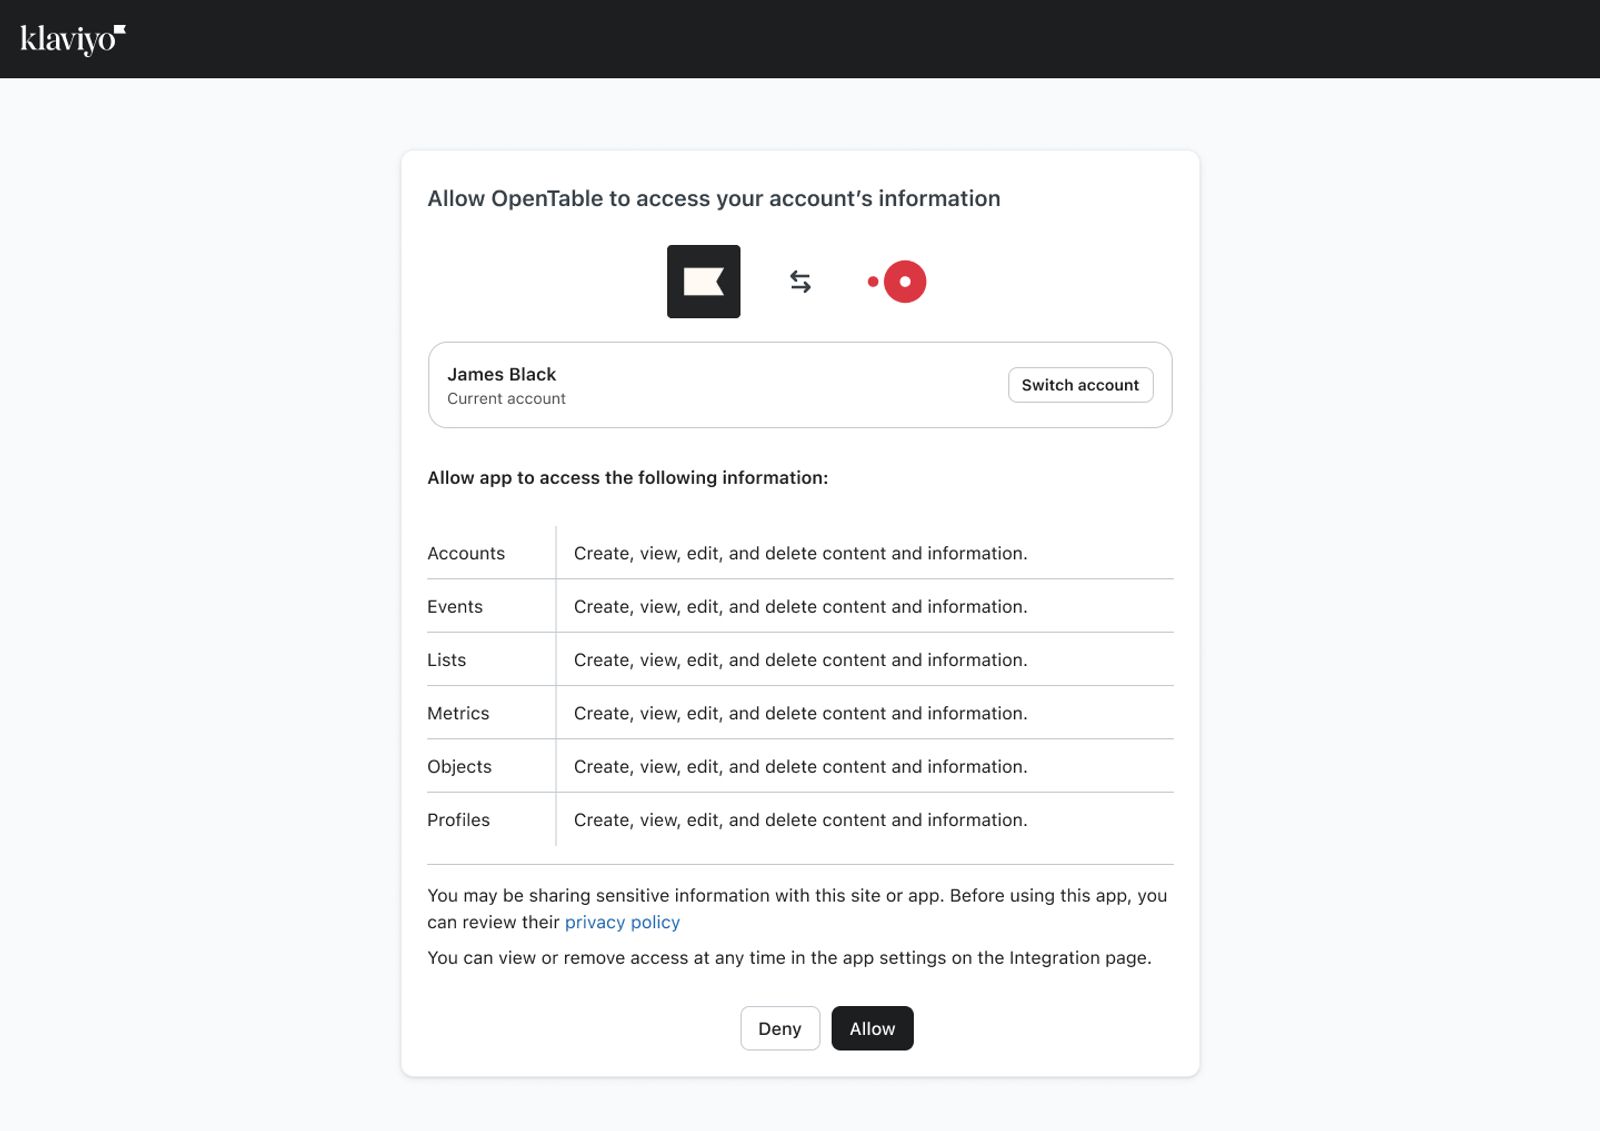
- Review the permissions OpenTable is requesting in Klaviyo and click Allow.
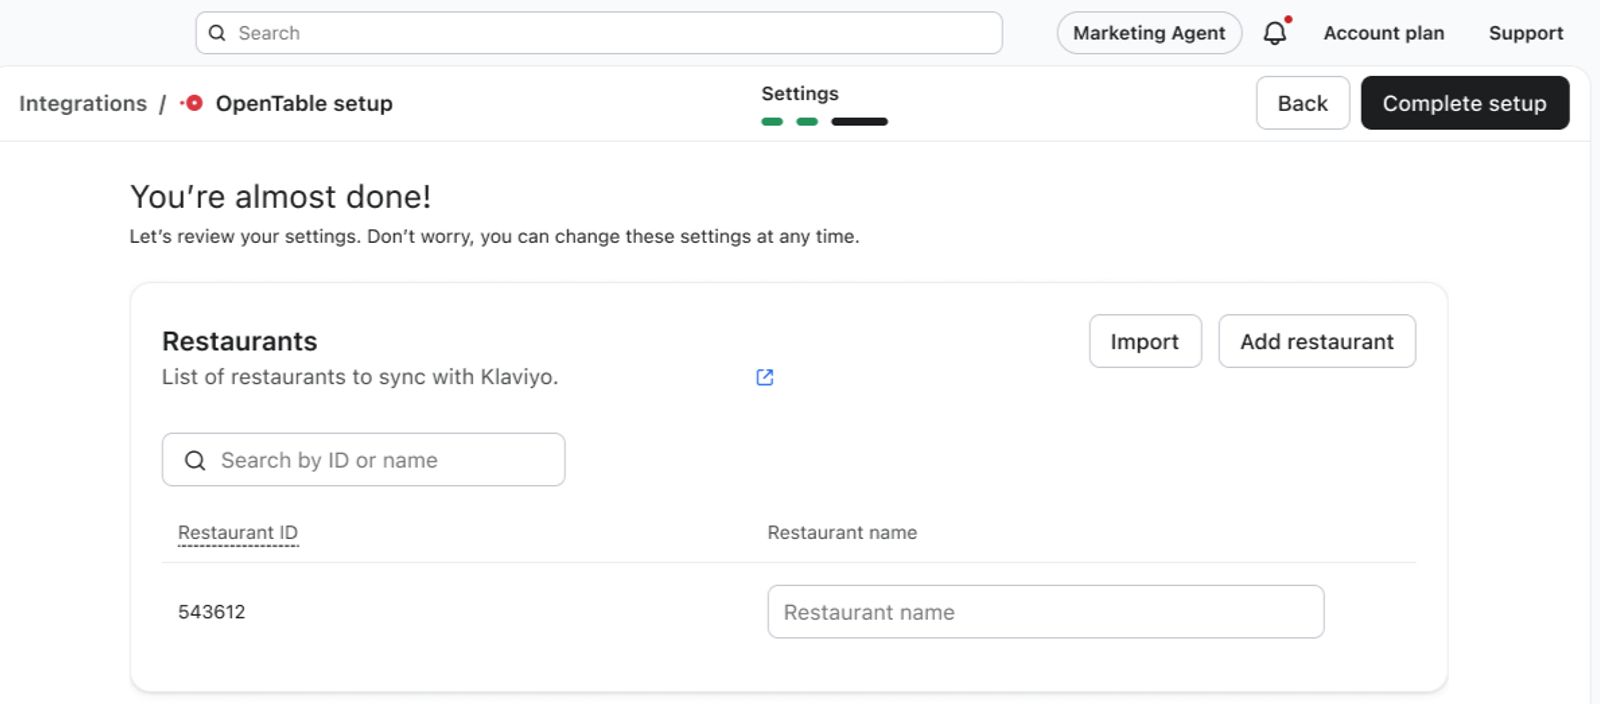
- Return to the OpenTable integration in Klaviyo here. On the You're almost done! page, review your restaurants. Your connected restaurant's ID is filled in for you. Enter a Restaurant name for each restaurant. This name is what you'll see on your OpenTable events in Klaviyo, so if you have multiple locations, include the location in the name (e.g., "Bistro - Seaport").
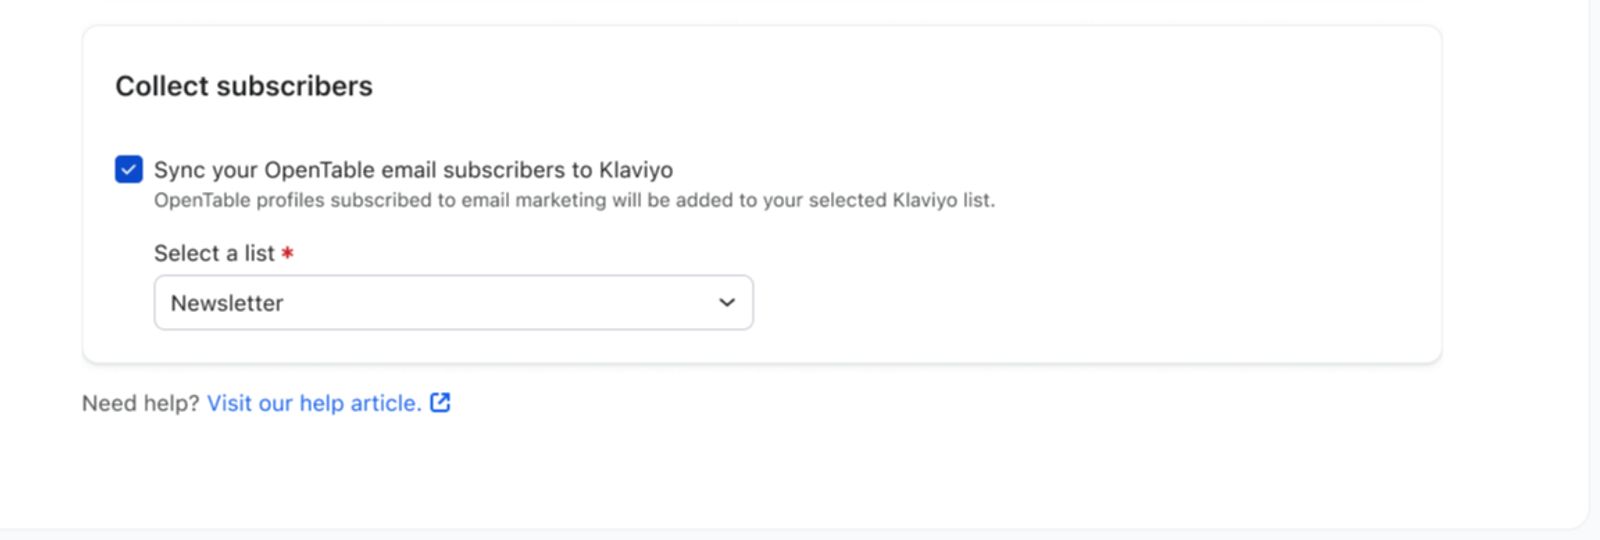
- Under Collect subscribers, check Sync your OpenTable email subscribers to Klaviyo if you'd like to do so, then select the list you created in the Before you begin section of this article.
- Click Complete setup to begin the integration.
- You'll receive a success message confirming that your OpenTable account is now connected to Klaviyo.
Completing setup starts a 2 year historical sync of OpenTable reservation data, along with all of your OpenTable guest profiles. Going forward, reservations sync to Klaviyo in real time, and orders and guest data syncs every 30 minutes.
Add or edit restaurants
To connect additional restaurants or update a restaurant's name:
- In Klaviyo, navigate to Integrations and click OpenTable.
- To connect another restaurant, click Add restaurant. You'll be redirected to OpenTable to select and authorize the restaurant, then returned to Klaviyo.
- To update a restaurant's name, edit it in the Restaurants table.
- Click Save.
Understand your OpenTable data
Klaviyo syncs reservation events, reservation objects, and guest profiles from OpenTable. We sync 2 years of historical reservation data from OpenTable.
While phone numbers are synced, SMS consent is not. This means that SMS cannot be sent to phone numbers synced from this integration.
To view your OpenTable data:
- Click the Analytics dropdown in the left-hand navigation sidebar.
- Select Metrics. Here, you can view all of the metrics in your account. The metrics labeled “OpenTable” represent all of the metrics synced from your OpenTable integration.
- Filter this view to see OpenTable metrics by using the filter selector next to the search bar and select OpenTable.
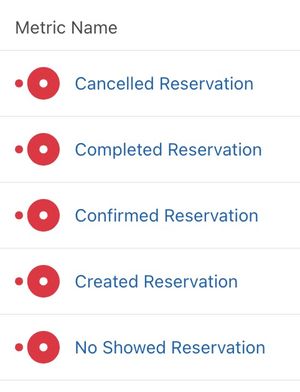
Learn more about your OpenTable data.
Segment customers using OpenTable data
When you install the integration, Klaviyo automatically creates these segments in your account:
- Recent diners (OpenTable)Guests who completed a reservation in the last 90 days
- First Time Customers (OpenTable)Guests who have completed exactly 1 reservation and can receive email marketing
- Repeat Customers (OpenTable)Guests who have completed more than 1 reservation and can receive email marketing
- VIP Customers (OpenTable)Guests who have completed more than 5 reservations and can receive email marketing
- Winback Opportunities (OpenTable)Guests who have completed a reservation before, but not in the last 180 days, and can receive email marketing
You can also use OpenTable's metrics to segment customers and target them with a campaign. For example, you can create a segment of everyone who has previously completed a reservation.
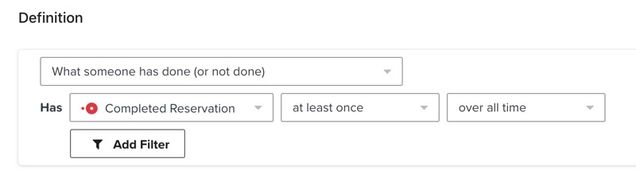
To create the example segment shown above:
- Click the Audience dropdown in the left-hand navigation sidebar.
- Click Lists & Segments.
- Click Create List / Segment in the top right.
- Select Segment.
- Name your segment and select tags if desired.
- Under Definition, select What someone has done (or not done) > Completed Reservation > at least once > over all time.
- Click Create Segment.
Using Reservation objects, you can also create a segment of guests with an upcoming reservation:
- Click the Audience dropdown in the left-hand navigation sidebar.
- Click Lists & Segments.
- Click Create new > Create segment.
- Name your segment and select tags if desired.
- Under Definition, select Properties about someone > Reservation (OpenTable) > has at least one > where ScheduledTime > in the next > 5200 weeks.
- Click Create Segment.
Segment by reservation value
If you want to segment by the value of a reservation, you'll need to have your POS connected to OpenTable. If your POS is not connected to OpenTable, value amounts will not sync from OpenTable to Klaviyo.
For example, if you are using both OpenTable and Square and have Square connected to OpenTable, your OpenTable reservation events include the reservation's total spend as their value, along with a POS Data property containing the check subtotal, tax, tip, and total. You can use these in segmentation and filtering.
Use OpenTable data in flows
You can use OpenTable metrics to trigger flows. For example, you can use the Completed Reservation metric to trigger a flow to send messages to someone immediately when they complete a reservation.
To create a flow using OpenTable metrics:
- Navigate to the Flows tab from the left-hand navigation sidebar.
- Click Create flow in the top right.
- Click Create from scratch in the top right.
- Name your flow and select tags if desired.
- Click Create Flow.
- In the flow builder, choose Metric as the trigger.
- From the sidebar, choose Your metrics > OpenTable > Completed Reservation or All triggers > Metric > Completed Reservation.
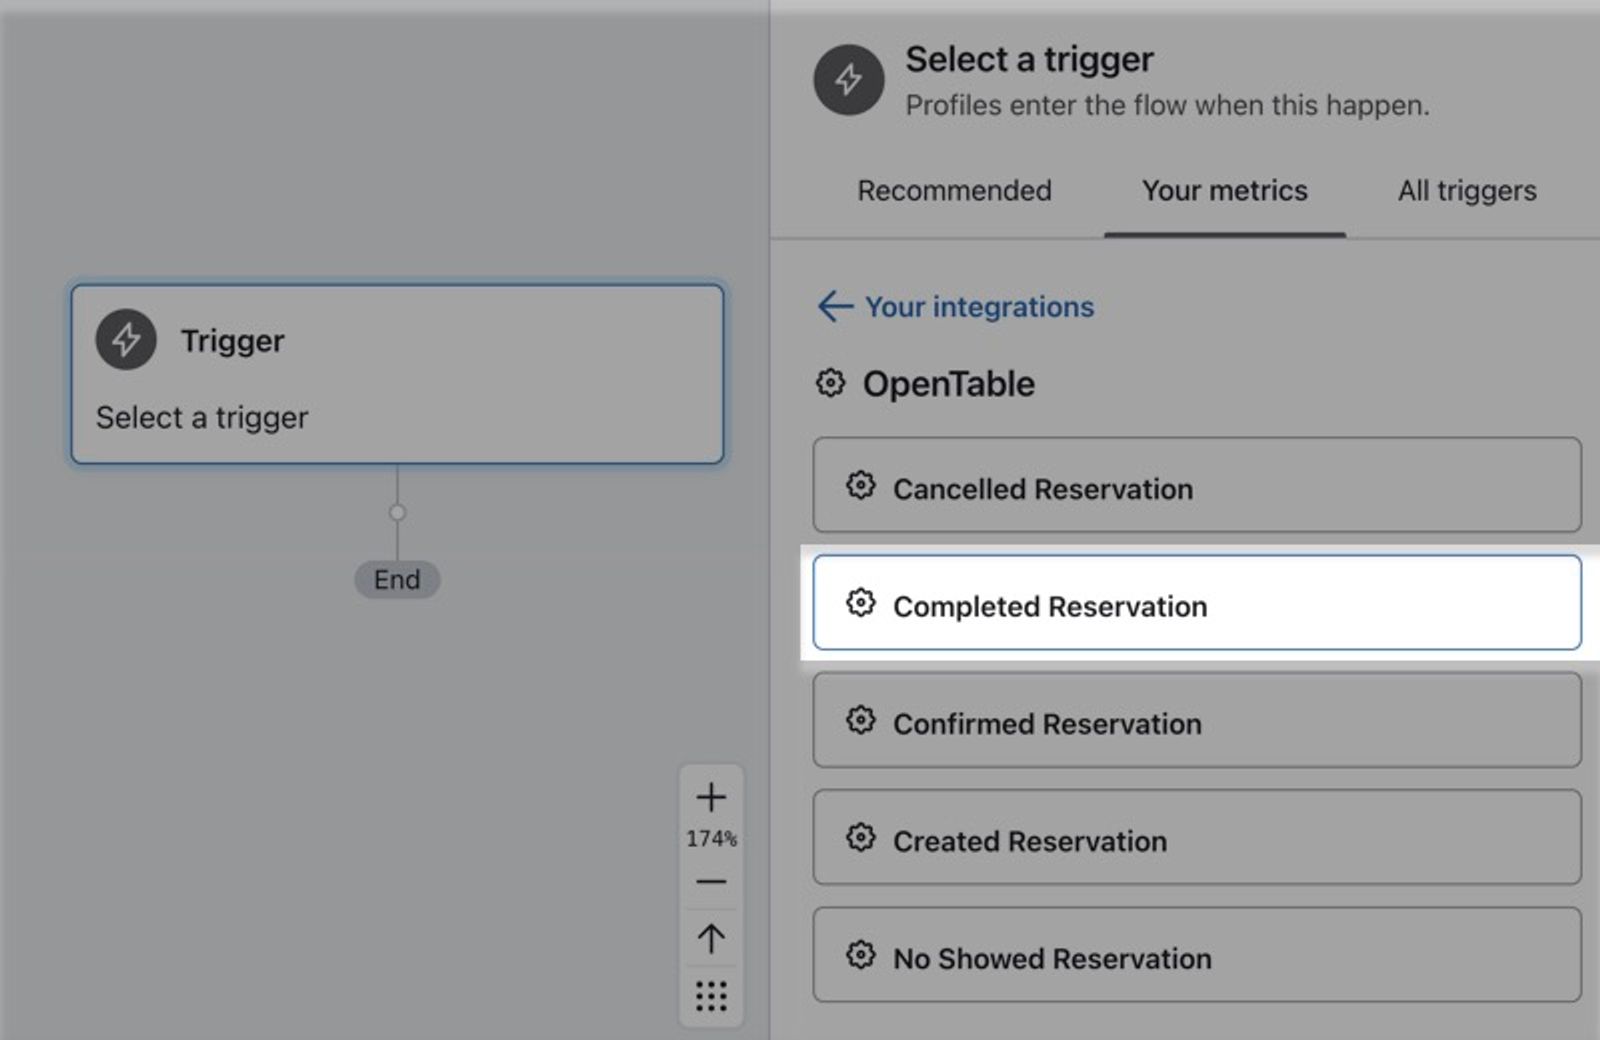
- Click Done.
- Add time delays and messages relevant to the triggering action. Learn more about how to create a metric-triggered flow.
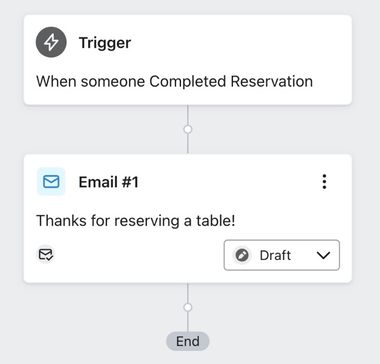
- Once your content is ready, click Update Action Statuses in the top right of the flow builder to set the flow live.
You can also create a flow with OpenTable Reservation objects. To send a reminder before a guest's reservation, for example:
- Navigate to Flows > Create flow > Build your own.
- Name the flow and select tags (optional).
- Select the Date property trigger.
- Select OpenTable, Reservation: ScheduledTime from the Date property dropdown.
- Choose when you'd like the flow to start (e.g., 1 day before).
- Add your messages.
Outcome
You've now integrated OpenTable with Klaviyo and learned about OpenTable data in Klaviyo, segmenting customers using OpenTable data, and using OpenTable data in flows.
Additional resources
- Understanding Klaviyo-built integrations
Learn about the built-in integrations offered by Klaviyo that will allow you to sync data with your new Klaviyo account and use this information for precision targeted marketing.
- How often integrations sync reference
Learn what data syncs from a particular Klaviyo integration and how often the sync runs. We've organized these integrations by ecommerce platforms, email service providers, and other data integrations.
- enhancing restaurant guest relationships