How to migrate existing email subscribers (and unsubscribes) into Klaviyo
You will learn
Learn how to use Klaviyo's list import tools to add contacts from a former email service provider (ESP) into your Klaviyo account, as well as other best practices for getting started with Klaviyo.
Before jumping in
To start, we recommend that you maintain one main email list in your account. As you import contacts and connect sign-up forms to Klaviyo, maintaining one primary list will make it easy to manage and communicate with your contacts efficiently.
Our segment builder allows you to create dynamic subsets of your lists that don’t require maintenance. For example, instead of having different signup forms link to multiple lists, have all of your forms point to one list. Then, pass a sign-up source property ($source) that is unique for each form. This way, you maintain one subscriber list and create segments based on this property.
Sync contacts from another email service provider (ESP)
If you are migrating from Mailchimp, Campaign Monitor, or Salesforce Marketing Cloud (formerly ExactTarget), you can use a built-in integration with Klaviyo to import existing subscriber lists, as well as unsubscribes. To do this, install the relevant integration:
- Navigate to Integrations > Explore apps.
- Enter your provider’s name in Search integrations.
- Select your provider in the search results.
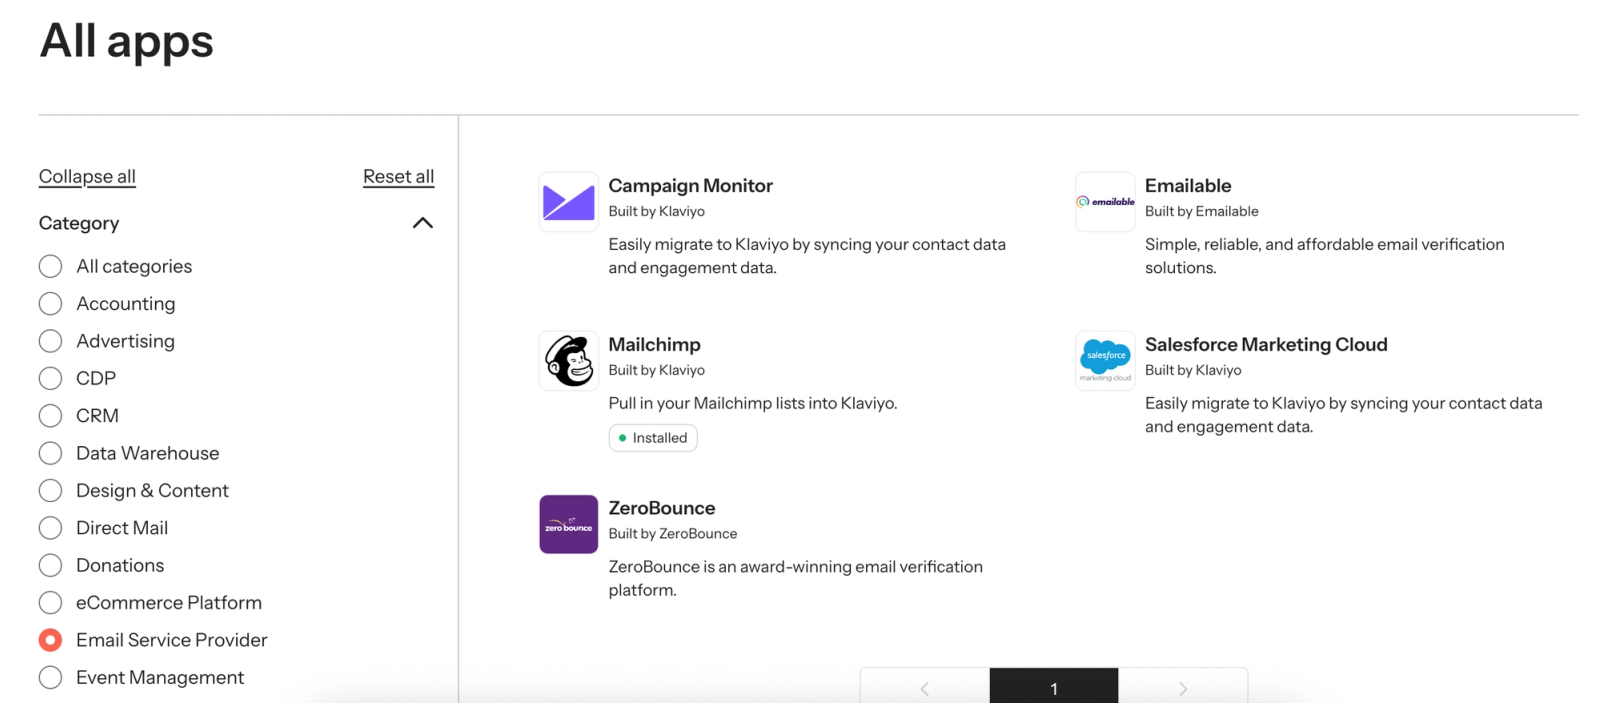
- Click Install, then complete the provider’s setup steps. Review the list-sync options and select the lists you want to bring into Klaviyo.
- If you enabled list syncing, check Audience > Lists & segments for your selected lists as the sync runs. Wait for the sync to finish before sending to the imported contacts.
These integrations also sync unsubscribe data. Before sending, review your contacts’ email consent and suppression status in Klaviyo.
For Mailchimp, Campaign Monitor, and Salesforce Marketing Cloud (formerly ExactTarget), the scope of synced unsubscribes depends on your Klaviyo account and list unsubscribe settings. Keep global unsubscribes enabled if you want an unsubscribe to stop email marketing across your account. In Salesforce Marketing Cloud, Bounced and Held statuses cause global bounce suppression in Klaviyo; Unsubscribed and Deleted statuses are processed as unsubscribes.
If you are not currently using an ESP we integrate with, you will need to take a more manual approach (outlined in the next section).
Import contacts from a CSV file
If you are migrating from an ESP that we do not currently integrate with or have a subscriber list already saved as a CSV or Excel file, you can easily import your subscribers into Klaviyo. If you have your list saved as an Excel file, make sure to save it as a CSV file first.
For Constant Contact, export your subscribers and unsubscribes separately and import them using the CSV steps in this article. See How to migrate from Constant Contact for provider-specific guidance.
Your CSV should have the first row formatted as the headings for the columns you intend to upload. Include an email address column and map it to Email in Klaviyo. Labeling it "Email" or "Email Address" helps Klaviyo match the column. Other columns you may want to include are "First Name" and "Last Name," along with any other custom properties you wish to upload.
When importing a list from another ESP, most platforms have a link to export lists to a CSV or Excel file. If you're having trouble, we recommend reaching out to your current platform for help.
Keep unsubscribed and bounced addresses out of your subscriber CSV. Import them using the suppression steps below before sending email.
Once you have your list exported:
- Navigate to Audience > Lists & segments in Klaviyo.
- Choose a list (e.g., Newsletter or Email list).
- Click Manage list > Import contacts.
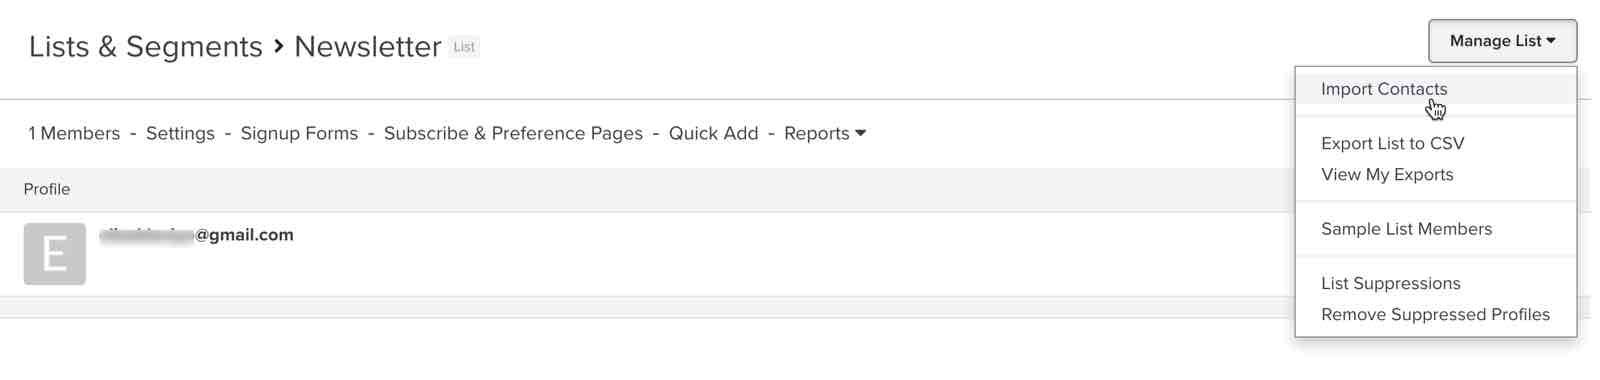
- Click Upload and select your CSV file of subscribers.
- Map each column from your CSV to an appropriate property in Klaviyo, including any consent columns. Click Next if it appears to continue to the consent step. If your mapped consent columns already cover the imported channels, you can proceed directly to Import.
- If prompted, select Apply bulk consent only if everyone in your CSV has explicitly consented to receive email marketing from you. If channel choices appear, select only the channels they have consented to. To use the consent values already in your file without applying additional bulk consent, select Only import the consent in my file.
- Click Import.
Use the Klaviyo API
If you're tech-savvy or have a developer on your team, you can use Klaviyo's bulk subscribe API endpoint to subscribe profiles to email marketing and optionally add them to an existing list.
For existing subscribers whose consent you already collected, set historical_import to true and provide each profile’s consented_at timestamp at least 5 minutes in the past. This skips double opt-in messages and list-triggered flows. Without historical_import, subscription requests follow the list’s opt-in setting, or the account default if you do not provide a list.
Load historic unsubscribes into Klaviyo
Before sending email, manually import any historic bounces and unsubscribes that were not synced through your ESP integration. If you migrated subscribers by CSV or API, use the steps below to import your suppression file.
This step is important for several reasons:
- To ensure you follow spam laws
- To keep your email deliverability high by sending to clean lists from the start
- To keep your subscribers happy and make sure you don't email anyone who has opted out
To import your historic unsubscribes into Klaviyo:
- Prepare a CSV file of bounces and unsubscribes, with a single column containing one email per row.
- Navigate to Audience > Profiles in Klaviyo.
- Click View suppressed profiles in the upper right.
- Click Import. If your suppression page has a More actions menu instead, open it and select Import suppressions.
- Click Upload to choose your CSV file, then click Upload again to start the import.
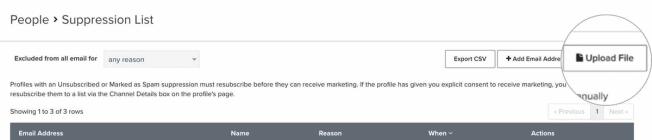
Wait for the confirmation that your suppressions list has been updated. The imported addresses are now suppressed from email marketing.
Additional resources
- Understanding the benefits of having a main list for each marketing channel
Learn about the benefits of using one main list per marketing channel (e.g., SMS and email) and how to organize your lists in Klaviyo. Additionally, see the tools you can use to identify and target subscribers based on their behavior or how they subscribed.
- Acceptable date and timestamp formats for profile and event properties reference
Learn which date and time formats Klaviyo recognizes in event and profile data sent through our APIs or in a CSV upload. Note that this does not apply to an event timestamp sent via the Track API, which must be unix time in seconds.
- Getting started with segments
Learn how to create and use segments in Klaviyo, which are a powerful tool for understanding your audience and sending targeted messages.
- How to create customer persona segments based on activity
Learn how to use segmentation to create customer persona segments based on the actions they have taken. This allows you to send more relevant marketing communications so you can gain the most value from your audience.