Understanding custom profile properties
You will learn
Learn about custom properties in Klaviyo that you can use to store information about the contacts in your account.
Here are several examples of how you might use custom properties:
- To collect additional information about your contacts, such as gender, size, coupon code, etc.
- To collect contacts' preferences, such as email frequency, type of content, etc.
- To collect contacts' responses to a questionnaire
You can collect virtually any type of information you'd like about a contact using custom properties, and then later use this information to tailor content, create segments, or filter flows. There is no limit to the number of custom properties that can be added to one profile.
How to add a custom property to a profile
There are 2 main ways you can add a custom property to a contact's profile:
- Add this information yourself (e.g., by manually adding it, or uploading a CSV)
- Ask contacts to provide this information
Add a custom property yourself
When uploading a list, include a column for each custom property you want to add. For an email list, include an Email column to identify your contacts. For example, you could have a "Gender" column that corresponds with a contact's gender.
To keep profiles' existing subscription status when adding properties, leave consent and consent timestamp columns out of your upload, or deselect them during mapping. Importing these columns or choosing Apply bulk consent can change subscription status.
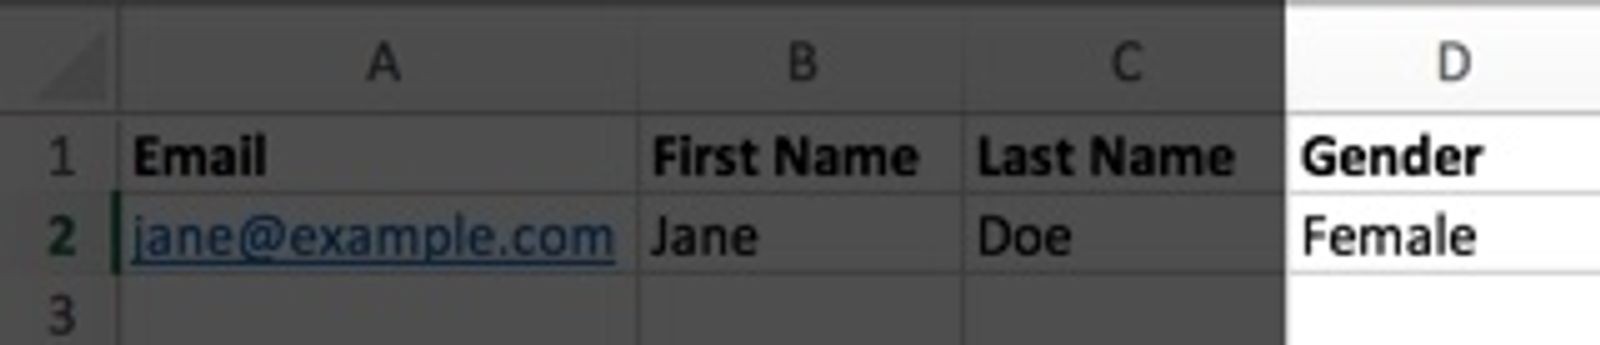
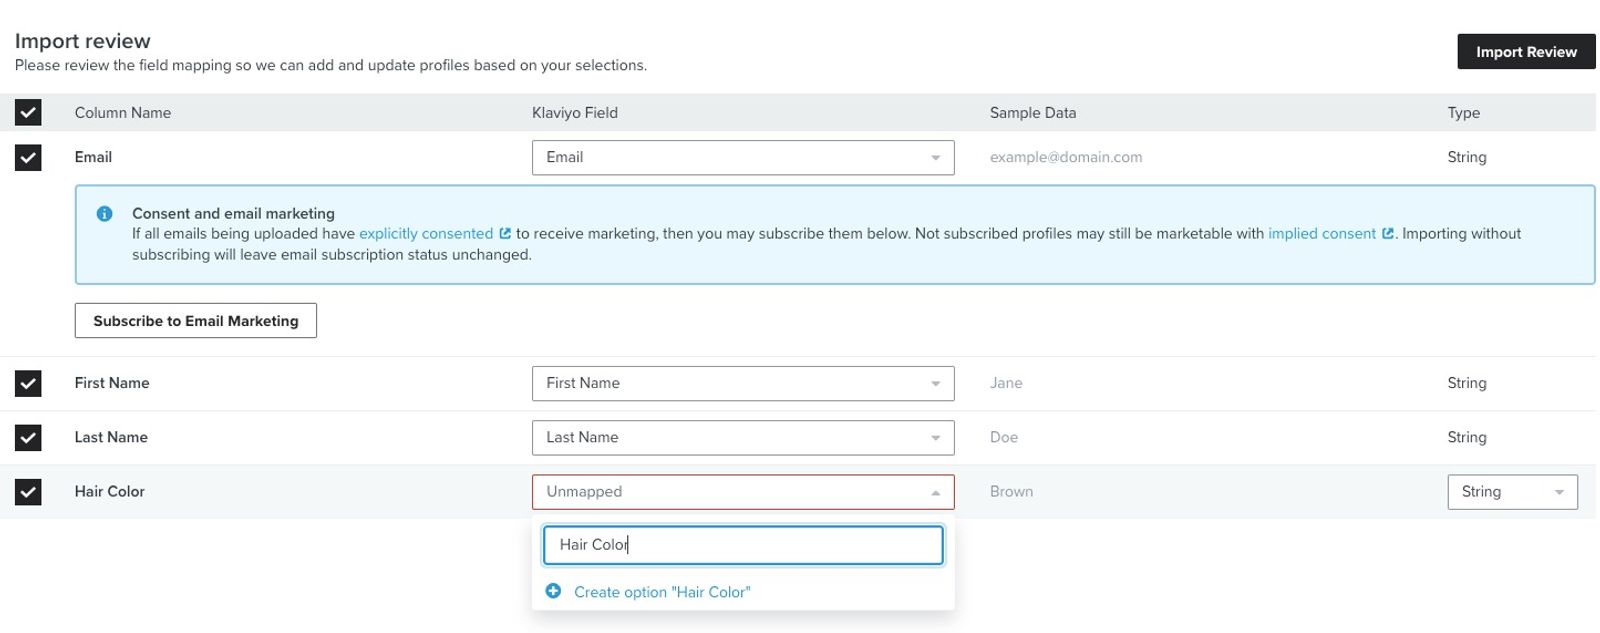
During the upload, map each column to an existing profile property or create a new one:
- Open the Klaviyo profile property dropdown for a column and select the matching property. If you need a new property, select Create New Field.
- For a new property, enter its Profile property name, select the appropriate option under Choose data type, then click Create.
- Finish mapping the columns you want to import, then click Next.
- Select Only import the consent in my file to keep existing subscription status when your upload contains no consent or consent timestamp columns. Click Import.
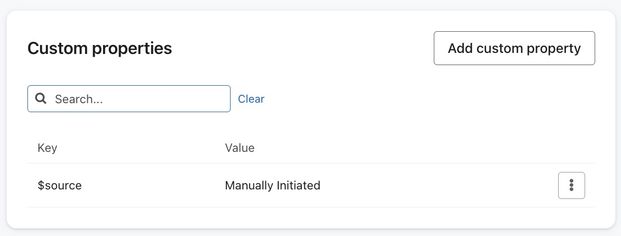
You can also add custom properties directly to a contact's profile:
- Open the profile and select the Details tab.
- In Custom properties, click Add custom property.
- Enter or select a Property name and Value.
- Click Add profile property.
Collect custom profile property data
You can collect custom properties straight from your subscribers when they sign up using a subscribe page, sign-up form, or third-party list growth integration. You can also collect custom properties from existing subscribers using a manage preferences page.
- Collect custom properties with a sign-up form
- Collect custom properties with a subscribe or manage preferences page
Fields connected to custom profile properties store responses as custom properties. Fields connected to built-in Klaviyo properties, such as First Name, update those properties instead. You can even use these methods as a questionnaire if you would like to filter segments or flows by the responses you receive.
Profile properties in sign-up forms
Use a different profile property for each answer you want to store separately. For broader instruction, see properties in sign-up forms. All custom fields can be edited before or after publishing your form.
To collect a custom profile property with a sign-up form:
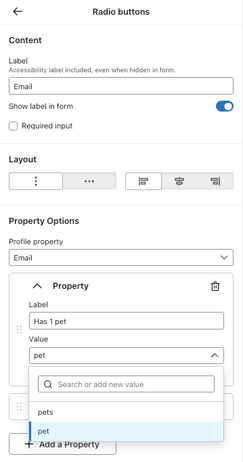
- In the form editor, add or select the input field you want to configure.
- Under Profile property, select an existing property. To create a new one, type its name and select Create [property name].
- For dropdowns, radio buttons, or multi checkboxes, set each option's Label and Value. The label is what visitors see, and the value is what Klaviyo stores on the profile. You can select an existing value or create a new one.
- When you are ready to make your changes live, click Publish or schedule. In the publishing panel, select Publish now, then click Publish now.
Different form fields create properties with different data types. For example, the boolean data type can only represent 2 values: true or false. Shopify's Accepts Marketing custom property is an example of a boolean value. A custom property is separate from a profile's email or SMS subscription status; setting it to true does not subscribe someone to marketing.
To review the current profile property values collected by your form, export the profiles as a CSV, along with the properties from your form. This export includes values stored on profiles, rather than a history of every form submission.
Submitting a new value for the same profile property replaces its previous value on the profile, including when the value comes from a later form step or a repeat submission. Properties not included in the new submission keep their existing values. If you need to track and store each form submission separately, we recommend using a survey tool like Typeform.
How to use custom properties
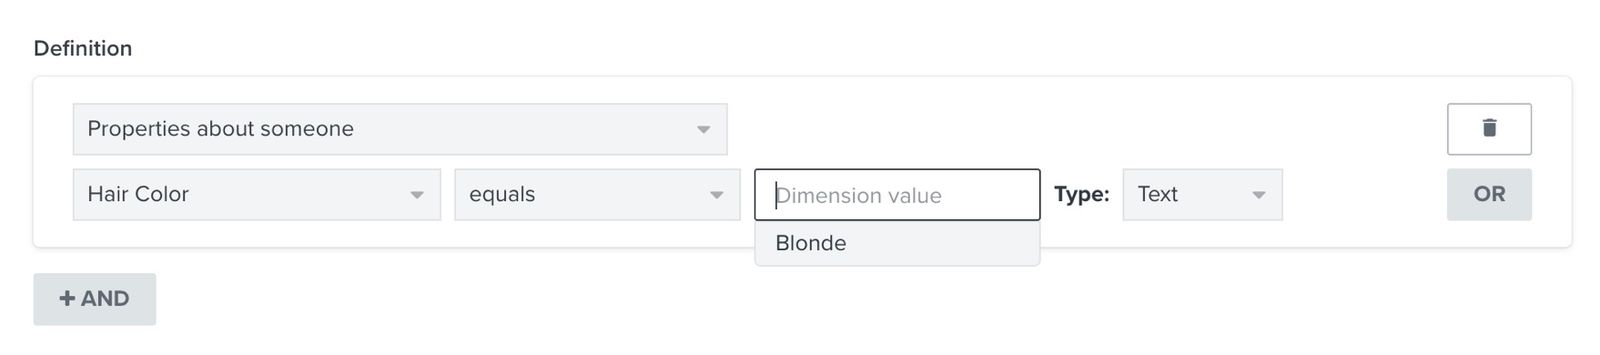
You can use custom properties to segment your audience, filter flows, and include dynamic content within emails. Once you've created a custom property and it is present on at least 1 profile, it will populate in the segment builder when you select Properties about someone. Likewise, this will happen when you add filters to a flow.
You can also dynamically populate your emails with a custom property by using the "lookup" filter:
Your hair color is: {{ person|lookup:'Hair Color' }} | Your hair color is: Blonde |
Additional resources
- Profiles and properties glossary
The glossary below defines common terms regarding profiles and properties in Klaviyo.
- Profile properties reference
Learn about the difference between custom and Klaviyo properties, how to use them to track information about your subscribers, how to remove them, best practices, and more.