Getting started with consent pages
You will learn
Learn about the different consent pages related to Klaviyo lists, including the preferences, subscribe, and unsubscribe pages, and how to customize them.
In your Klaviyo account, there is 1 set of account consent pages that all lists will use by default. These account-level consent pages include your default preference page, subscribe page, email confirmation page, and email unsubscribe page.
You can edit the style and design to standardize the look of your account’s default consent pages for a consistent experience. However, if you would like 1 particular list to have its own consent pages (i.e., give your VIP list its own subscribe page) you can disconnect a list from the default pages and customize a unique set of consent pages for the specific list.
This article will cover how to use and manage consent pages within Klaviyo; however, if you would prefer to design your own custom coded consent pages, you can explore Klaviyo’s hosted pages feature. Navigate to Settings > Other > Consent pages, then click Enable Custom Pages to enable this feature. Only accounts with paid email features that have passed account verification have access to this setting.
About consent pages in emails
Your account's default consent pages are used by default in:
- Emails sent to segments
- Emails sent to multiple lists and/or segments
- Segment triggered flows
- Flows triggered by an event
- Date triggered flows
- Price drop flows
This means that when you insert an unsubscribe tag, {% unsubscribe %}, or a manage preference tag, {% manage_preferences %}, into a campaign that is sent to a segment, the account default consent pages will be used. The same is true when you insert these tags into flow emails where the flow is triggered by an event.
If you're adding the manage preferences tag as linked text in a message, use {% manage_preferences %}. However, if you're adding the manage preferences tag to a button or image block in a message, you must use {% manage_preferences_link %}.
When you send an email to a list that uses a customized set of consent pages, the default consent pages are not used. Instead, the customized consent pages that you created for that particular list will be used. To edit these pages further, navigate to the list you want to edit the pages for, then select Consent pages.
While your account’s default consent pages are helpful for centralizing a consistent experience for your subscribers, choosing to customize a unique set of consent pages for a list is often helpful. For example, if a specific list is being used for a special contest or subscriber offer, you may want the consent pages for this list to look a certain way and display a unique set of subscriber preferences.
Find your account's default consent pages
To navigate to your default consent pages:
- In Klaviyo, navigate to Audience > Growth tools.
- Under Customize subscribe and preference pages, click Customize.
- Select Account default pages.
The pages available to edit include:
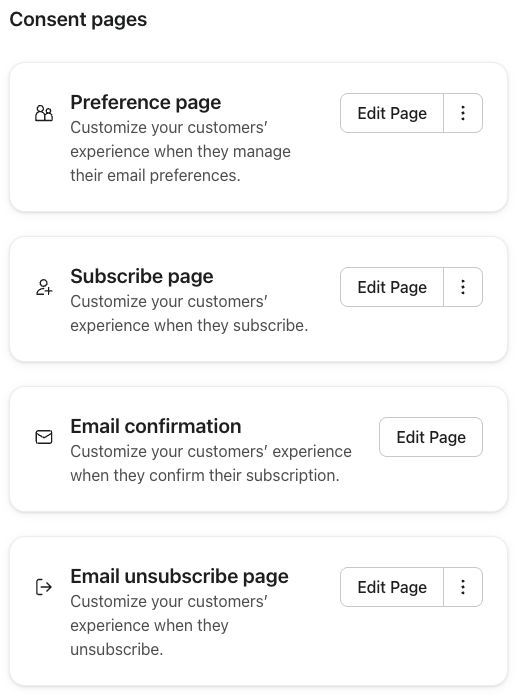
Preference pages
- Preferences page
The page where existing subscribers can update their preferences. Here, you can provide your subscribers with the opportunity to share more information about themselves like age, gender, or birthday, but also more detailed information like their preferred email frequency or product interests.- The information collected on preferences pages will show on the site visitor's individual profile. Learn more about viewing form responses and creating segments based on this information.
- Preferences success page
The page subscribers will see after updating their preferences.
Subscribe pages
- Subscribe page
The page where interested shoppers can sign up to hear more from your brand. If your list uses single opt-in, subscribers are directed straight to the subscribe success page after submitting the form. For double opt-in lists, subscribers will first see a confirmation page, then need to confirm their subscription in the confirmation email, and finally, they'll be directed to the subscribe success page. - Confirmation page
If your list is double opt-in, this is the page that new subscribers will see after they submit the subscribe page, instructing them to check their email to confirm their subscription.
Email confirmation pages
- Confirmation email
For double opt-in lists, this is the email sent to subscribers after they subscribe via subscribe page or sign-up form. It includes a button that, when clicked, takes them to the subscribe success page. Adding links to this email requires paid email features. - Subscribe success page
The page that subscribers will see after signing up via subscribe page. By default, this page includes a button linking to the preferences page, allowing new subscribers to manage their preferences. The button may not appear when someone submits the subscribe page again, because Klaviyo needs a link that identifies the subscriber to open their preferences page.
Email unsubscribe pages
- Email unsubscribe page
The page someone will see when they click the unsubscribe link in an email.
The default email unsubscribe page includes a link to your preference pages at the bottom. Using unsubscribe and manage preferences pages together allows you to encourage recipients to change their email preferences, rather than unsubscribe completely.
- Email unsubscribe success page
The page someone will see after they unsubscribe from receiving emails.
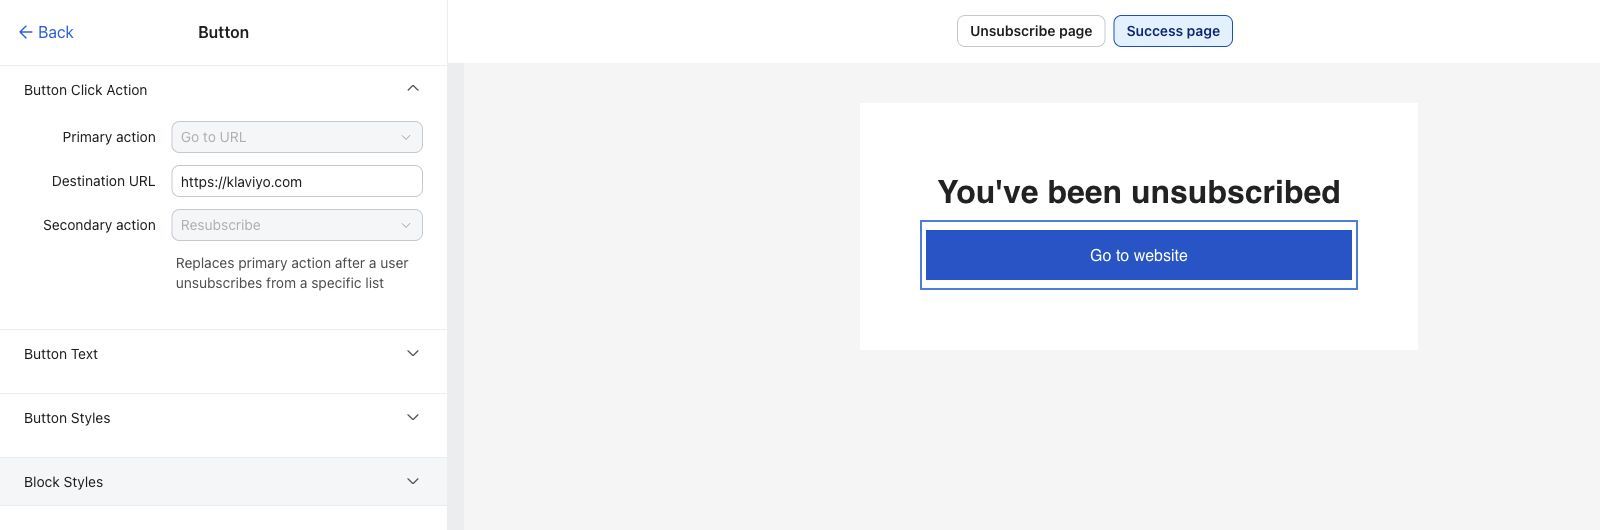
On your account unsubscribe success page, the button settings will show a Primary action and a Secondary action. The Secondary action comes into play when a list uses this page. For example, if a list uses the default consent pages instead of customized ones, then subscribers of this list will see the secondary action (i.e., Resubscribe) when they click the button.
These consent pages listed above come into play when you build sign-up forms that add new subscribers to your list. By reviewing and updating these pages, you can control the experience and messaging that your subscribers see when they first opt in, when they update their preferences, as well as when they unsubscribe.
When you choose to create a new list, each list will default to using your account’s default consent pages.
Customize consent pages for a specific list
You can choose to disconnect your list from the default consent pages and instead customize a unique set of consent pages for a particular list.
In emails, list-specific consent pages are only used when an email targets exactly one list (a single static list). This includes:
- Campaigns sent to one list
- Flows triggered by a list (e.g., “added to list” flows)
If a list doesn’t have its own customized pages, Klaviyo falls back to the account default consent pages.
To customize consent pages for a list, follow the steps below:
- Navigate to Audience > Growth tools.
- Under Customize subscribe and preference pages, click Customize.
- Choose For a specific list, then select the list from the List dropdown.
- Select Unlink and customize to override the default pages.
- Here you will see a new set of consent pages available to edit. Find the consent page(s) you’d like to edit (e.g., the preference page), click Edit Page.
- Once you finish customizing the page in the editor, click Publish.
Note that you can revert to your account’s default consent pages if you no longer want your list to use these customized pages. However, all prior customizations will be lost and cannot be recovered if you reset back to the defaults. Click Reset All Pages To Default at the bottom of the page, then confirm the reset to re-link your list to the default consent pages.
Edit the design of your consent pages
Whether it is your default consent pages or a particular list’s unique set of consent pages, you can customize the style and design of each page to give your site visitors a consistent, on-brand experience.
If you would prefer to custom code your own preference, subscribe, or unsubscribe pages, open the page’s three-dot options menu and select Use Hosted Page. Head to our guide on using hosted consent pages for more detail.
- Find the consent page you’d like to edit (e.g., the preference page), click Edit Page
- Selecting a consent page will bring you to its respective editor, where you can customize the style and design to fit your brand. Choose what you would like to edit, these include:
- Styles
Use this section to edit design settings such as Form Background, Page Background, Form Styles, etc. - Add Blocks
Use this section to add elements to your consent page, such as a text or image block. You can also edit any text in the preview by clicking on it and replacing the default text with your own.
- Styles
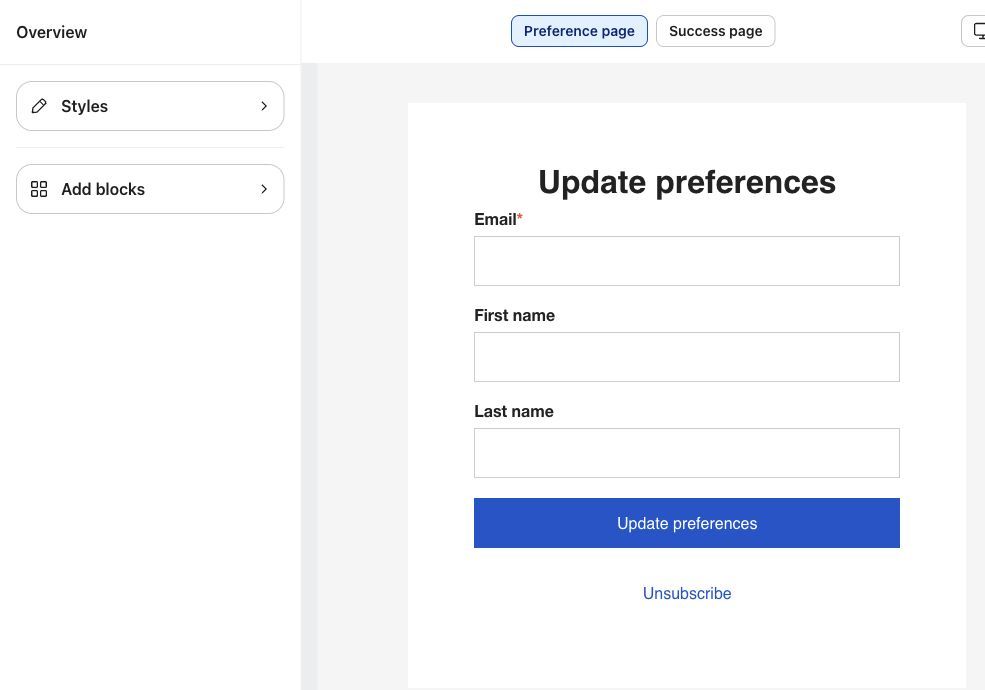
When adding blocks to your preference page and subscribe page, you also have the option to add input fields, such as a date field or a checkbox.
- Button
Click on the button in your preview (e.g. the Unsubscribe button or Update your preferences button) for options to edit the Button Text, Button Styles, and Block styles.
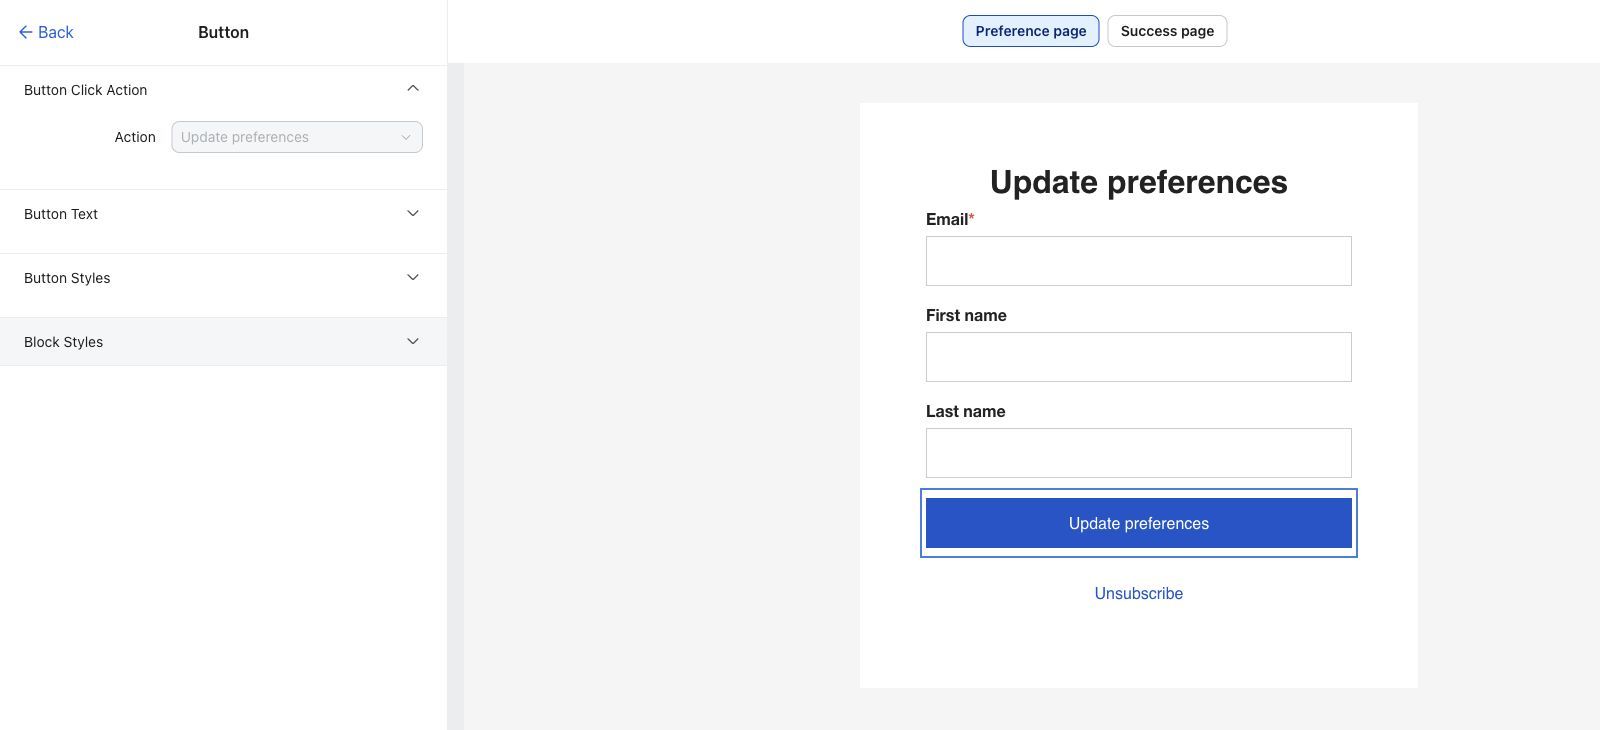
- When you're ready to share your consent page, click Publish.
Be sure to edit each step of the consent page that you want to customize. You can also click Success page in the top menu bar of the editor to adjust the design of the success message that appears when a recipient completes the form.
Add profile properties
If you add an input field (e.g., a date field) to your consent page, use the Profile property dropdown to select a corresponding property (e.g., birthday). This enables Klaviyo to track the information on the visitor's dedicated profile when they submit the form. Klaviyo supports many profile properties that you can choose from to add personal information to someone’s profile.
Use a different profile property for each input field to avoid issues with collecting information. For example, if you have two text input fields in your form to collect first and last name, each of these must have their own dedicated profile property, such as First Name and Last Name.
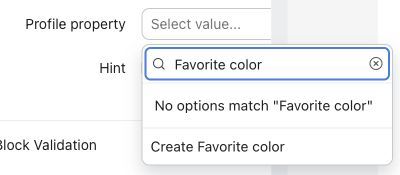
If you don’t see the property that you would like to use in the list, you can also collect custom properties by typing the property name in the dropdown’s search field and selecting Create [property name].
Translate consent pages to different languages
The language on consent pages defaults to American English. You can change the default text manually or create multiple language versions with Smart Translations.
To create multiple language versions, first enable Smart Translations, then:
- Open the consent page editor and click Translate in the upper-right corner. If translations already exist, click the button showing the number of translations.
- Select the language the page is written in, the languages you want to translate to, and the default language to use when a subscriber’s preferred language is unavailable. Click Translate.
- Select each language in the translation editor and review the text, button labels, disclosures, required-field alerts, and error messages. Edit any text that needs adjustment.
- Click Publish, review any translation warnings, then confirm publication. Publish each consent page editor separately when you want its changes to go live.
Adding a language makes it available across the related consent pages, but you should review each page. See how to translate consent pages into different languages for the full workflow.
To change the default text manually:
- Navigate to the builder of any consent page you would like to translate.
- Click on any text in the preview to edit it.
- In the menu that appears on the left, delete the default text, then type the text that you would like to appear in the language of your choice. Note you can click on any text in the preview form to customize it into a different language, including error messages and required text alerts for input fields.
Be sure to follow this process for each step and each consent page you would like to translate (e.g., preferences pages, subscribe pages, email confirmation pages, and email unsubscribe pages).
- When you’re ready to share your consent page, click Publish and confirm publication if prompted. The Live status indicates a published page. Editing indicates unpublished changes.
Find your subscribe page URL
Klaviyo automatically creates a subscribe page for every list in your account, which you can use to enable potential subscribers to sign up for your email or SMS marketing. Once you’re finished editing the design, you can copy the subscribe page URL to share in an email or elsewhere to grow your audience.
To find a list’s subscribe page URL:
- Navigate to Audience > Lists & segments.
- Choose your list.
- From the menu bar, select Sign-up forms.

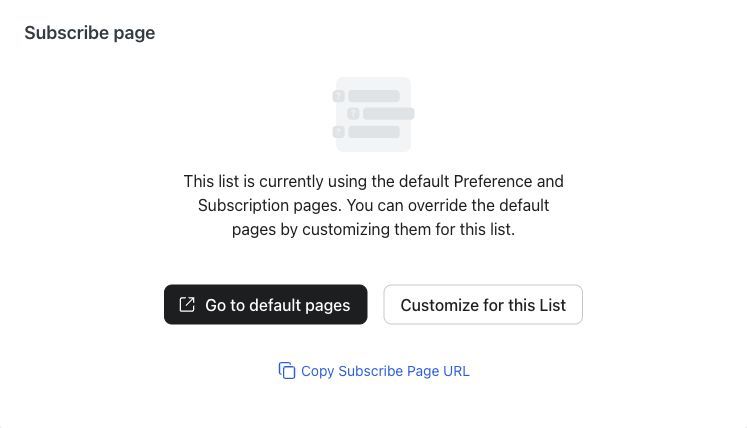
- Find the Subscribe page section, then click Copy Subscribe Page URL.
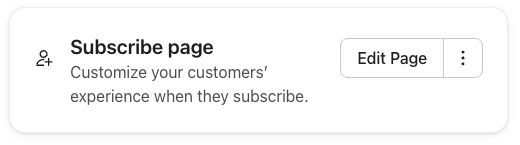
You can also retrieve the URL by clicking Edit Page on the subscribe page and copying the subscribe page URL from the overview menu.
Your subscribe page URL is now copied to your clipboard and ready to use in marketing campaigns or social channels. Check out this guide on using a subscribe page as a landing page on your website to learn more.
Redirect opted-in recipients to a different website page
You can redirect subscribers to a different URL, such as a page on your website, instead of showing the subscribe success page. For single opt-in lists, this happens after they submit the subscribe page. For double opt-in lists, this happens after they confirm their subscription in the confirmation email.
Setting up a new redirect requires paid email features. If a page already has a redirect configured, you can edit or remove that redirect even if your account no longer has paid email features.
To use a redirect URL on the subscribe success page:
- Navigate to your consent pages (this can be your account’s consent pages or a specific list’s consent pages).
To reach your default consent pages, navigate to Audience > Growth tools, click Customize under Customize subscribe and preference pages, then select Account default pages. To navigate to a specific list’s consent pages, navigate to Audience > Lists & segments, choose a list, then click Consent pages.
- Under Subscribe Page, click Edit Page.
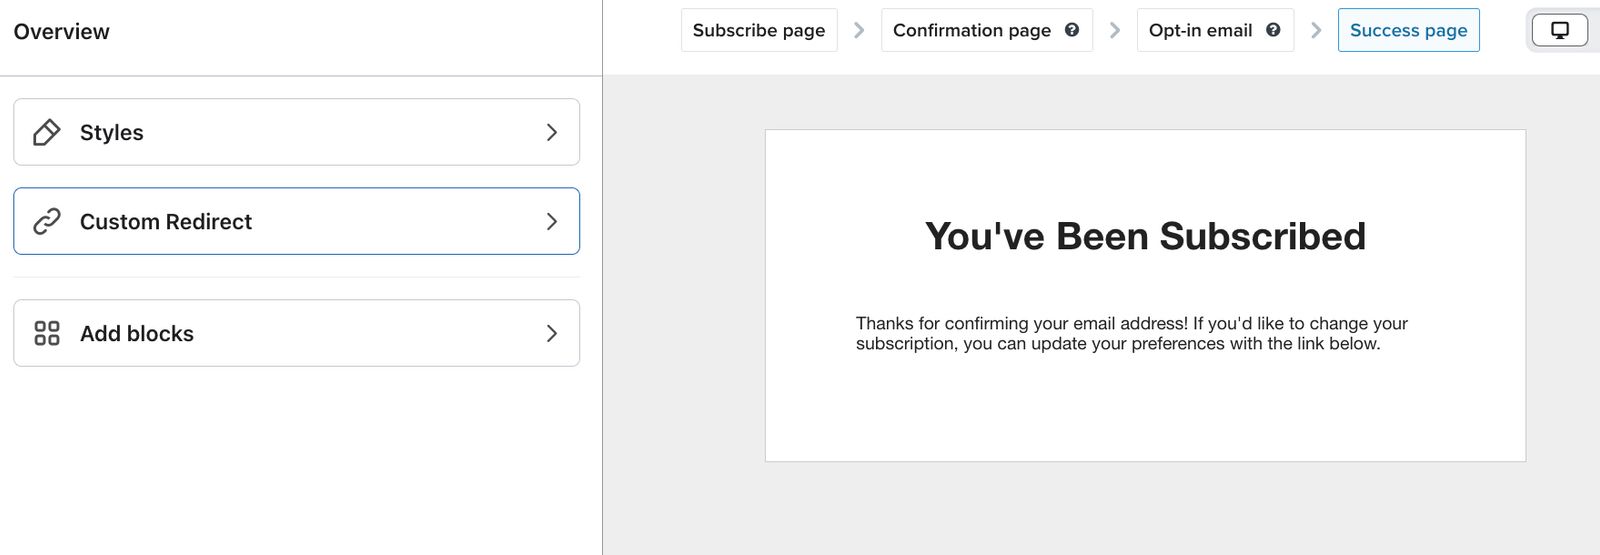
- In the menu bar at the top, select Success page.
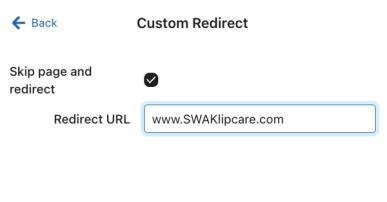
- Click Custom Redirect.
- Check the box to Skip page and redirect.
- Paste the URL that you would like subscribers redirected to in Redirect URL.
- When you are finished with all other design edits, click Publish.
Additional resources
- How to custom code consent pages
Learn how to enable and use Klaviyo's hosted pages feature, which allows you custom code your own preference pages, subscribe pages, and unsubscribe pages.
- How to use a subscribe page on your website
Learn how to create and customize a subscribe page so that your customers can easily sign up to hear more from your brand.
- How to customize a list's unsubscribe page
Learn how to customize an unsubscribe page for a specific Klaviyo list, which is the page where your subscribers can unsubscribe from receiving your marketing.