How to set up RCS messaging
RCS allows you to send branded, rich, interactive messages to your customers using a verified sender called an RCS Agent. This guide explains what an RCS agent is, how to request and enable one in Klaviyo, and how to manage its status.
What is an RCS agent?
An RCS agent is a verified sender used to send RCS business messages. When you send messages using RCS, your subscribers receive messages from your brand's contact card, which includes brand name, logo, banner, and contact details.
Who can get an RCS agent?
Accounts with an active SMS sender are eligible to create an RCS Agent. SHAFT brands may not be eligible to create an RCS Agent; this is because RCS is stricter than SMS, so content allowed on SMS may still be prohibited on RCS.
To sign up for RCS, you need permission to edit account settings. Before activating an agent, make sure you have an active SMS sending ID for the same country to provide SMS fallback. You will not be able to activate your RCS agent without an active SMS sending ID in the same country.
How to create an RCS agent in Klaviyo
Step 1: Choose your country
You must complete setup separately for each country.
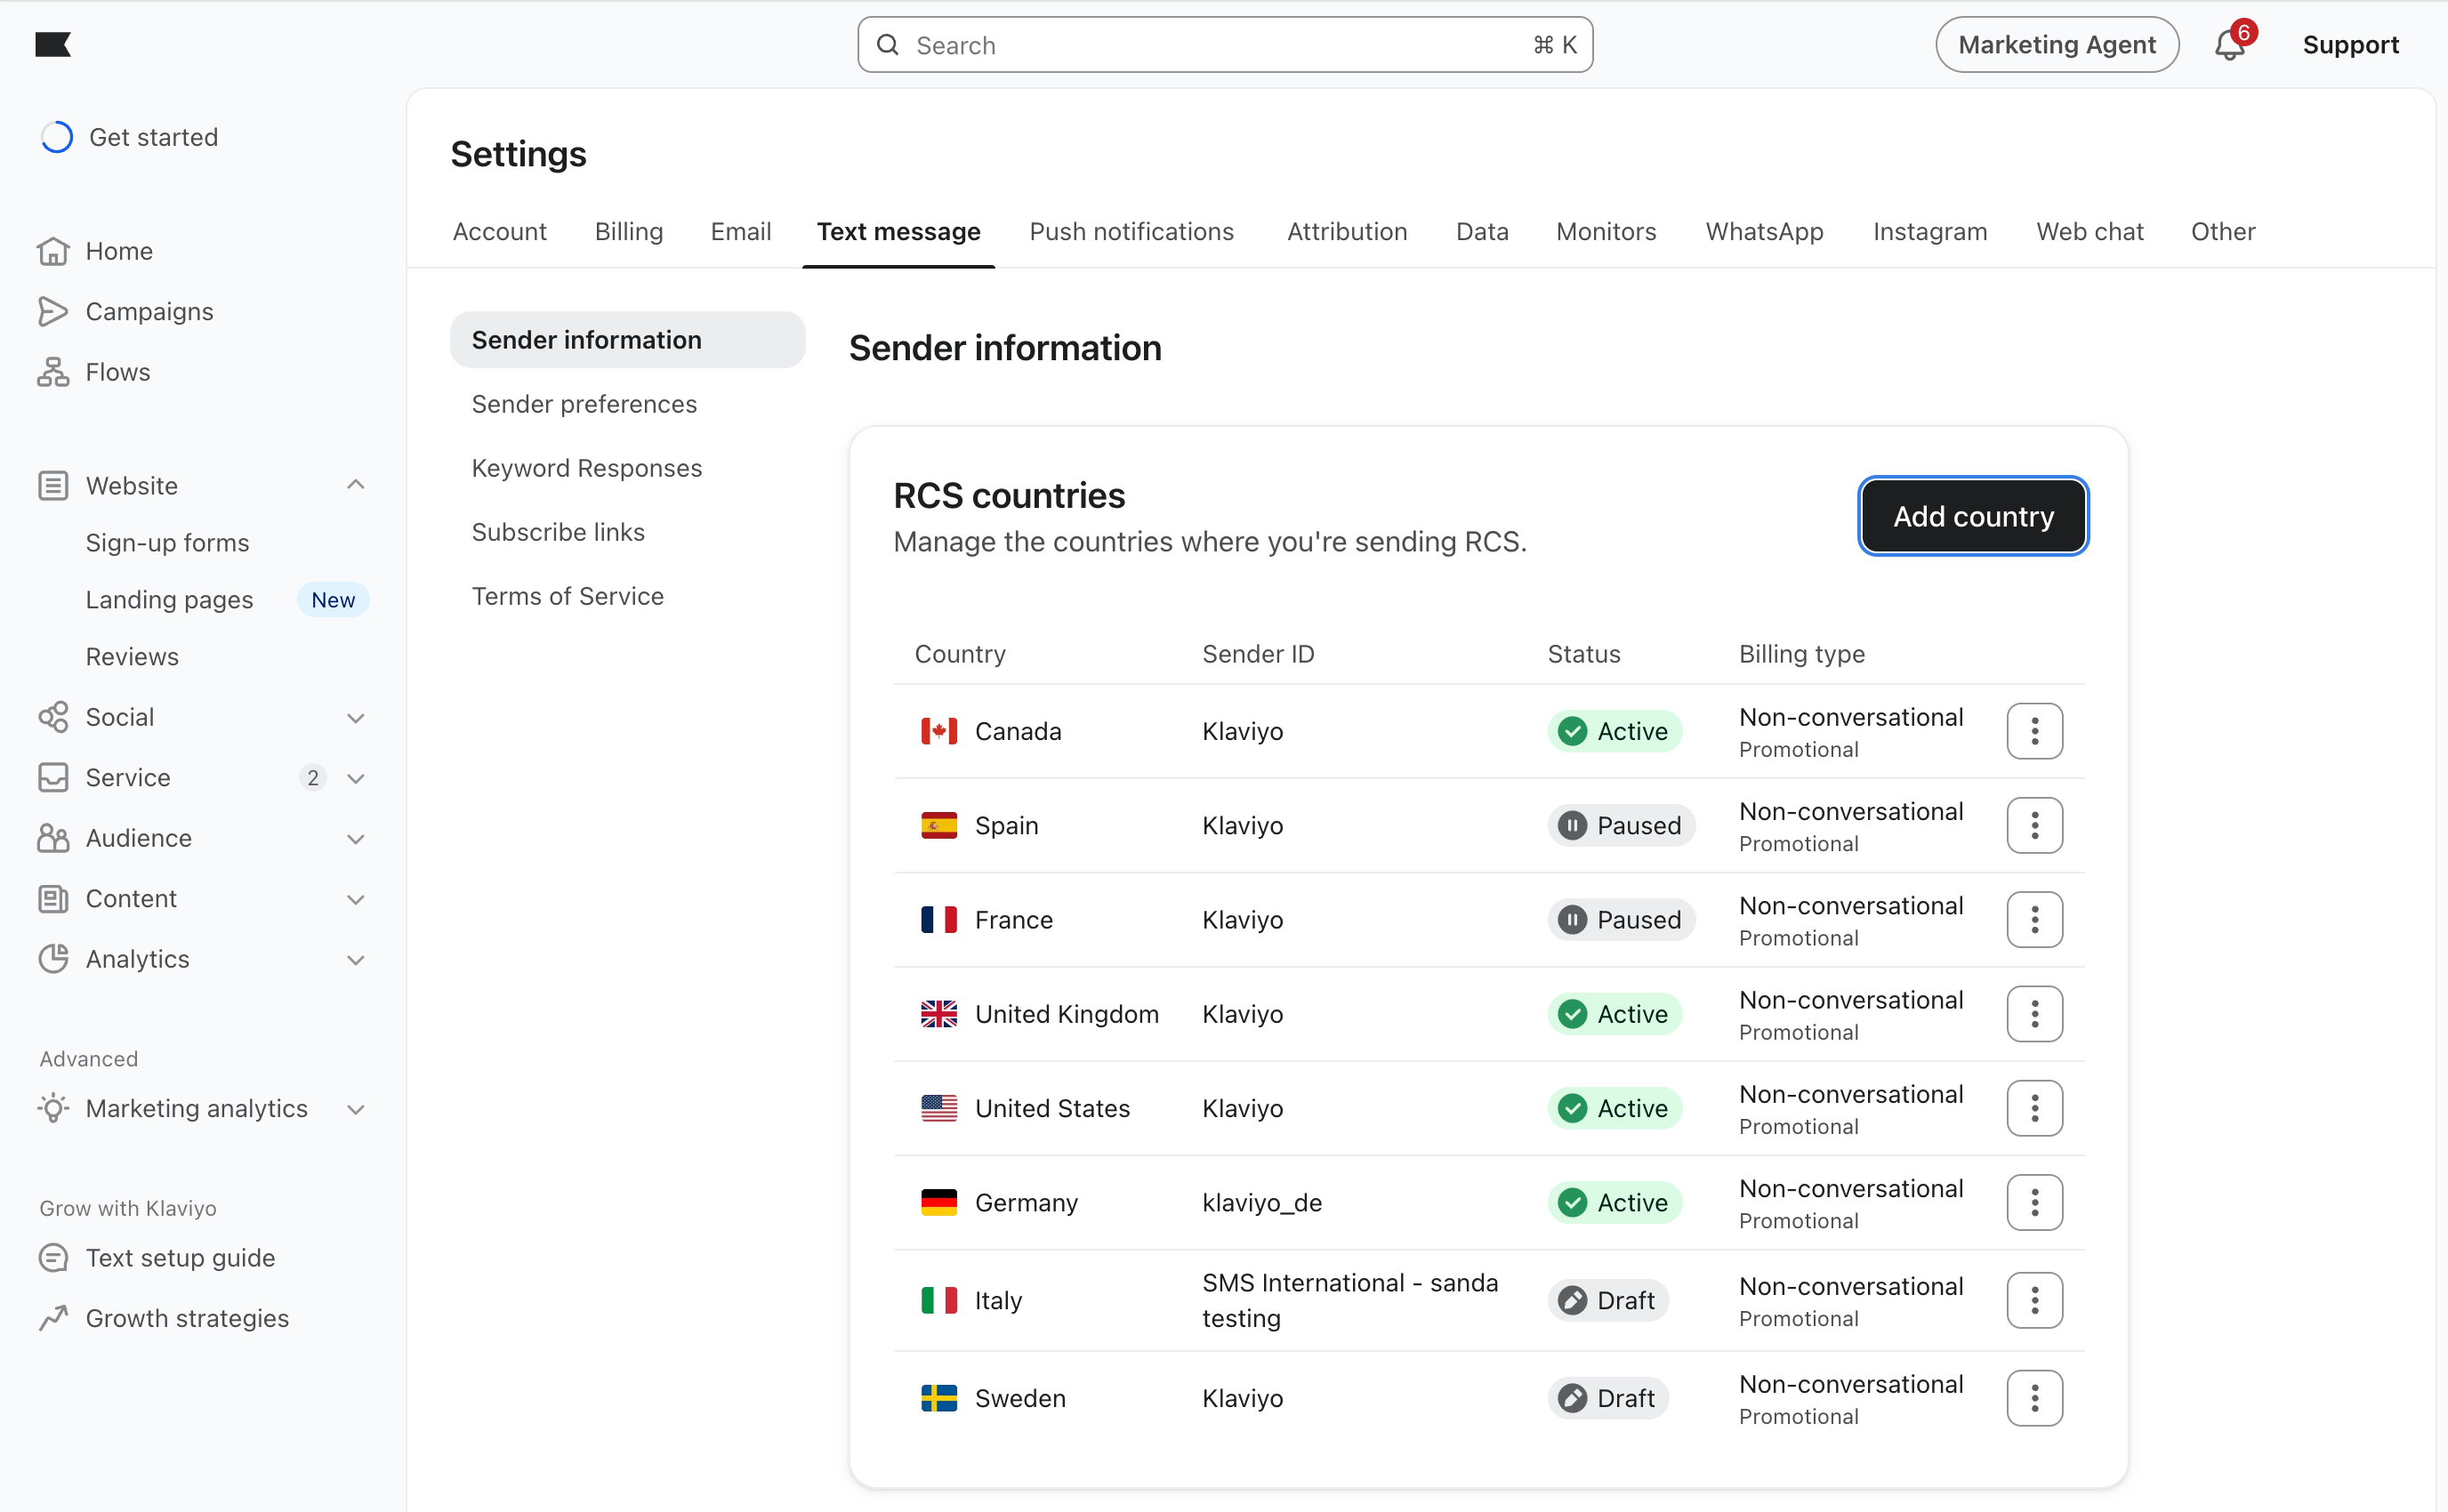
- Go to Settings.
- Select Text message > Sender information.
- In the RCS countries section:
- Click Get started if you are setting up RCS for the first time.
- Click Add country if you are adding a new agent.
- Select the country where you want to create the agent, then click Next.
Step 2: Create your RCS contact card
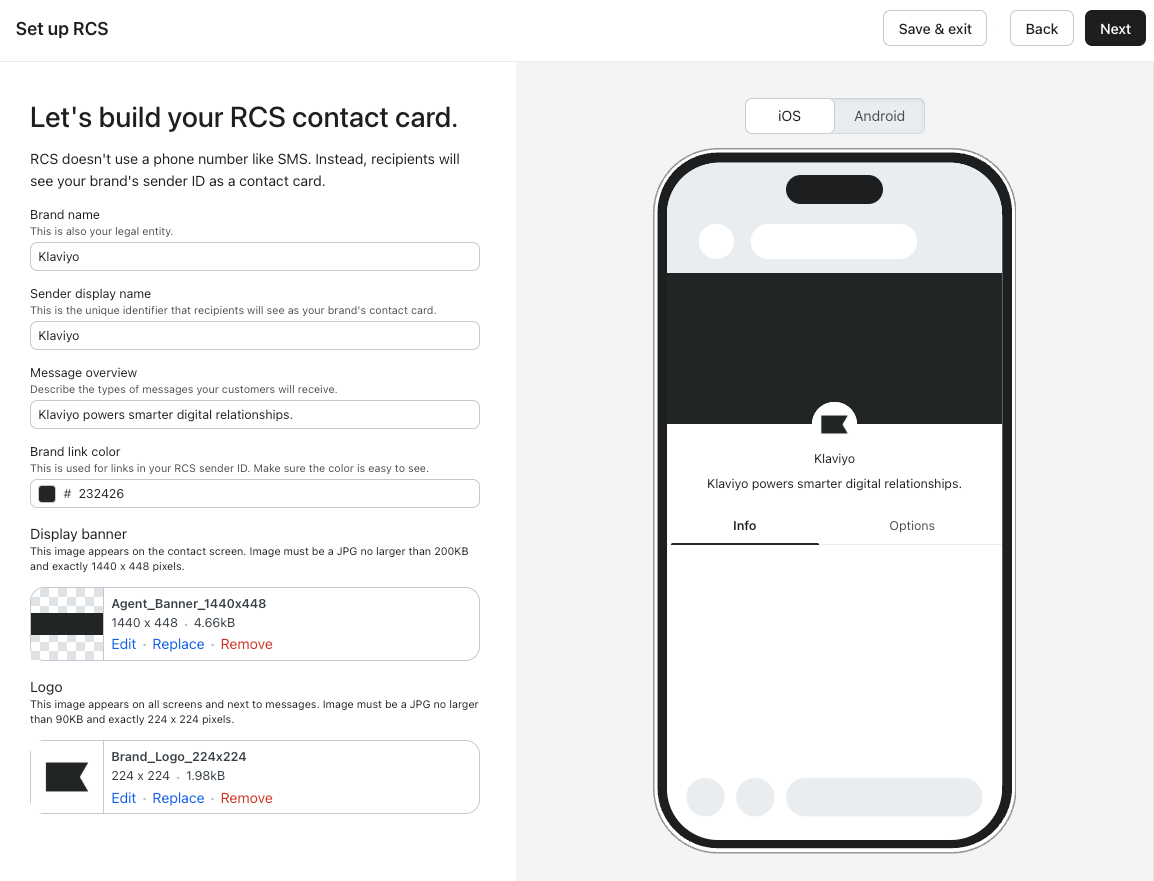
RCS recipients see your brand as a contact card. Complete the following fields, clicking Next to move through the branding, contact information, and legal information screens:
- Brand name - Your company’s legal name.
- Agent display name - The name shown to end users, up to 40 characters.
- Logo - The logo that displays alongside the display name (224 × 224 px, JPG or PNG, max 50 KB).
- Display banner - The banner image that appears at the top of the brand info page (1440 × 448 px, JPG or PNG, max 200 KB).
- Brand link color - The hex color value used for links on the brand info page. Choose a color with a contrast ratio of at least 4.5:1 against white.
- Description - A short piece of text, up to 100 characters, that appears under the sender name of the brand’s RCS contact card. In the US, this field is labeled Agent description.
- US only: Select at least 1 marketing message type and 1 transactional message type for your agent description. For example, “Promotions, cart reminders, and order updates.” You can customize the text, but keep the selected message-type wording. Do not use a brand description or tagline only. Message type examples must be included.
- Contact details - Contact information that appears on the brand info page. Include a Support email address and Website URL, with labels for each. A Support phone number is optional; if you add one, include its label.
- Privacy Policy - A URL link to the Privacy Policy that appears on the brand info page.
- Terms of Service - A URL link to the Terms of Service that appears on the brand info page.
Use different URLs for your privacy policy and terms of service. Both pages must be live and publicly accessible. Your privacy policy must state that text message opt-in data and consent status are not shared with third parties for purposes unrelated to the messaging service.
Step 3: Review and submit your agent
Adding test numbers and sending test messages from agent setup are not currently supported. Use the contact card preview, then continue to registration.
Review your contact card before continuing to registration:
- Use the iOS and Android preview options to review your contact card.
- Check your branding, contact details, and legal URLs. Use Back to correct them if needed.
- Click Next on the agent review screen to submit the agent and continue to registration.
After agent setup, the status changes to Ready to register. This may take a few minutes. Continue to Step 4 to submit your registration for carrier approval.
Step 4: Registration
Once you have created your RCS agent, you must submit it for Google and carrier approval. This step verifies your business and ensures you meet RCS messaging and compliance requirements.
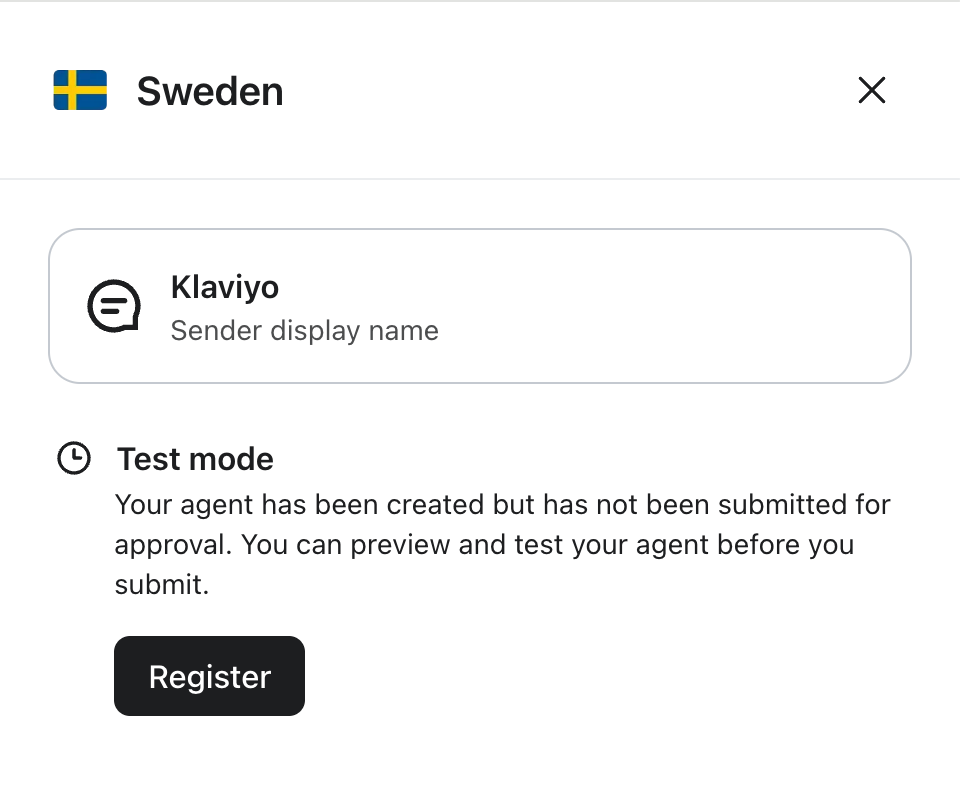
Continue to the registration screens after reviewing your agent. If you left setup and your agent is Ready to register, reopen registration:
- Go to Settings.
- Select Text message > Sender information.
- In RCS countries, locate the country where you want to register the agent.
- Click the 3-dot menu next to the agent.
- Click View.
- Click Register.
Carrier review typically takes 4 or more weeks and registration requirements vary by country and carrier. The exact information requested may differ depending on where you are registering your agent.
Below is an example of the typical information requested during registration:
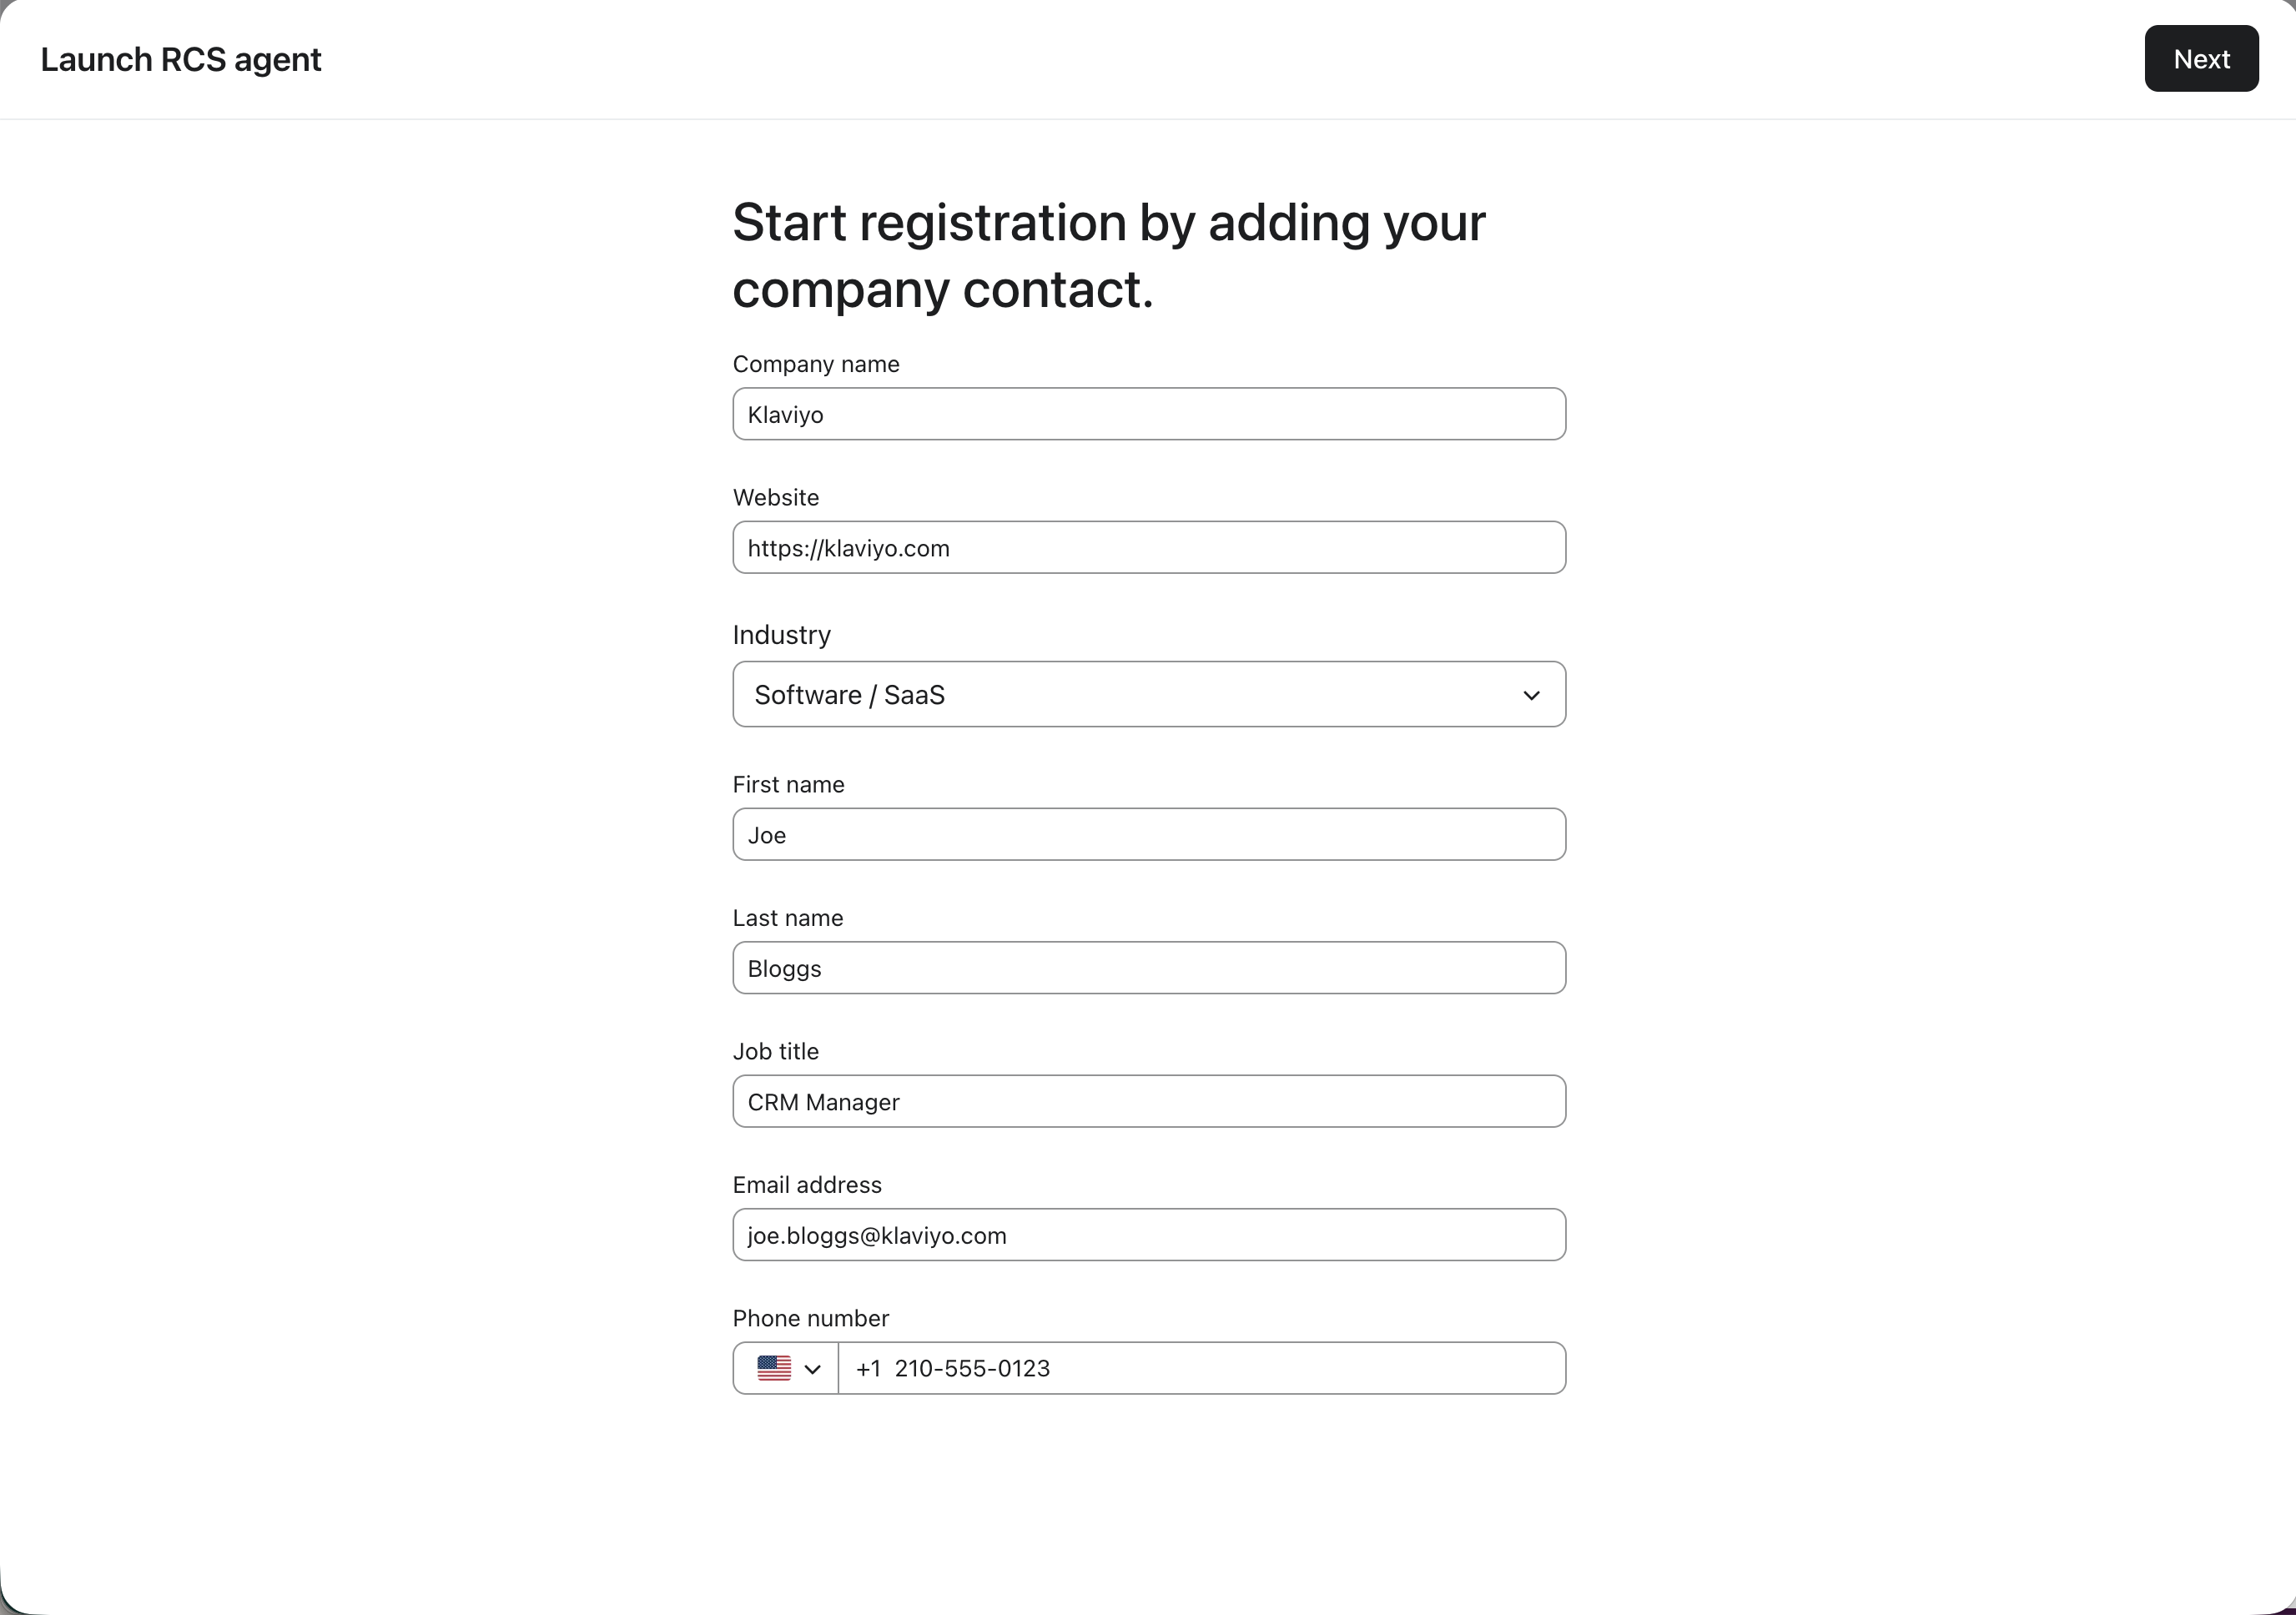
1. Company contact details:
- Legal company name - Your legal entity name. Enter it exactly as it appears on your business registration or tax documents, including designations such as Inc., LLC, or Ltd.
- Website - Your primary domain. It must be live and publicly accessible and connect your brand name to your legal company name, for example in the footer, About page, or terms of service.
- Industry - Select the industry that best represents your business.
- First name and last name - Contact person name.
- Job title - Contact person job title.
- Email address - The company contact’s direct work email. It must include their name, use the same company domain as your website, and differ from the support email on your RCS contact card. Do not use a free email provider or a shared inbox such as info@ or hello@.
- Phone number - The company contact’s personal or office number. It must differ from both the company phone number and the support phone number on your RCS contact card.
The contact details provided here will be used by the RCS for Business support team during review.
2. Business registration details:
- Country of registration - The country where your business is legally registered.
- Registered street address - Registered street address.
- City - Registered city.
- State/Province/Region - Registered state or region.
- ZIP/Postal code - Registered postal code.
- Company phone number - Your company’s primary phone number.
- Business registration number - For example, EIN for US businesses or the equivalent local registration number in other countries.
- Legal entity type - For example, Private company, Public company, Sole trader etc.
If you select Public as the legal entity type, also provide the Stock exchange abbreviation and Trading symbol.
If your business registration belongs to a parent company:
- Enter the parent company’s registered name as the Legal company name.
- Use a website that publicly connects your brand to that legal company.
3. Proof of opt-in collection:
Provide a screenshot of a sign-up form that shows how text message consent is collected.
- The screenshot must clearly show the phone number field, examples of promotional and transactional messages, STOP and HELP instructions, message frequency, the “message and data rates may apply” disclosure, and links to your privacy policy and terms of service.
- If you see an upload field, upload your screenshot and confirm the sign-up form requirements. You can take the screenshot from the Klaviyo forms section.
If you see a sign-up form preview:
- Review the selected form or click Select different form. If no form is available, click Create form.
- Click Capture screenshot to attach the screenshot before continuing.
If Klaviyo adds disclosure language or creates a draft form, click Open editor, review the form, and publish it when ready to use it to collect consent. Capturing a screenshot does not publish those changes.
4. Estimated monthly RCS sends:
If the registration form asks for Estimated monthly RCS sends, select a realistic estimate of your expected monthly RCS message volume.
Click Next to review your registration details. Correct any errors, then click Submit to send the registration for approval.
Step 5: Authorization and country-specific requirements
After you submit your RCS registration, your agent status will change to 'Under review' and your registration information will be reviewed by Google and local carriers. In some countries, additional manual steps are required before your agent can be approved for launch.
Google authorization:
All brands must complete a Google authorisation step. The brand contact listed on the RCS registration form will receive an email from Google and Infobip (Klaviyo’s RCS partner) requesting authorisation to launch an RCS agent on your behalf.
You must review and approve this request promptly. Your agent cannot be reviewed by carriers until Google confirms brand authorisation.
Country-specific requirements:
In the following countries, extra actions are required in addition to Google authorisation. Any required forms or templates will be provided to you by email.
Country | Requirements |
United States | Aegis Mobile will send a verification email to your brand contact. You must complete the steps in that email within the required timeframe. |
United Kingdom | Your brand contact must send approval emails to major UK carriers using the template provided.
|
Germany | A completed form letter must be submitted by email to the designated carrier contact. |
France | A French carrier will contact your customer facing support email to test French language support and request approval for your RCS Agent. You must respond in French and follow their instructions exactly. |
Austria | A completed form letter must be submitted by email to the designated carrier contact. |
Netherlands | A completed form letter must be submitted by email to the listed carrier contacts. |
Step 6: Approval
If additional information is required during review, the status will change to Action required. Click Resolve next to the agent to view the feedback and follow the instructions to correct your registration.
Carrier review typically takes 4 or more weeks.
Once approved, the agent status will change to Ready to activate. At this stage, the agent will not begin sending messages automatically and must be manually activated in Klaviyo.
We do not automatically activate approved agents to allow you to:
- Update existing flows and scheduled campaigns
- Review segmentation and targeting
- Inform or prepare customers before switching to RCS
If an RCS application is rejected, review the feedback and click Start new registration to submit a new registration after making the required updates.
Step 7: Activation
Once your agent is Ready to activate, you must manually activate it before it can send RCS messages. You need an active SMS sending ID for the same country.
To activate an approved agent:
- Go to Settings.
- Select Text message > Sender information.
- In the RCS countries section, locate the relevant country.
- Click the 3-dot menu next to the agent, then select View.
- Click Activate in the agent details.
- In the confirmation dialog, click Activate. The status changes to Active.
Once you activate an agent, RCS becomes the default text message channel in that country. Klaviyo sends messages via RCS to eligible recipients whose devices and carriers support RCS, with SMS as the fallback.
For more information on using RCS after activation, see the Getting started with RCS article.
How to deactivate or reactivate an RCS agent in Klaviyo
To pause or reactivate an RCS agent, contact Klaviyo Support and specify the country.
When Support pauses the agent, its status changes to Paused and RCS sending for that country stops. Messages use SMS fallback if you have an active SMS sending ID for that country.
When Support reactivates the agent, its status changes to Active and RCS sending resumes for eligible recipients in that country, with SMS as the fallback.
Agent Statuses
The statuses you may see include:
- Draft - Agent setup has started but has not been created with Google.
- Action required - Agent was not approved and requires updates before it can be resubmitted.
- Ready to register - Agent has been created and is ready to submit for carrier approval.
- Under review - Agent has been submitted to carriers and is being reviewed for approval.
- Ready to activate - Agent has been approved by all required carriers and is ready to be activated in Klaviyo.
- Active - Agent is live and can send RCS messages to eligible recipients.
- Paused - Agent has been paused for sending in Klaviyo and will not send messages until reactivated.