How to use ticket tagging in Helpdesk
Learn how to use tags to categorize, organize, and easily find support tickets in Klaviyo Helpdesk.
What are ticket tags?
Tags are labels that you can apply to tickets in Helpdesk to help you categorize and manage your customer conversations. Tags make it easier to:
- Filter and group similar tickets
- Create custom ticket views
- Understand what problems are most common for your customers
How ticket tagging works in Klaviyo Helpdesk
There are 2 ways to tag tickets in Helpdesk: automatic tagging and manual tagging.
Automatic ticket tagging
When a new ticket arrives in Helpdesk, Klaviyo automatically scans the customer’s message for keywords and context. It then automatically applies 1 or more relevant tags from the following predefined options:
- Chit-chat
- Loyalty
- Order tracking
- Pricing
- Product specific
- Recommendations
- Returns
- Shipping
- Speak to human
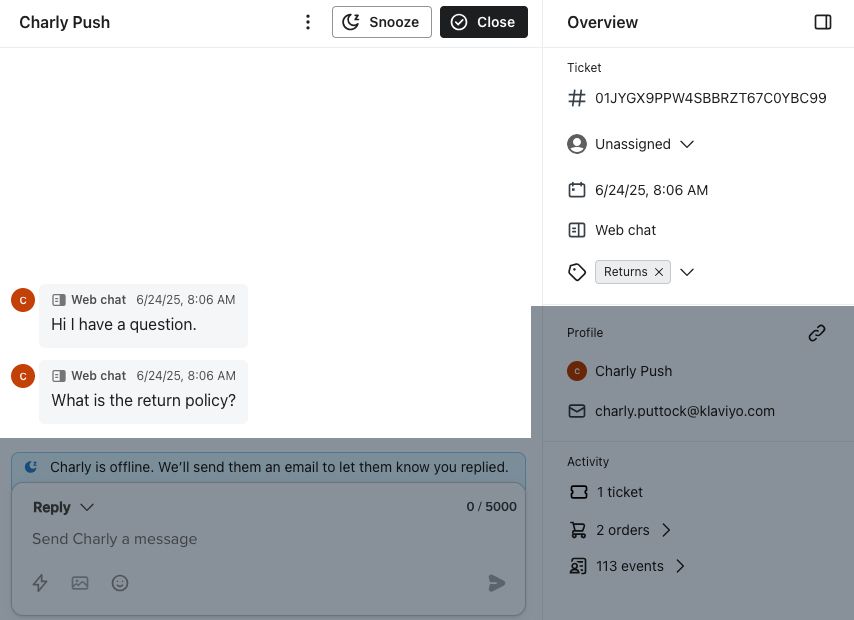
Note that automatic tagging only uses Klaviyo’s predefined set of tags. In the example ticket below, Returns was auto-tagged.
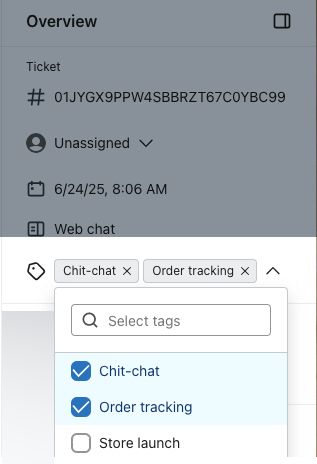
Automatic tagging cannot be disabled, but you can remove these tags as needed after they are added. When a ticket is auto-tagged, only the specific predefined tag(s) added by Klaviyo will show in the Tags dropdown in the ticket, along with any custom tags you have created. The full list of predefined tags is not shown as options in the dropdown.
Manual ticket tagging
In addition to automatic tags, if you want to add your own label, you can create and attach new tags to any ticket manually.
Note that new tags are applied only to the ticket on which they are created. While tags you've created will not be automatically added to new tickets, they can still be used for creating custom views and are visible on the Helpdesk reporting dashboard.
How to add a new tag to a ticket
- In Klaviyo, navigate to Service > Helpdesk.
- Open the relevant ticket.
- In the right-side Overview panel, click the Select tags dropdown.
- To add a tag, you can either:
- Select an existing tag
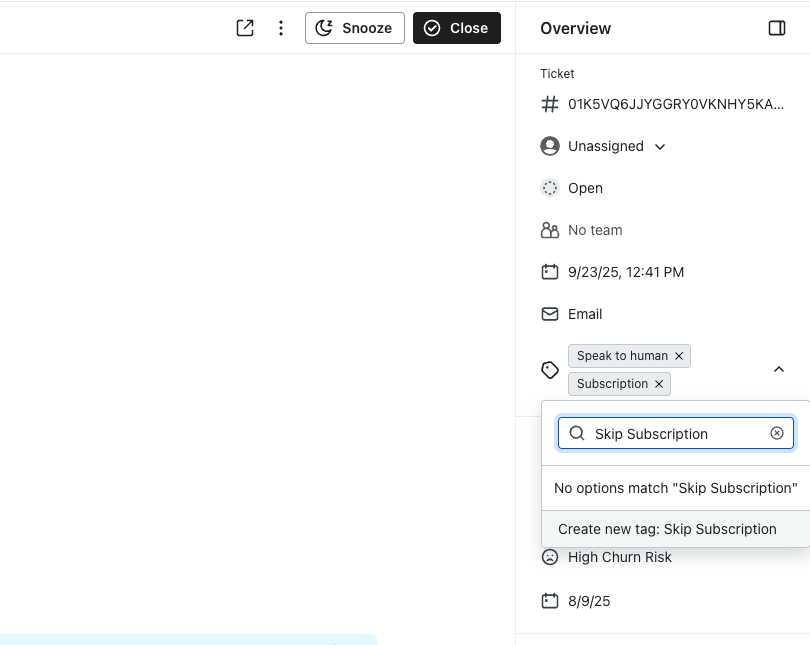
- Type the name of the tag you’d like to create into the Select tags field and select Create to instantly save the new tag.
You can add or remove tags from a ticket at any time from this menu using the checkboxes.
Add tags in your account
You can add new tags right on the ticket, where they'll then be saved to your account to be used by other members of your team.
- Go to a ticket
- Click the tags section, and type in the name of your desired Tag.
- Click Enter
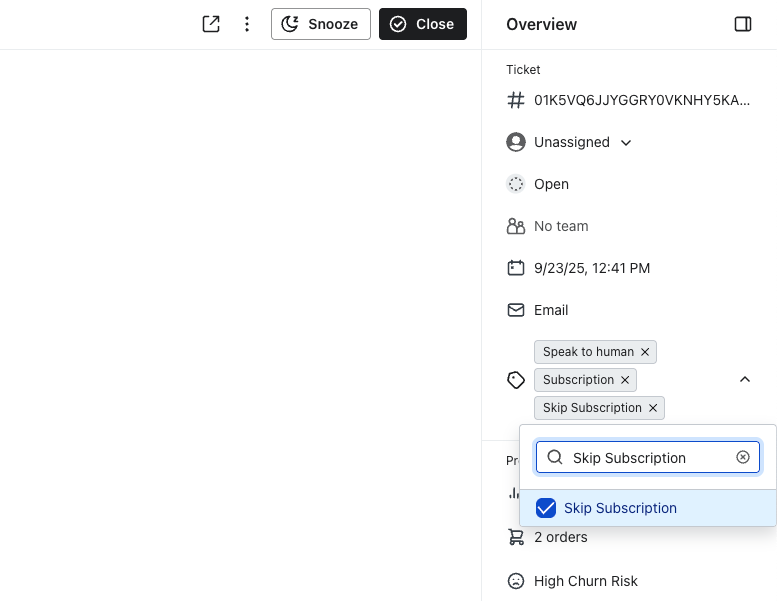
- Now when you go to any other ticket, you'll automatically see your new tag available to select, as well as being automatically reported on when you go to the tag performance section of the reporting page.
Next steps
Review the tag reporting dashboard to analyze ticket trends based on your tags.
Additional resources
- How to create a custom ticket view in Helpdesk
Learn how to create and save custom views in Helpdesk to help organize and manage your tickets.
- How to assign tickets in your Klaviyo Helpdesk
Learn how to assign tickets within your Klaviyo Helpdesk to efficiently manage customer inquiries and delegate responsibilities among your support team. By understanding views in Helpdesk and assignment actions, you can ensure efficient, organized customer support operations.
- Getting started with Customer Agent
Learn how to activate Klaviyo's Customer Agent, an AI-powered tool that provides instant support to your website visitors. Customer Agent ingests information from your Shopify store, and learns any additional information you provide, to answer shopper inquiries across web chat, SMS and email (beta).