How to assign tickets in your Klaviyo Helpdesk
Requirements: Only Owners, Admins, Managers, or Support roles can assign tickets.
You will learn
Learn how to assign tickets within your Klaviyo Helpdesk to efficiently manage customer inquiries and delegate responsibilities among your support team. By understanding views in Helpdesk and assignment actions, you can ensure efficient, organized customer support operations.
About ticket assignment
You have 3 options for assigning tickets in Klaviyo's Helpdesk:
- Segment and Tag based Routing
- Route tickets based on the tag or customers segment membership to specific teams.
- Round robin (auto-assignment)
- When Round robin assignment is enabled, Klaviyo automatically assigns new support tickets to available ("Online") agents in a rotational order. This is a great option if you have a dedicated support team with multiple users monitoring tickets.
- Manual assignment
- Manually review and assign each ticket to yourself or another user managing your Helpdesk.
Helpdesk views for accessing tickets
When using ticket assignment, it’s helpful to understand the different Helpdesk views for proper ticket management and organization.
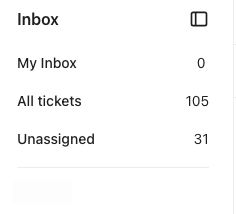
Tickets can be organized into the following views:
- My inbox: Shows only the tickets assigned to you (i.e., the user who is currently logged in and viewing the Helpdesk).
- All tickets: This default view shows every ticket in Helpdesk, regardless of who they are assigned to.
- Unassigned: Displays tickets that are not currently assigned to anyone and may require attention.
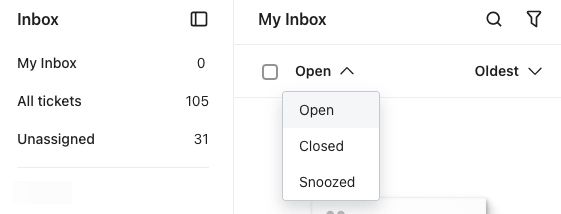
By default, these views are filtered to show open tickets only to help you track the status of unassigned tickets, but you can apply additional filters to view tickets by status or other criteria.
Assign tags and segment membership to teams for routing
If you want to leverage even more information about your customers and their issues to route tickets effectively, create a team with at least one agent and select which tags or segment memberships should trigger a ticket to be assigned to that team.
- Navigate to Service > Helpdesk in Klaviyo's main navigation.
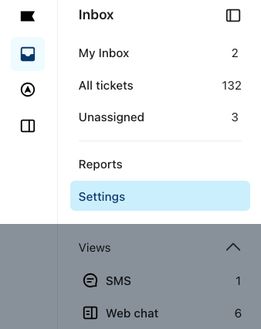
- Select Settings.
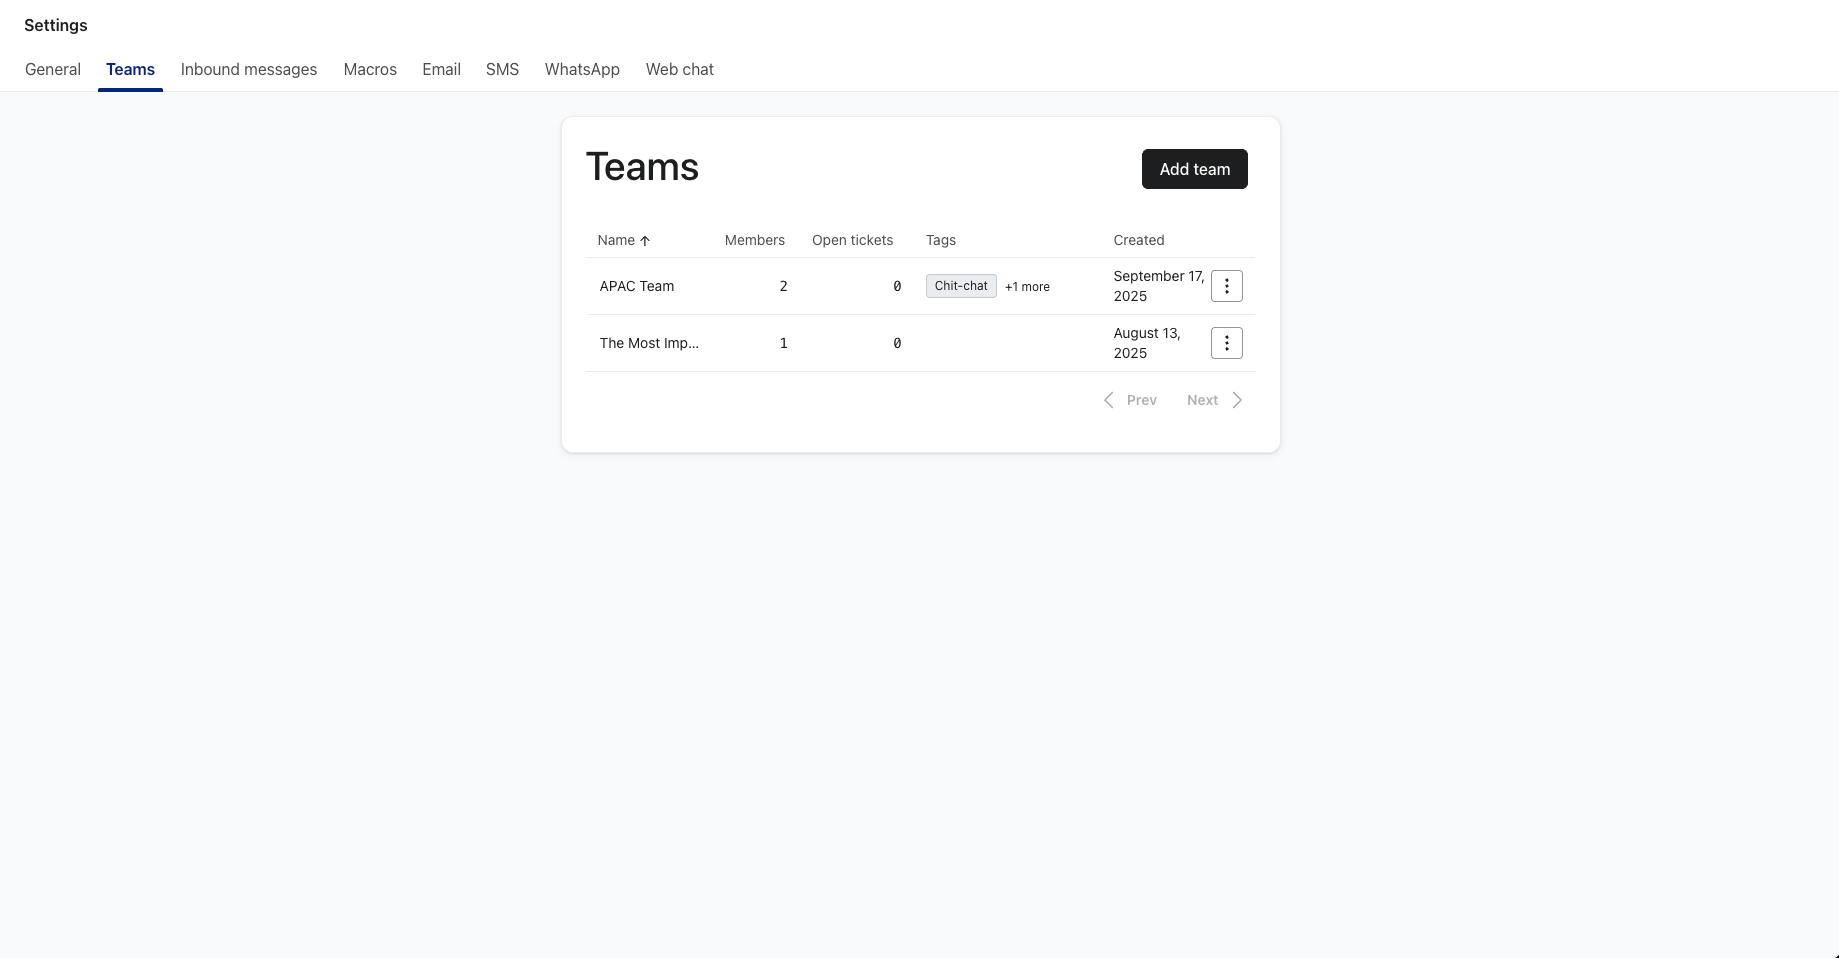
- Select the Teams tab in the top menu bar.
- Select "Add Team"
- Name and add a description for your team, and then select which tags and segment memberships you want to assign to the team.
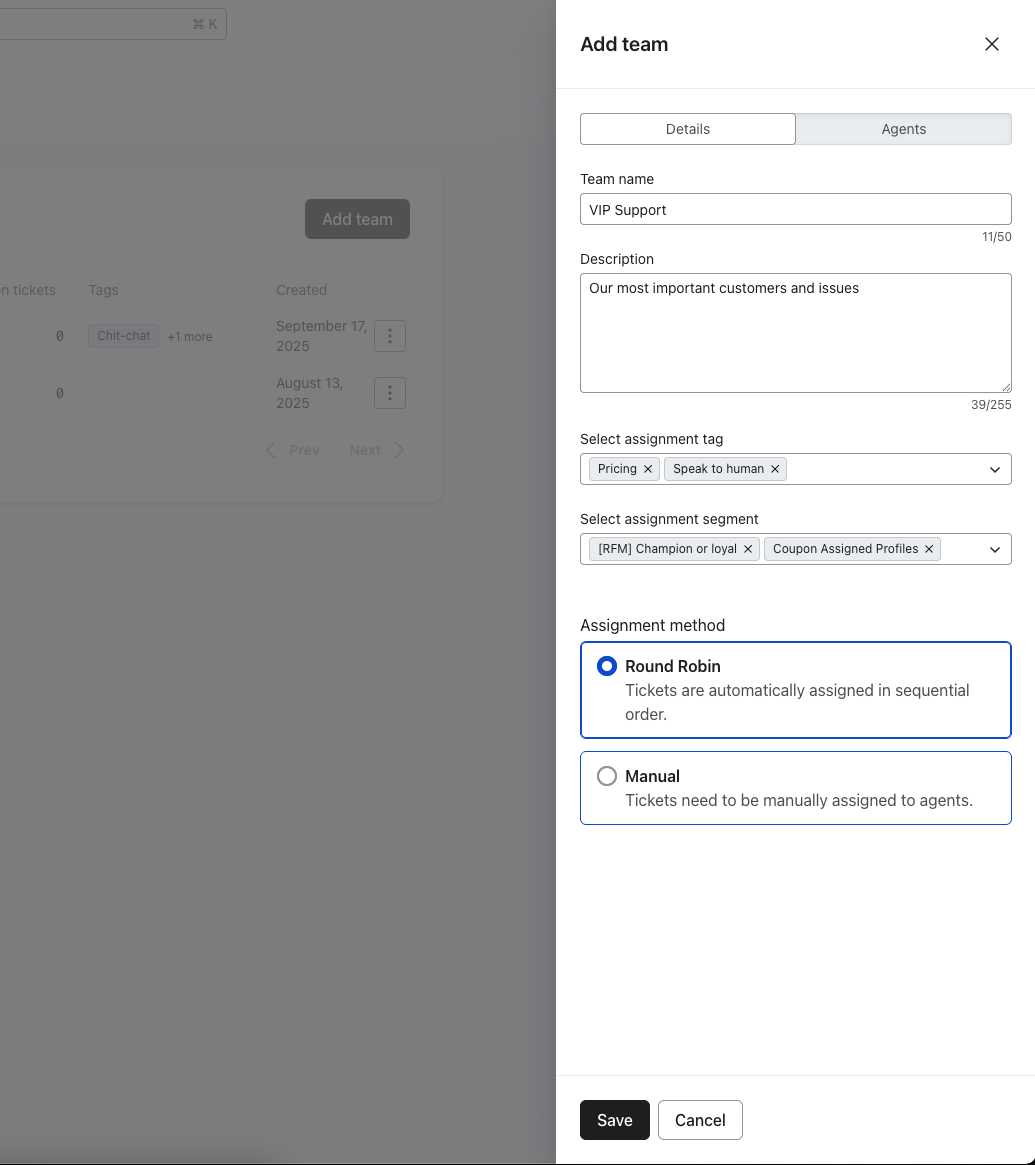
- Click save
Now any ticket that matches those tags or segment membership will be routed and assigned to a member of that team.
Enable round robin to auto-assign tickets
Round robin assignment allows Klaviyo to automatically and evenly assign new tickets among support agents who are actively monitoring your Helpdesk. This helps ensure fair distribution of responsibility and helps customers receive timely support form those ready to assist.
To turn on Round robin assignment:
- Navigate to Service > Helpdesk in Klaviyo's main navigation.
- Select Settings.
- Select the Inbound messages tab in the top menu bar.
- Under Round robin assignment, select On.
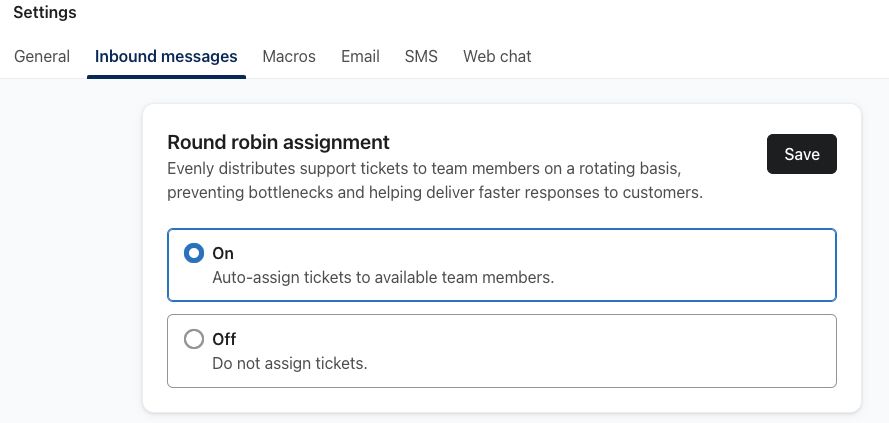
- Click Save.
When you have the setting enabled, users in your account see an Online/Offline switch in their Helpdesk view. Klaviyo only includes users who are Online in the automated ticket assignment; it does not assign tickets to Offline users until they switch their status to Online. This means that users must manually set their status when they are available or unavailable to receive tickets.
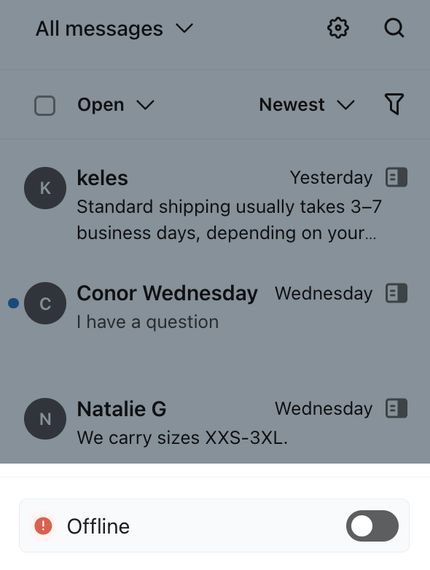
It is not possible to set another agent's status for them. Logged out users are automatically marked as Offline.
Round robin assignment also respects your office hours, meaning that tickets are only auto-assigned during the working hours you've configured in your Helpdesk settings. Outside of these hours, even active agents will not receive tickets automatically. However, they can still manually assign tickets to themselves outside of office hours, and this will not disrupt the round robin rotation. Auto-assignment resumes when your office hours begin again.
Manually assign a ticket to someone
If you do not want to have Klaviyo auto-assign Helpdesk tickets, you can instead opt to have your team members manually assign themselves to tickets they're working on, and thus keep the Round robin assignment setting disabled.
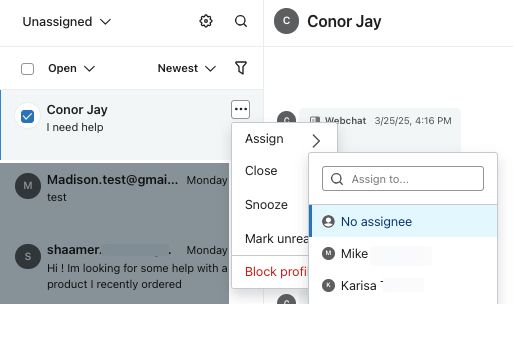
If multiple users manage tickets within your Helpdesk, ensure that a ticket is unassigned before taking ownership. To streamline this process, assign tickets from the Unassigned view:
- Navigate to Service > Helpdesk in Klaviyo.
- Select the Unassigned ticket view to display tickets without an assigned agent.
- On the desired ticket, select the 3 dots (additional options) menu, then choose Assign.
- To assign multiple tickets to a person, check the select box on each ticket first, then click the three dots on any of the selected tickets.
- Select the user to whom you want to assign the ticket.
- The ticket(s) will automatically route to the appropriate view:
- If you assigned a ticket to yourself, it moves to the My inbox view.
- If you assigned the ticket to another user, it moves to their My inbox view.
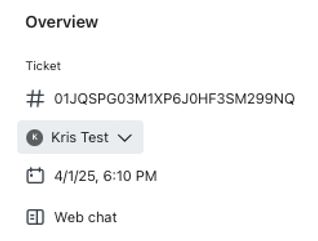
Once an user is assigned, the ticket's Overview pane will be updated to show their name as the assigned agent (e.g., Kris Test is the assignee in the image below).
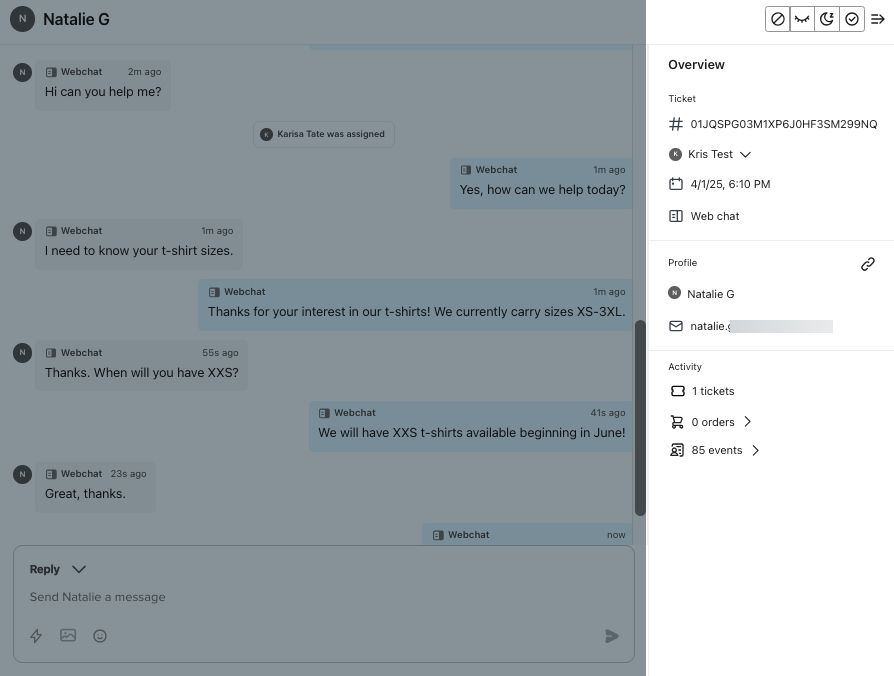
Note that the Overview section also includes other ticket information (e.g., ticket number, creation date, channel (SMS or web chat), total number of tickets associated with that customer, etc.), providing additional context for your support team. For more information on how tickets function in Helpdesk, see our guide to navigating the Inbox tab.
Reassign a ticket
To change the assignee for a ticket, or temporarily set a ticket back to unassigned:
- Open the ticket in your Helpdesk.
- In the Overview section along the right, find the assignee's name and click the dropdown menu next to it.
- Select a new assignee.
The reassigned ticket will move to the new assignee's My Tickets view. If you select "No assignee," the ticket will return to the Unassigned view.
Additional resources
- Guide to Klaviyo Helpdesk
Learn about Klaviyo Helpdesk, which helps you manage support conversations across all channels, powered by the data you already have in Klaviyo.
- Getting started with web chat
Learn about web chat, which is a 2-way communication channel you can add to your website. Web chat can be set up on its own for you to use with Customer Agent and Helpdesk, but it's also designed to be a seamless part of Customer Hub. Web chat allows your business to engage in live, personalized conversations with visitors on your website so they can easily get answers to their questions or assistance with issues.
- How to leave internal notes on Helpdesk tickets
Discover how to create and use notes to manage tickets in Klaviyo Helpdesk.