How to include a follow-up email to resend a campaign to "non-openers"
Your account must have a deliverability score above 50 to use the follow-up email feature. Your account’s deliverability score can be found at Analytics > Deliverability > Email > Score.
Learn how to use the include a follow-up email setting to resend a campaign to recipients that didn't open the original email. This option is available in the campaign wizard when setting up a new campaign.
Before you begin
Note that you can only send follow-up emails to profiles that have engaged with (opened or clicked) other emails sent from your account in the last 30-90 days. Sending to non-openers who have never engaged or haven’t engaged in over 90 days can potentially damage your sender reputation and lead to your emails landing in the spam folder.
If you haven’t already, learn the basics of how to create and send an email campaign.
Poor deliverability score
If you see the message "Disable due to poor deliverability score", this means that the follow-up message feature has been disabled due to your account having a delivery score below 50. This won't affect your ability to send the campaign itself.
Learn more about email deliverability best practices to improve your deliverability score.
Limitations with follow-up emails
There are some limitations with resending campaigns:
- Sending an automatic follow-up message is exclusive to email campaigns.
- It’s not possible to detect open rates for SMS campaigns to determine non-openers, and resending SMS campaigns is not recommended in general.
- You can't automatically follow-up when A/B testing campaigns.
Include a follow-up email for your campaign
- Create a new campaign or edit an existing campaign.
- On the Review step of the campaign wizard, turn on the setting Add a follow-up email in the sidebar. This option is only available when creating a new campaign or editing an unsent campaign.
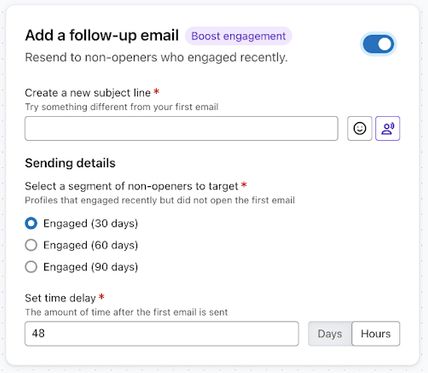
- Enter a new subject line.
- The content of the follow-up email will remain the same as the original campaign, but it's important to change the subject to try something different to attract non-openers.
- Select which profiles to resend to based on their engagement (i.e., if they opened or clicked in the last 30, 60, or 90 days).
- Set a time delay for how long to wait before sending the follow-up email. You can toggle between days or hours.
- The minimum amount of time is 2 days or 48 hours.
- The maximum is 30 days.
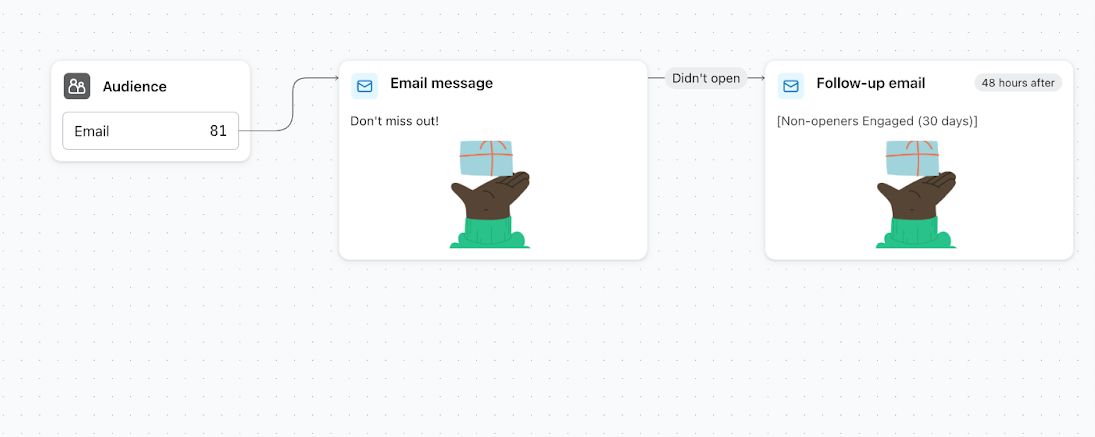
- Check that all of the fields are entered as intended. After all fields are set, the follow-up will be listed in the campaign schedule next to the original email.
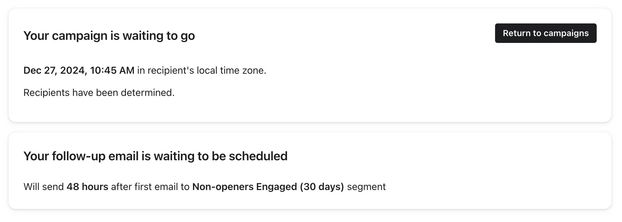
- Click Schedule or send and choose a date and time for the initial email.
The details of the original and follow-up email are displayed on the confirmation screen.
Cancel or change the details of the follow-up email
The details of the follow-up email can be changed any time before the campaign is sent.
- On the Campaigns tab, click on the name of the scheduled campaign.
- On the follow-up email card, click the 3-dot menu.
- Click Cancel to prevent a follow-up from being sent or click Edit to change the details. Canceling the follow-up does not cancel the original campaign.
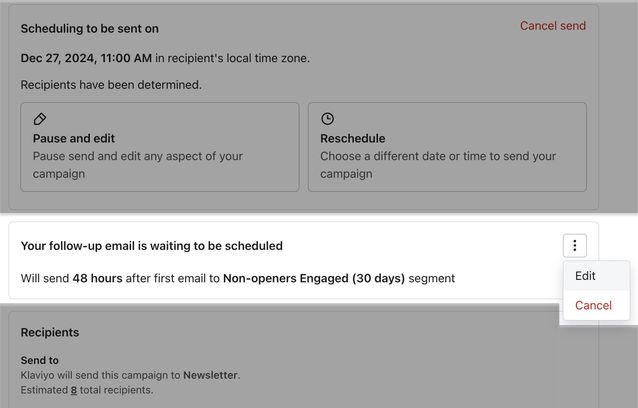
- If you choose to edit the follow-up, change the subject line, segment, or time delay.
- If you make changes, click Save.
Manually resend a campaign
It’s recommended to use the automatic follow-up email option in the campaign wizard, but if you’d like to manually send a follow-up email to non-openers, follow the steps below.
Create a segment
Create a segment with the following conditions:
- What someone has done > Received Email > at least once over all time > where Campaign Name equals [EXAMPLE]
AND - What someone has done > Opened Email > zero times over all time > where Campaign Name equals [EXAMPLE]
AND - What someone has done > Clicked Email > zero times over all time > where Campaign Name equals [EXAMPLE]
Replace "[EXAMPLE]" with the name of the campaign you want to resend to. If you want, you can also add engagement behavior (e.g., Opened email in the last 60 days).
Resend the campaign
- Find the original campaign that you want to resend.
- Select the 3-dot menu to the right.
- Click Clone.
- Choose Clone to this account and select the select the segment you created above.
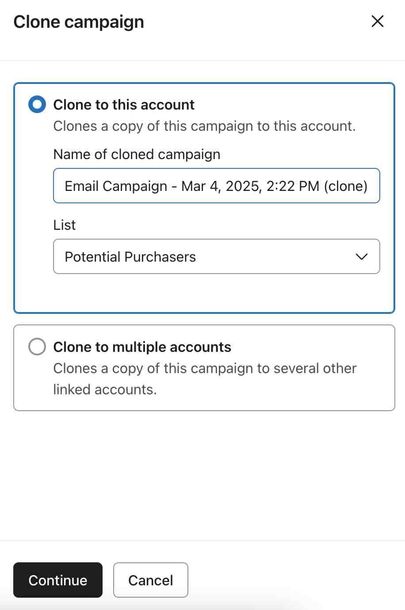
- Click Continue and proceed through the remaining steps for creating campaign content and sending.
- Make sure to disable the option to Skip recently emailed profiles if you resend the campaign within your Smart Sending window.
- Make sure to disable the option to Skip recently emailed profiles if you resend the campaign within your Smart Sending window.

- If scheduling your campaign, make sure to select the Determine recipients at send time option.
Additional resources
- How to resend emails in Klaviyo
Learn about the two methods for resending flow and campaign emails in Klaviyo.
- How to send a campaign to people skipped by a list-triggered flow
Learn how to build a segment of people who should have received a list-triggered flow and send them a campaign. The main reason you would want to send a campaign to a group of people who were skipped by a list-triggered flow (for example, a welcome series) is if you have an existing flow, but a number of people were skipped by a flow email for some reason. Perhaps you initially had the wrong filters on the flow, or Smart Sending was on by mistake.