How to run a re-engagement email campaign
You will learn
Learn how to create and send a re-engagement email campaign.
Note that a re-engagement campaign differs from a winback flow because it is a one-off email rather than a sequence of emails.
- A winback flow is triggered by the Placed Order event and sends when a certain amount of time has passed without an additional purchase.
- A re-engagement campaign is a single email that is sent infrequently to those who may not receive a winback flow. Once a year is a good rule of thumb.
You can run a similar re-engagement campaign for SMS subscribers. Use text message marketing consent and SMS engagement criteria, such as can receive text message marketing and Clicked SMS. The suppression steps below apply only to email.
Run a re-engagement campaign
To run a re-engagement campaign, take the following steps:
- Create these 2 segments: one for unengaged purchasers and another for unengaged non-purchasers.
- Send a personalized email campaign to these subscribers featuring your latest releases and an easy way to update their preferences or unsubscribe.
- Suppress profiles that don't engage with your re-engagement campaign to preserve strong deliverability.
Split your unengaged subscribers into 2 segments
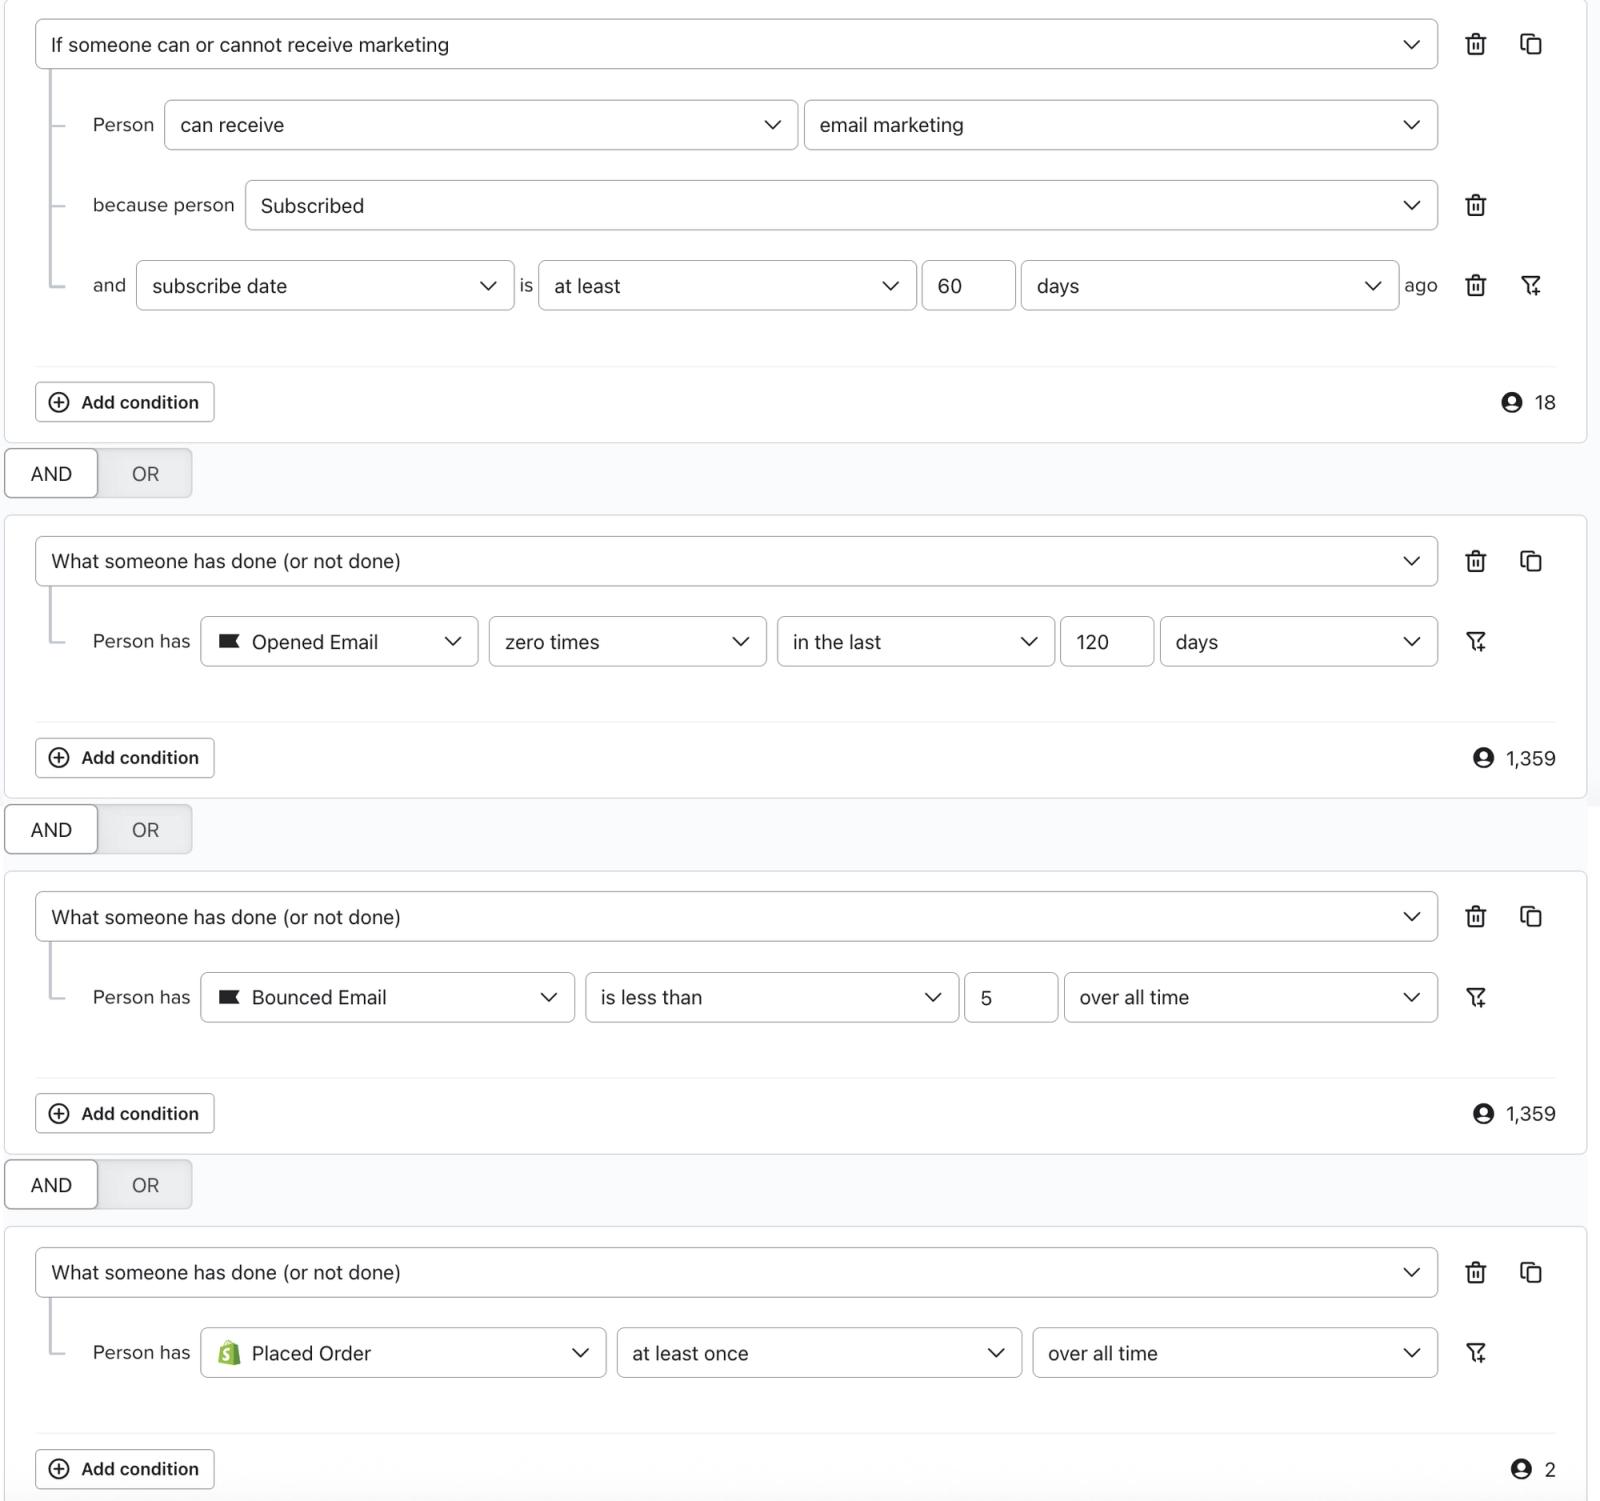
First, split your unengaged subscribers into segments: those who have made a purchase and those who have not made a purchase. This allows you to easily determine which group is more valuable once you send your campaign. Create a segment for each group below, joining all its conditions with AND.
Unengaged subscribers - purchased
This segment should contain people who:
- Are subscribers and subscribed more than 60 days ago
- Haven't opened an email in the past 120 days
- Haven't clicked an email in the past 120 days
- Have had an email bounce less than 5 times over all time
- Have placed an order at least once over all time
Unengaged subscribers - never purchased
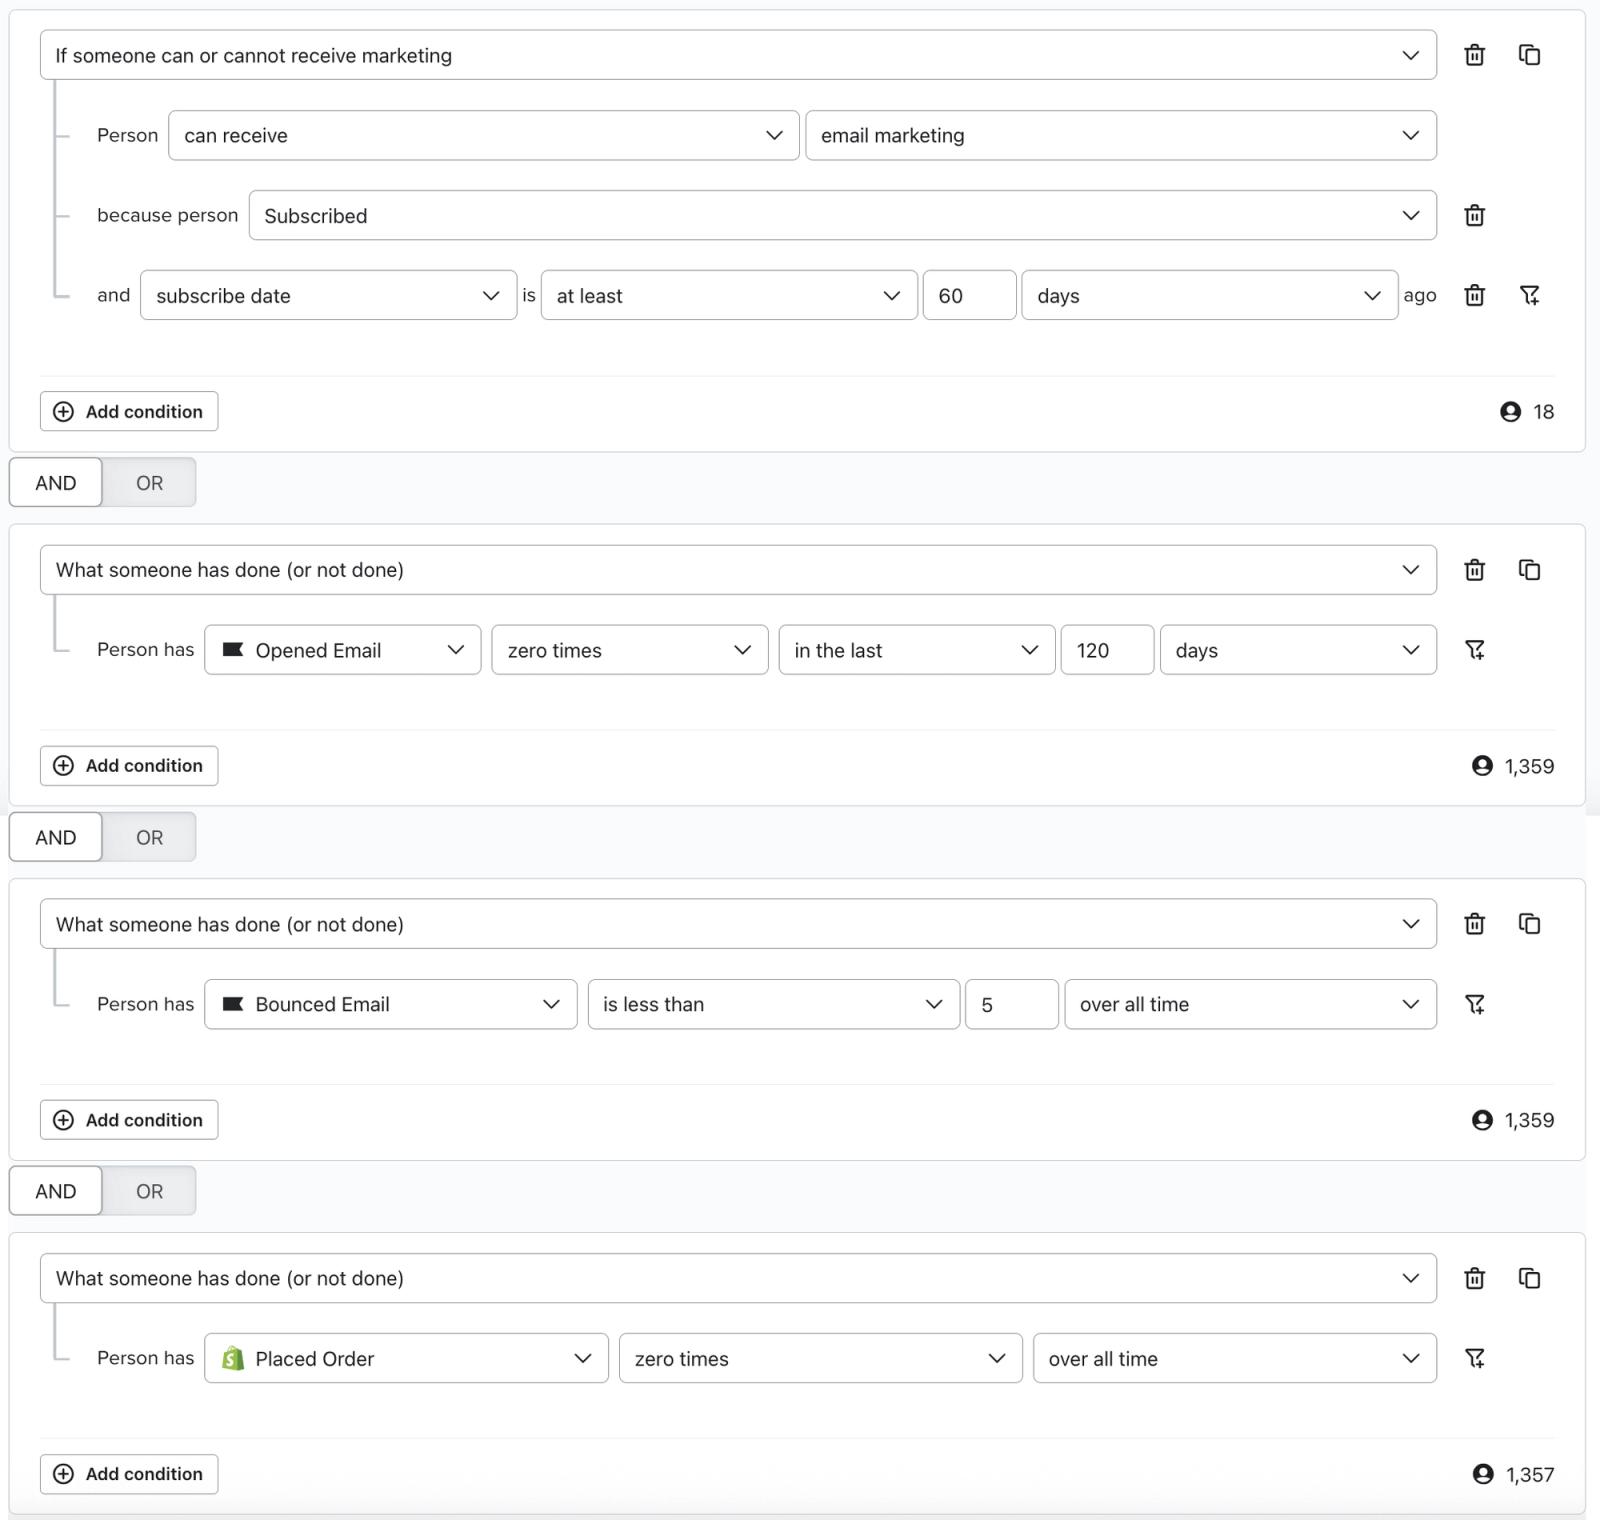
Your second segment should have exactly the same conditions as the first, except they should have never placed an order:
- Are subscribers and subscribed more than 60 days ago
- Haven't opened an email in the past 120 days
- Haven't clicked an email in the past 120 days
- Have had an email bounce less than 5 times over all time
- Have placed an order 0 times over all time
Send the campaign
Send a campaign to these unengaged subscribers. Consider the following best practices for re-engagement campaigns:
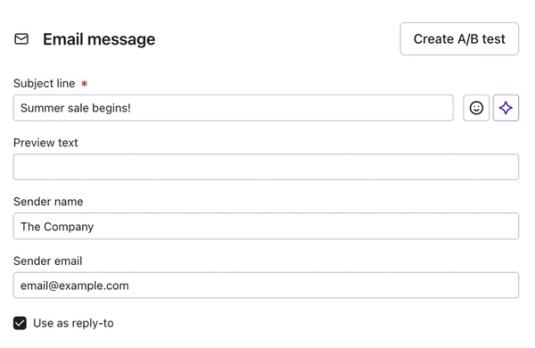
- Make the email personal. Try using a text-only email for a personal feel.
- Use the
{{ first_name }}tag to customize the email for each recipient. - Try a friendly Sender name, like "Marissa from Klaviyo."
- Include a prominent unsubscribe and manage preferences link, in case subscribers want to update their settings rather than unsubscribe completely.
- Include content about any new products that have been released since they've become inactive.
- Consider offering a discount to entice them to buy.
Include prominent unsubscribe and manage preferences links, in case subscribers want to update their settings rather than unsubscribe completely. You may also want to consider segmenting your newsletter by sending frequency to avoid bombarding subscribers with emails and causing them to become inactive in the first place.
Use gradual sending
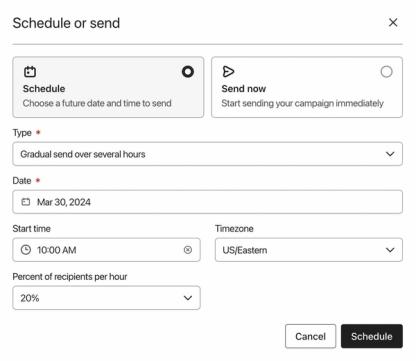
When you're ready to send your campaigns, consider Gradual send. This distributes deliveries over a longer span of time, which can be a safer option if you're sending to a large group of unengaged people. Gradual send isn't available for A/B tests or campaigns with follow-up messages enabled.
- In the campaign scheduler, select Schedule, then choose Gradual send under Scheduling options.
- Set the percentage of recipients per batch and the send date, time, and timezone. If Send every is available, choose the interval between batches.
- Click Schedule message.
After you've sent the campaigns, monitor the results closely to see if this is something you would like to repeat annually. An open rate above 10% can be a useful signal, but also review clicks, conversions, unsubscribes, and spam complaints before deciding whether the campaign was successful. Apple Mail Privacy Protection (MPP) can record opens without a recipient reading your email, so opens alone do not establish engagement. Learn how to identify Apple Privacy opens. Compare the results for the 2 segments; you may only want to email the more engaged segment for future re-engagement campaigns.
Suppress profiles that don't engage
You may also want to suppress profiles who received either re-engagement campaign but did not open or click either campaign. Give recipients time to respond before building this segment. Suppression stops future marketing emails while keeping the profiles and their data in your account.
Create a segment using the conditions below. Replace Campaign Name 1 and Campaign Name 2 with the names of your re-engagement campaigns. If you sent only 1 campaign, use only that campaign’s name. Join the receipt group and all the no-engagement conditions with AND:
- Received Email at least once over all time where Campaign Name equals Campaign Name 1. Add another Received Email condition for Campaign Name 2 and join these 2 receipt conditions with OR.
- Opened Email 0 times over all time where Campaign Name equals Campaign Name 1. Add a separate condition for Campaign Name 2 and join them with AND.
- Clicked Email 0 times over all time where Campaign Name equals Campaign Name 1. Add a separate condition for Campaign Name 2 and join them with AND.
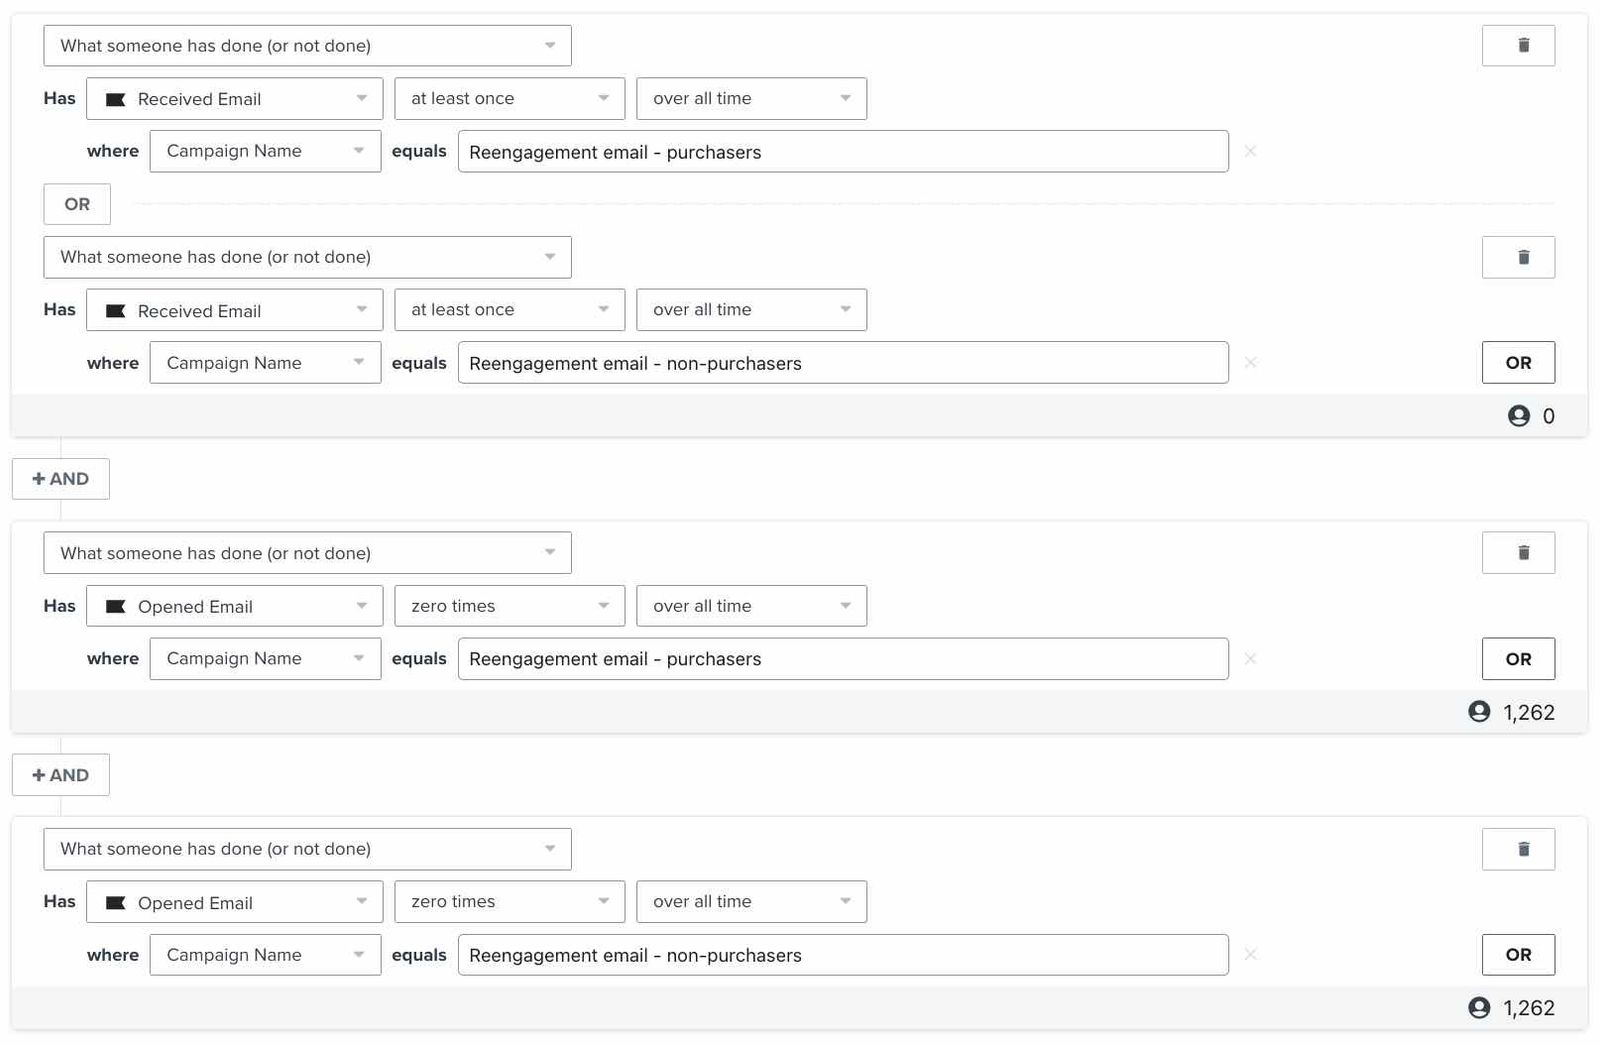
- Create the segment, then export it to a CSV file. Remove all columns except Email.
- Navigate to Audience > Profiles and click View suppressed profiles.
- Open More actions > Import suppressions. If your page shows an Import button instead, click that button.
- Select your CSV file, then click Upload. Wait for the confirmation that your suppressions list has been updated.
If a profile was manually suppressed and then unsuppressed, it cannot be manually suppressed again within 90 days of the original suppression. This limit does not apply during the first 30 days after a new account is created.
Additional resources
Check out flows for re-engaging and sunsetting subscribers: