How to Add Klaviyo Onsite Tracking to Your Booking Engine
This guide will walk you through integrating Google Tag Manager (GTM) with your Property Management System (Mews, Cloudbeds, or Guesty) using the Klaviyo Hotels Tag.
By the end of this setup, you’ll be able to track key website visitor behaviors like Active Onsite, Viewed Listing, and Started Checkout directly in your Klaviyo account. This will allow you to easily set up revenue-driving automations, such as Browse Abandonment and Abandoned Cart flows, and create highly-targeted segments.
Before you begin, if you don't already have a Google Tag Manager account, please follow Google's guide on how to set one up.
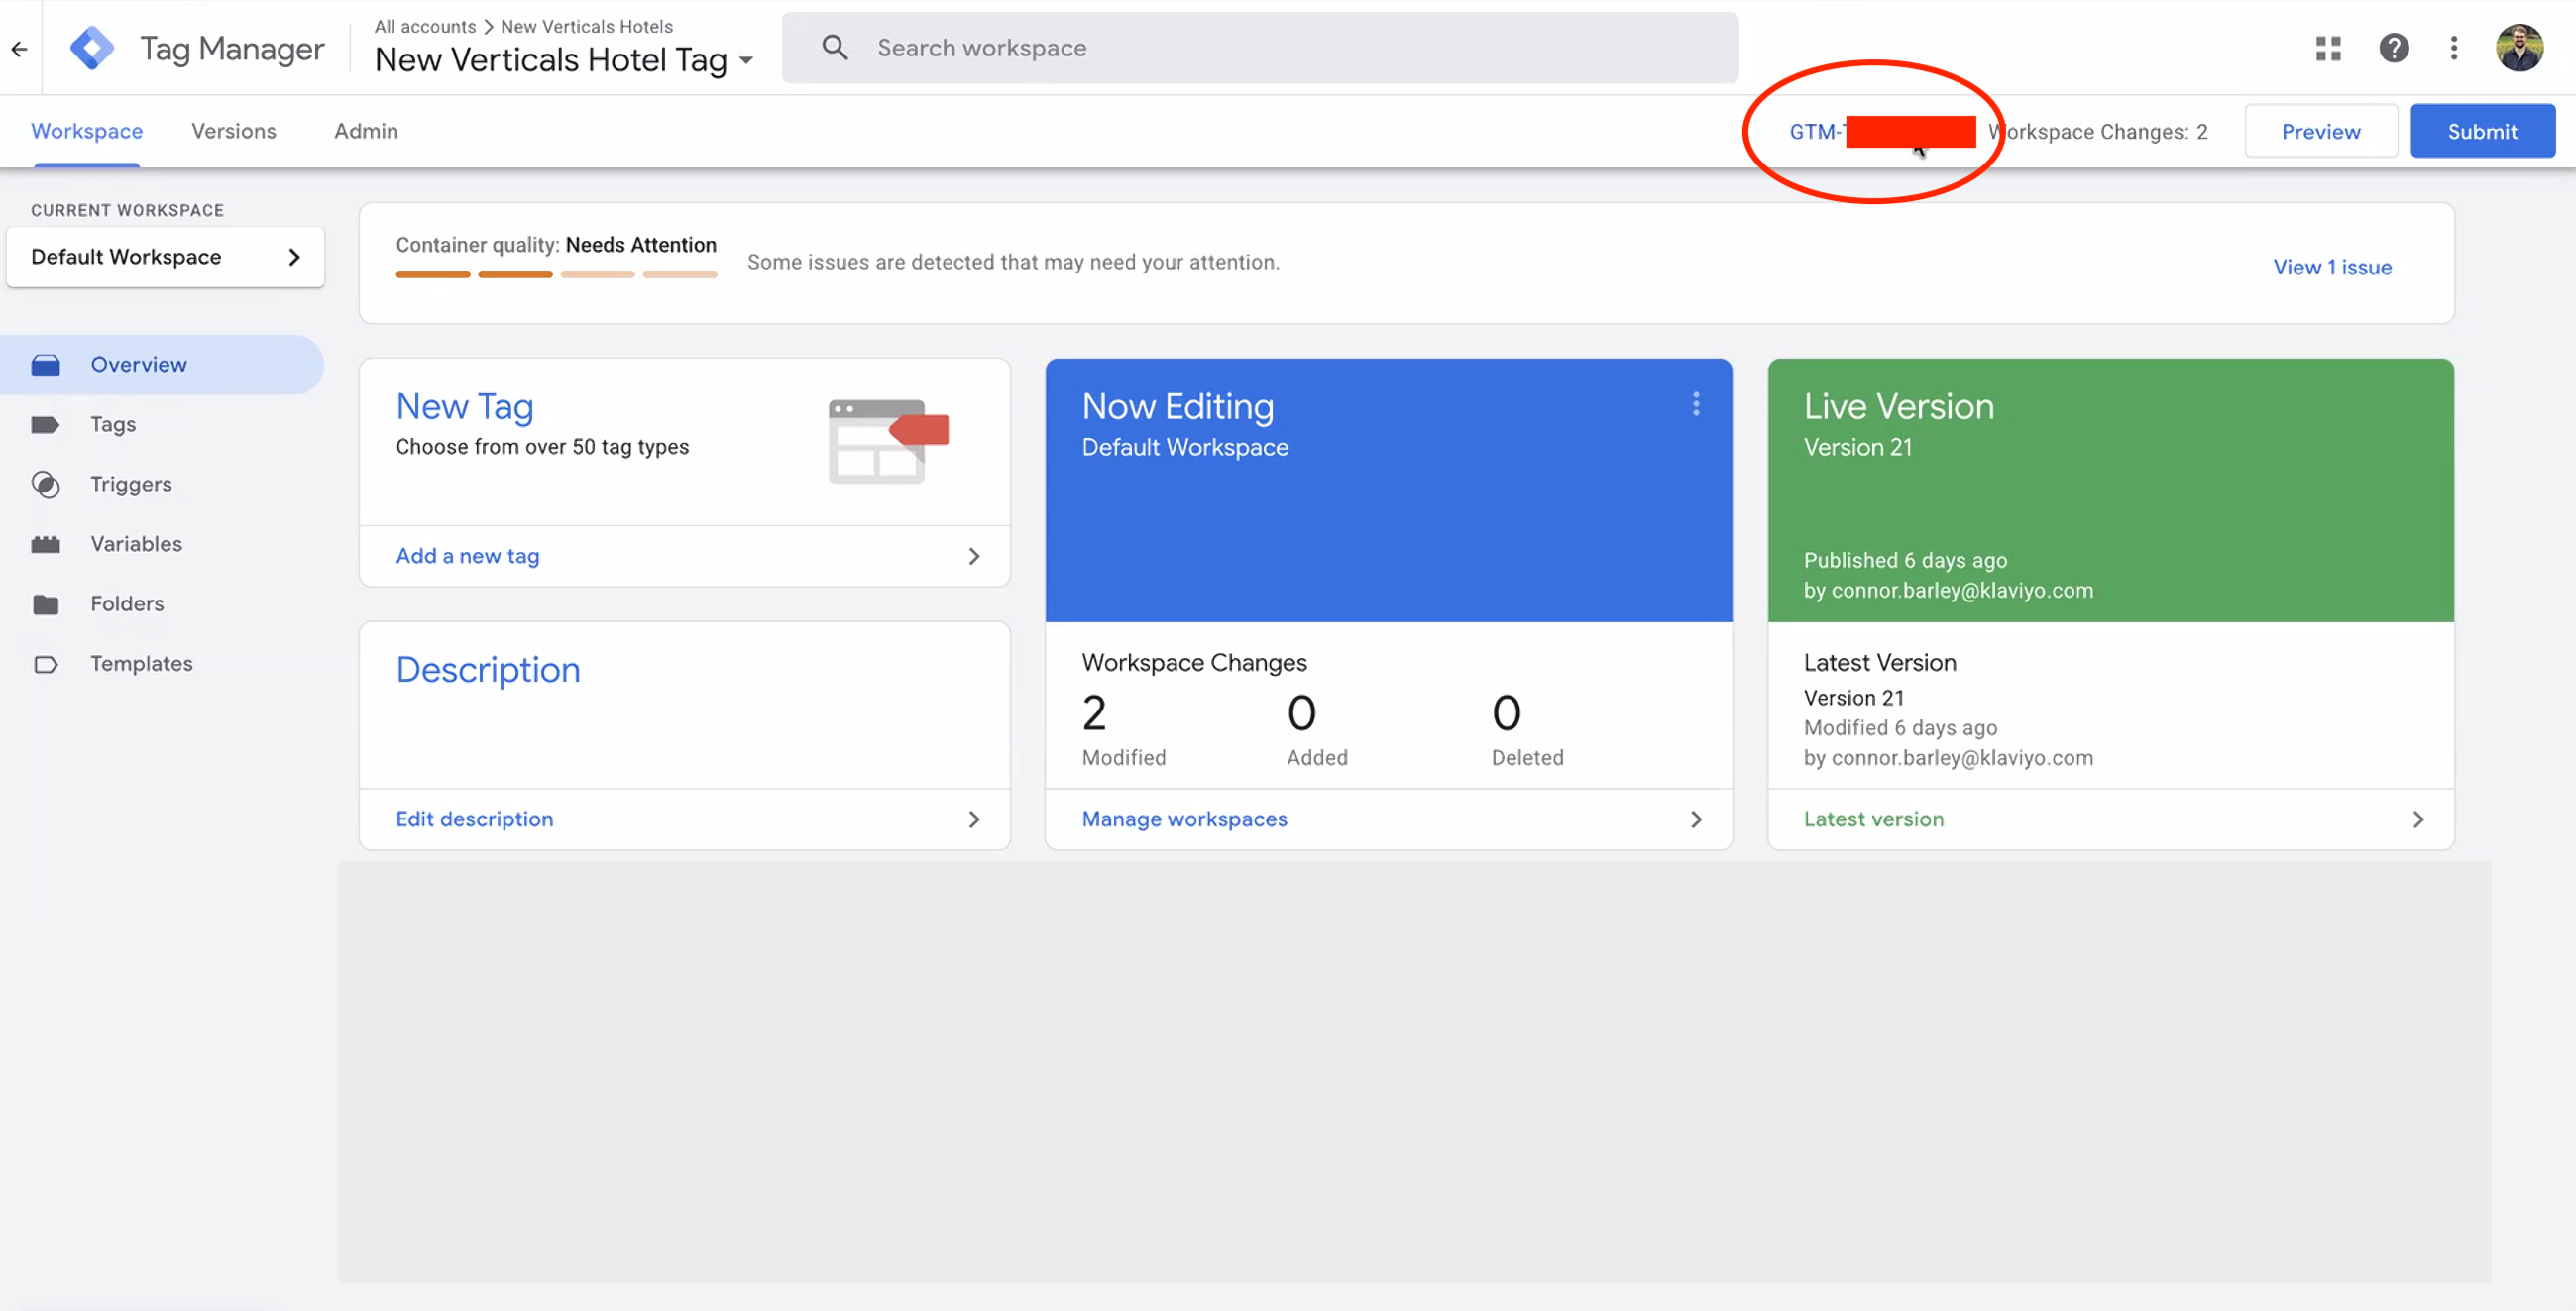
Step 1: Locate Your GTM Container ID
Before you begin, you need to identify the specific container you want to use.
- Log into your Google Tag Manager account.
- Select the Container associated with your hotel’s website.
- At the top of the window, next to the "Submit" and "Preview" buttons, you will see your Container ID (it looks like
GTM-XXXXXXX). - Copy this ID to your clipboard.
Step 2: Connect GTM to Your Property Management System (PMS)
You need to tell your booking engine to "listen" to your GTM container. Follow the steps for your specific platform below:
For Cloudbeds
- Log into Cloudbeds.
- Click on the Account Icon > Settings > Booking Engine.
- Select the Analytics tab.
- Paste your Container ID into the GTM field and save.
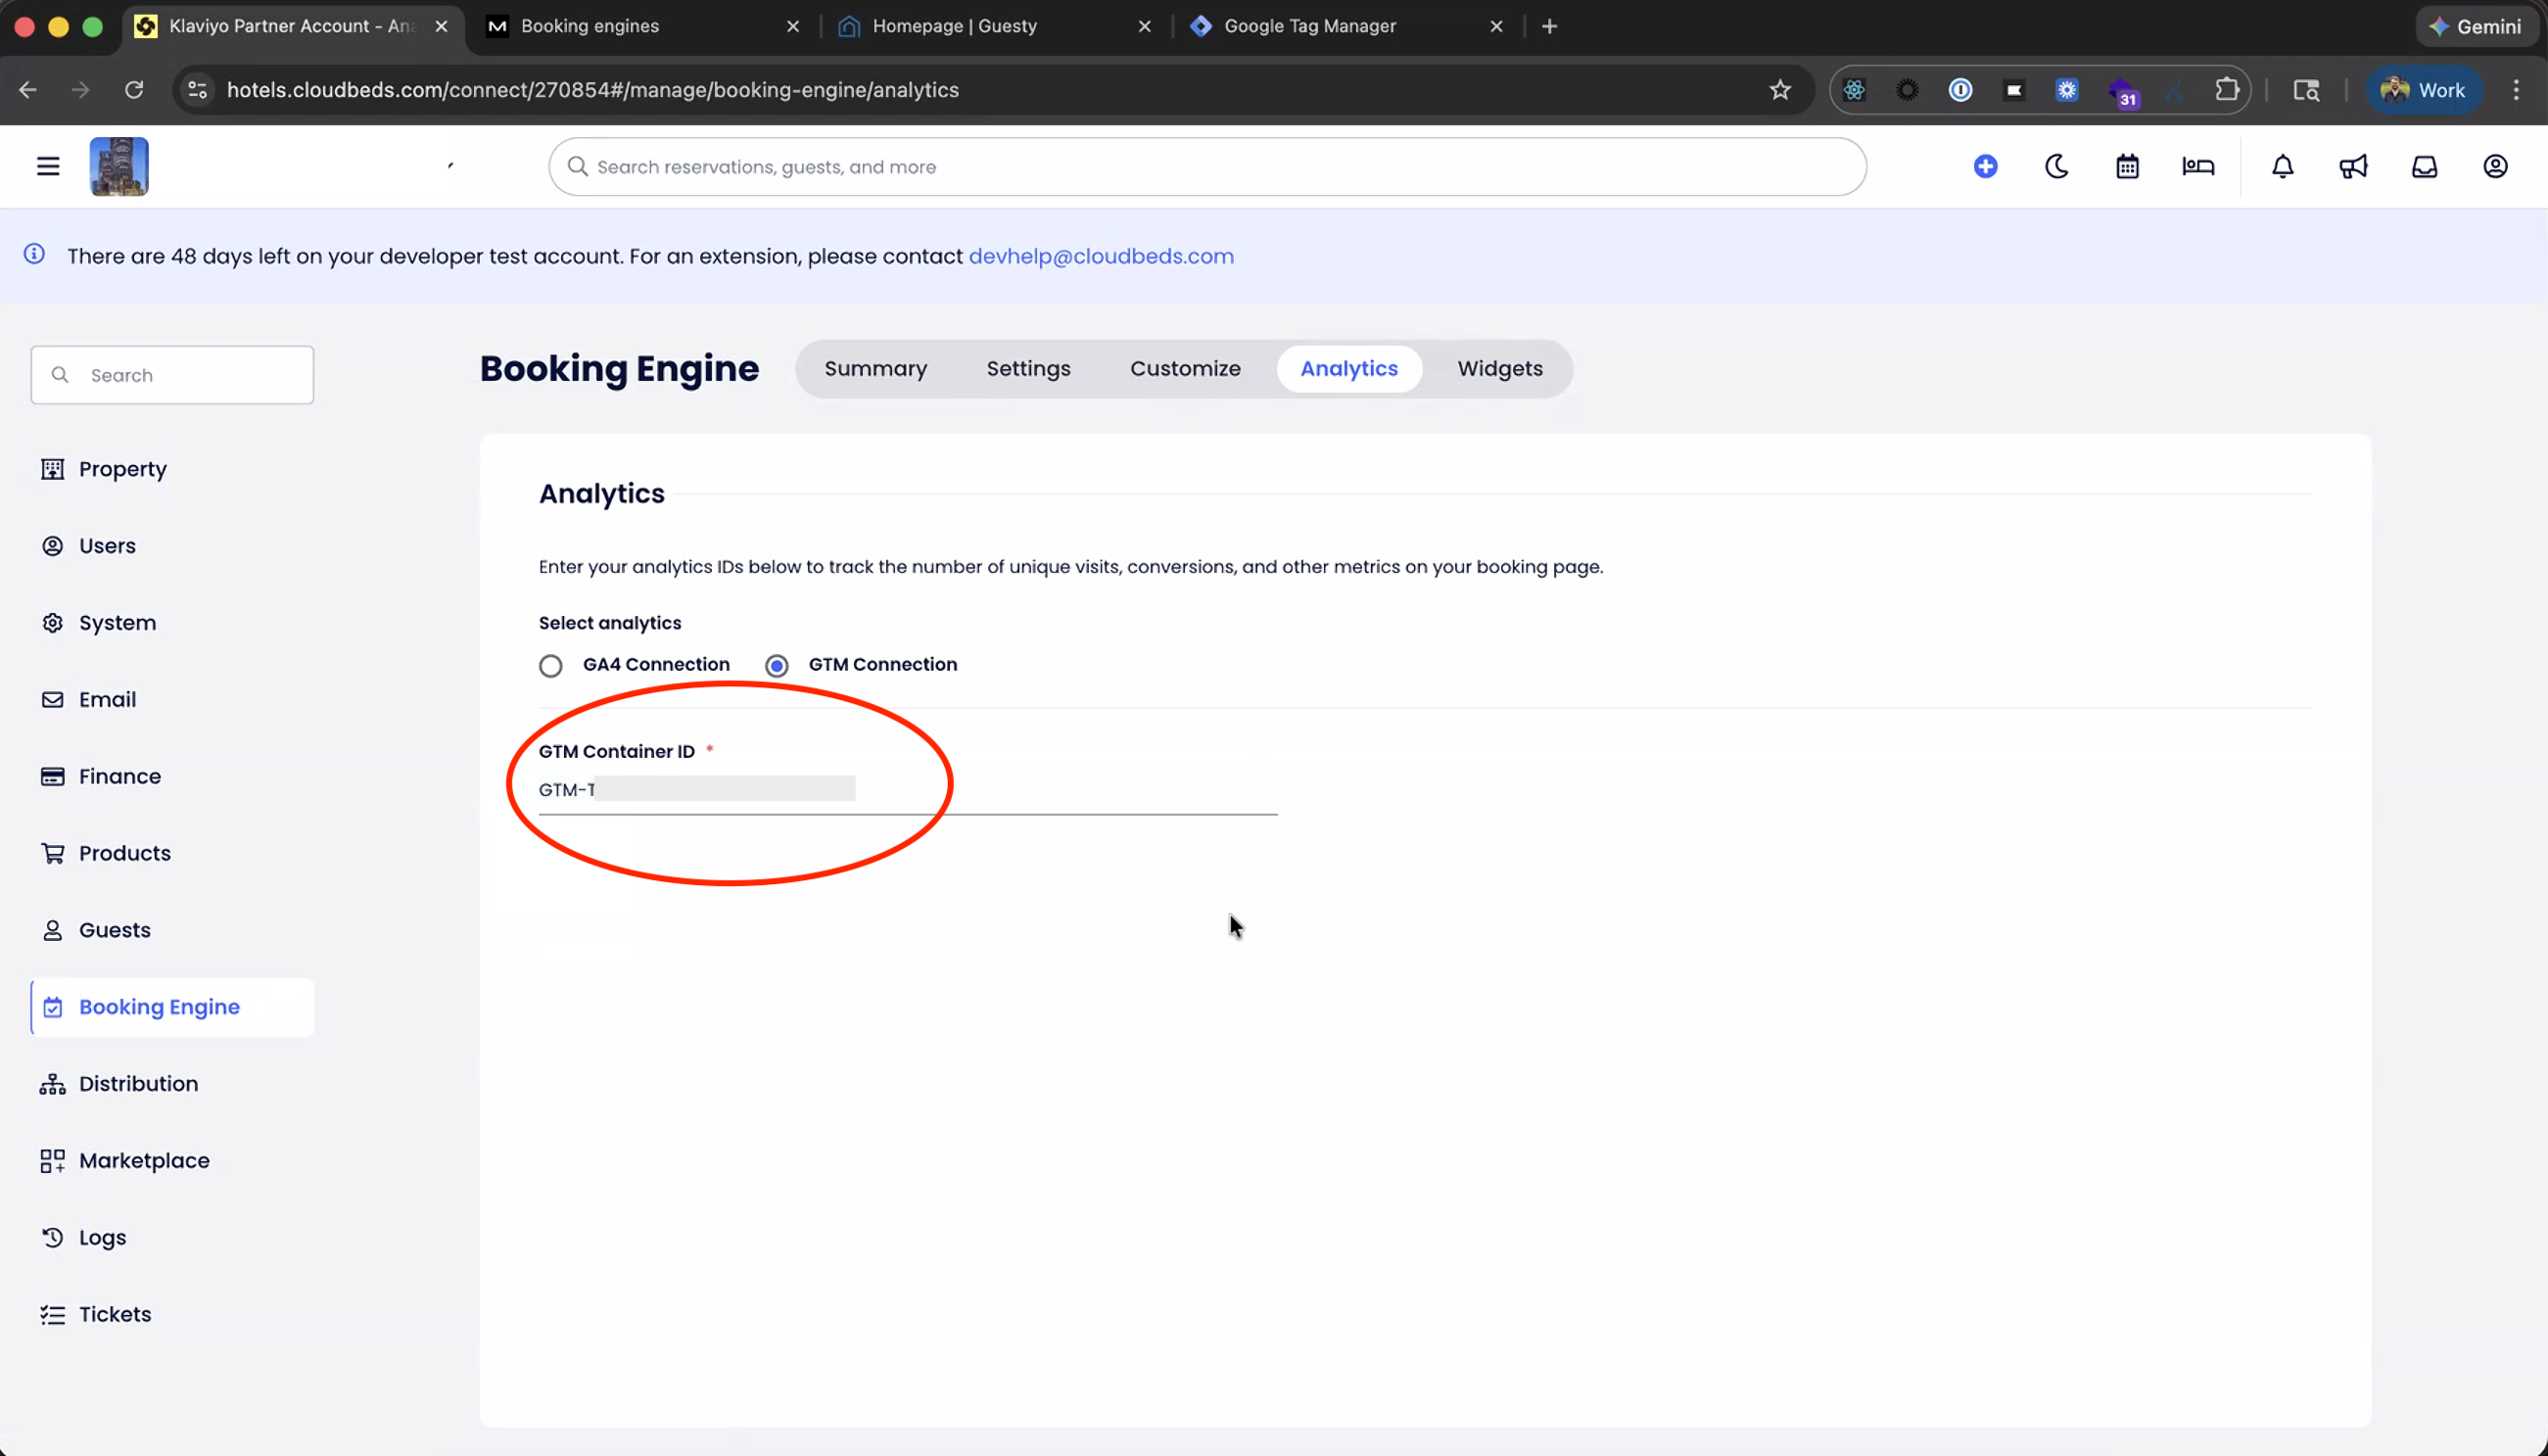
For more instructions, follow the Cloudbeds guide.
For Mews
- Log in to Mews.
- Go to Settings > Services.
- Select a Bookable service.
- Click on Booking engines.
- Select the booking engine that you want to track with Google Tag Manager.
- Under Google tag manager ID, paste your Container ID.
- Click Save.
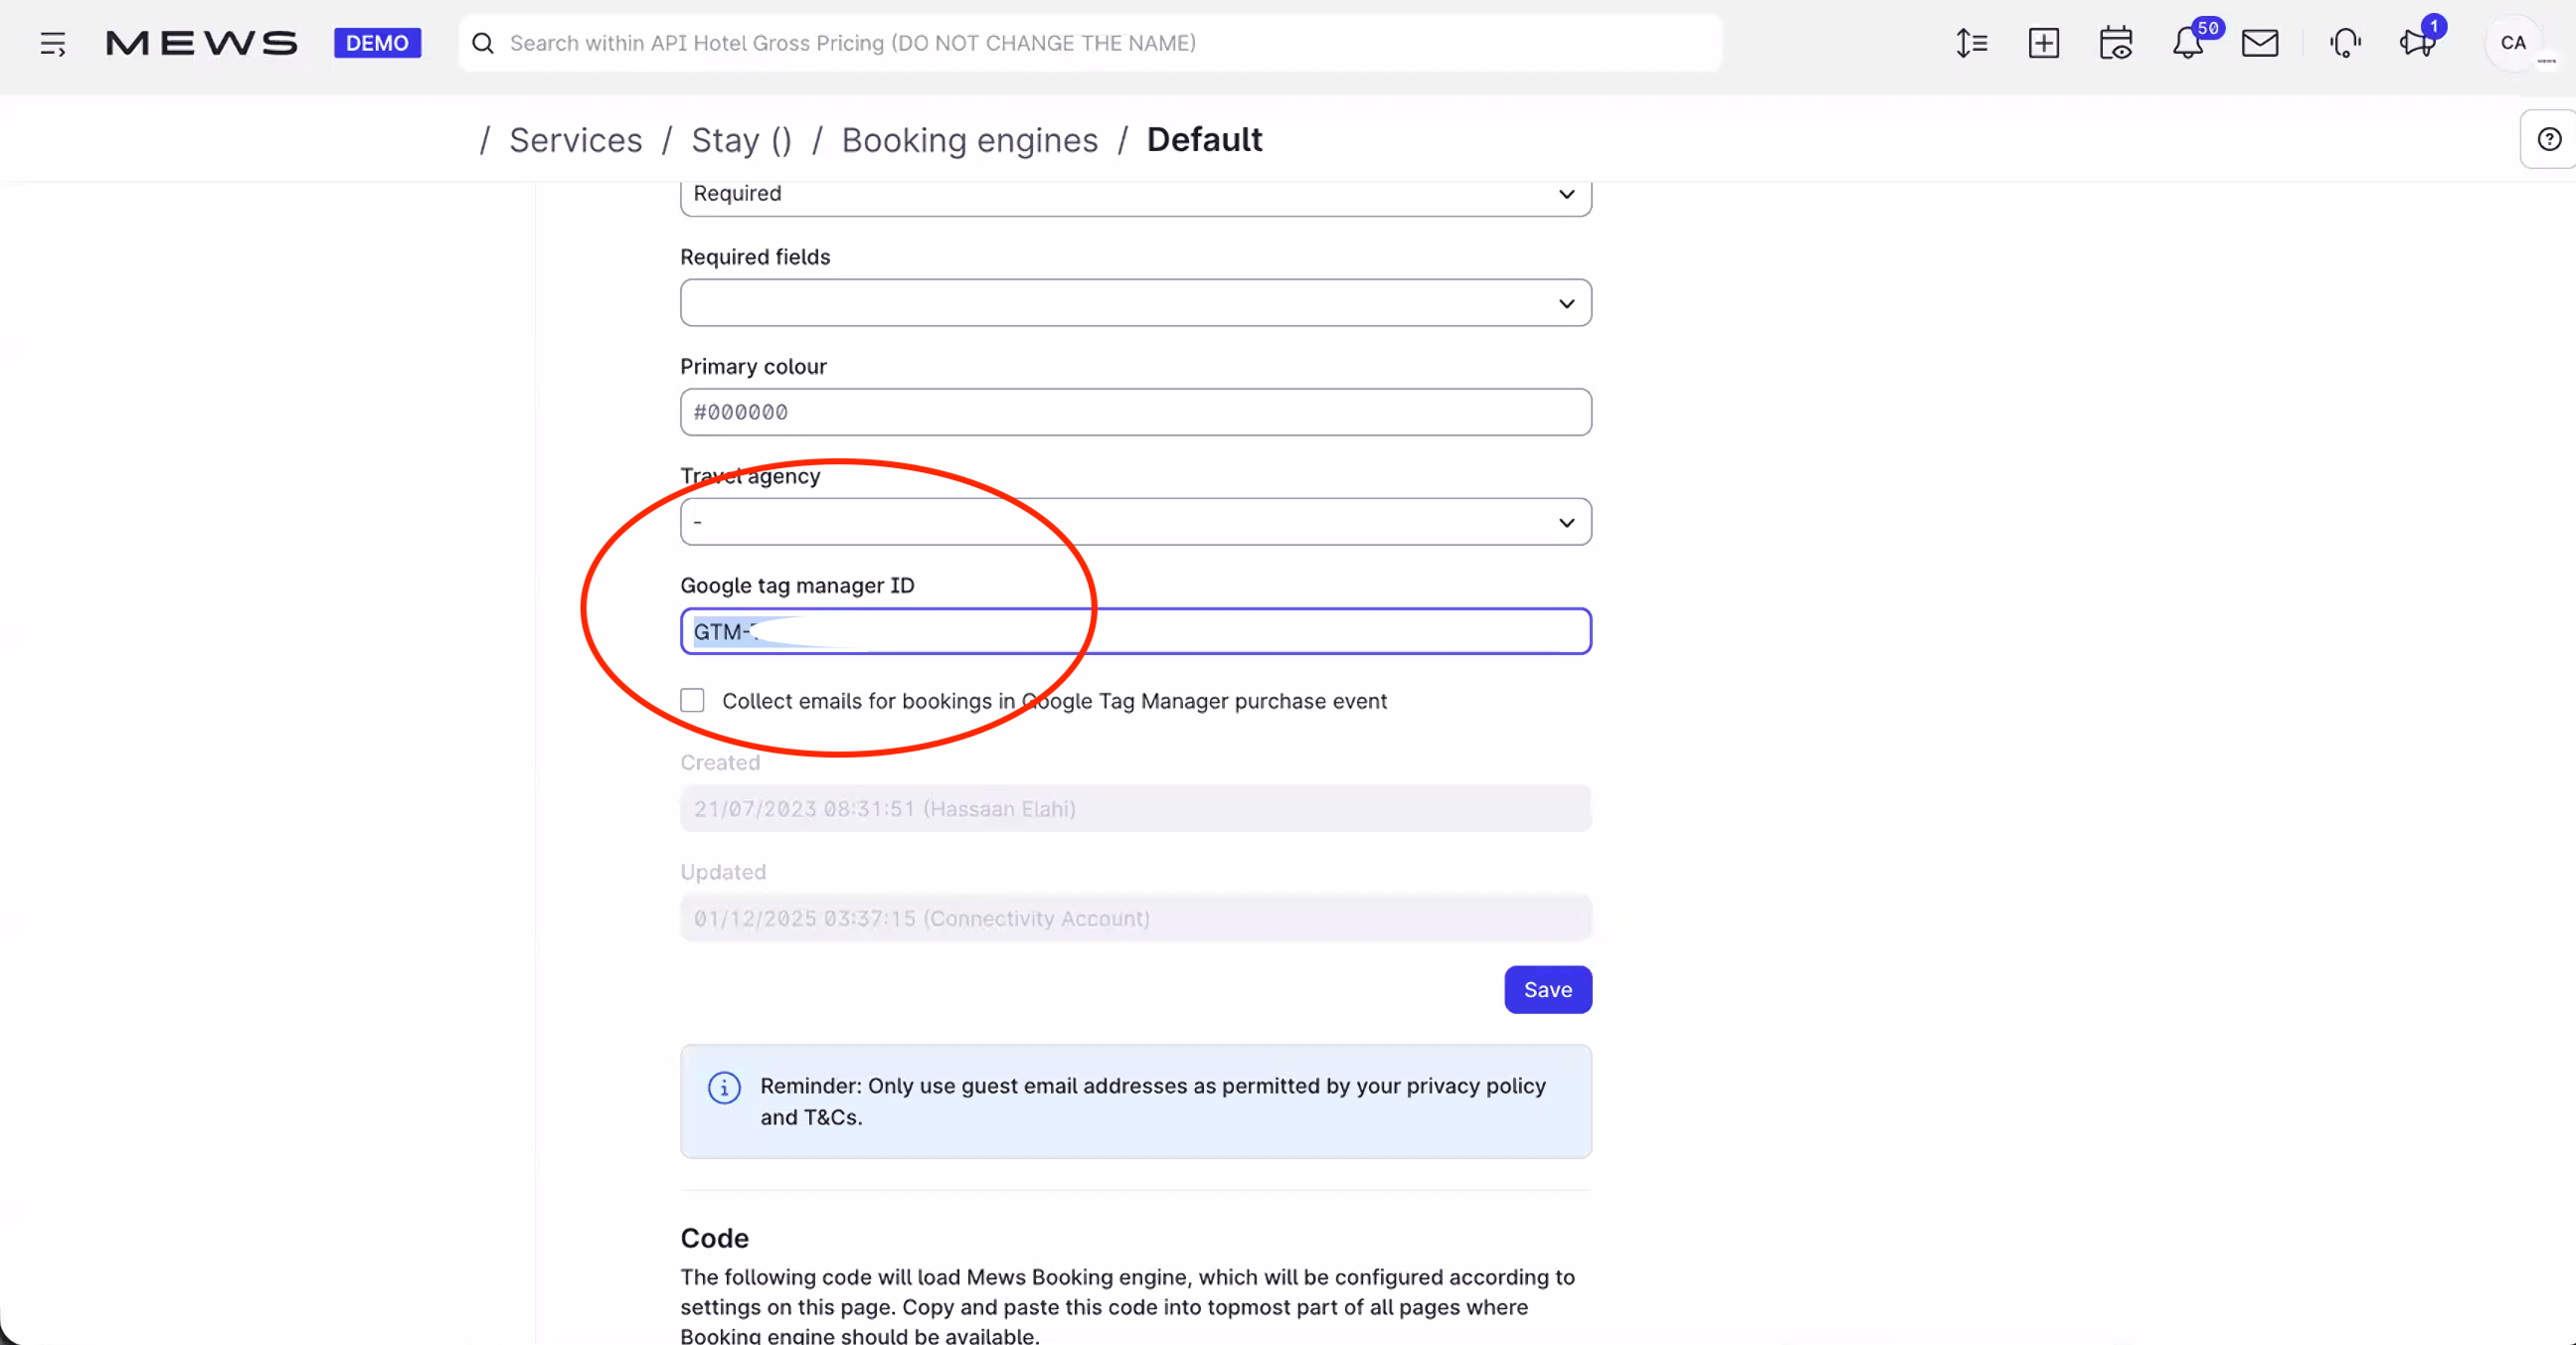
For more instructions, follow the Mews guide.
For Guesty
- To install the code on your site:
- Log in to Guesty.
- Select the Operations dropdown at the top, then select Growth > Distribution.
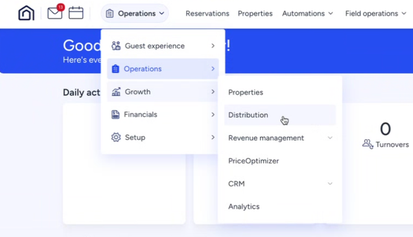
- Select Guesty Booking Engine.
- Click the triple dots next to your booking engine and select Edit Booking Engine.
- Scroll to the Web analytics section and past your Container ID.
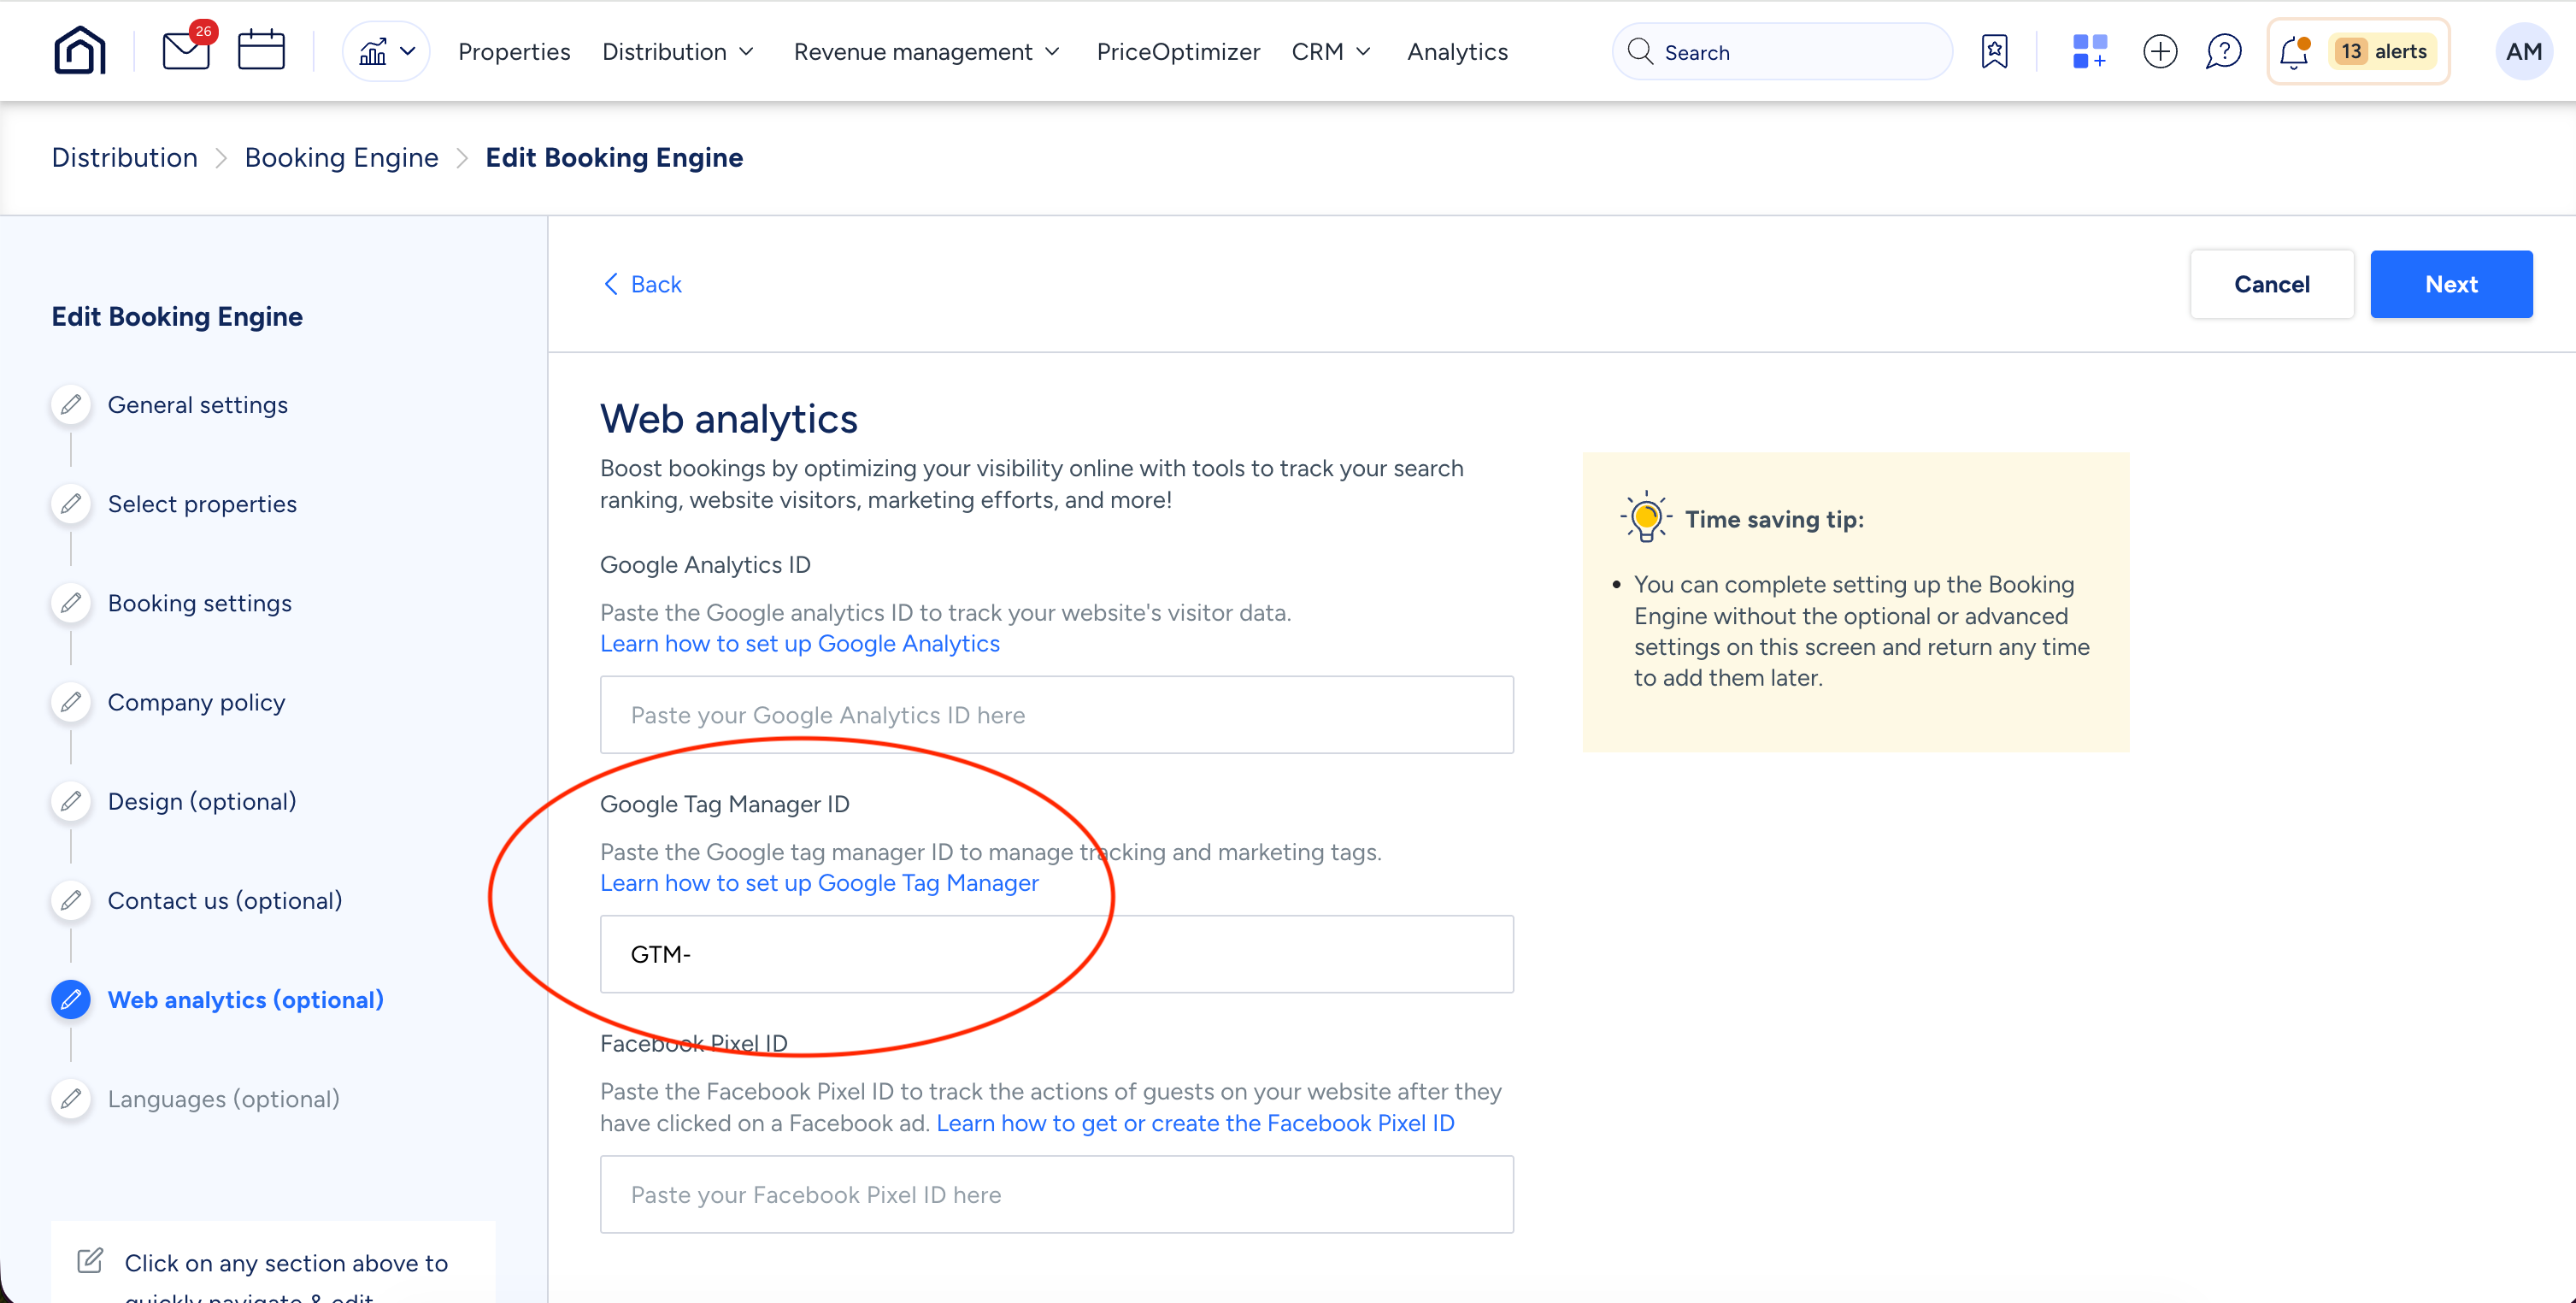
- Select Save Booking Engine.
For more instructions, follow the Guesty guide.
Step 3: Add the Klaviyo Hotels Template in GTM
Now that GTM is connected to your PMS, you need to add the Klaviyo-specific tracking logic.
- Back in Google Tag Manager, click Templates on the left-hand sidebar.
- In the Tag Templates section, click Search Gallery.
- Search for "Klaviyo Hotels Tag".
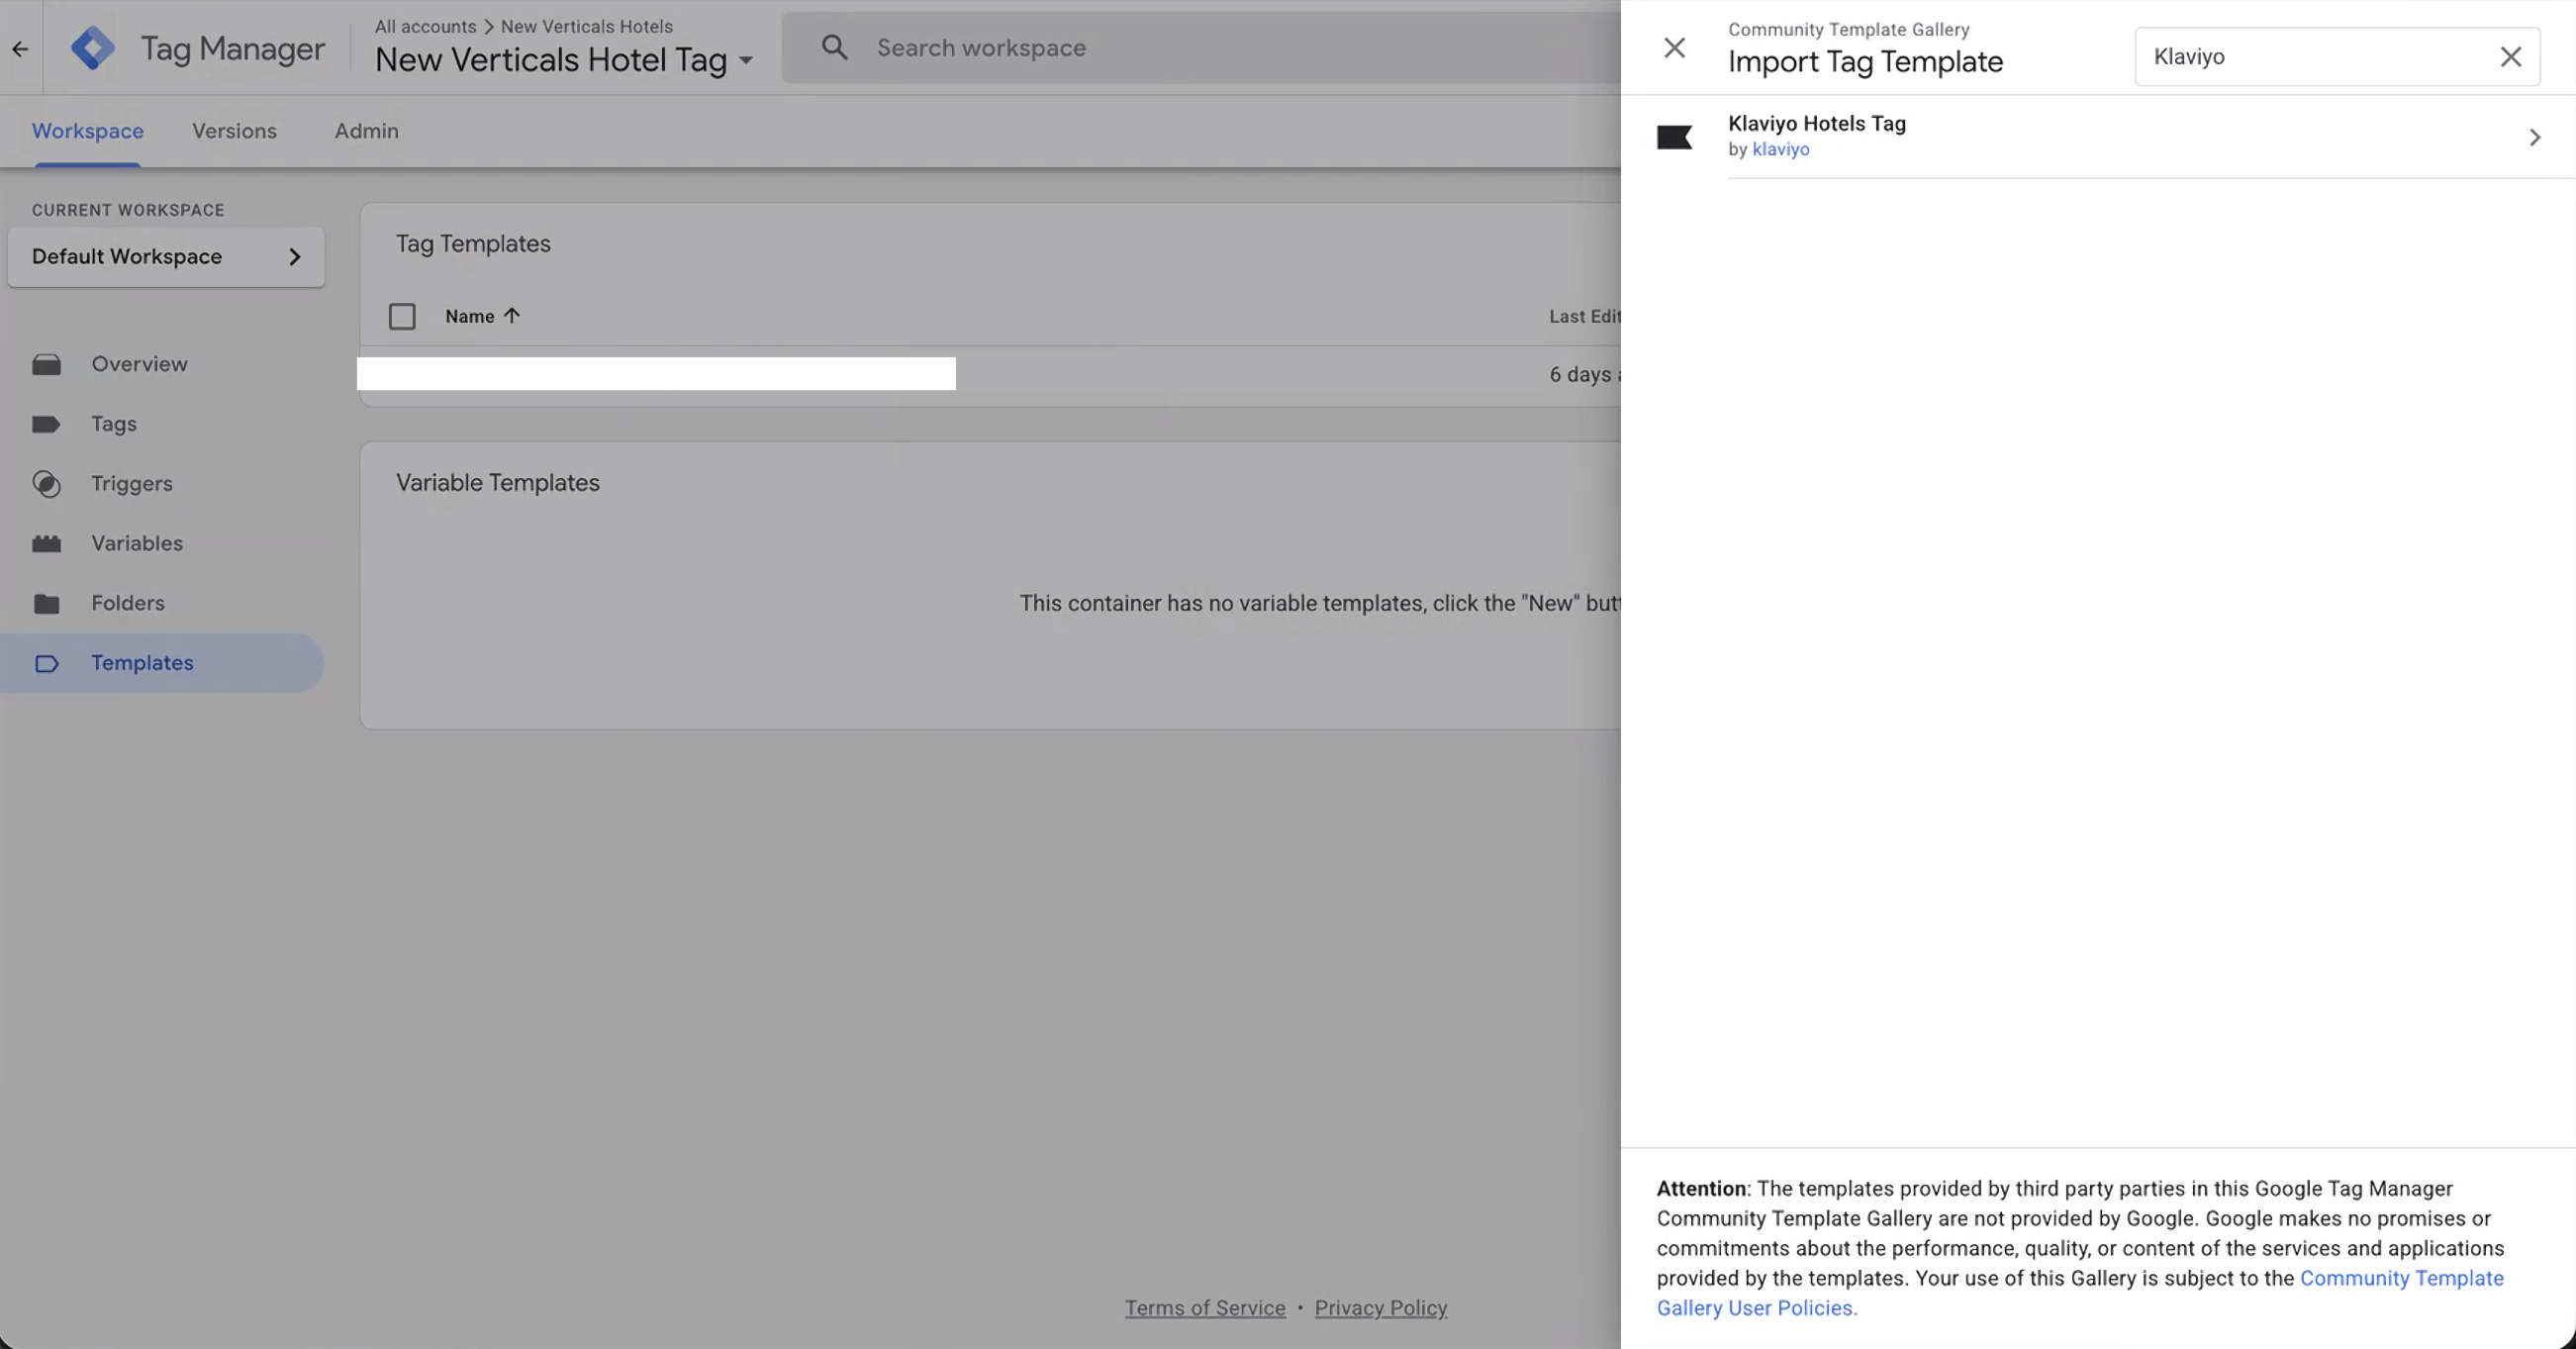
- Select the template and click Add to Workspace.
- Confirm by clicking Add again.
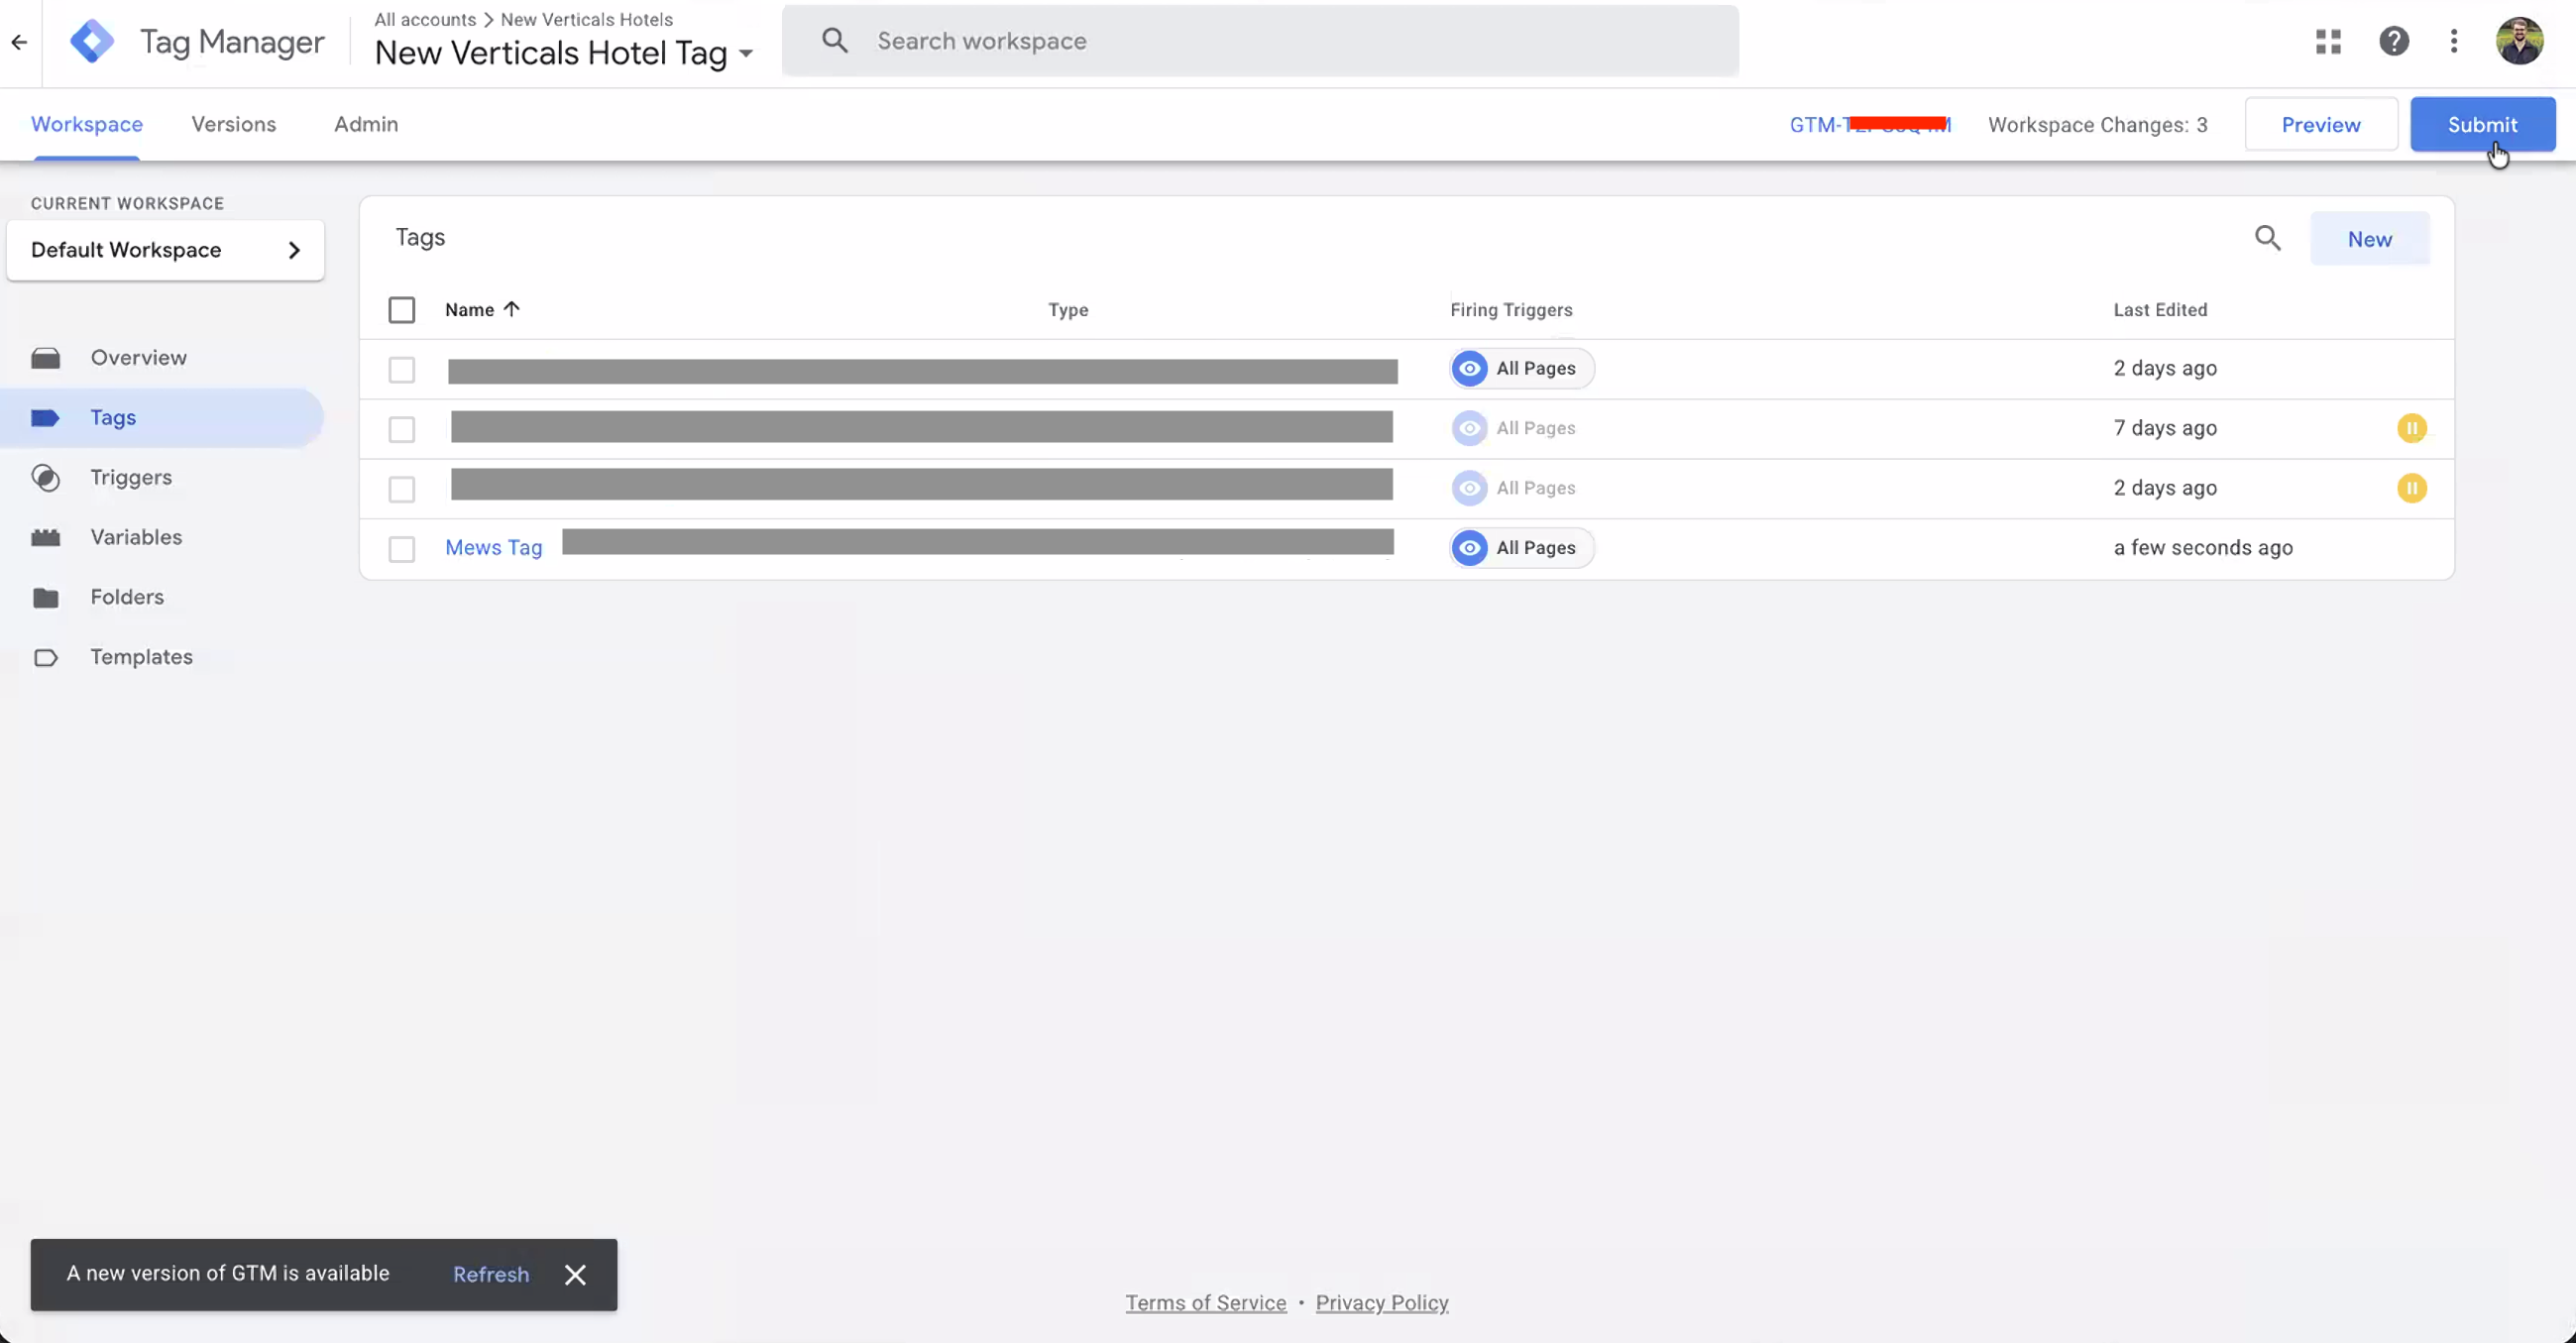
Step 4: Create and Configure Your Tag
This step connects the template to your specific Klaviyo account.
- Go to Tags on the left sidebar and click New.
- Name your tag (e.g.,
Klaviyo Hotels Tracking). - Click Tag Configuration and select the Klaviyo Hotels Tag you just added.
- Enter your Klaviyo Public API Key: This is the 6-character identifier found in your Klaviyo Account Settings (see our guide to finding your public key).
- Select your PMS: Choose Mews, Cloudbeds, or Guesty from the dropdown menu.
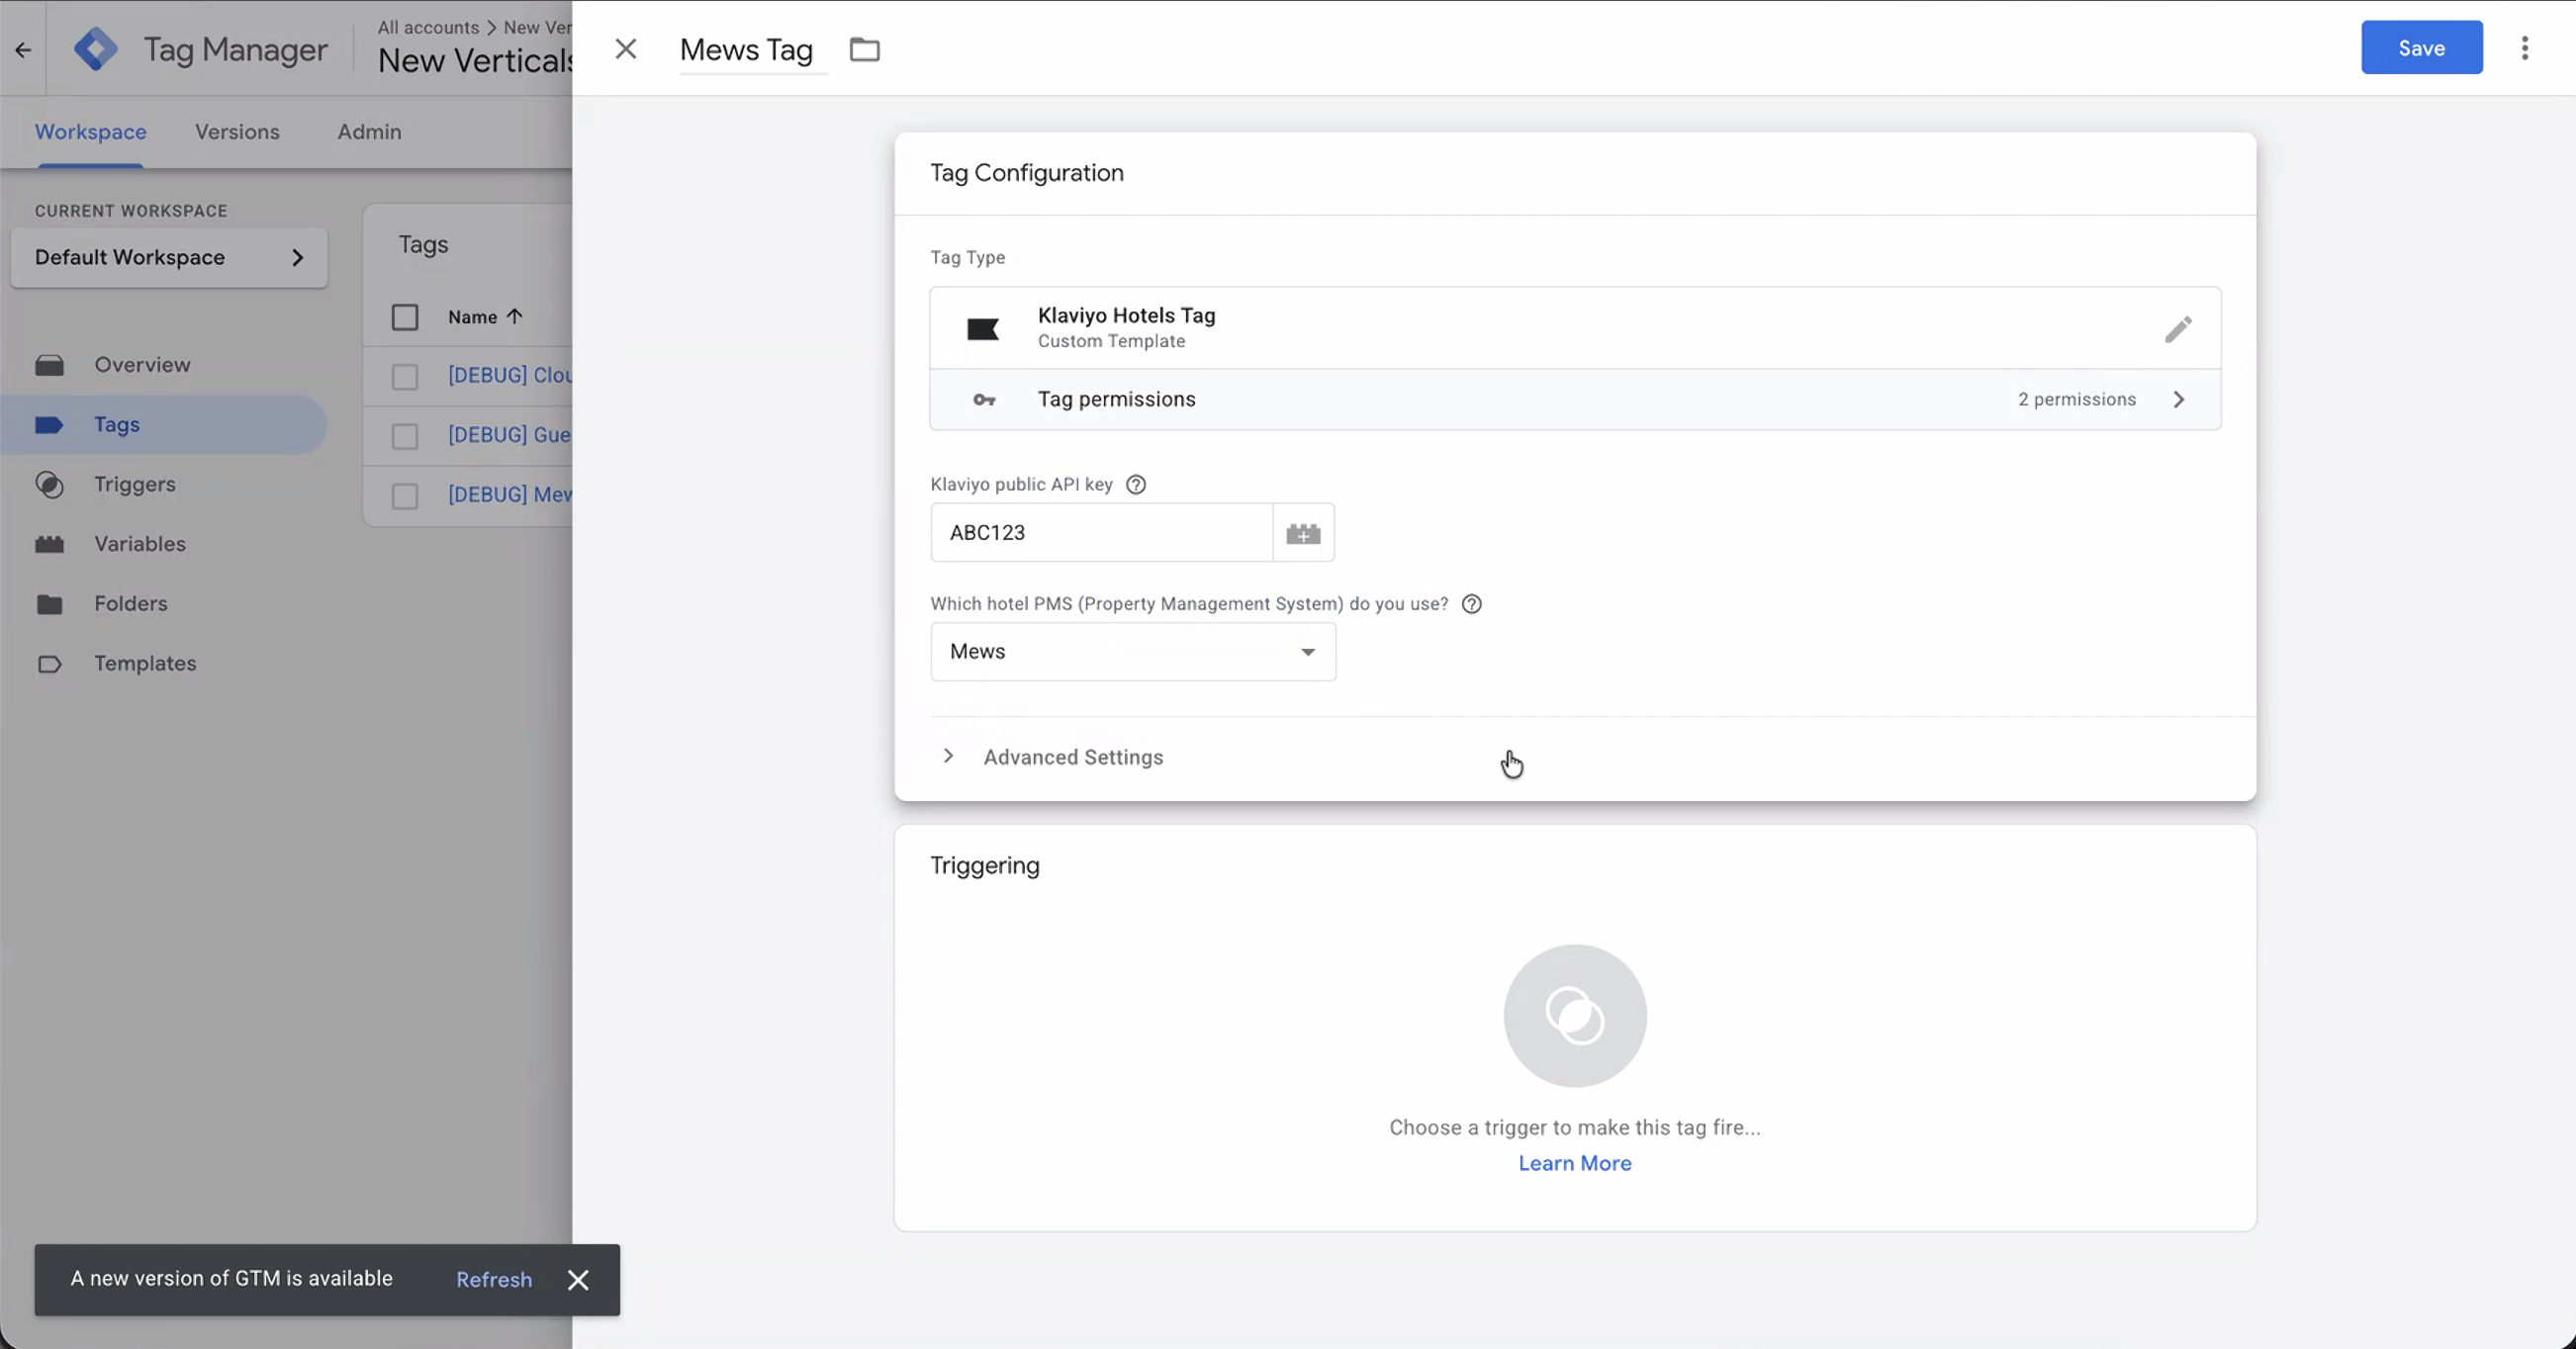
- Set the Trigger: Hover over the Triggering section. Click on the pencil that appears in the top right corner. Select All Pages.
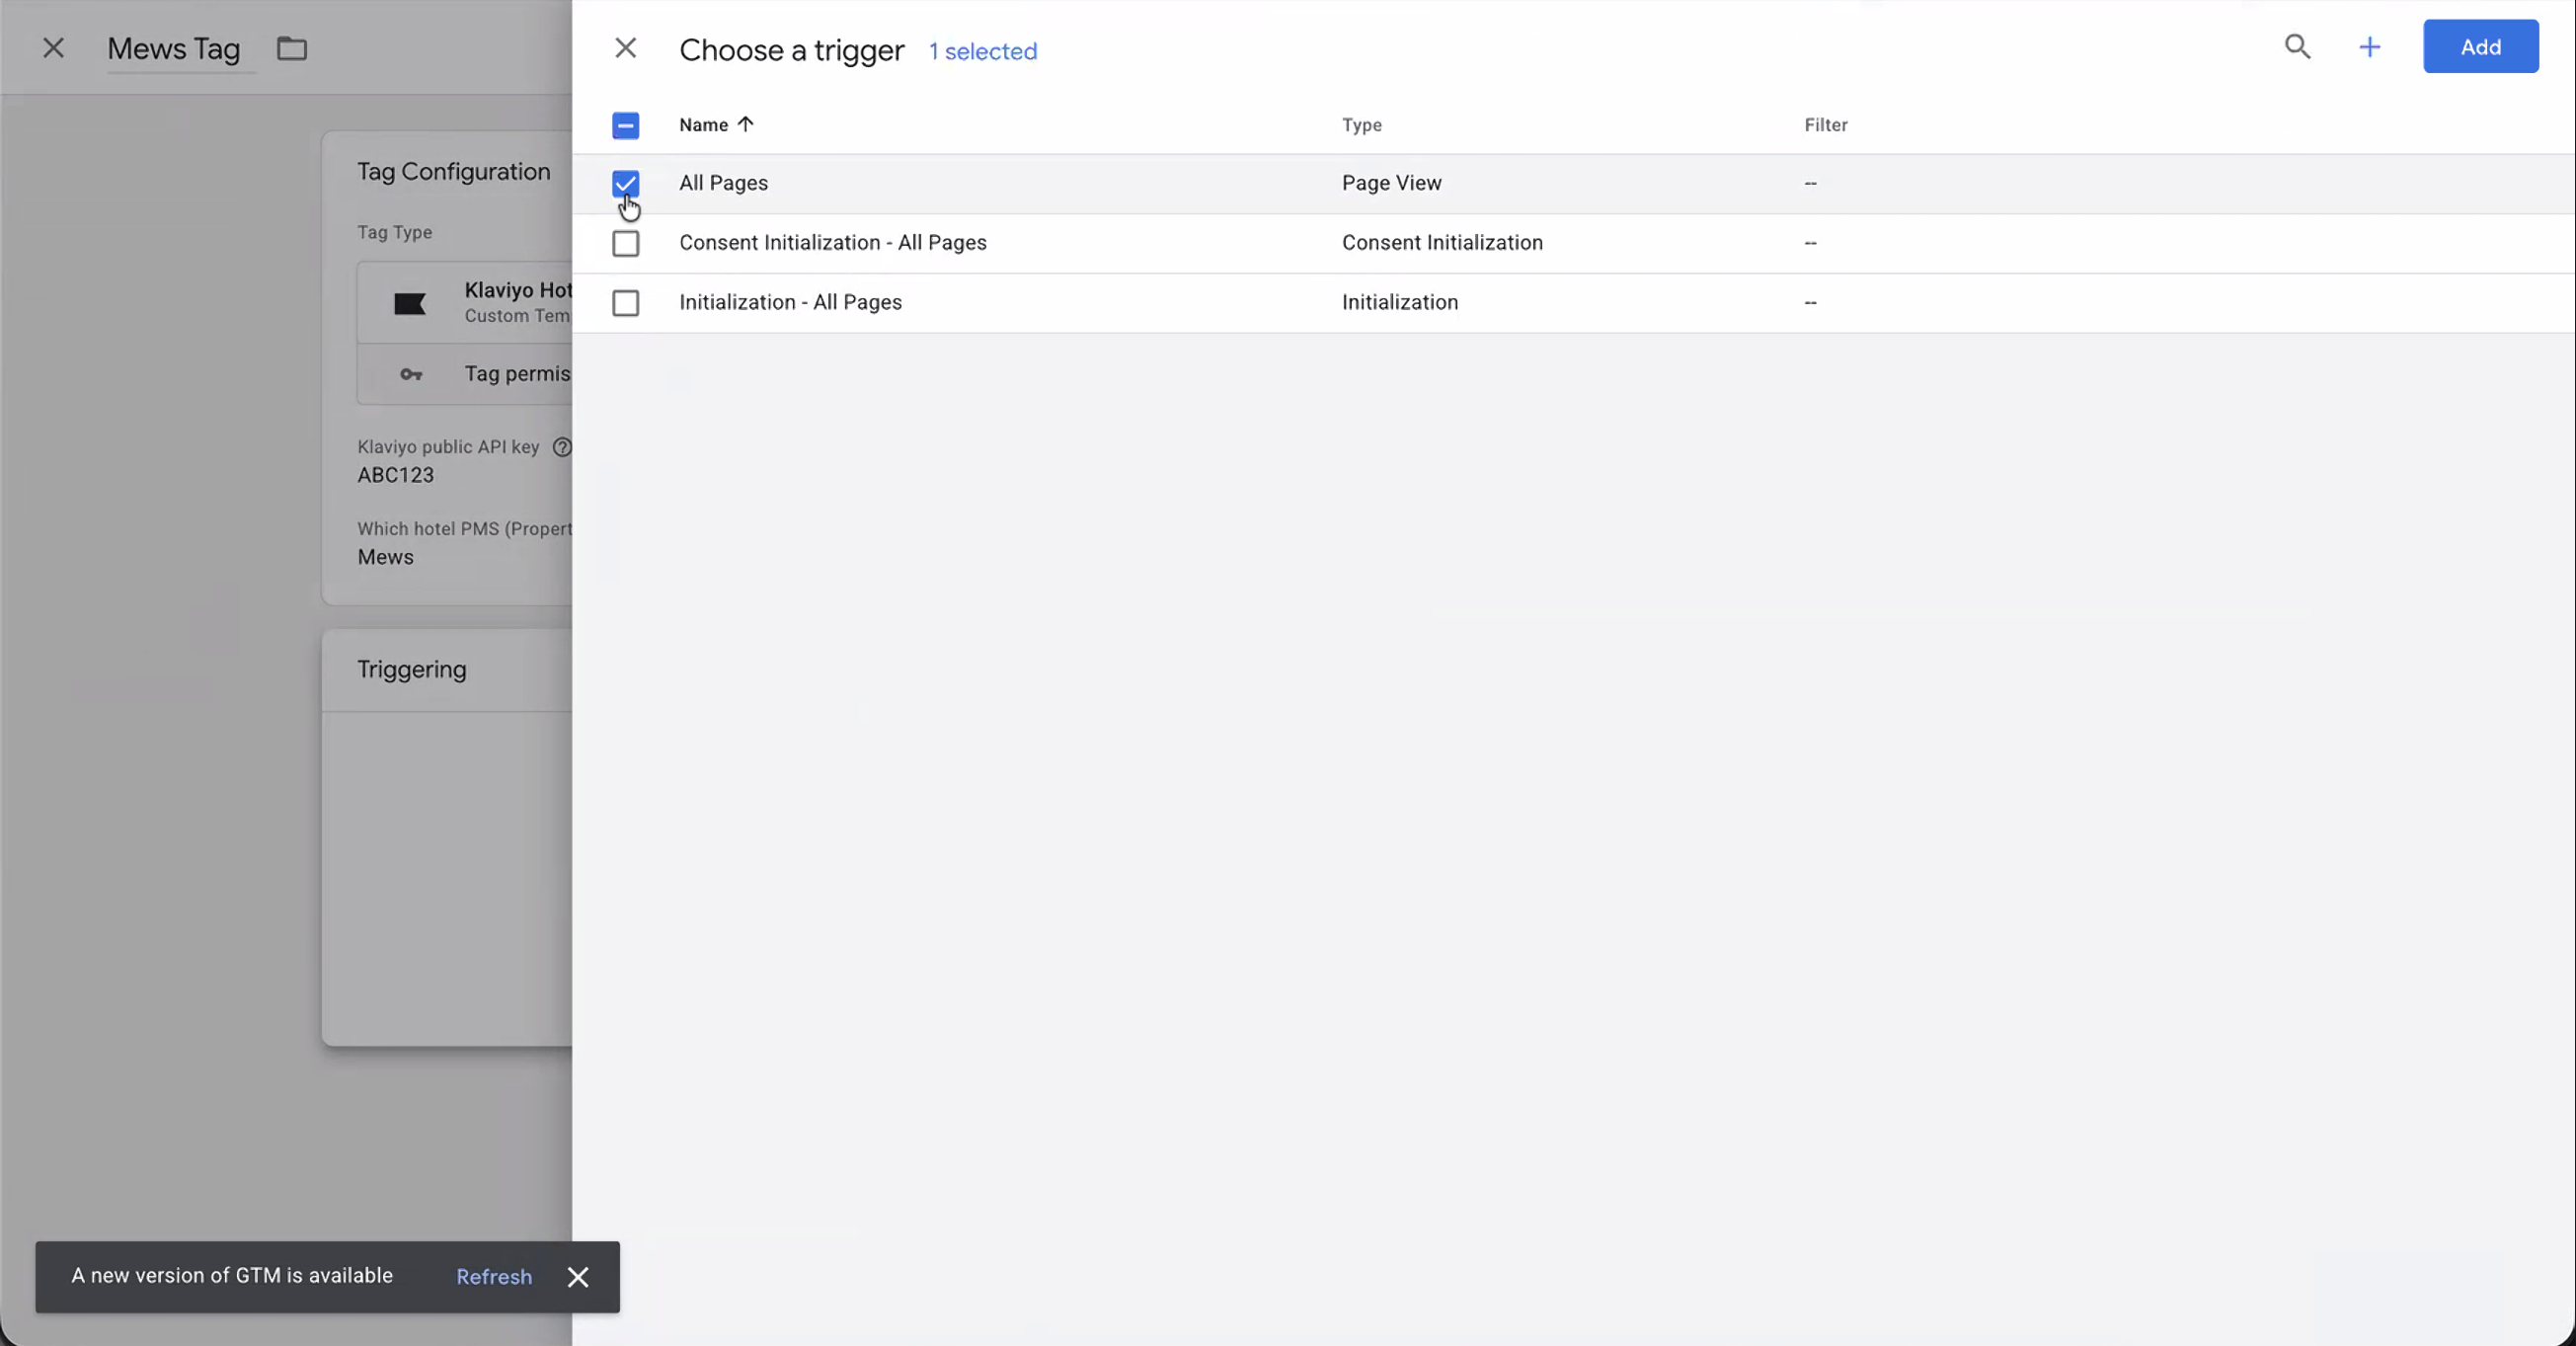
- Give the tag a name (e.g. [Cloudbeds/Mews/Guesty] Tag). Click Save.
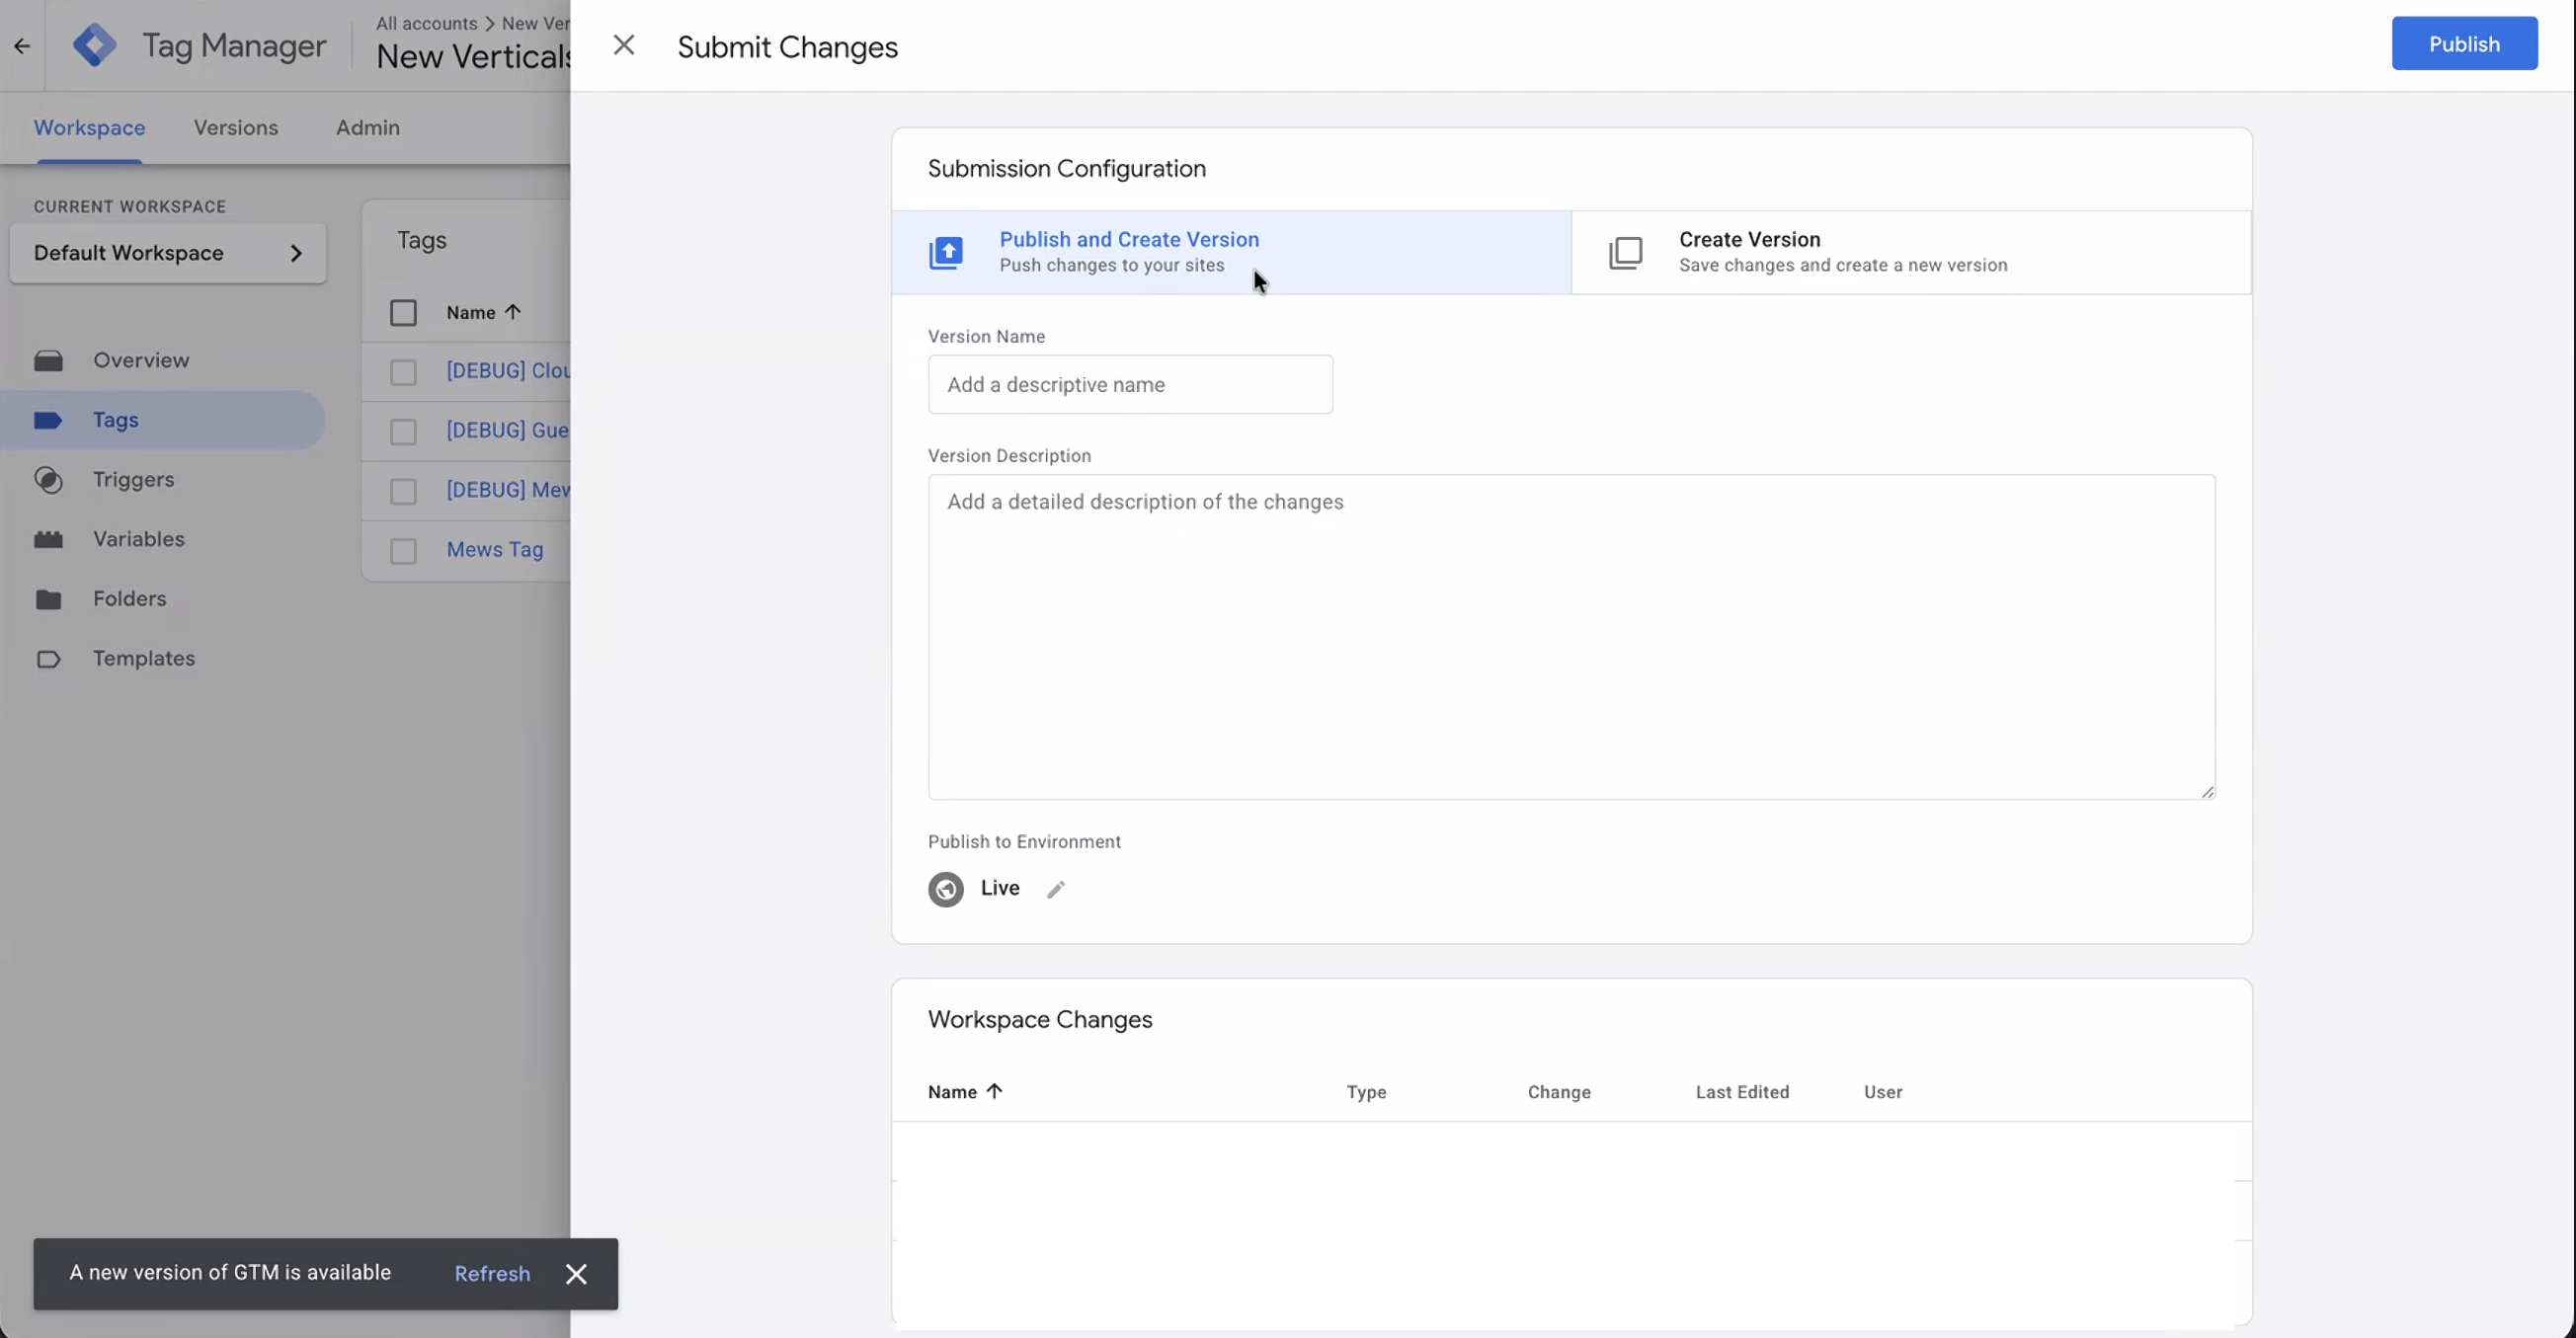
Step 5: Publish Your Changes
Your tracking will not go live until you submit these changes.
- Click the blue Submit button in the top right corner of GTM.
- Give your version a name (e.g.,
Added Klaviyo Hotels Tracking). - Click Publish.
What Happens Next?
Once published, the tag will automatically start sending event data to Klaviyo for identified visitors on your booking engine. Learn about who Klaviyo can track here. You can verify that events are being tracked by checking the Metrics tab in your Klaviyo account for the following events:
- Active Onsite: Fires when someone is active on the website.
- Viewed Listing: Fires when a traveler looks at a specific room or property.
- Started Checkout: Fires when a traveler enters the booking flow.
Now you are ready to use the browse abandonment and abandoned cart flow templates, which can be found here after selecting your PMS integration. But that is only the beginning - learn more about what you can do with Klaviyo onsite tracking here!