Skip to success in multi-step sign-up forms
Use Skip to success button action in multi-step forms to let visitors bypass optional steps (like SMS opt-in) and still see your success screen, without closing the form or losing their original reward.
This article is part of the Forms best practices collection.
You will learn
- When to use Skip to success in multi-step forms
- How Skip to success behaves for visitors and analytics
- How to add a Skip to success button to a form
- Important limitations and validation alerts to watch for
Before you begin
Before adding Skip to success, make sure that:
- You’re editing a Klaviyo sign-up form from the Sign-up forms tab (standard forms only).
- Your form is multi-step and includes a Success step.
- At least one previous step contains a required email or phone input. Skip to success is only available when the form has a required email or phone field on an earlier step, so visitors can’t skip past all required information.
- The form does not:
- Use Spin-to-Win on any step
- Use Age Gate
- Place Skip to success on the Smart Opt-In code confirmation step
If any of these conditions aren’t met, the action won’t appear in the editor, or you’ll see form alerts prompting you to adjust your configuration.
How Skip to success works
When you add Skip to success as a button action on a step:
- What visitors see
- Clicking the button skips the current step and any remaining steps, and immediately shows the Success step.
- This is ideal for buttons like “No thanks”, “Skip SMS”, or “Continue without phone”.
- What data is (and isn’t) collected
- Any fields already submitted on earlier steps (e.g., required email) remain saved as usual.
- Any inputs on the same step as the Skip to success button are not submitted when the visitor clicks Skip to success.
- This ensures visitors don’t accidentally submit partial or unwanted information from the step they’re skipping.
- What events are recorded
- Klaviyo still records a Completed form event when a visitor uses Skip to success to reach the success step, so your form analytics and funnels continue to work as expected.
This behavior gives visitors a clear confirmation screen (for example, to show a discount code or redirection to their mailbox) even when they choose not to provide optional information like SMS consent.
Best practices for using Skip to success
1. Use Skip to success for optional steps
Skip to success works best when used on optional steps that come after a required email or phone field, such as:
- Email then SMS:
- Step 1: Required email input
- Step 2: Optional SMS opt-in using a phone number field or Smart Opt-In
- Button on Step 2: “No thanks” → Skip to success
In this pattern:
- Visitors who want SMS complete the SMS step as usual.
- Visitors who don’t want SMS click “No thanks” and go directly to the success screen where they can still:
- See their discount code
- Get a confirmation message
- Be reassured that their email submission was captured
2. Keep required fields before Skip to success
Because Skip to success lets visitors bypass later steps:
- Put all required fields (email, phone, key profile properties) on steps before any Skip to success button.
- Use Skip to success only after:
- A required email or phone field, and
- Any must-have compliance steps for your use case
Klaviyo’s form alerts help enforce this: if a Skip to success button appears before required inputs or if there are no inputs before it at all, you’ll see alerts prompting you to adjust the form.
3. Don’t rely on the Skip step for important data
Because data on the Skip step is not submitted when visitors click Skip to success, avoid placing any critical fields on that same step, such as:
- Legal checkboxes that must always be captured
- Non-optional profile attributes required for downstream flows
Instead:
- Put must-have fields on a previous step, or
- Move optional enrichment questions (e.g., “What are you shopping for?”) to:
- The same step, but accept that you’ll only collect them from visitors who complete that step normally, or
- A separate follow-up experience (such as a preference center email).
4. Monitor performance in your analytics
After turning on Skip to success:
- Compare submit rate and completed form events before and after enabling the feature to ensure it’s increasing completion without reducing key consents (like SMS).
If you see SMS opt-ins drop more than expected, consider adjusting your SMS step copy (e.g., reinforcing value and incentive).
How to add a Skip to success button
Follow these steps to configure Skip to success on a multi-step sign-up form.
- Open your form
- In Klaviyo, go to Sign-up forms from the left-hand navigation.
- Open an existing multi-step form or create a new one.
- Make sure your form has:
- A Success step.
- At least one previous step with a required email or phone input.
- Choose the step where visitors can opt out
- Navigate to the step you want visitors to skip from (for example, an SMS step or an optional enrichment step).
- Confirm that any must-have data is captured before this step.
- Add or select a button
- From the Add blocks tab, drag a Button block onto the step, or click an existing button (such as “No thanks”).
- In the block settings, configure the text (for example, “Not now” or “Continue without phone”).
- Set the button action to Skip to success
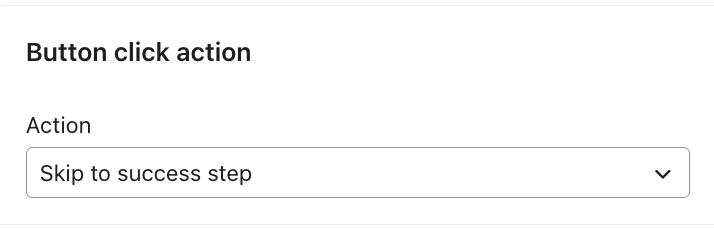
- In the button settings, find the Action dropdown (where you normally choose actions like Close form, Submit form, or Go to URL).
- Select Skip to success from the list of actions.
- If you don’t see this option:
- Confirm you’re editing a standard sign-up form, not a Back in Stock or landing page form.
- Confirm there is a required email or phone input on a previous step.
- Confirm the form doesn’t contain Spin-to-Win, Age Gate, or Skip to success on the Smart Opt-In code step.
- If you don’t see this option:
- Review form alerts (if any)
- If your configuration conflicts with best practices or blocked combinations (for example, Skip to success appears before any input), you’ll see alerts in the editor pointing to the problematic block or step.
- Follow the guidance in the alert to:
- Move the Skip to success button to a later step, or
- Add a required input earlier in the flow, or
- Remove incompatible components (like Spin-to-Win or Age Gate).
- Preview your form
- Optionally test your form on a non-customer facing page to ensure behavior:
- Click through the form as a visitor would.
- Confirm that clicking the Skip to success button:
- Skips the expected steps.
- Shows the Success screen with the right copy, discount codes, or next steps
- Optionally test your form on a non-customer facing page to ensure behavior:
- Publish the form
- When you’re satisfied with your configuration, Publish the form so that changes go live on your site.
- Monitor performance in your form analytics and make iterative improvements over time.
Limitations and edge cases
Keep these limitations in mind when planning your forms:
- Not available everywhere
- Only available on standard sign-up forms.
- Not available on:
- Back in Stock forms
- Landing pages
- The first step of a form or on the Success step.
- Incompatible features
- Forms that use any of the following cannot use Skip to success:
- Spin-to-Win steps
- Age Gate steps
- Skip to success on the Smart Opt-In code step
- Forms that use any of the following cannot use Skip to success:
- No inputs before Skip to success
- If there are no input fields before the earliest Skip to success action, Klaviyo will surface a blocking alert so you don’t accidentally publish a form that lets visitors reach the success step without providing any information.
- Required inputs after Skip to success
- If Skip to success appears before or on the same step as a required input, you’ll see a warning alert so you can move the button or adjust your fields.
Configuring forms within these constraints ensures visitors always have a smooth, trustworthy experience and that your list growth and consent data stay reliable.
Related resources
To learn more about multi-step and high-performing forms: