How to add, update, or delete SMS subscribe keywords
You will learn
Learn how to create, change, and remove custom subscribe keywords in Klaviyo.
Customers can text a custom subscribe keyword to your sending number to subscribe to a selected list. Klaviyo allows you to create, change, and remove subscribe keywords for free.
Before you begin
Before you begin, set up SMS in Klaviyo and have a sending number that can receive text messages. Branded sender IDs cannot receive replies. You also need a list to add subscribers to.
If your business must verify subscribers’ ages, use an age-gated sign-up form to collect their date of birth. A standalone subscribe keyword does not collect this information.
Before learning how to add custom keywords, it is important to know what kind of words can be used. When creating keywords in Klaviyo, follow these guidelines:
- Do not use words related to sex, hate, *alcohol, *firearms, or tobacco (SHAFT).
- *Alcohol and firearms businesses may be allowed to use SMS with age-gating in certain countries. These exceptions do not change the keyword restrictions above.
- Use alphanumeric characters (A–Z and 0–9); do not use any other special symbols.
- Keep keywords between 3 and 20 characters.
- Do not use common words such as “the,” “that,” “are,” “can,” “here,” “about,” or “and.” Klaviyo blocks these words to prevent people from subscribing accidentally during a normal text conversation.
- Choose a keyword that does not match an existing subscribe keyword or a default keyword, such as HELP, STOP, START, YES, or UNSTOP.
Note that keywords are not case-sensitive. If you input the keyword as “SHOES,” Klaviyo will accept “shoes,” “Shoes,” etc.
You can add up to a max of 500 subscribe keywords.
Add a custom subscribe keyword
- Click your organization name in the lower left corner.
- Navigate to Settings > Text message > Keyword responses.
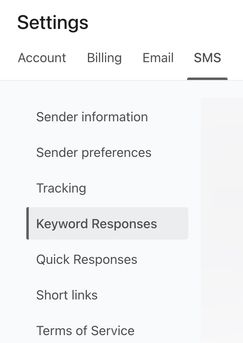
- Find the Subscribe keywords section.
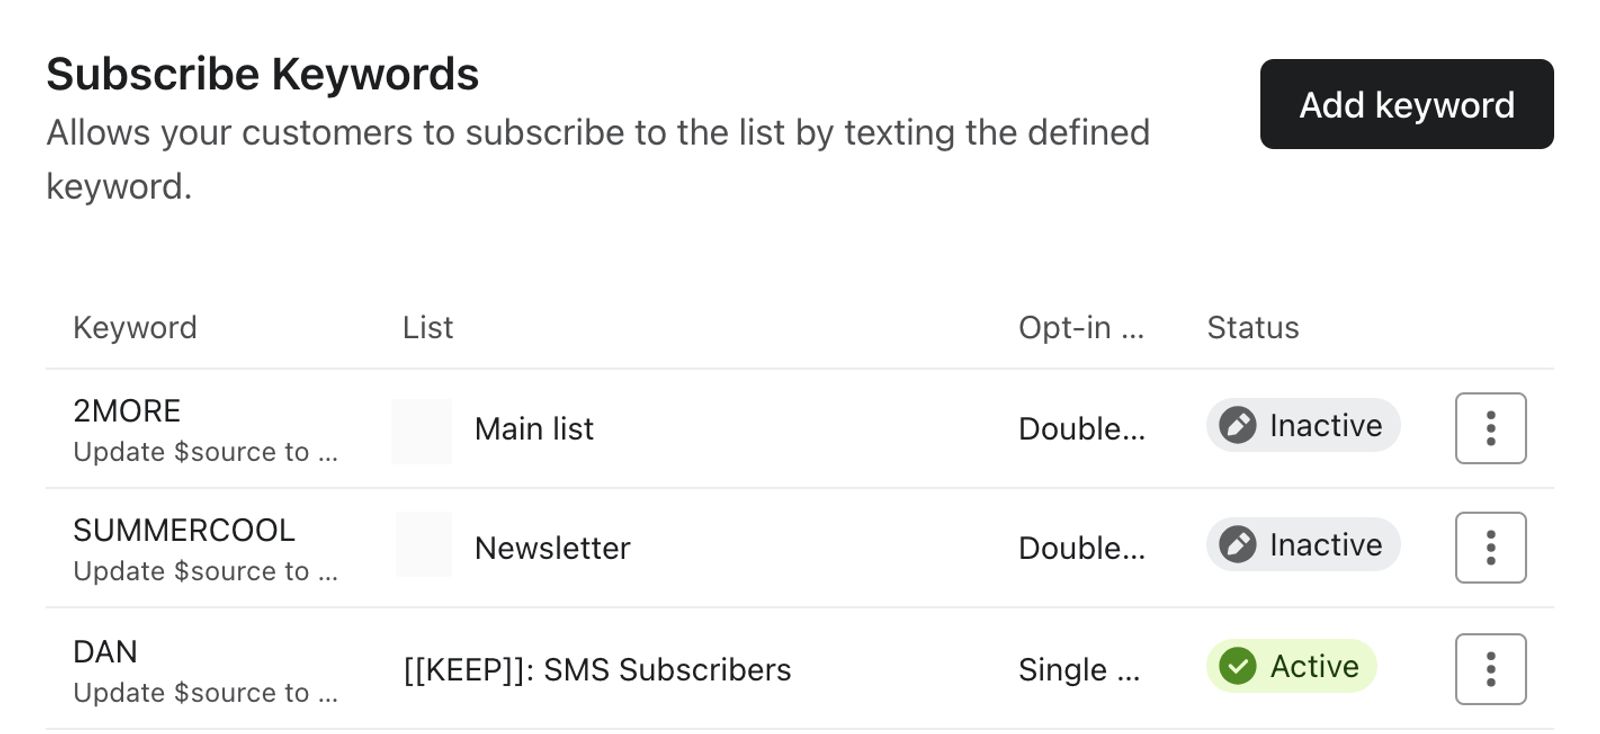
- Click Add keyword.
- In the Create Subscribe Keyword modal, enter your keyword. Leave Allow customers to subscribe with this keyword turned on so customers can subscribe.
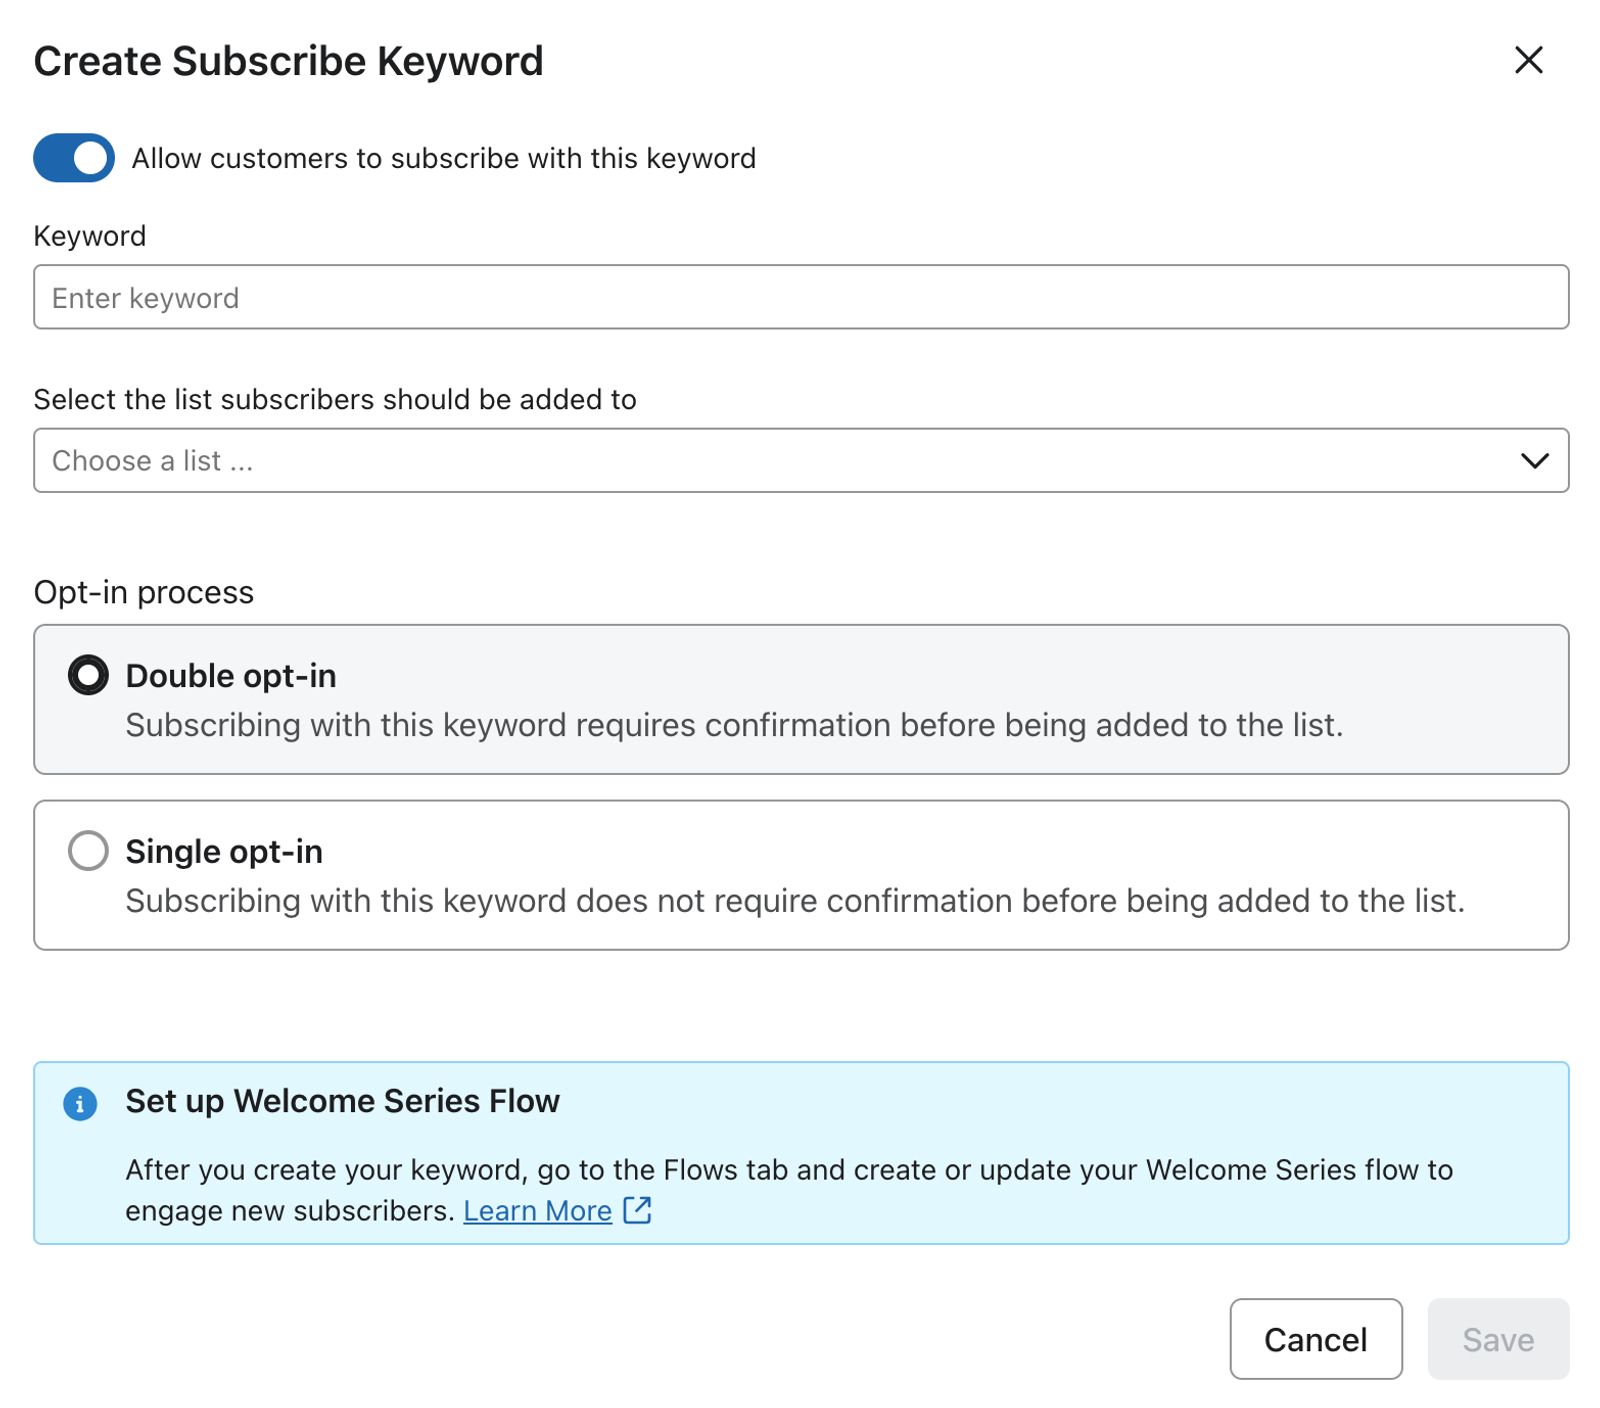
- Choose the list that subscribers who use the keyword should be added to.
- Under Opt-in process, choose Double opt-in (selected by default) to require confirmation before someone is added to the list, or Single opt-in to add them without confirmation. This choice applies to the keyword, regardless of the list’s opt-in setting.
- (Recommended) Only use single opt-in with tap-to-text, and do not publish single opt-in keywords anywhere on your website.
- Click Save.
After adding a keyword, you can create an SMS welcome flow for new subscribers or build a flow to update the profile properties of those who use the keyword.
Update a custom keyword
In the US and Canada, you cannot edit the default messages for the opt-out (e.g., STOP) or resubscribe (e.g., UNSTOP) keywords.
- Click your organization name in the lower left corner.
- Navigate to Settings > Text message > Keyword responses.
- Scroll to the Subscribe keywords section.
- Find the keyword you want to edit.
- To the right of it, click the 3 dots menu.
- Choose Edit.
- In the Edit Subscribe Keyword modal, you can change the keyword's:
- Status: Turn Allow customers to subscribe with this keyword on or off
- Keyword
- List
- Opt-in process: Choose Double opt-in or Single opt-in
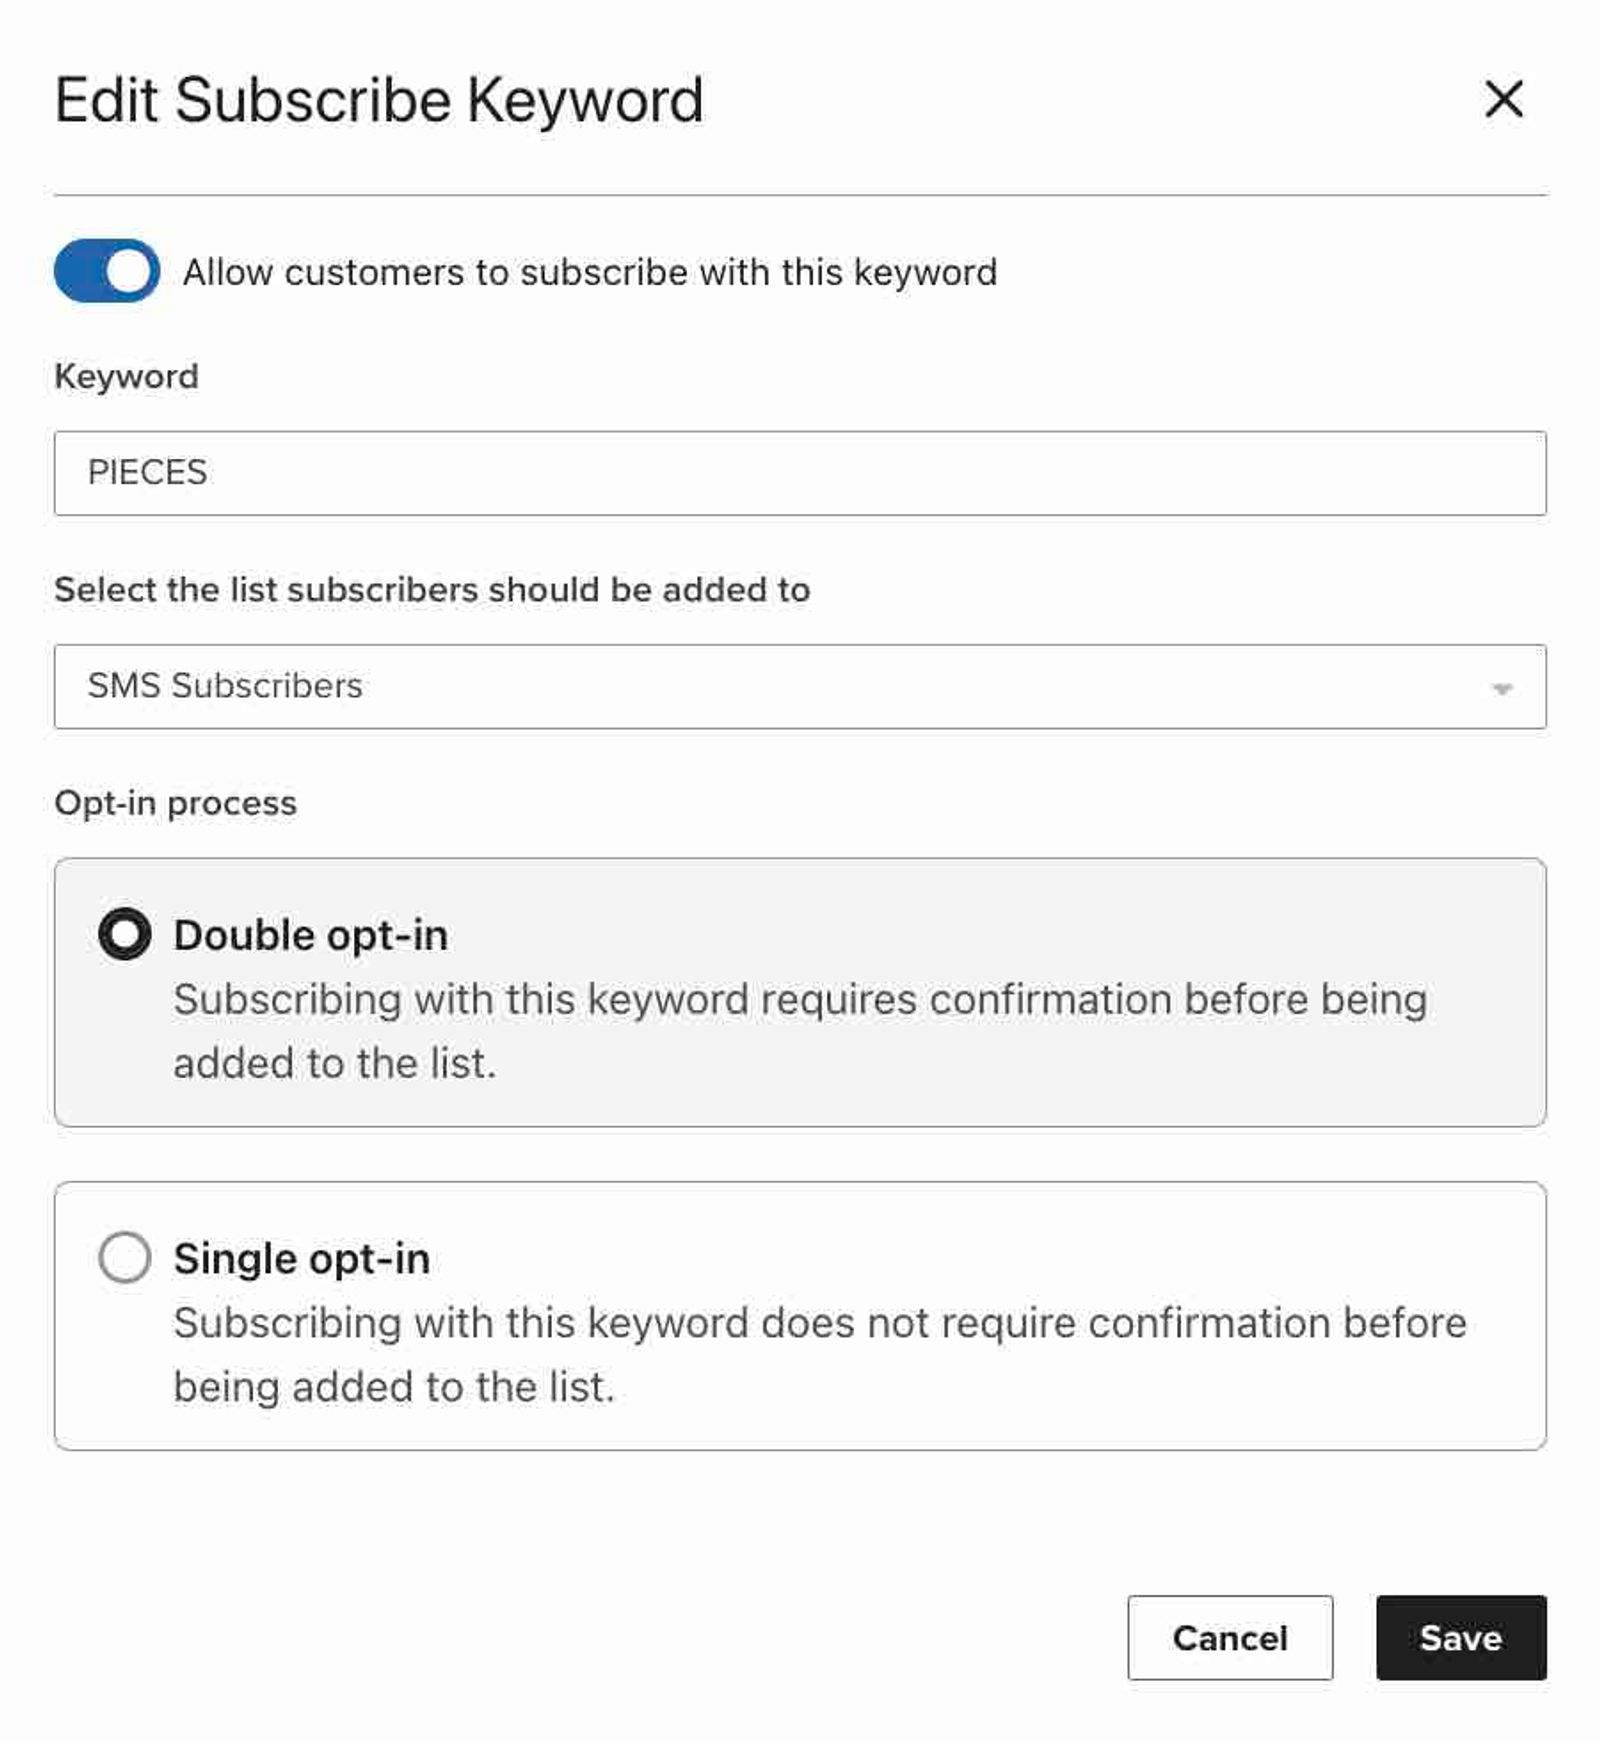
- Click Save when you finish making edits.
Delete a custom keyword
- Click your organization name in the lower left corner.
- Navigate to Settings > Text message > Keyword responses.
- Scroll to the Subscribe keywords section.
- Locate the keyword you want to delete.
- Select the 3 dots to the right of your keyword, then click Delete.
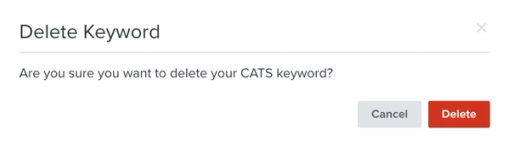
- In the modal that appears, click Delete to confirm that you want to remove the keyword.
Using subscribe keywords
Share double opt-in keywords on social media, your website, business cards, and more. For example: “Text JOIN to 123-456-7890.” Only use single opt-in keywords with tap-to-text, as recommended above.
As you use these keywords, please note that:
- It's important to use disclosure language anywhere you show your subscribe keywords (i.e., on the social media post, website, etc. near the subscribe keyword), so subscribers are informed before they sign up.
- Double opt-in is highly recommended for subscribe keywords.
- If you have multiple sending numbers, remember to change the phone number when you show a subscribe keyword to different countries.
Note that subscribe keywords are different from compliance keywords (e.g., HELP, STOP, START). Subscribe keywords are an opt-in method, while compliance keywords must, by law, provide certain information or perform a certain action (such as removing SMS consent).
Additional resources
- Understanding SMS consent collection
Learn about SMS consent, including what counts as SMS consent, how you can collect it, and how resubscribes work. SMS consent refers to whether someone is opted in (i.e., if they have agreed to receive marketing text messages from your brand).
- How to configure your opt-out keyword settings
Learn how to control when an opt-out keyword results in an unsubscribe.
- Guide to Klaviyo Helpdesk
Learn about Klaviyo Helpdesk, which helps you manage support conversations across all channels, powered by the data you already have in Klaviyo.