How to import subscribers to a list
You will learn
Learn how to add subscribers to a list in Klaviyo. Uploading contacts is key when getting started with Klaviyo, particularly if you’re migrating from another service provider or pulling in information from a third party.
Before you begin
Please note the following before starting the import process:
- Your list must abide by Klaviyo's Terms of Service.
- Turn off any flows triggered by the list you’re uploading, unless you want the flow to send to all of the imported contacts.
- Uploads do not trigger double opt-in
- Your CSV file must be 50 MB or less. Larger uploads must be split into multiple CSV files.
Upload a CSV to a list
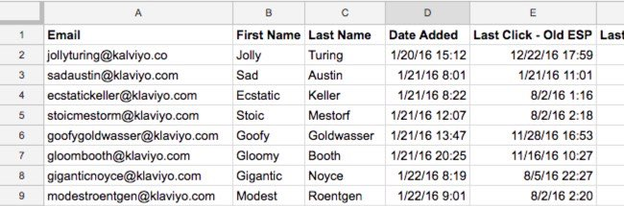
Format your CSV
Place email addresses or phone number in the first column
In general, the first column should be your customers’ email addresses (labeled either “Email” or “Email Address) or phone numbers (labeled “Phone Number”). If you are importing SMS subscribers, we recommend reading through our guide on uploading SMS consent.
Optional: indicate consent status
If your list contains a mix of subscribed, suppressed, and unsubscribed contacts, include a column with the type of consent:
- Email Marketing Consent
- SMS Marketing Consent
- SMS Transactional Consent
Alternatively, if you have a consent timestamp column (e.g., Email Marketing Consent Timestamp), you can indicate whether someone is:
- Subscribed
Person is opted in to receive messages. - Unsubscribed
Person used to be subscribed but has since opted out. You cannot send messages if they are unsubscribed for that channel (e.g., you cannot send an SMS to someone who’s unsubscribed from text messaging, but you may be able to send an email, and vice versa). - Never subscribed
Person never consented to receiving messages. This is also the default value if a cell in a consent column is blank. You cannot send mobile (SMS, push, etc.) messages to people marked as never subscribed; however, you can send emails and these are considered active profiles.
If you don’t have a consent column, you’ll be asked what type of consent to add and your choices will be applied to all contacts within the CSV (e.g., they will all be marked as subscribed).

If you are importing a list to resubscribe profiles, do not include backdated consent timestamps in your CSV as they may be skipped during import.
Optional: add other properties
Your CSV can include additional columns if you want to upload more properties for that profile. These properties could be anything, from their name, birthday, date they subscribed, last click, etc.
- If using a Klaviyo property, use the Klaviyo property name as the header for the column.
- This allows that column to be easily mapped to the right property with the correct data type.
- Dates must be in an accepted format (e.g., YYYY-mm-dd HH:MM:SS).
Please also note that when adding properties:
- Any new value/column that you include in a CSV upload that does not already exist on a contact's profile will:
- Create a new custom property
- Not affect existing custom properties
- If the value already exists for a profile, the value from the CSV will overwrite the prior value.
- If you're interested in uploading a list of values for a single property (such as “Sizes”), you will need to use JSON syntax. Create an array of your values that looks like this: ["value1", "value2", "value 3"].
Import contacts with consent
Check if you have any flows triggered by the list you want to select. If flows are triggered by this list, turn the flow to manual mode before continuing.
- Navigate to Audience > Lists & segments.
- Select the list you want to add your contacts to (e.g., Newsletter).
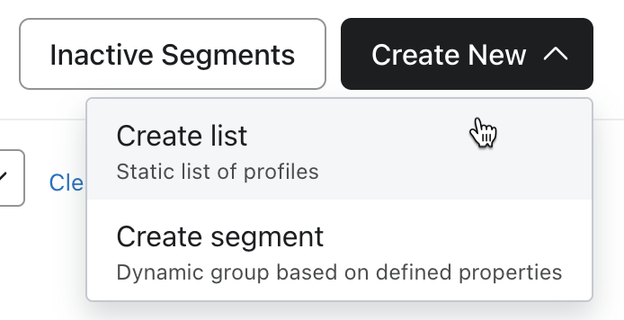
- If you want to create a new list, instead select Create New > Create list and name the new list.
- If you want to create a new list, instead select Create New > Create list and name the new list.
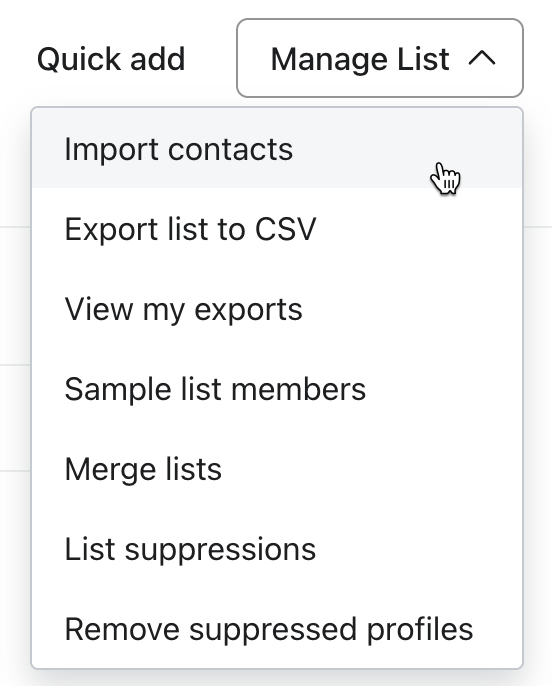
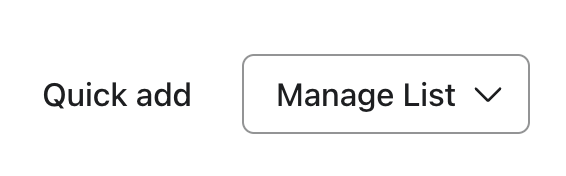
- Open the Manage List dropdown in the upper right.
- Choose Import contacts from the dropdown.
- If the option to import contacts does not appear, that means you either do not have the correct user permissions to upload contacts, or this is a segment, not a list.
- If the option to import contacts does not appear, that means you either do not have the correct user permissions to upload contacts, or this is a segment, not a list.
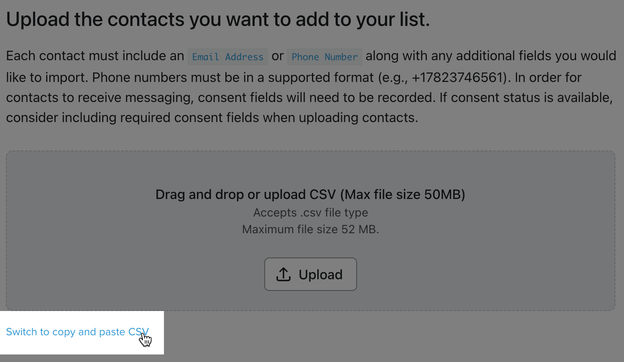
- Click Upload and select your CSV file of email subscribers.
- Click Next.
- Map each column from your CSV to an appropriate property in Klaviyo, then click Next.
- If your CSV includes a consent type (e.g., Email Marketing Consent) or timestamp (e.g., Email Marketing Consent Timestamp) column, Klaviyo knows to apply consent, so you can jump to step 10.
- If you have neither a consent timestamp or column indicating consent, you’ll see the following:
- Under Did these contacts subscribe to messaging, select Yes to add consent.
- Under Did these contacts subscribe to messaging, select Yes to add consent.
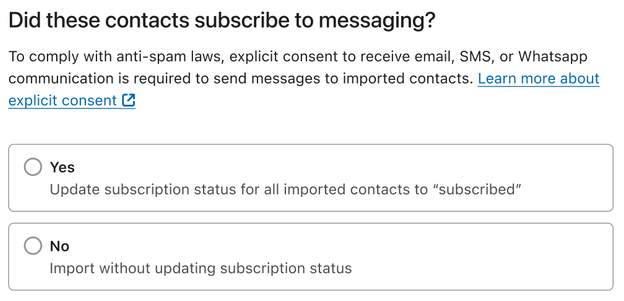
- Check the box for the types of consent to apply (e.g., Email).
- When ready to proceed, click Import.
The import process can take up to a couple of hours to complete. Please wait a few additional hours before you turn your list-triggered flows back on (if applicable).
Upload via copy/paste
As an alternative to uploading a CSV file, you can copy and paste a list of subscribers to upload them.
- Navigate to Audience > Lists & segments.
- Select the list that you want to add subscribers to.
- Click the Manage list dropdown in the upper right-hand corner.
- Click Import contacts.
- If the option to import contacts does not appear, that means you either do not have the correct user permissions to upload contacts, or this is a segment, not a list.
- Click Switch to copy and paste CSV beneath the bottom-left corner of the upload tool.
- Paste contact information in this format:
Email,First Name,Last Name
someone1@example.com,George,Washington
someone2@example.com,Abraham,Lincoln
If you are adding properties with list values as part of your copy/paste import, use the following structure:
Email,Property
someone1@example.com,"[""a"",""b""]"
- Click Next.
- Map each column from your upload to an appropriate property in Klaviyo.
- To add consent (i.e., if you have explicit email consent for every contact):
- Under Did these contacts subscribe to messaging, select Yes to add consent.
- Under Did these contacts subscribe to messaging, select Yes to add consent.
- Choose the type of consent (e.g., Email).
- Click Import.
Add subscribers via Quick Add
Add subscribers via Quick Add (email only)
If you would like to quickly add a handful of individuals to your list, you can use the Quick Add option instead.
- Navigate to the list you'd like to add the profile to.
- Click Quick Add.
- If the Quick Add button does not appear, that means you either do not have the correct user permissions to upload contacts, or this is a segment, not a list.
- If the Quick Add button does not appear, that means you either do not have the correct user permissions to upload contacts, or this is a segment, not a list.
- On the following page, fill in the Email field.
- If the person has explicitly opted in to receive emails from you, check the box for Profile has granted explicit consent to receive email marketing.
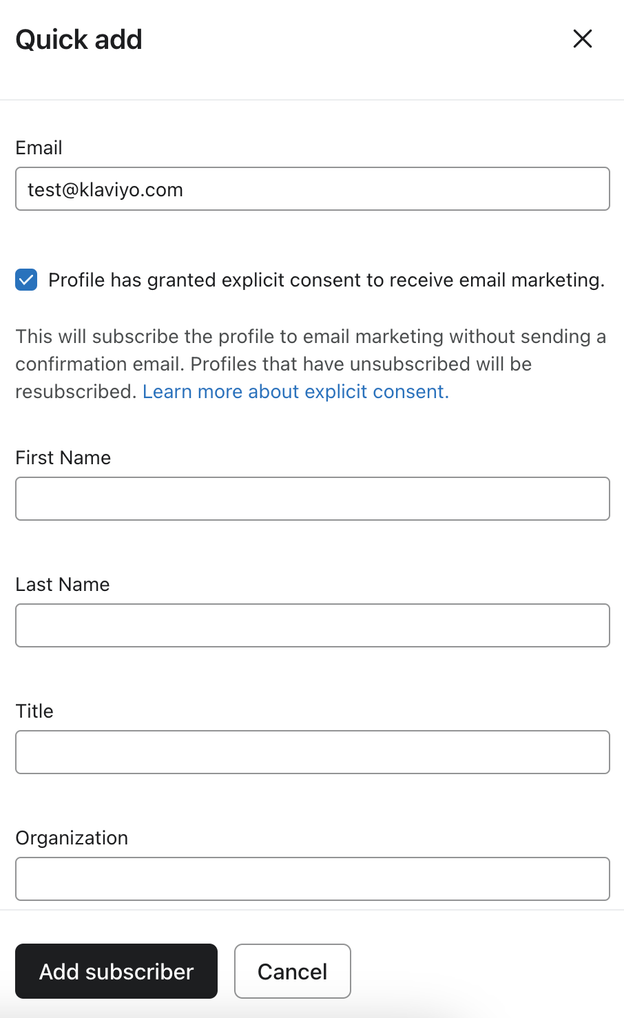
- Optional: add other information about the contact, such as their name or title.
- Click Add subscriber.
Once the CSV finishes importing, Klaviyo will either create a new profile or associate the data to an existing profile.
With email for instance, Klaviyo looks for any existing profiles with that same email. Then, Klaviyo updates the consent status and any properties you chose to import to that contact.
Bulk remove consent
If you want to remove consent for profiles, you can use essentially the same import process.
The only differences are that you must:
- Have a column for the type of consent (e.g., Email Marketing Consent).
- Add “Unsubscribed” for each profile within that column.
- Note that you cannot reset profiles in bulk to “Never Subscribed.”
Additional resources
- Troubleshooting list imports
Learn how to troubleshoot errors that occur when uploading a CSV of contacts to a new or existing list in Klaviyo. Uploading reviews? Head to our article on how to import reviews.
- How to upload a list of SMS contacts
Find out how to add and remove SMS transactional or marketing consent in Klaviyo. Importing your SMS subscribers is an essential part of migrating providers or simply consolidating your data.
- Understanding the difference between segments and lists
Learn the difference between segments and lists, which are 2 Klaviyo tools you can use to keep track of your subscribers and contacts. Segmentation is one of the most important aspects of your Klaviyo account. Not only can you get extremely granular with your data, but segmentation happens fast, allowing you to get back to your data-driven marketing. That being said, it is important to understand the difference between segments and lists when getting started with Klaviyo.