How to personalize and export Shopify notification emails
You will learn
Learn how to customize Shopify’s default email templates using Klaviyo to achieve brand consistency across all of your notifications.
Shopify provides many default email templates that can be leveraged within Shopify for automated notifications, such as shipping updates and password resets. While these templates are functional, there is no built-in template editor in Shopify that you can use to customize and style these emails. With Klaviyo, you can fully customize your Shopify notification templates with a distinct layout and style, then export and paste them into Shopify in order to send them via Shopify (not Klaviyo).
Before you begin
Knowledge check
If you have not already, read our guide on Getting started with Shopify for step-by-step instructions on integrating, before continuing with this article.
- Klaviyo saves all of your email templates. If you decide to change your logo or website theme, it's easy to go back and update your notification emails accordingly. After making any changes, you'll need to re-import the updated template into Shopify.
- You can find a complete list of Shopify's notification variables here. You can use any of these variables to customize your Shopify email templates.
- Shopify doesn't currently support the use of Klaviyo Product Blocks, which are used to dynamically populate your products in emails. For this reason, if you attempt to export a notification template from Klaviyo that has a product block, you will see an error message or the Export option will be grayed out. If you delete the block, you should then be able to successfully export the template.
- All of the variables you see in these templates are Shopify variables, which are different from Klaviyo variables. While you can edit the content and customize these templates any way you'd like, edit the blocks with dynamic variables with caution. If you make too many changes, you may impact the functionality of the template.
- Preview the edited email templates directly in Shopify to understand what customers will receive. You can also preview these templates within Klaviyo, but only for styling purposes — you won't be able to see the variables populate with dynamic content unless you are previewing in Shopify.
Edit a template
- In Klaviyo, click the Content dropdown and select Templates.
- From the Email templates tab, click the Template type dropdown and select Shopify.
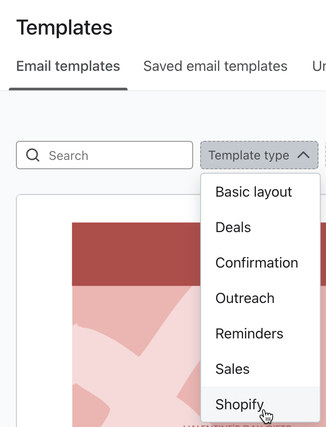
- This view shows several pre-built Shopify notification templates, which you can customize and export into Shopify. Select the template you'd like to use. In the modal that appears, click Use template.
- Edit the template to match your brand styles.
Your template will then appear in the Email: saved tab of your template library.
Export your template to Shopify
All Shopify notification emails are sent through Shopify, not Klaviyo. Once you've customized your templates, you'll need to export the HTML code one email at a time and paste it into Shopify. For each email template:
- Click the Content dropdown and select the Templates tab.
- Find your template and click the three dots, then choose Export. An Export Template HTML window will appear.
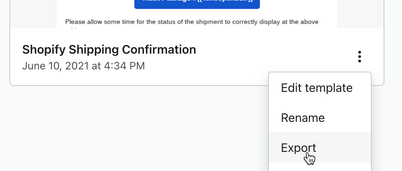
- Copy the HTML code in the window so that you can paste it into Shopify.
- In your Shopify store admin, click Settings > Notifications.
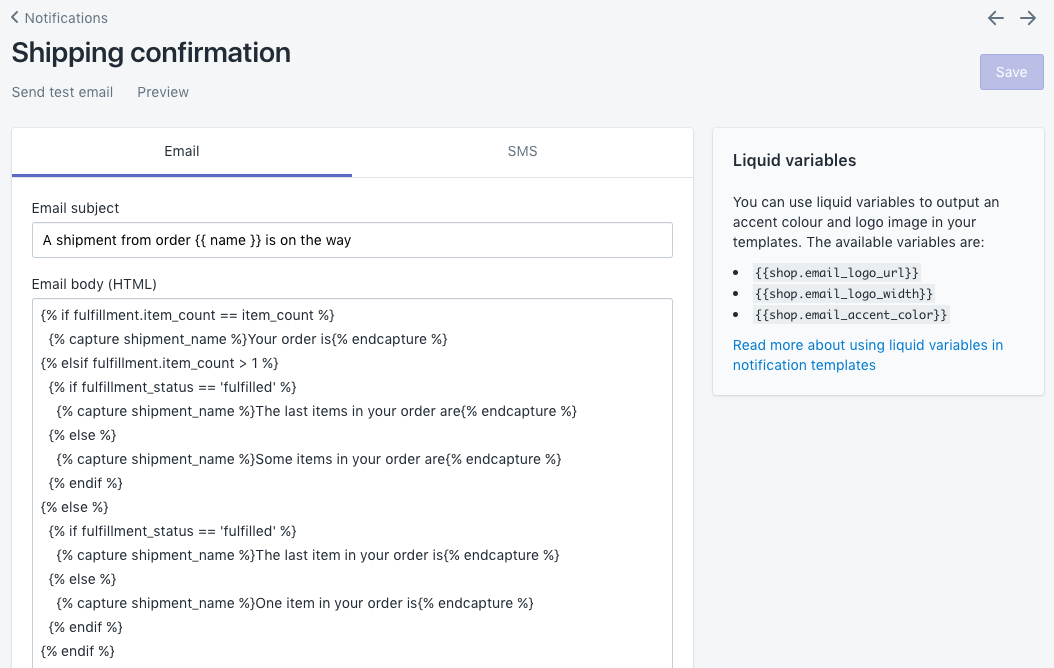
- Here, find the notification template you would like to update and click on it.
- You will immediately see a large section labeled Email body (HTML). Replace the existing code you see in this window with the code you copied from Klaviyo.
- Click Preview. You should see an example email that reflects the customized template you designed in Klaviyo.
- Click Save.
Outcome
Once you've customized each email template and added the HTML to Shopify, your notification emails sent by Shopify will be personalized and reflect your brand's styles.
Additional resources
- Getting started with Shopify
Learn how to integrate Klaviyo with Shopify in order to bring your customer profile and order data into Klaviyo and reach customers with targeted messaging. Additionally, enable Klaviyo onsite tracking and sign-up forms, and sync data from Klaviyo to Shopify.
- How to disable notification emails sent by Shopify
Learn how to disable certain marketing or notification emails in Shopify such as abandoned checkout or delivery notifications. You should disable these emails if you are currently sending them via Shopify and want to start sending them via Klaviyo, in order to avoid sending them twice.
- Shopify data reference
Learn what data syncs from Shopify to Klaviyo and where to view it. This includes both order data (such as Placed Order, Ordered Product, etc.), delivery data, onsite tracking data, and customer data. If you have not already, read our guide on getting started with Shopify for step-by-step instructions on integrating, before continuing with this article.