How to set up single sign-on (SSO)
You will learn
Learn how to set up single sign-on (SSO) for your Klaviyo account or portfolio. Currently, only identity provided (IdP) single sign-on is supported in Klaviyo.
Why use SSO?
Single sign-on (SSO) helps protect you, as well as your customers, by making your account more secure. If you have SSO set up for your business, you can require your Klaviyo users to log in using their SSO credentials.
Plus, if you use SSO for your organization, you and your users can remain logged in to Klaviyo for a longer period of time before re-entering your credentials.
Before you begin
We strongly suggest reaching out to your company’s IT department to help you set this up because there are certain steps you will need to take within your company’s identity provider. If needed, you can temporarily make them an admin in your account to set up SSO.
Please note:
- You must have a paid plan to use SSO.
- You must be an Owner or Admin to set up this feature.
- Klaviyo does not support service provider (SP) SSO, only IdP SSO.
If you use identity provided (IdP) single sign-on (SSO), you can use this to log in to Klaviyo. Security assertion markup language 2.0 (SAML 2.0) SSO gives members access to Klaviyo through an IdP of your choice.
Examples of IdP SSO providers include Okta, OneLogin, Microsoft Entra ID, and more.
If you enforce SSO for all users, any new user will need to accept the invitation and then log in using SSO.
View and use the exemption list
Users added to the exemption list will be able to bypass SSO and log in with a username and password when SSO is enforced for a company. This is important if there is an IdP outage or when you do not want to add a partner, contractor, or agency member to your IdP instance.
Note that you will only be able to view the exemption list once SSO is set up.
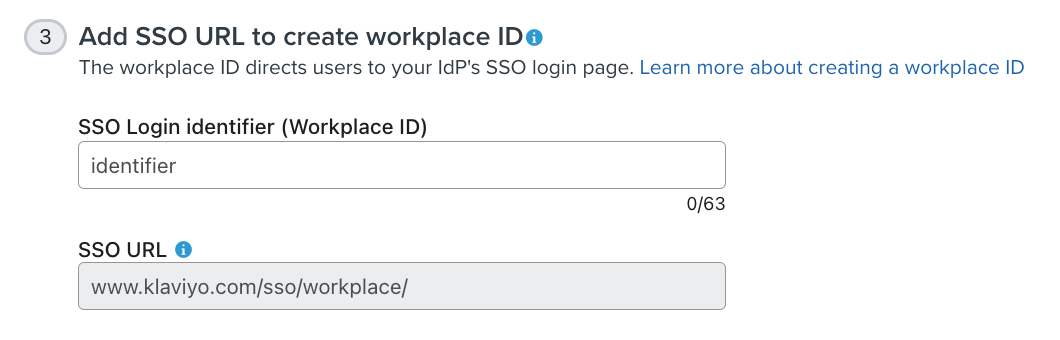
What is a workplace ID?
Also called the SSO login identifier, the workplace ID is required to set up SAML SSO in Klaviyo. It is usually the same name as your company. You'll create this ID as part of step 3 of the Klaviyo setup process (discussed in this section below).
After setting up a workplace ID, users can go directly to your company's custom URL (e.g., www.klaviyo.com/sso/workplace/<id>) to log in to Klaviyo. We recommend telling users to bookmark this URL to speed up the login process.
Tips for creating a workplace ID:
- The ID cannot be longer than 63 characters.
- The ID must be URL safe, so it can contain only upper- or lowercase letters, hyphens (-), periods (.), underscores (_), and tildes (~).
- The ID should be simple and easy for users to remember (such as your company name).
- For example, Klaviyo’s workplace ID is “Klaviyo.”
About just-in-time (JIT) provisioning
After you set up SSO, you will have the option to enable just-in-time (JIT) provisioning in Klaviyo. When a user is added to an account with JIT provisioning, the user will need to accept the invite in their email to start accessing the account.
Note that once SSO is enabled and JIT provisioning is turned on, you can only update the user's Klaviyo role inside of the IdP and will no longer be able to update any roles inside of Klaviyo. To update a role, you will need to do so inside your IdP or by temporarily turning off both JIT and SCIM to update inside of Klaviyo.
What is JIT?
When JIT provisioning is enabled, IT admins no longer need to create accounts manually for each user in each of their applications. Instead, user accounts are created the first time users try to log in to an application, as long as the user has permission for that app.
For instance, IT admins can automatically grant Klaviyo access to all users in their IdP so that those users' accounts will automatically be created the first time they log in to Klaviyo via their SSO portal or through Klaviyo-initiated login.
Set up SAML SSO
- In Klaviyo, click your organization name in the bottom left corner.
- Click Settings.
- Select Security.
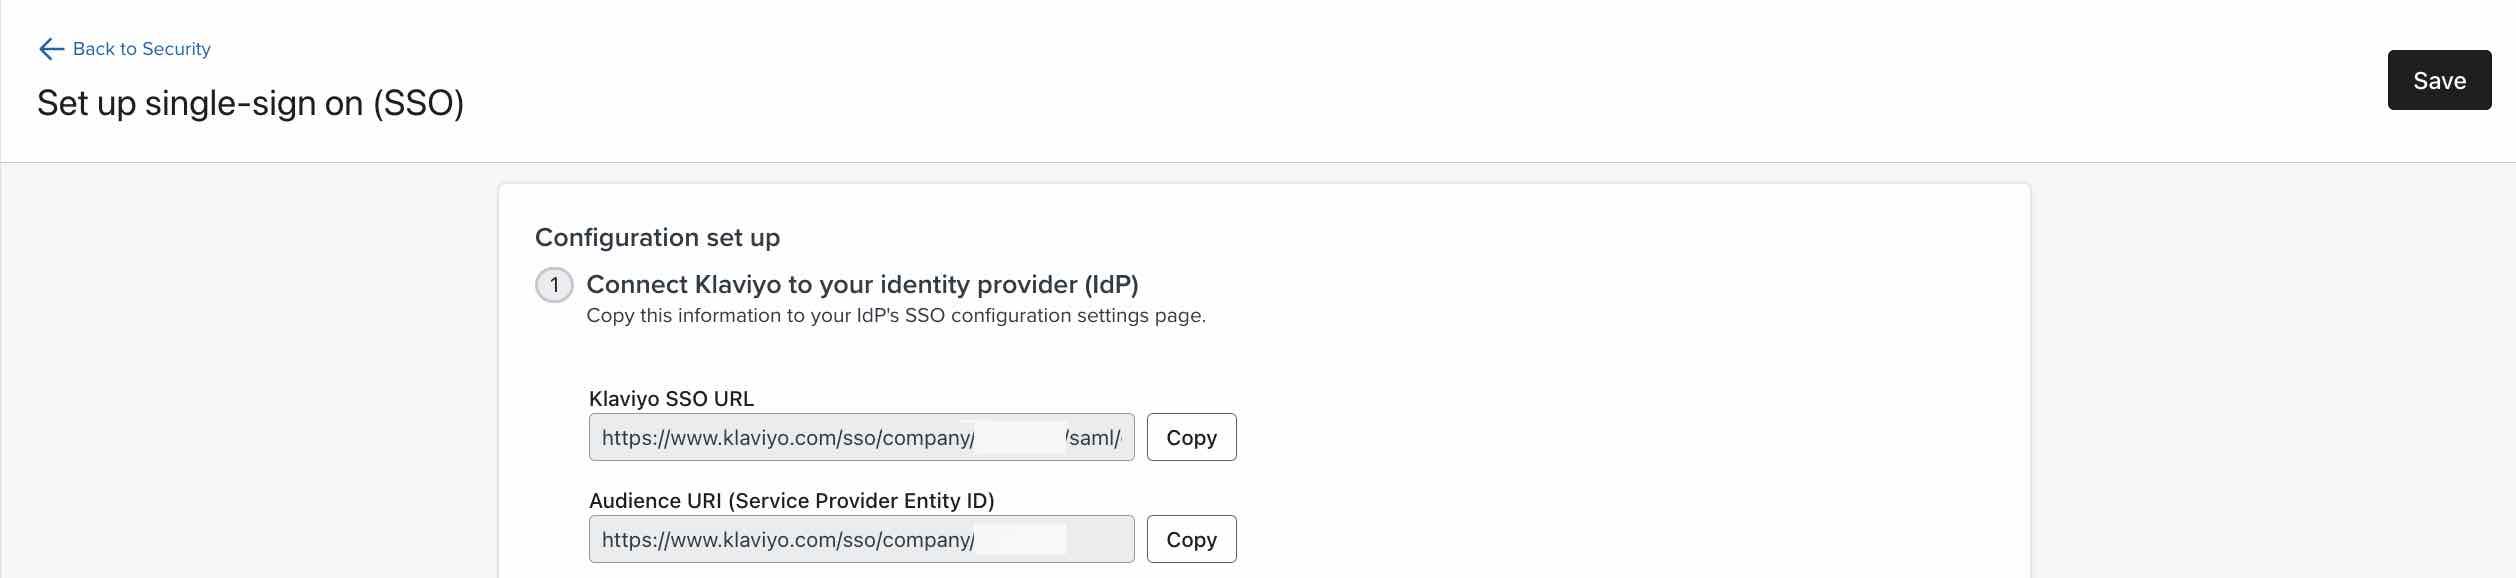
- Click Set up SSO. (Note that multi-factor authentication is not required.)
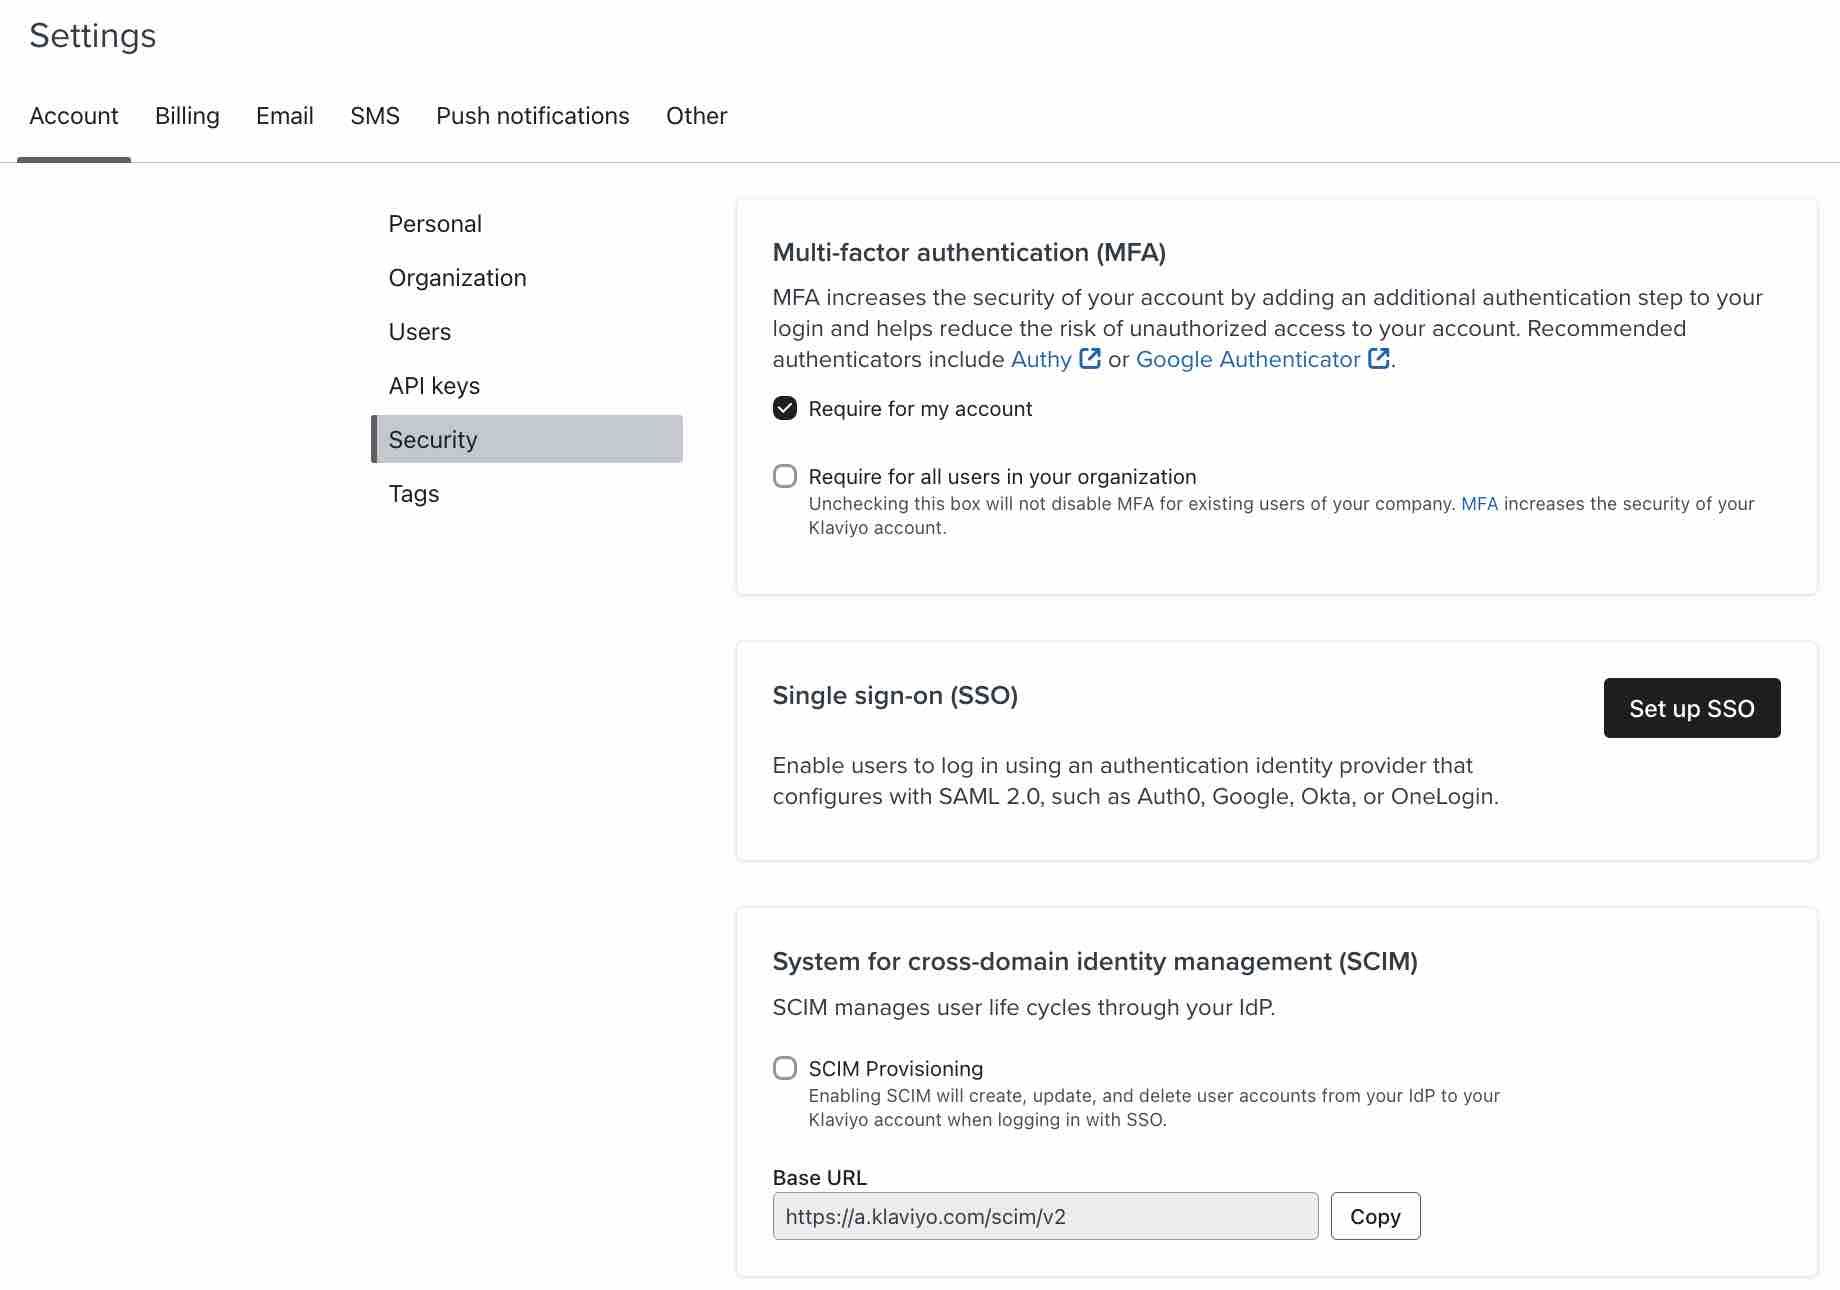
- Copy the Klaviyo SSO URL and Audience URI (Service Provider Entity ID) for use in the next section.
Log in to your SSO provider
Open the dropdowns below for IdP-specific instructions. In general, you will need to:
- Open a new tab and log in to your SSO provider.
- Find the confirmation settings for your provider.
- Paste in the Klaviyo SSO URL and save.
- Download or locate your IdP’s metadata.
- Assign users and their roles to the Klaviyo app.
- To have your role passing correctly to Klaviyo, we recommend using the key format. (Some IdPs convert attributes to lowercase in their protocol, so the label format is not recommended)
Account user roles | Portfolio user roles |
owner | portfolio_owner |
admin | portfolio_admin |
manager | portfolio_manager |
analyst | portfolio_analyst |
campaign_coordinator | |
content_creator | |
support |
The roles depend on the type of account where you're setting up SSO. In a normal account, only account user roles are applicable. In a portfolio account, only portfolio user roles are applicable
Okta
- Log in to your Okta admin account.
- Navigate to Application > Applications.
- Select Create App Integration.

- In the modal, select the option for SAML 2.0.
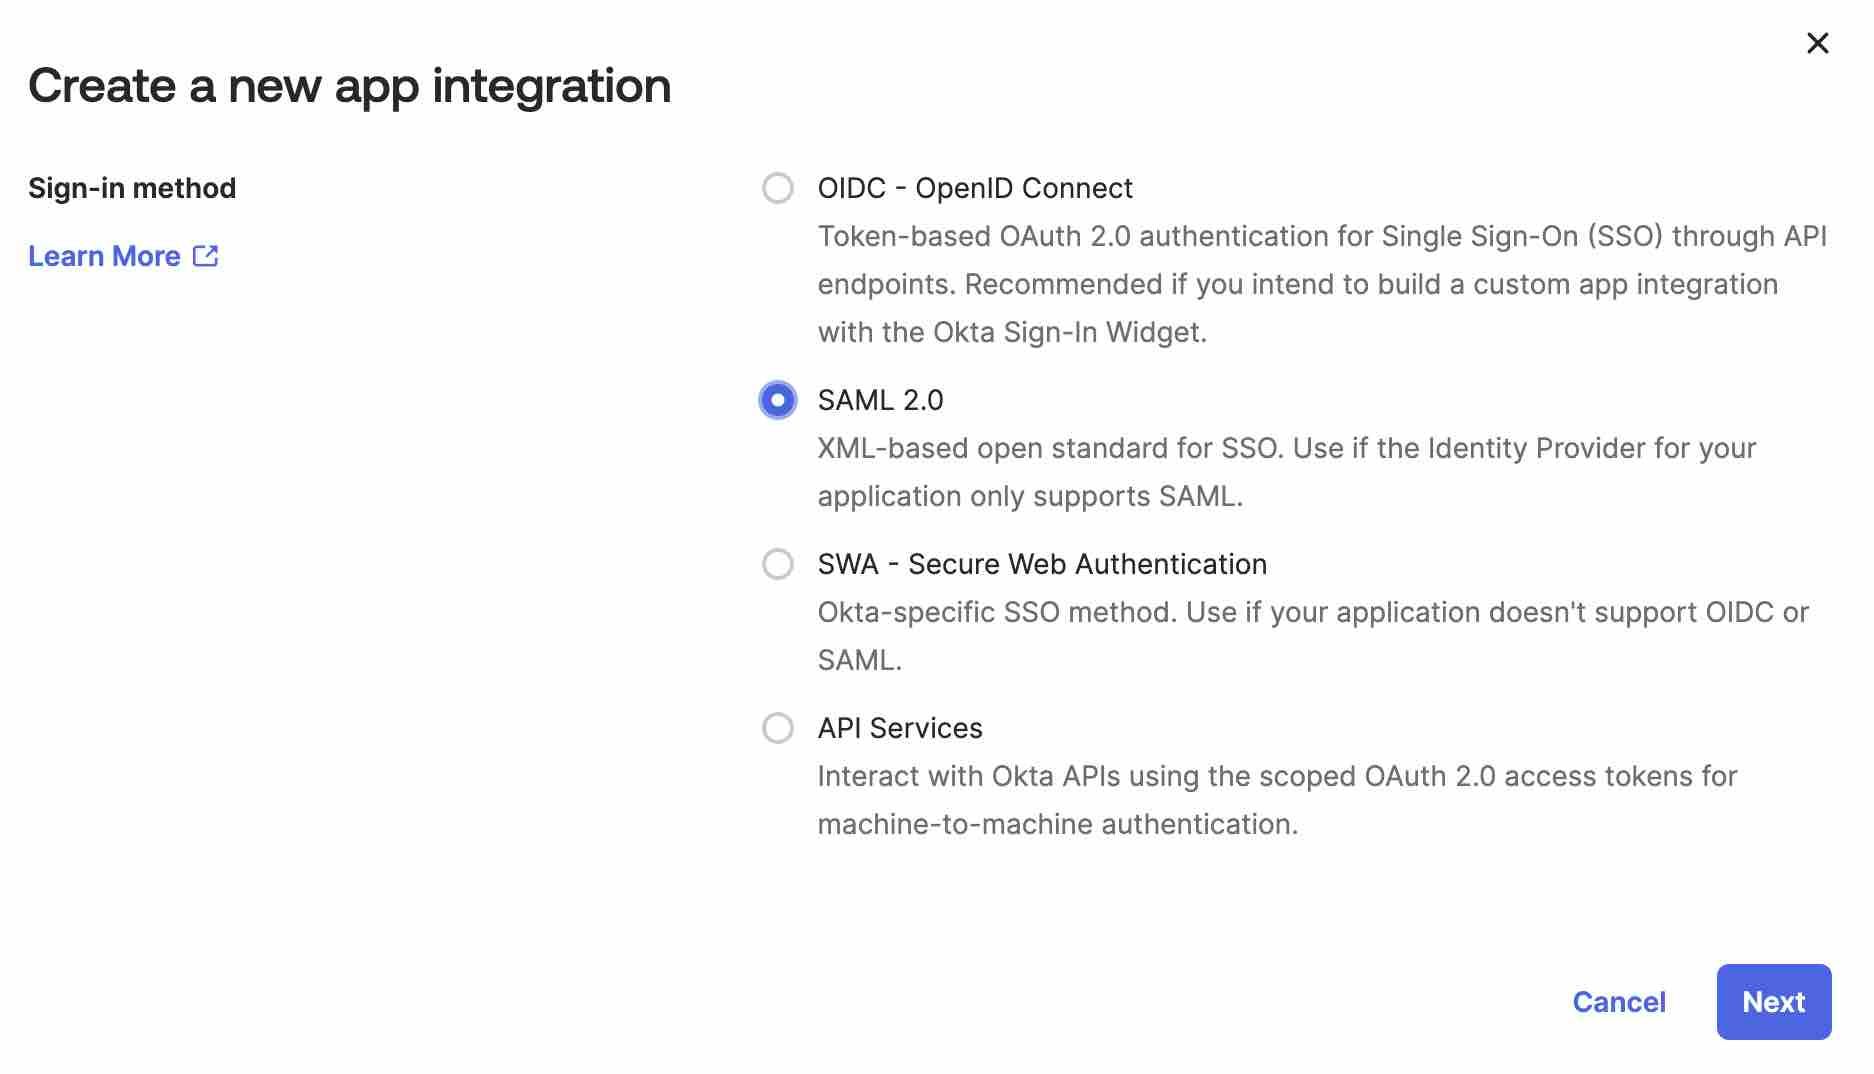
- Click Next.
- Name the integration (e.g., “Klaviyo”).
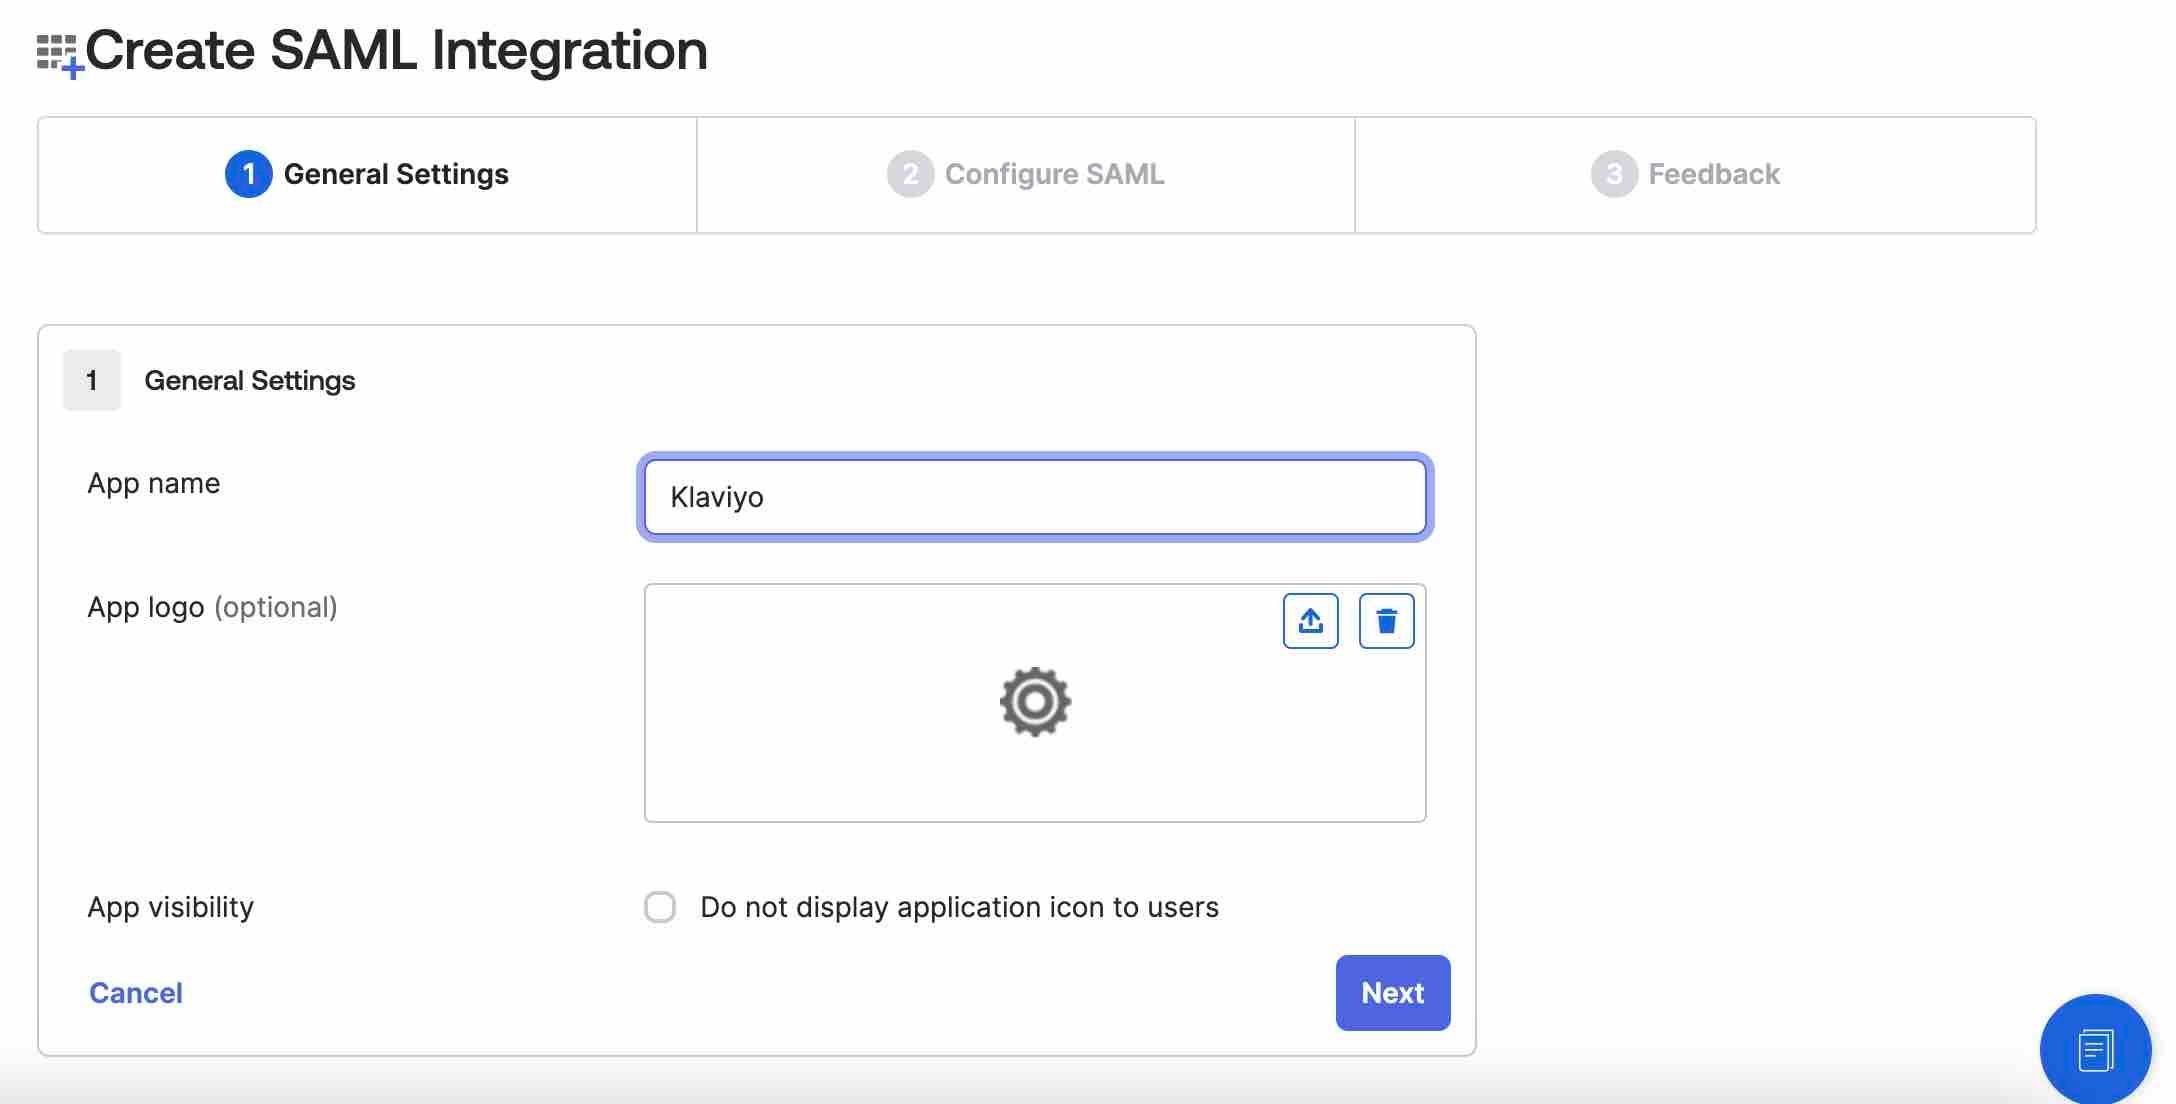
- Click Next.
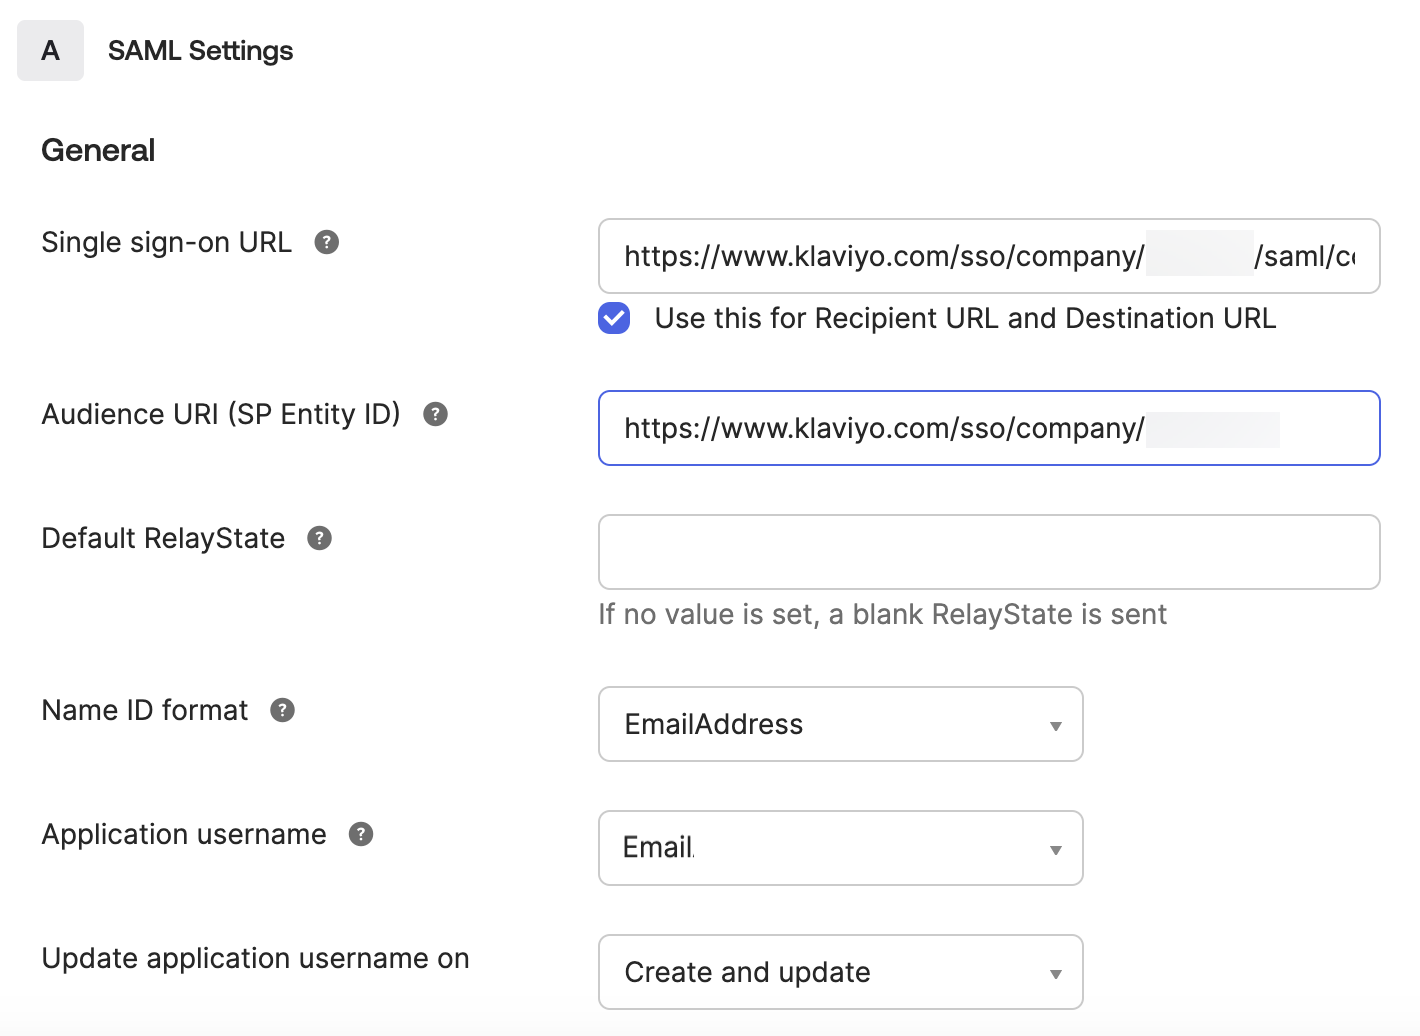
- In the Single sign-on URL field, paste in the Klaviyo SSO URL from the Klaviyo SSO setup screen.
- In the Audience URI (SP Entity ID) field, paste the Audience URI (Service Provider Entity ID) from Klaviyo.
- Set the Name ID format field to EmailAddress.
- Change the Application username to Email.
- Check that the Update application username on is set to Create and update.
- Click Next.
- Select I’m an Okta customer adding an internal app.
- You do not need to check or fill out any other information on this page.
- Scroll to the bottom of the page and click Finish.
- Go to the Sign On tab.
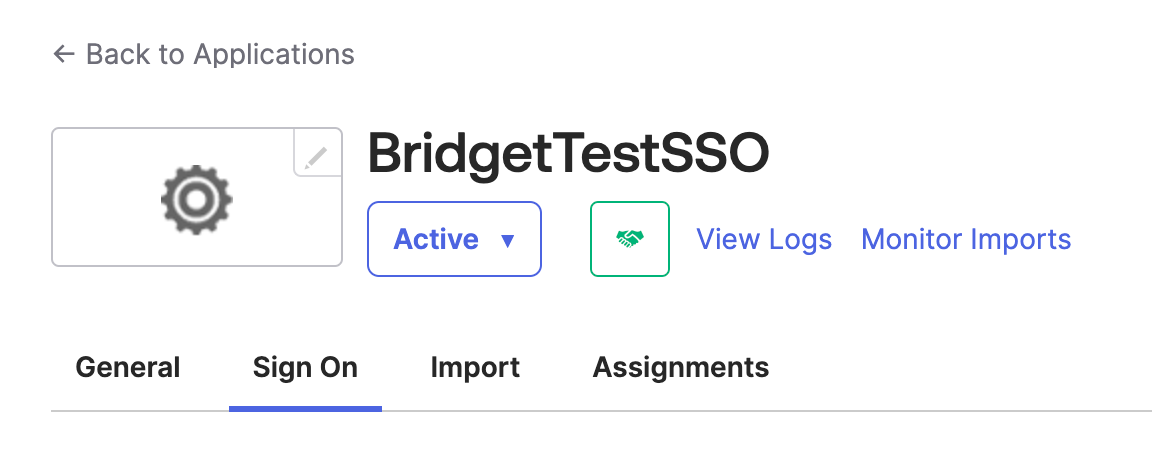
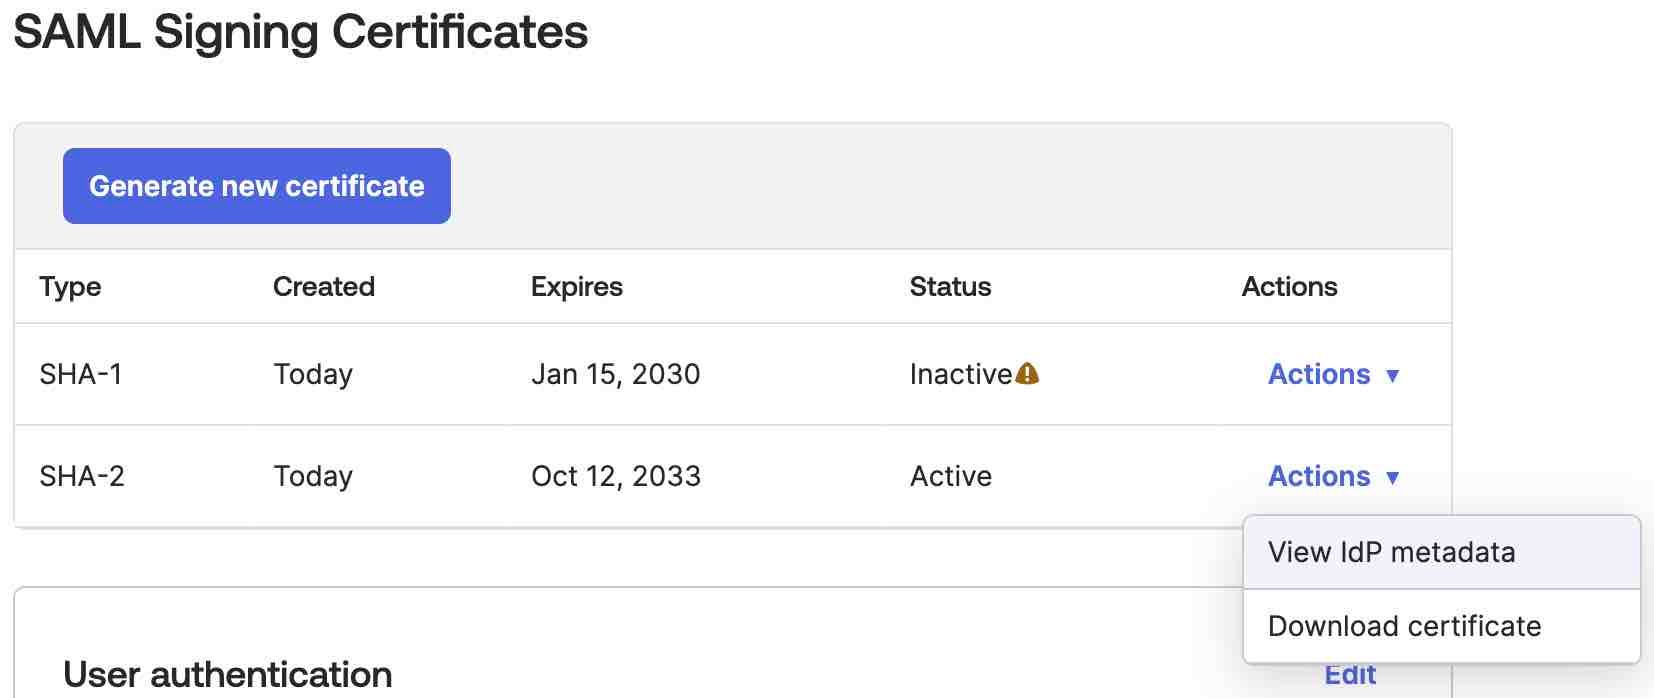
- Scroll down to the SAML Signing Certificates section.
- Find an active certificate and then click the Actions dropdown.
- Click View IdP metadata.
- A new tab will open that should look like the one below.
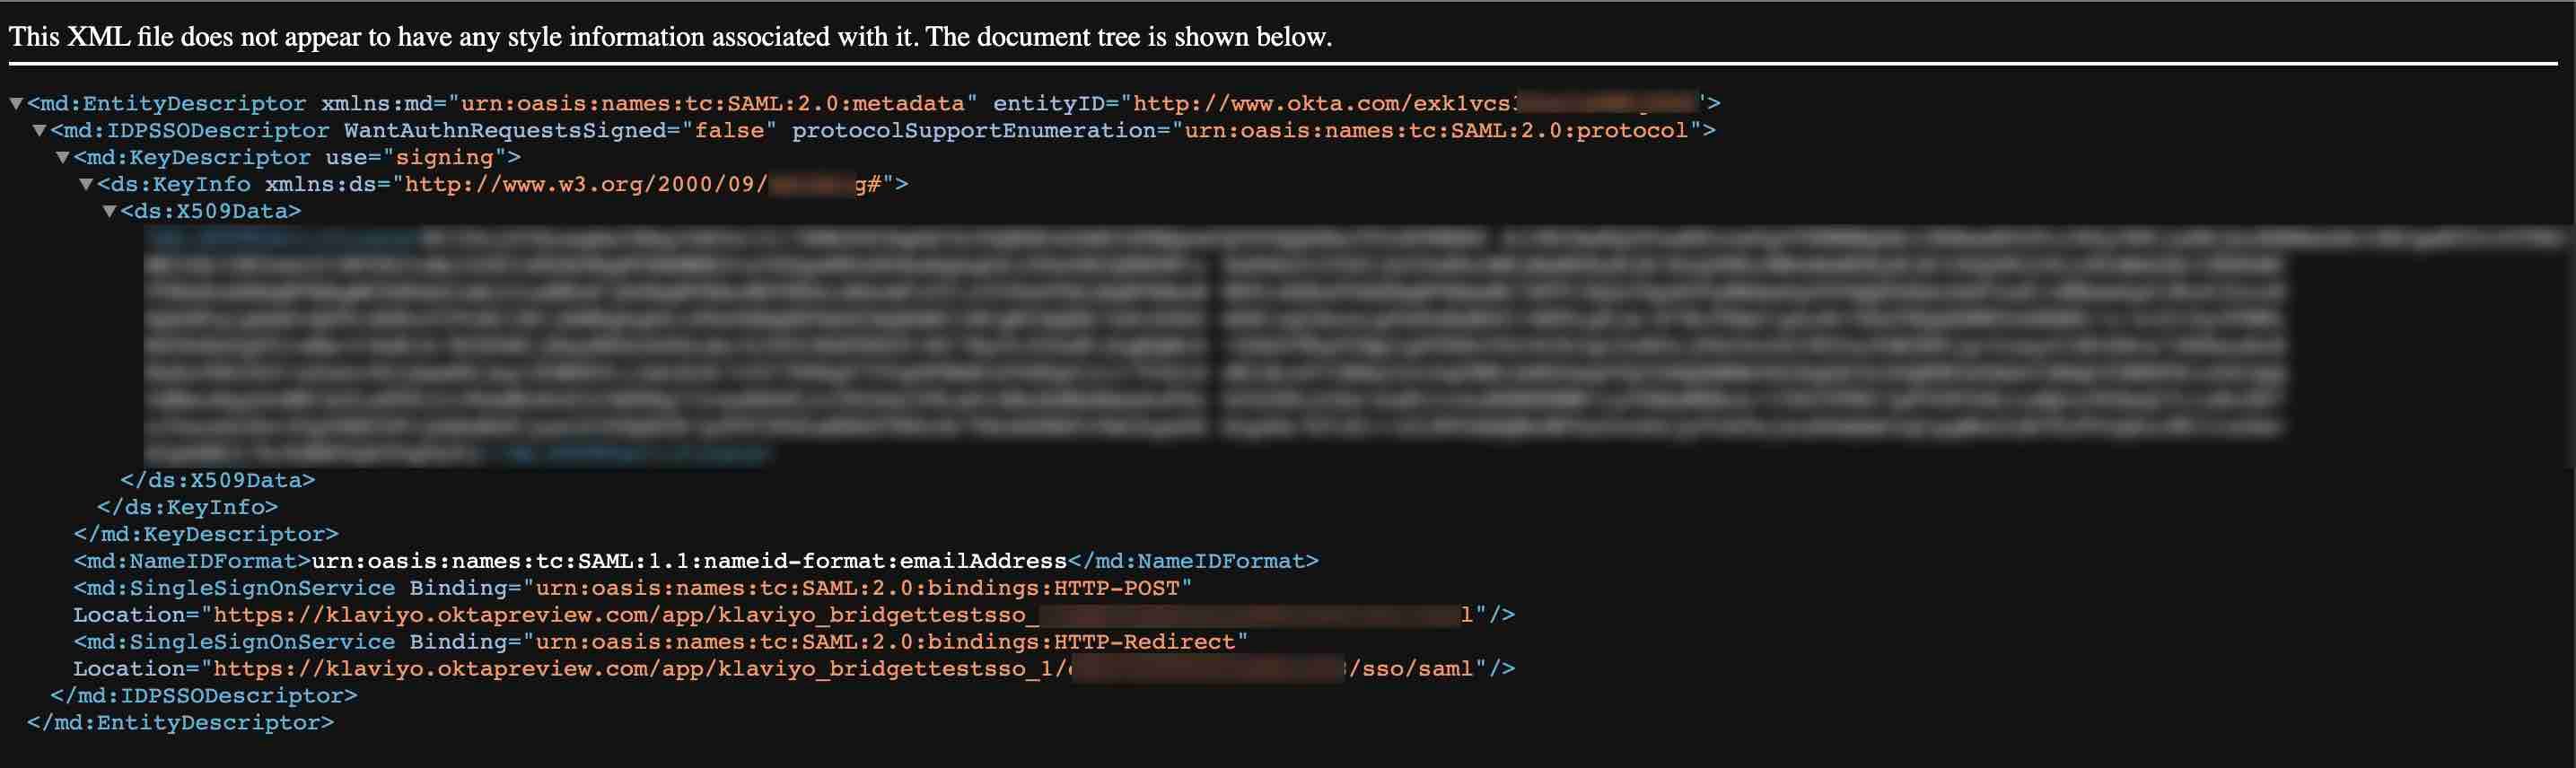
- In the new tab, right click and select Save as > Save so that you can upload this file to Klaviyo later.
- Navigate back to Okta.
- Go to the Assignments tab.
- Click Assign.
- Choose whether to assign the app to an individual (i.e., people) or to a group.
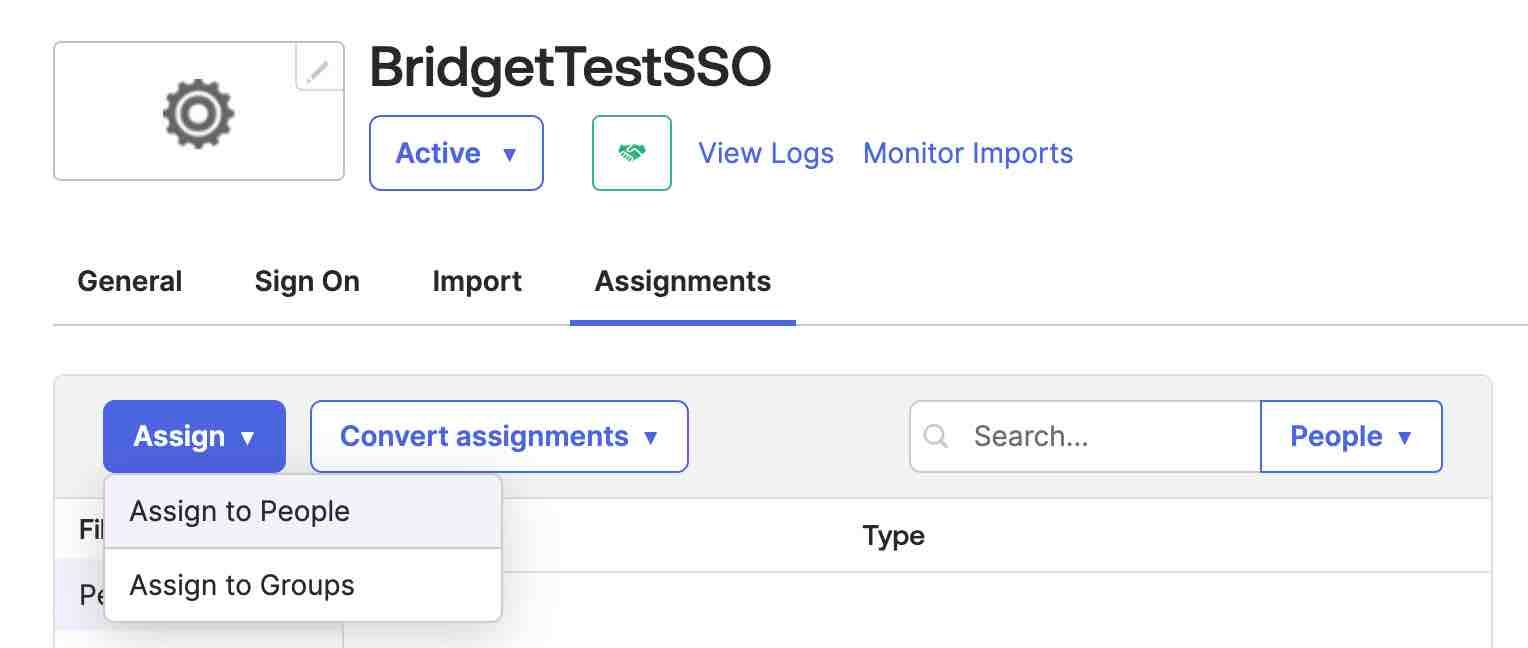
- Find the people or groups you want to assign Klaviyo to, and click Assign next to their name(s).
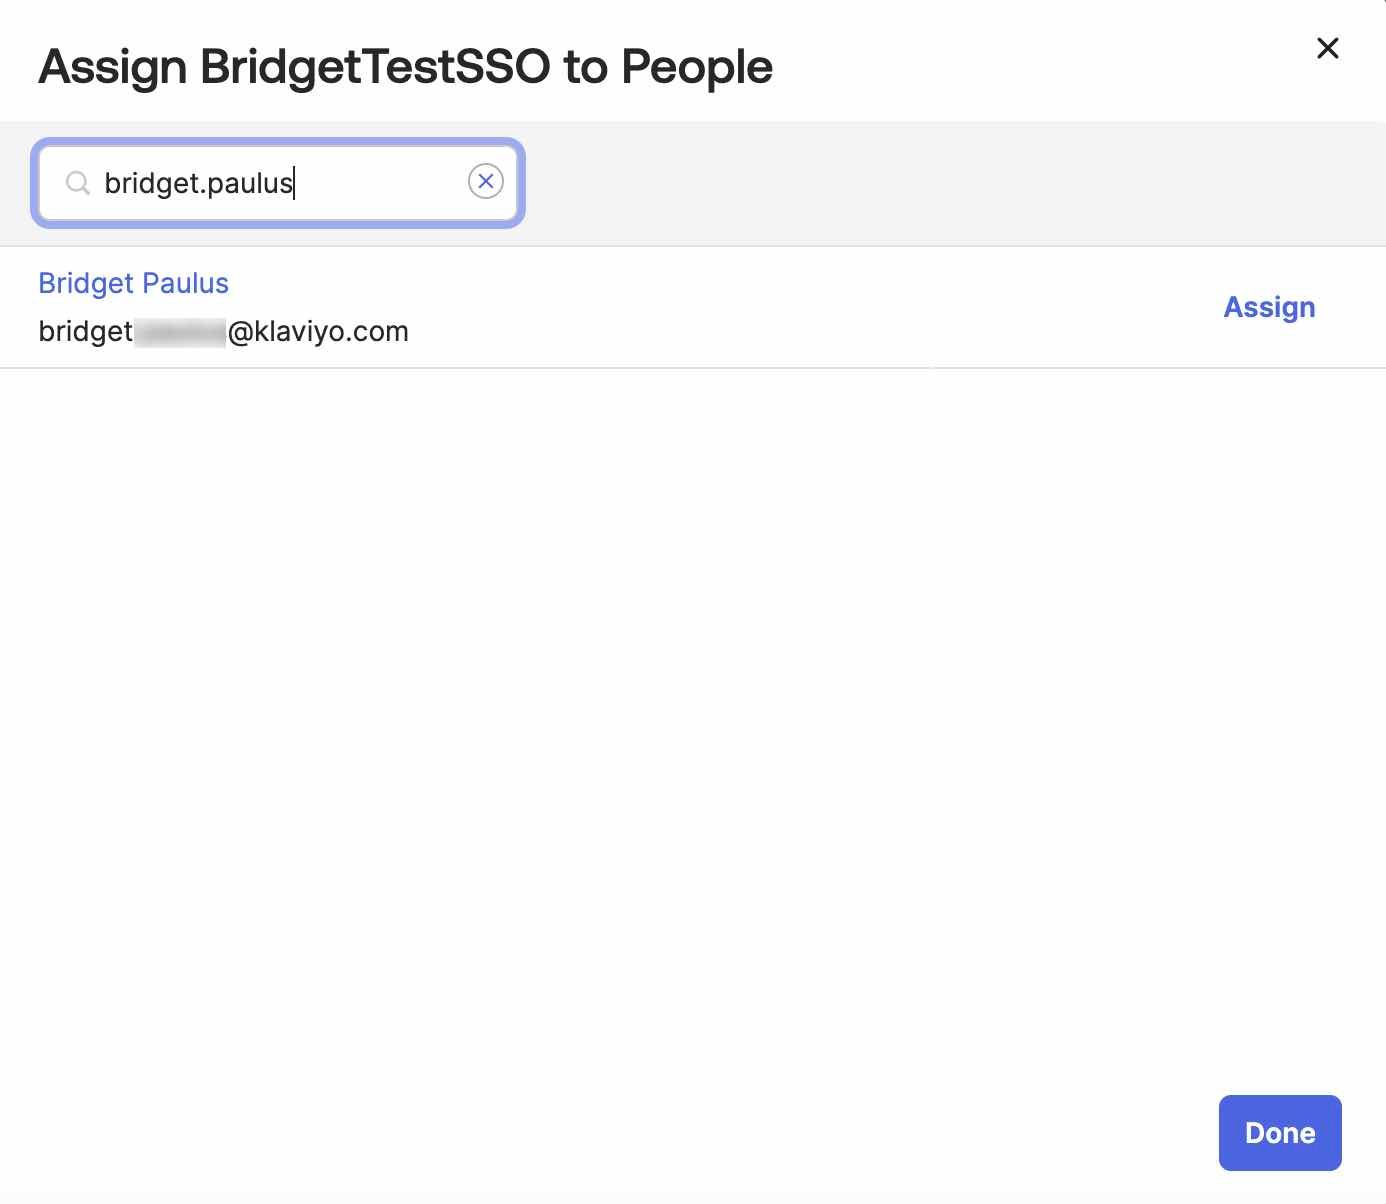
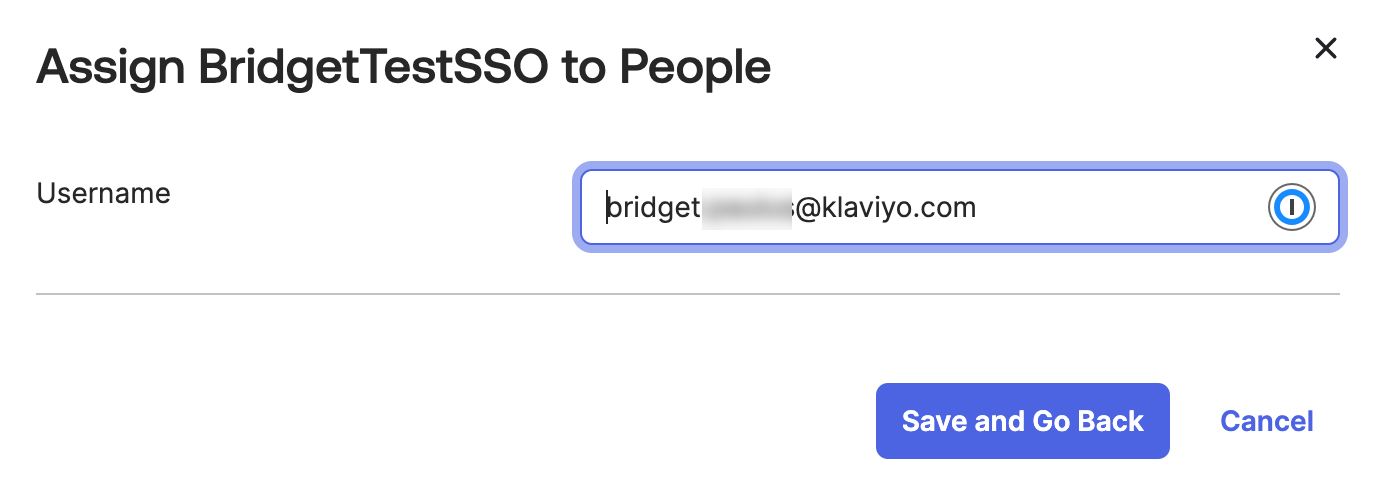
- If you’re selecting individuals:
- Choose the username for each individual; the default is their username in Okta.
- Click Save and go back.
- When you are finished, click Done.
One Login
- Log in to your One Login account.
- Navigate to Applications > Applications.

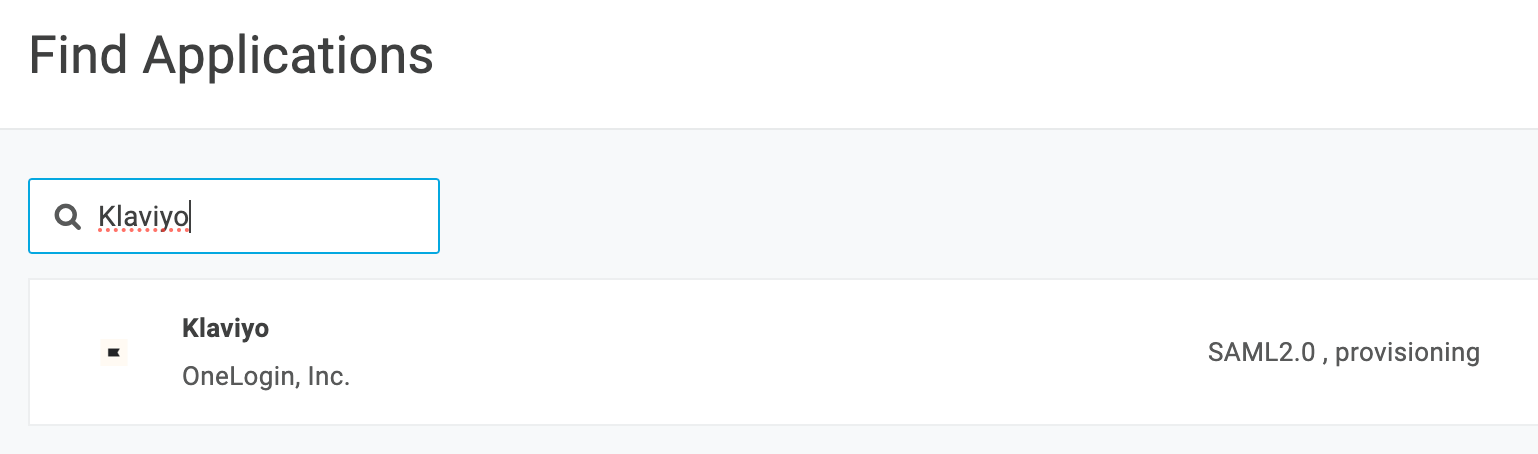
- Click Add App in the upper right corner.
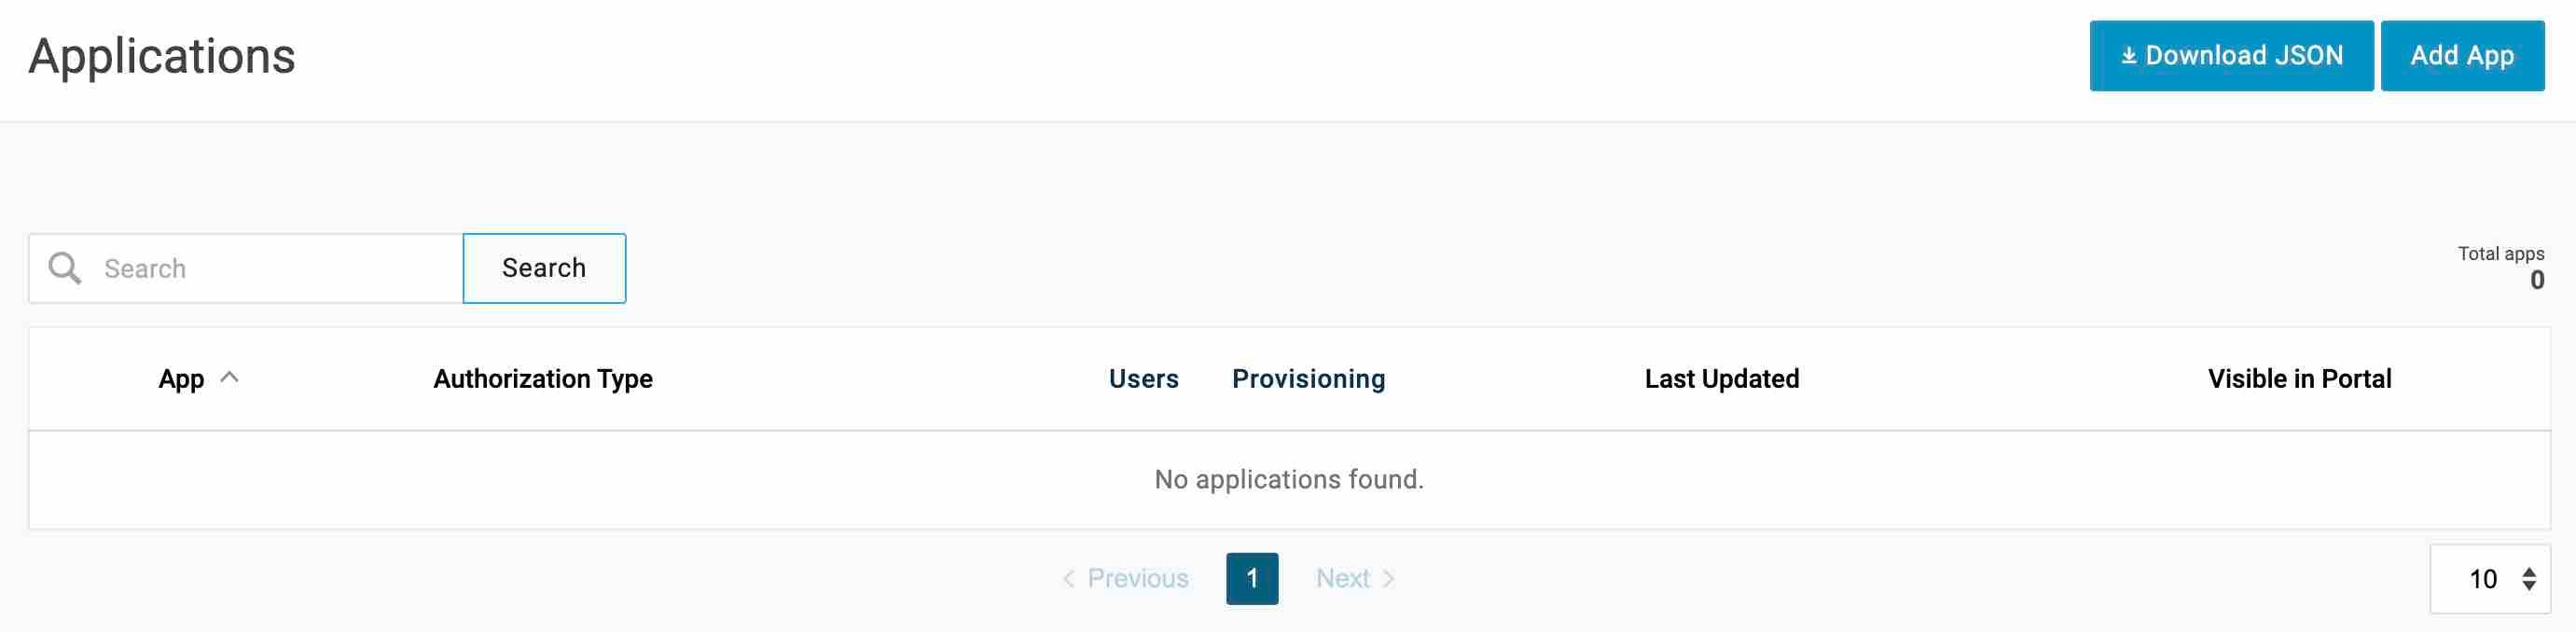
- Search for “Klaviyo” and then select the result that appears.
- Optional: choose the display name, upload a new icon, or add a description for this app.
- Click Save in the upper right.
- Navigate to Configuration in the left sidebar.
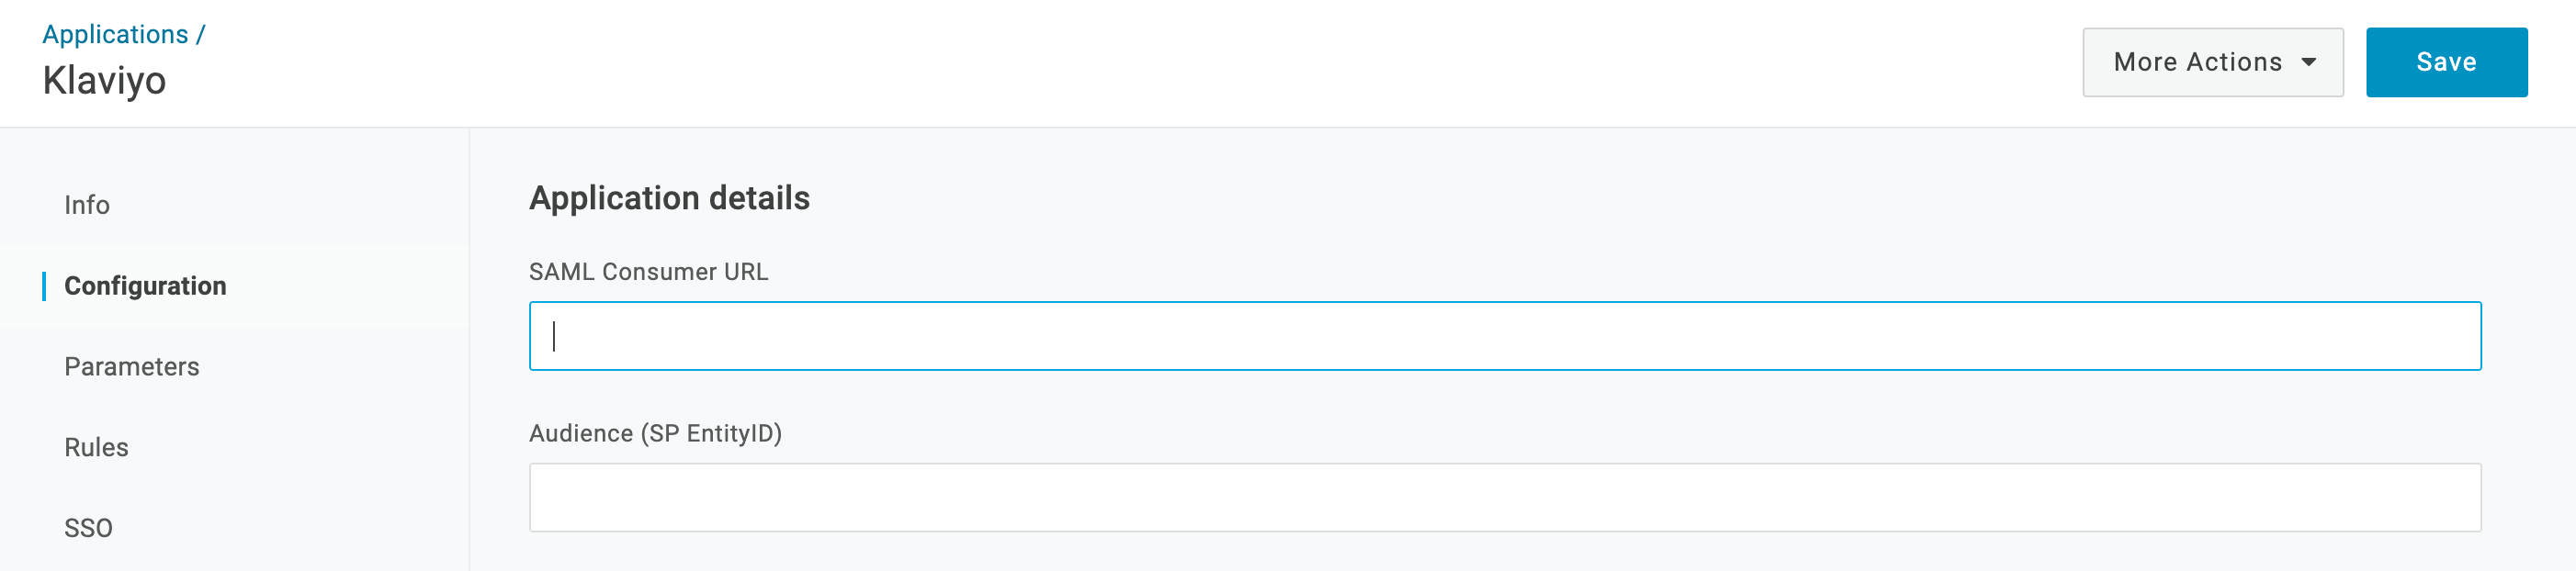
- In the SAML Consumer URL field, paste your Klaviyo SSO URL.
- In the Audience (SP EntityID) field, paste your Audience URI (Service Provider Entity ID).
- Click Save.
- Click SSO in the left sidebar.
- Open the SAML Signature Algorithm dropdown.
- Select SHA-256.
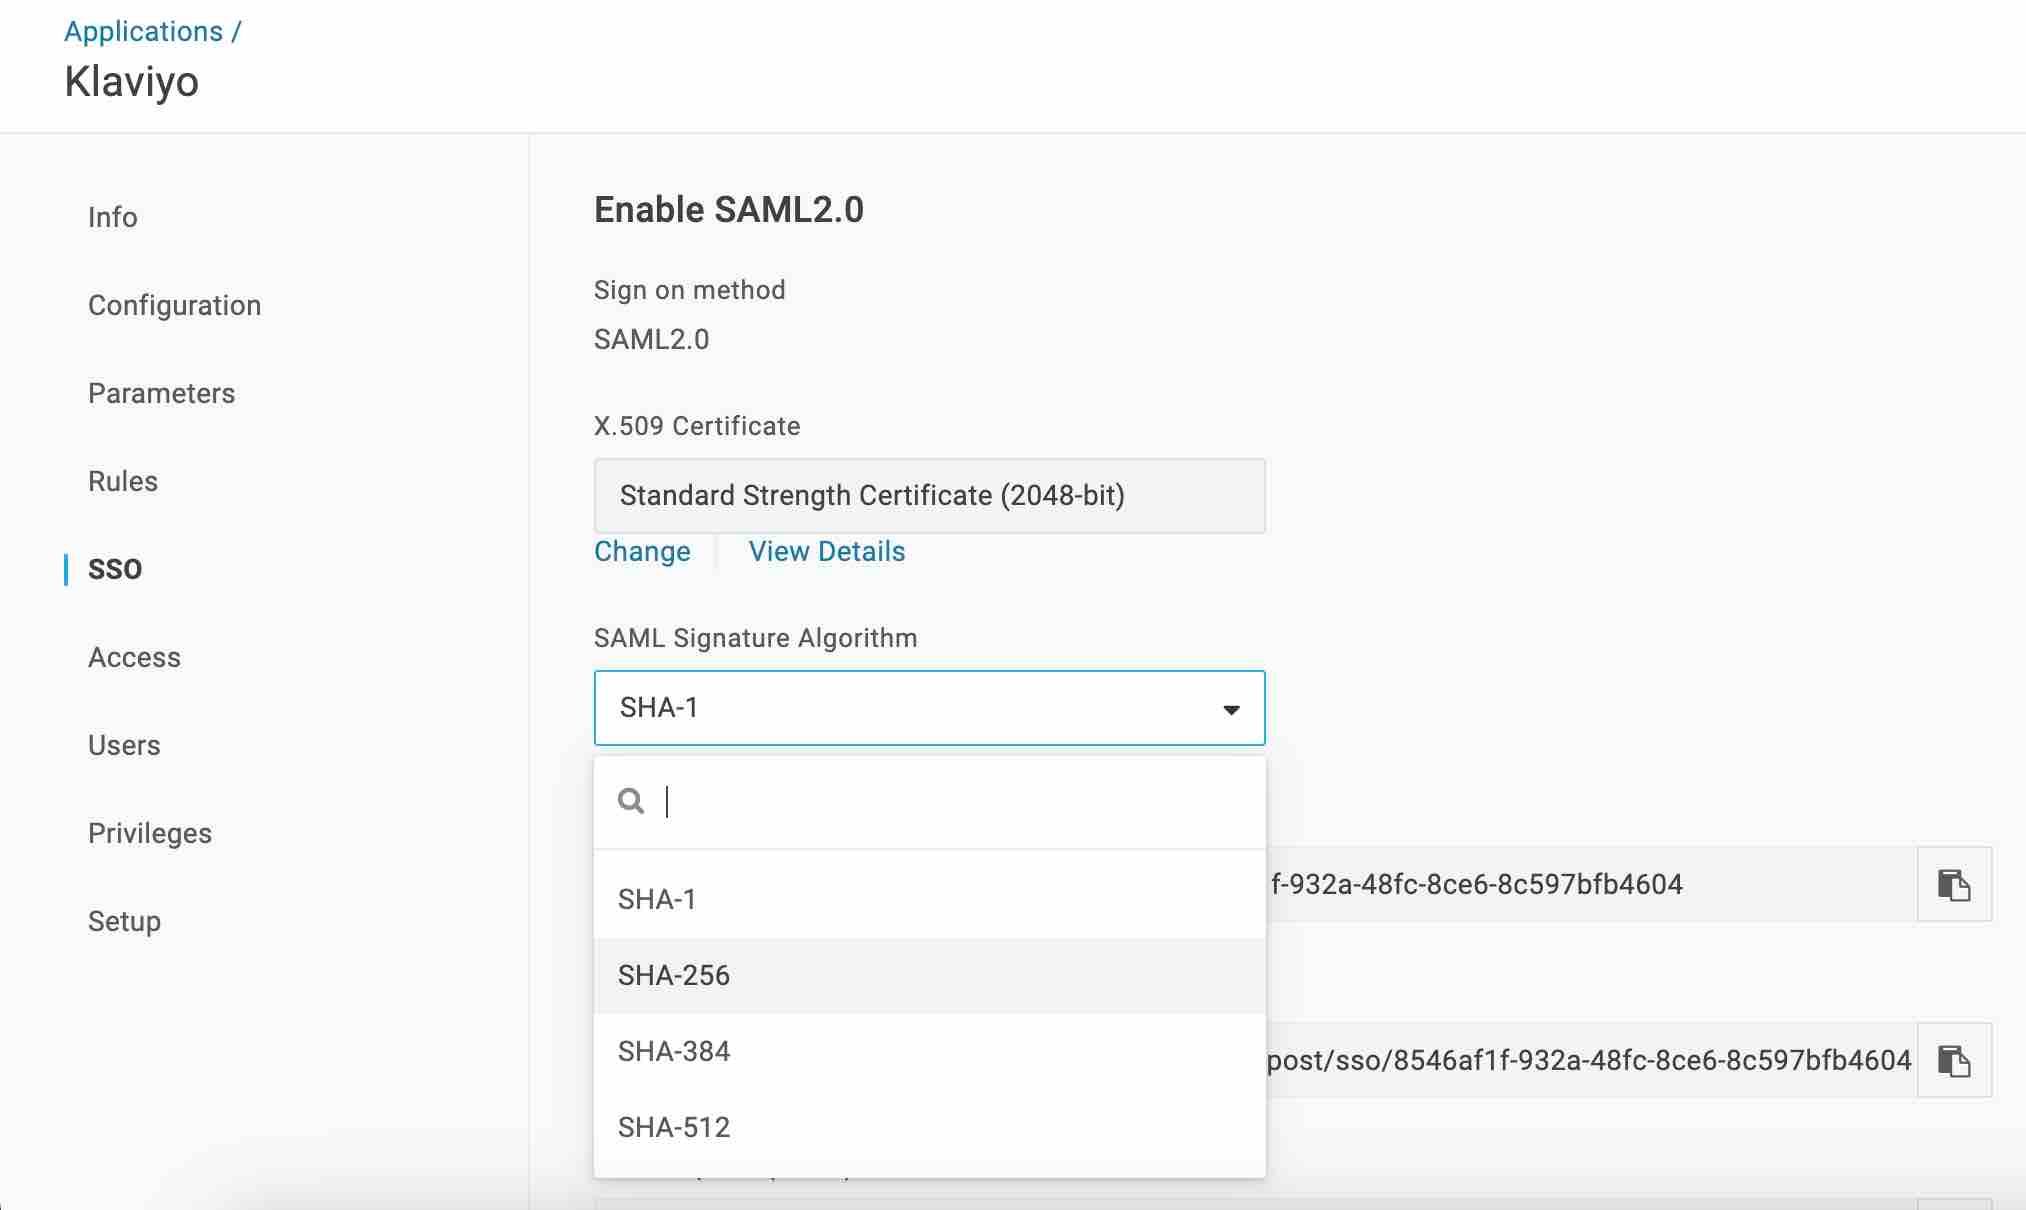
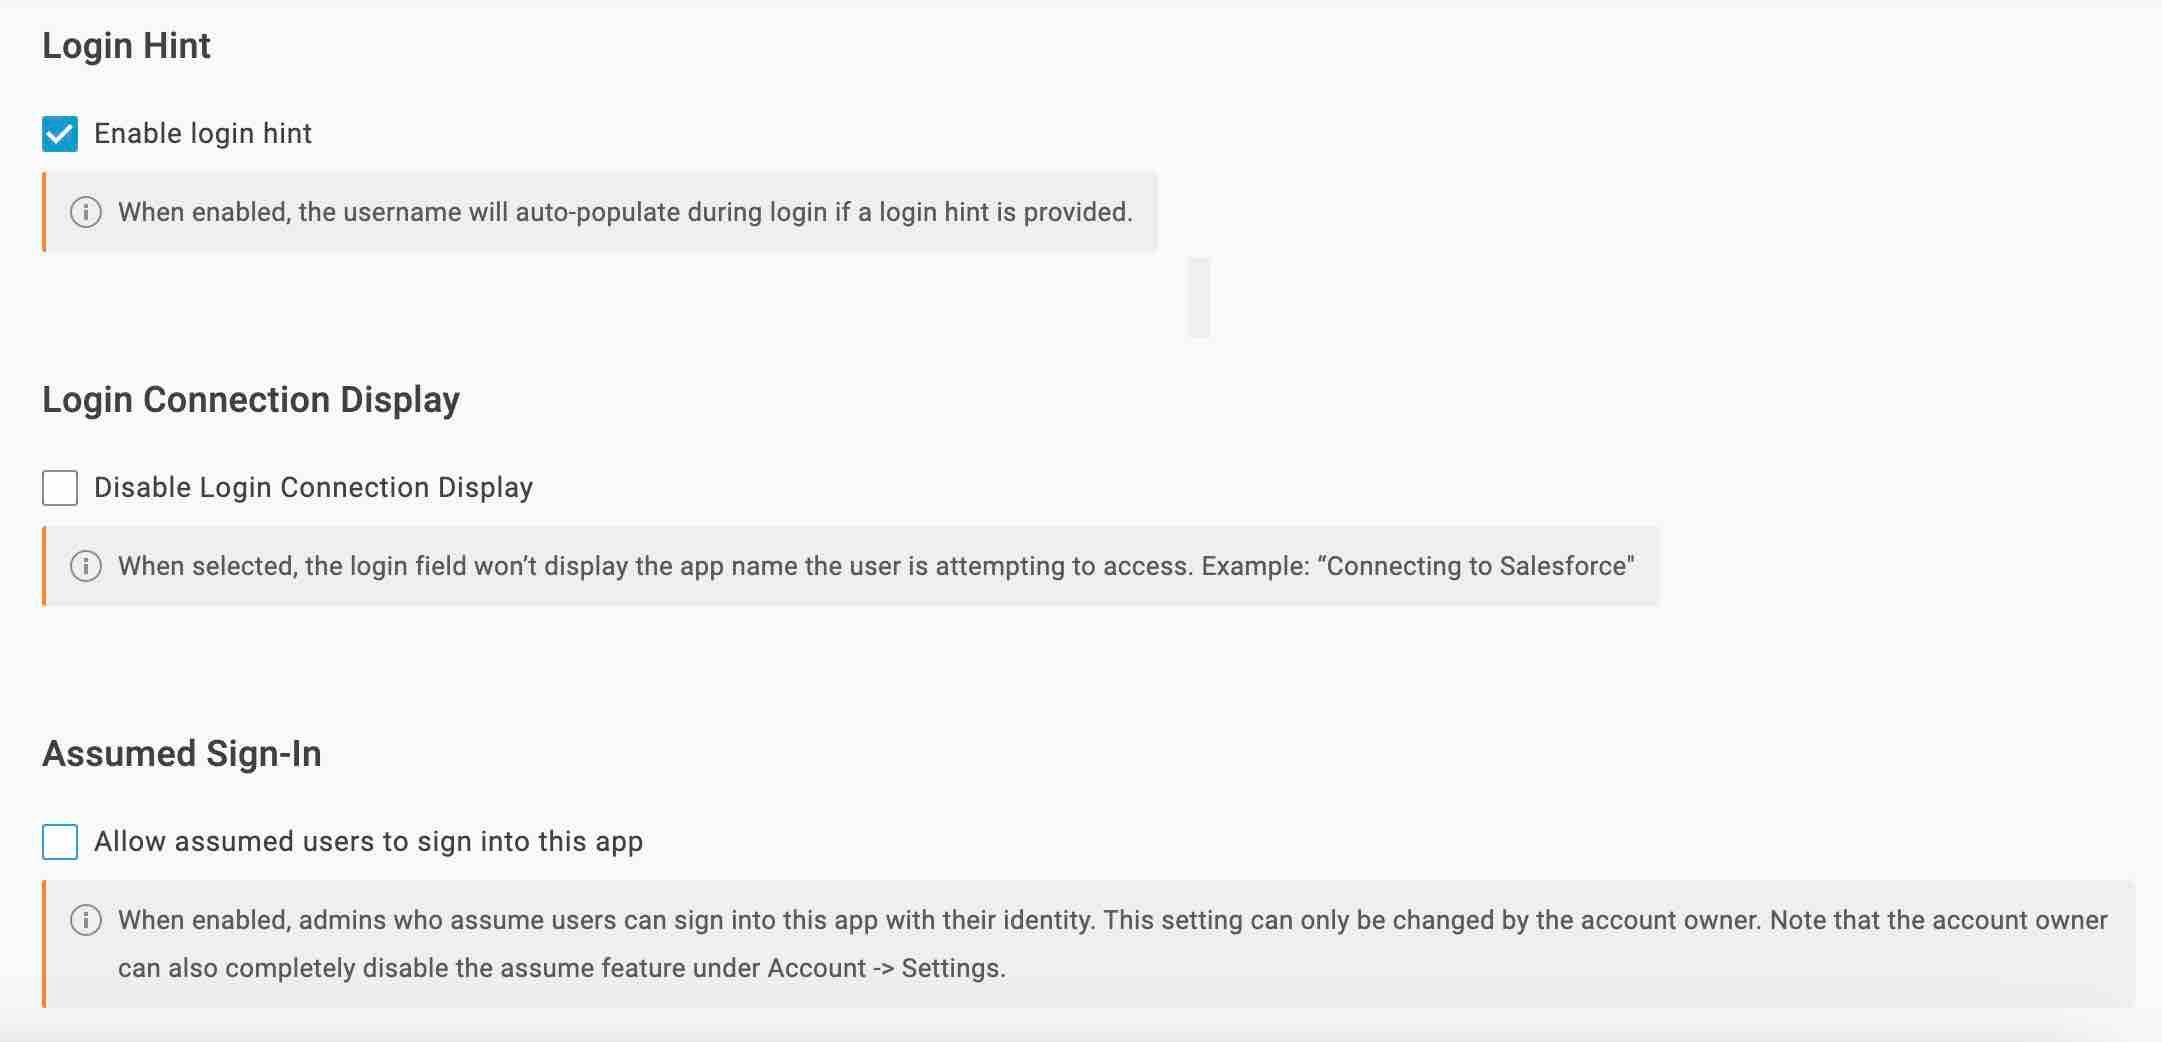
- Optional: scroll down to change your login display settings.
- Click Save.
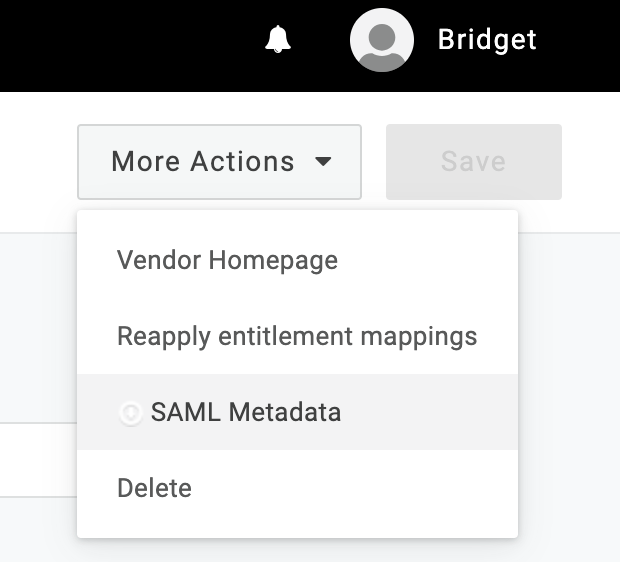
- Open the More Actions dropdown in the upper right.
- Select SAML Metadata. This will download the file you need to upload in the next section.
Before moving on to the next section, you need to add users to the Klaviyo app in One Login and then assign their roles.
- To add users to the Klaviyo app, click Users > Users in the upper left.
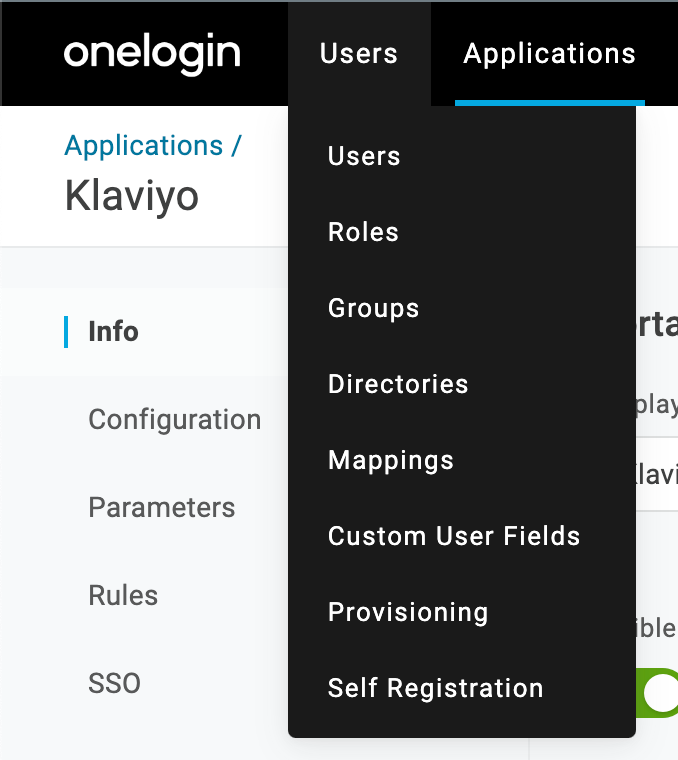
- Select a user to access Klaviyo. We recommend assigning the person who is setting up SSO in Klaviyo.
- Select Applications in the left sidebar.
- Click the plus button on the right side to add an application to this user.
- Select Klaviyo from the dropdown.
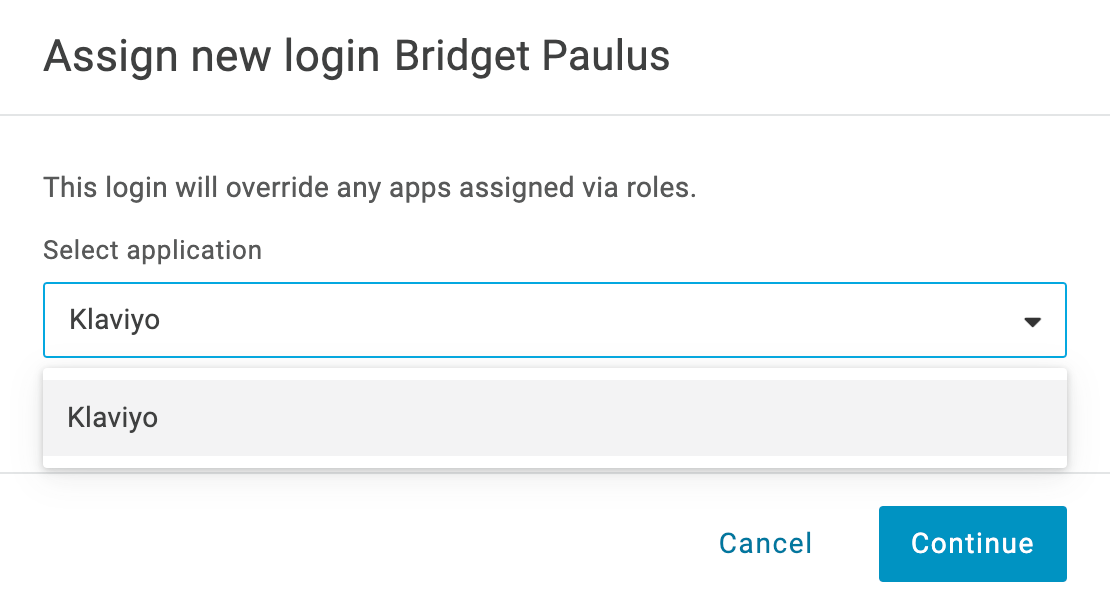
- Click Continue.
- In the resulting modal, scroll down to the role dropdown.
- Open this dropdown and select the Klaviyo role this user should be assigned.
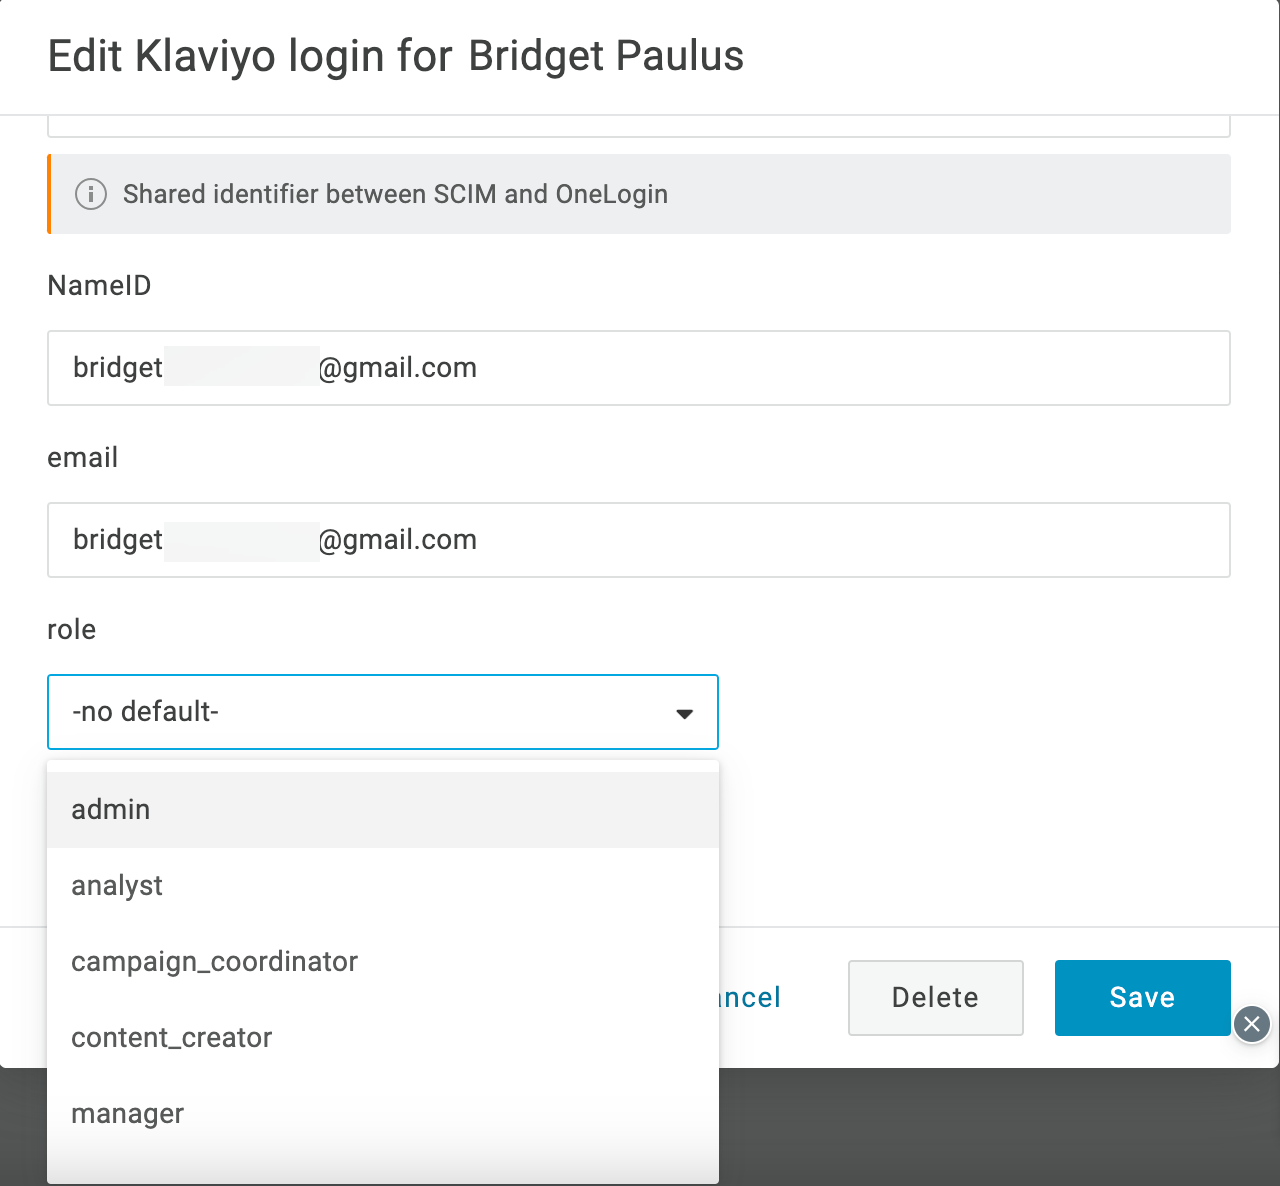
- Click Save.
Microsoft Entra ID (Azure AD)
- Log in to Microsoft Entra ID (formerly known as Azure AD).
- Click Microsoft Entra ID.
- Select the Add dropdown and then click Enterprise Application.
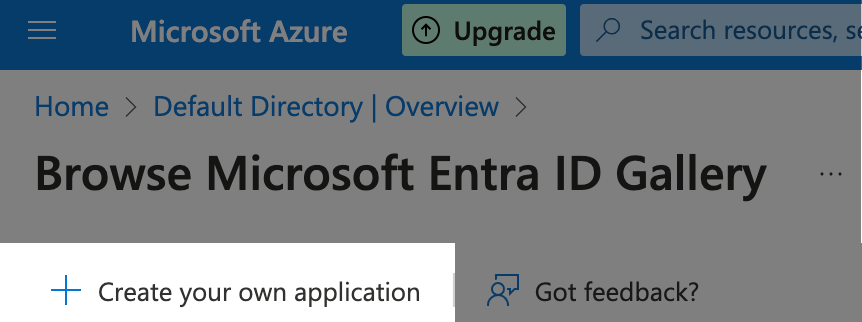
- Click Create your own application.
- Name the application “Klaviyo,” then click Create.
- Click Single sign-on in the left sidebar.
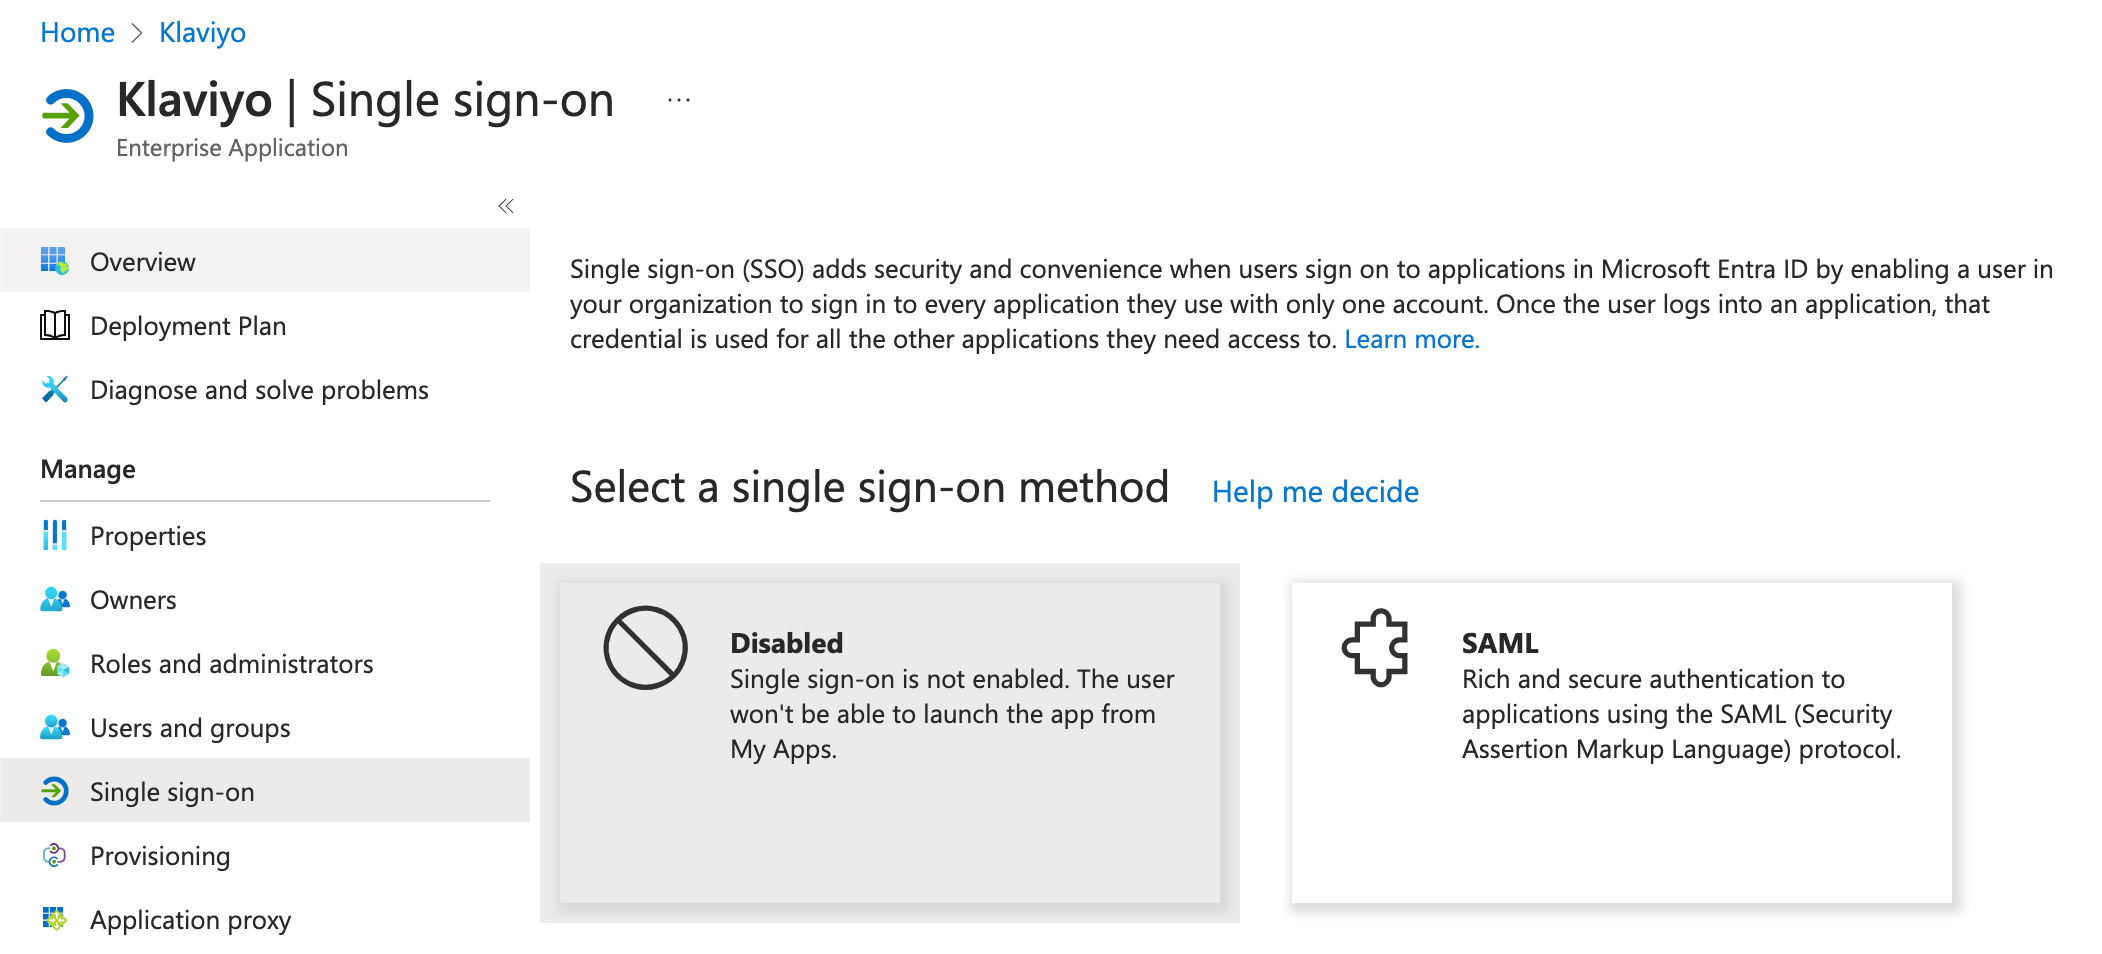
- Select SAML.
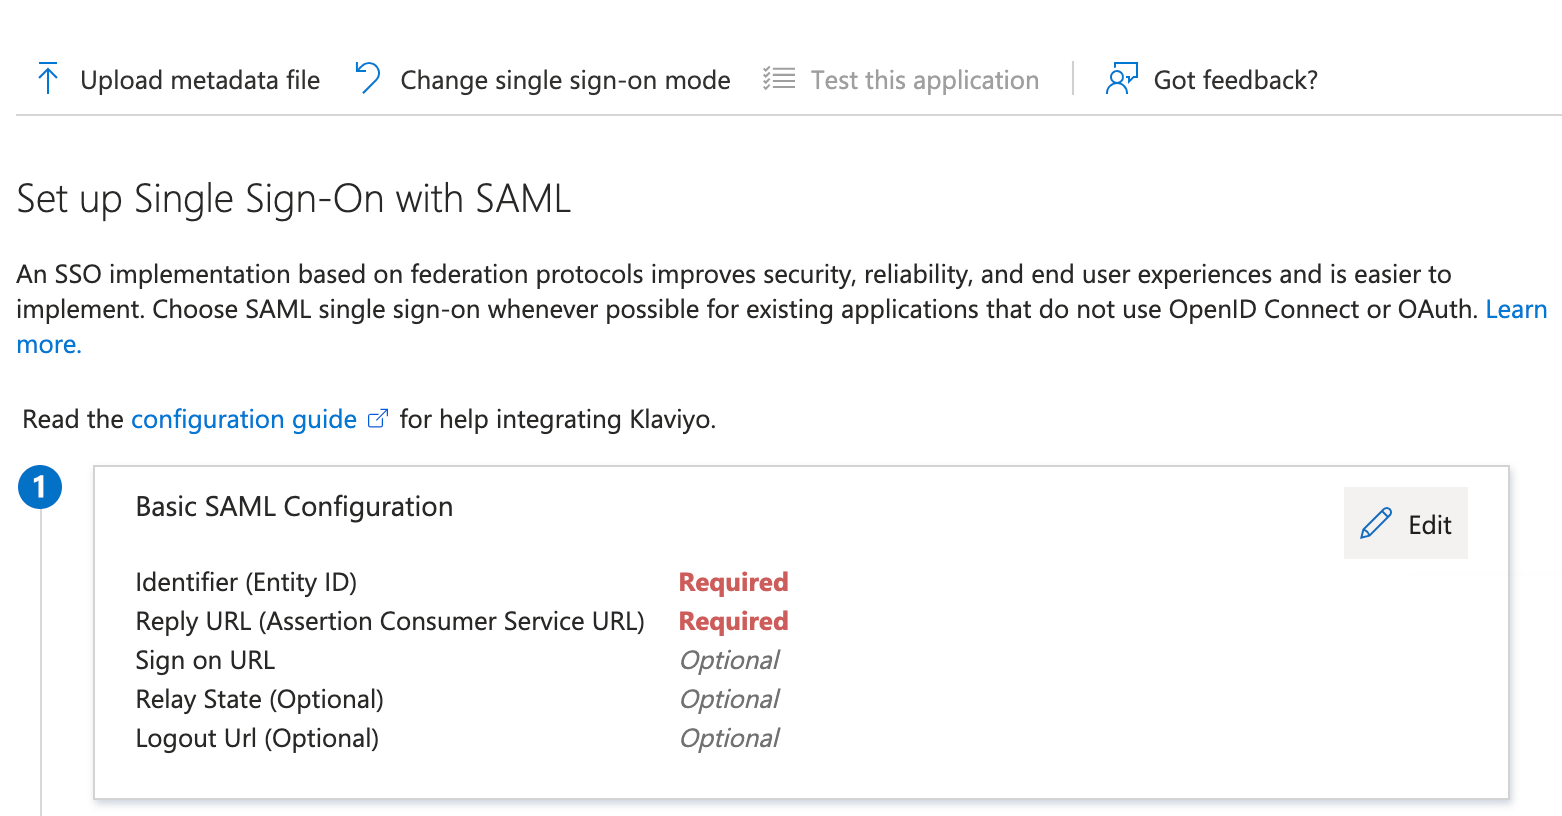
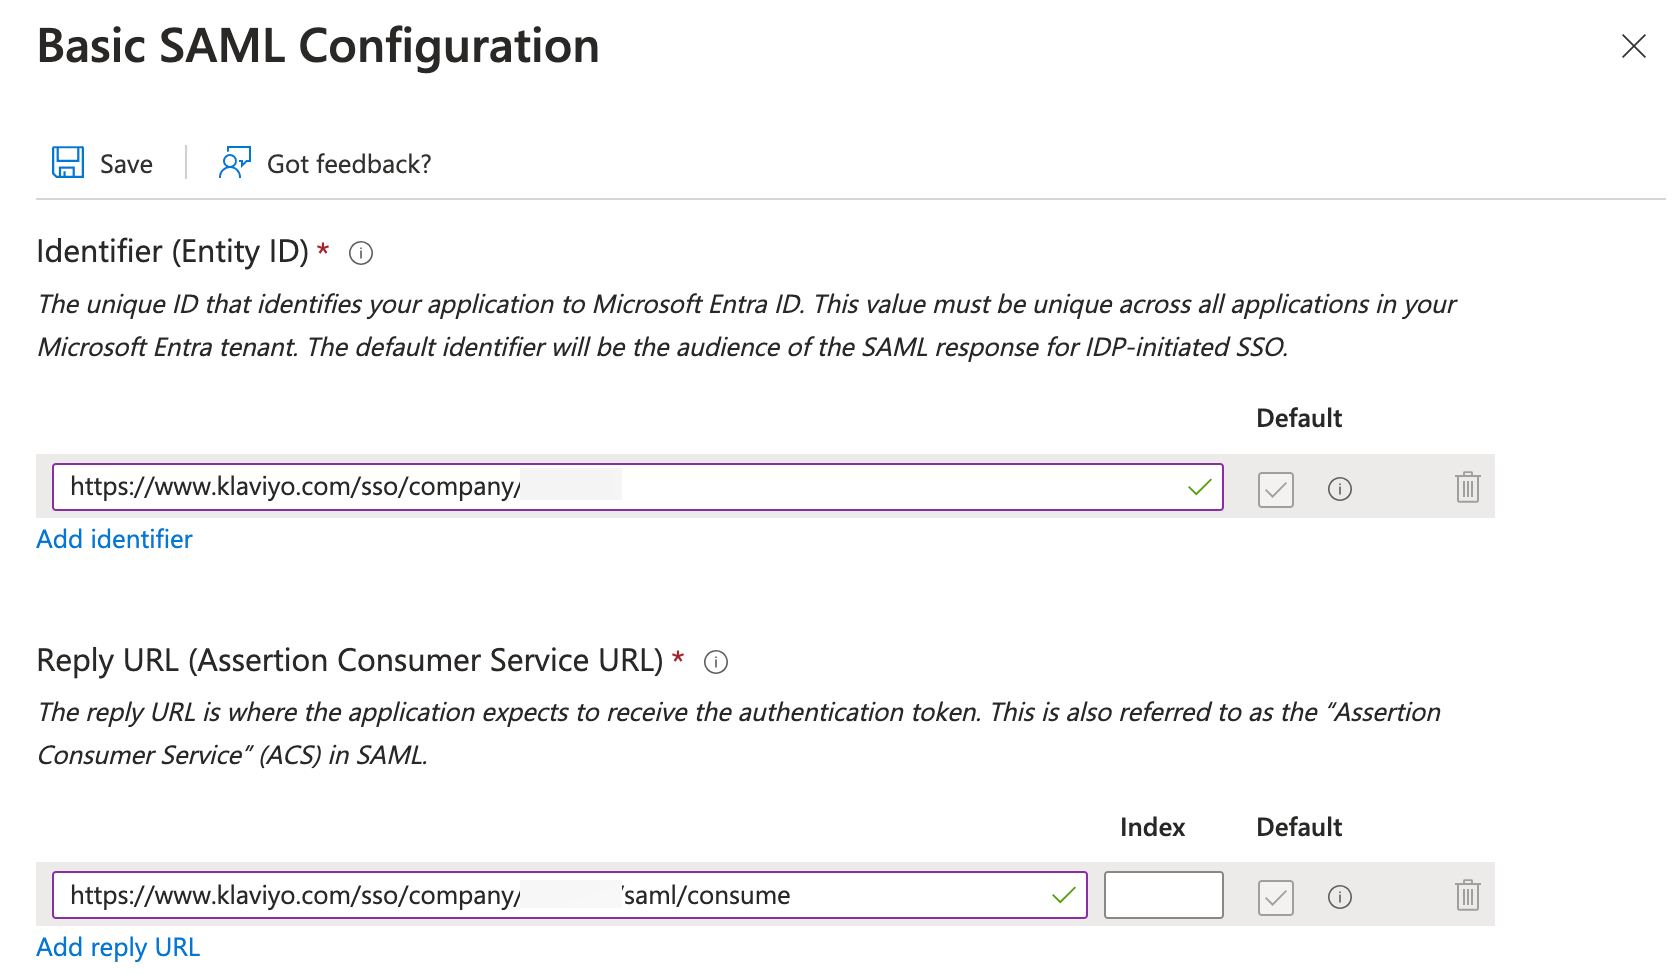
- Click Edit in the Basic SAML Configuration box.
- In the right sidebar that appears, click Add identifier under Identifier (Entity ID).
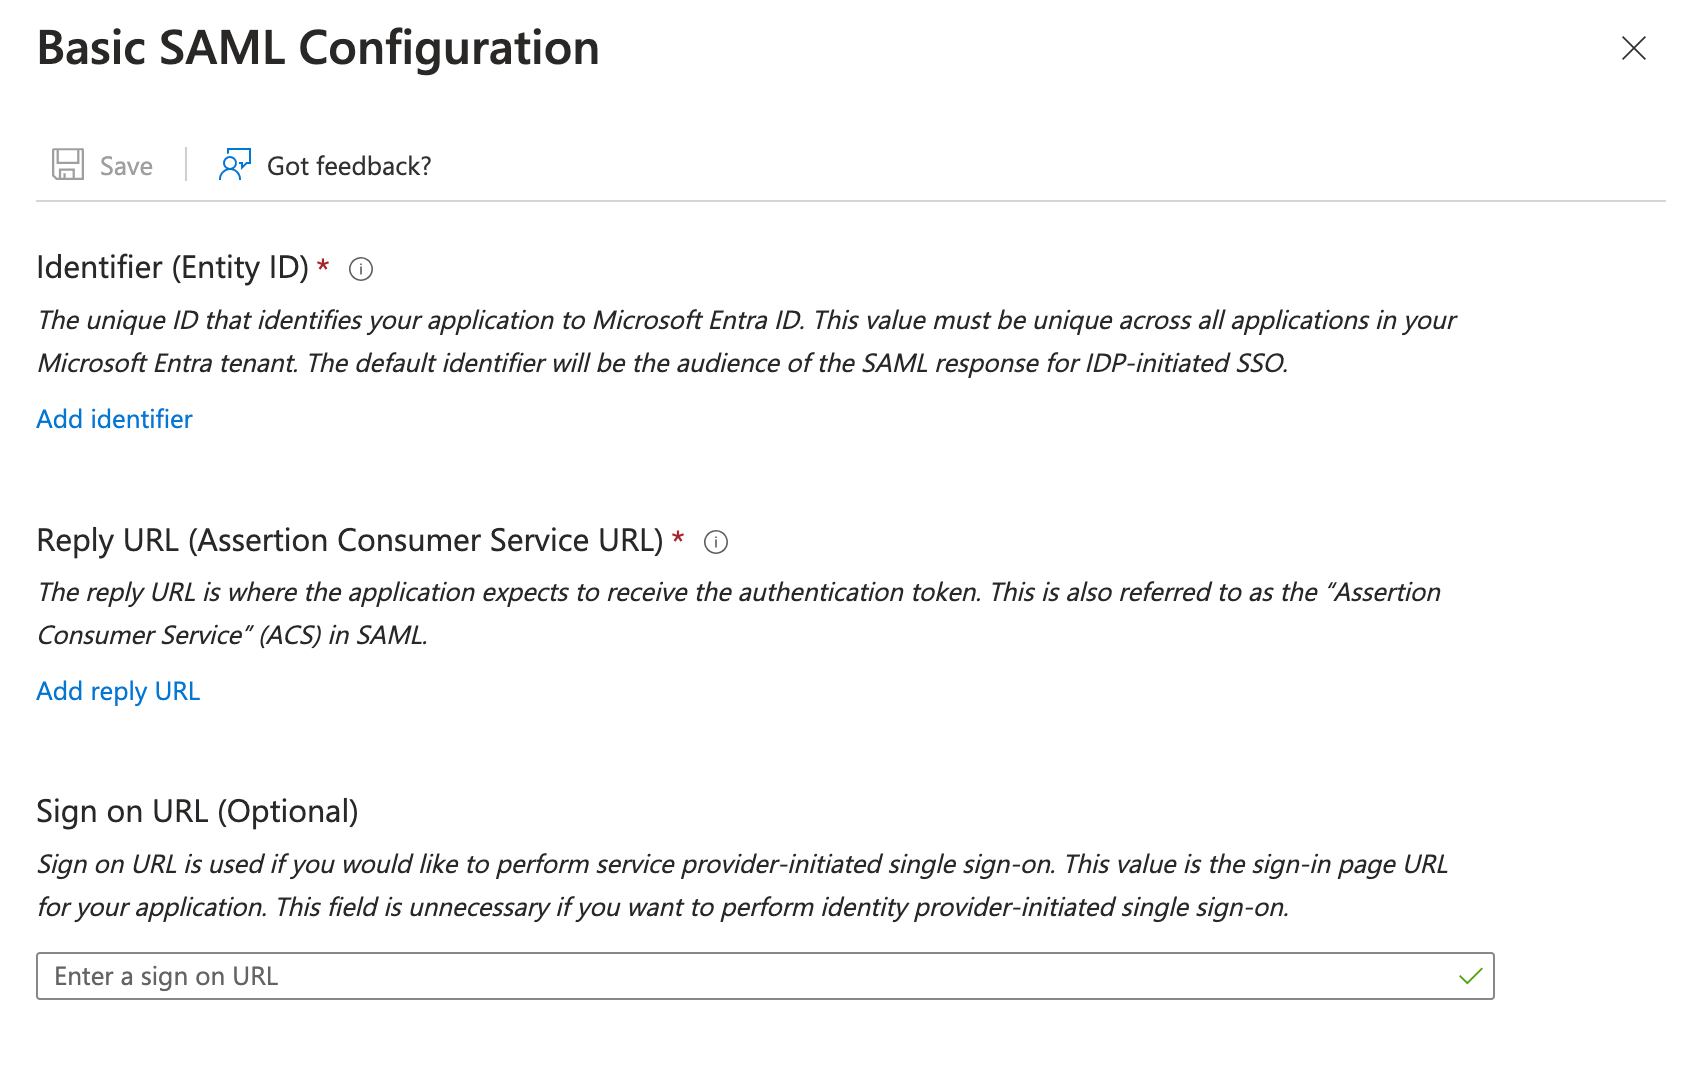
- In the field that appears, paste in the Audience URI (Service Provider Entity ID) from Klaviyo.
- Under Reply URL (Assertion Consumer Service URL), click Add reply URL.
- Here, paste the Klaviyo SSO URL from Klaviyo.
- Note: if you want to add in a Sign on URL, you must first create a workplace ID, which is discussed in the next section. We recommend finishing the setup process and then coming back to this step.
- Click Save in the top left corner of the sidebar before clicking the X in the upper right.
- Scroll down to the SAML Certificates box (step 3 on the Single sign-on page in Entra).
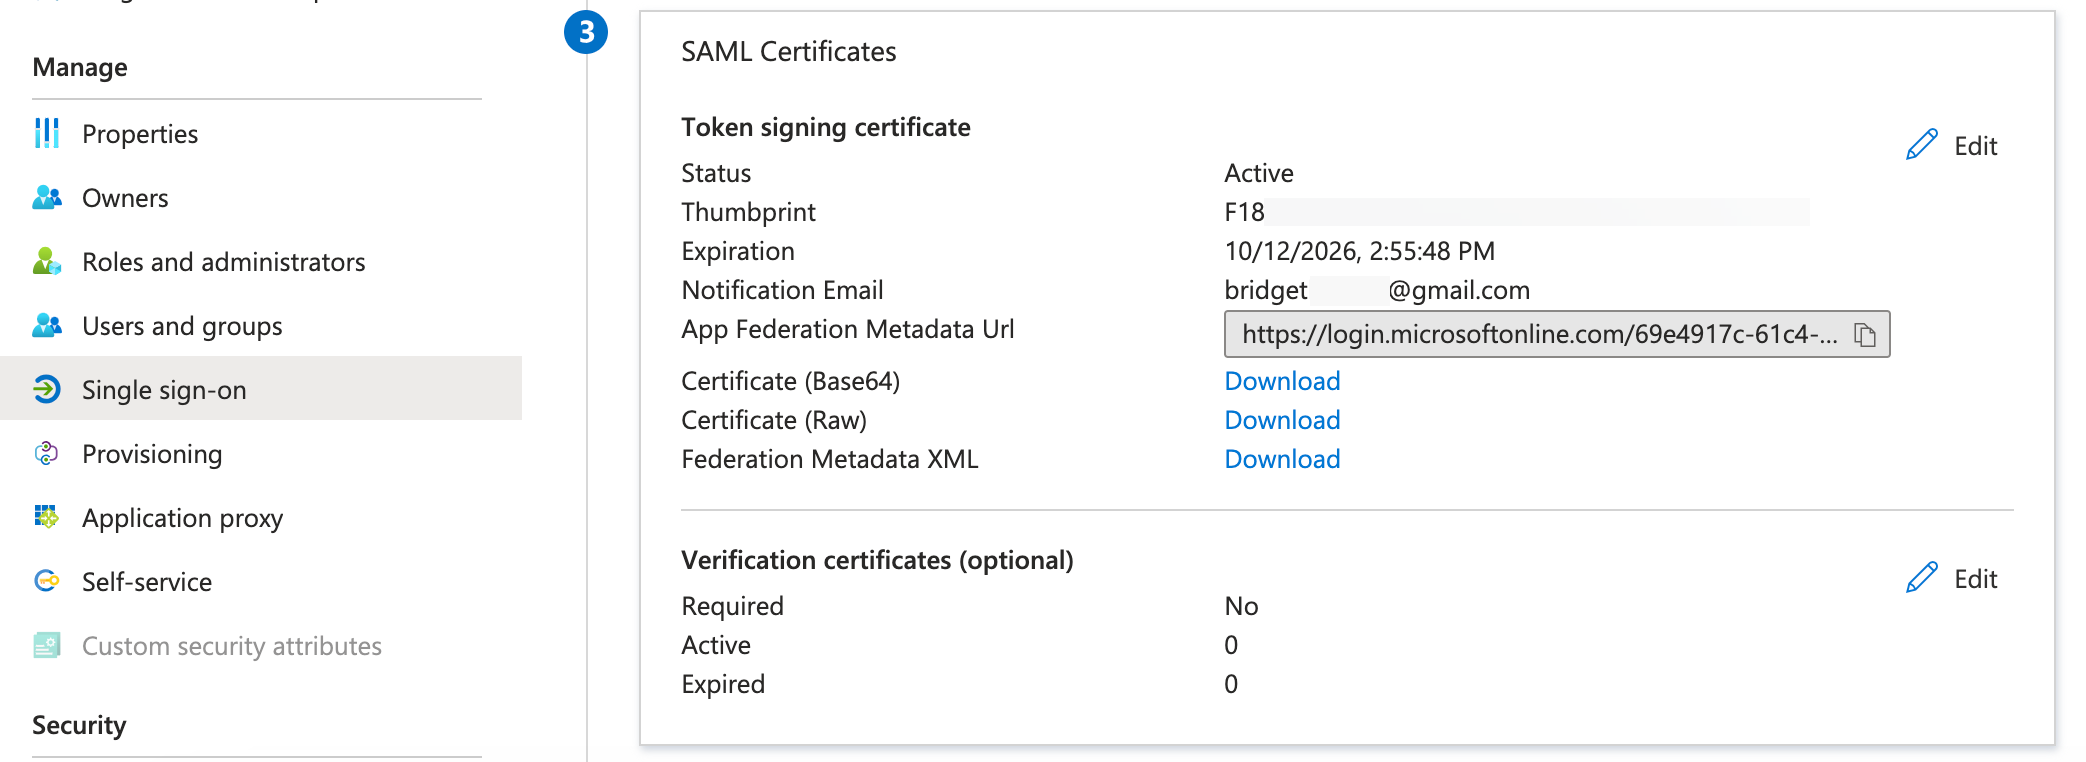
- Next to Federation Metadata XML, click Download.
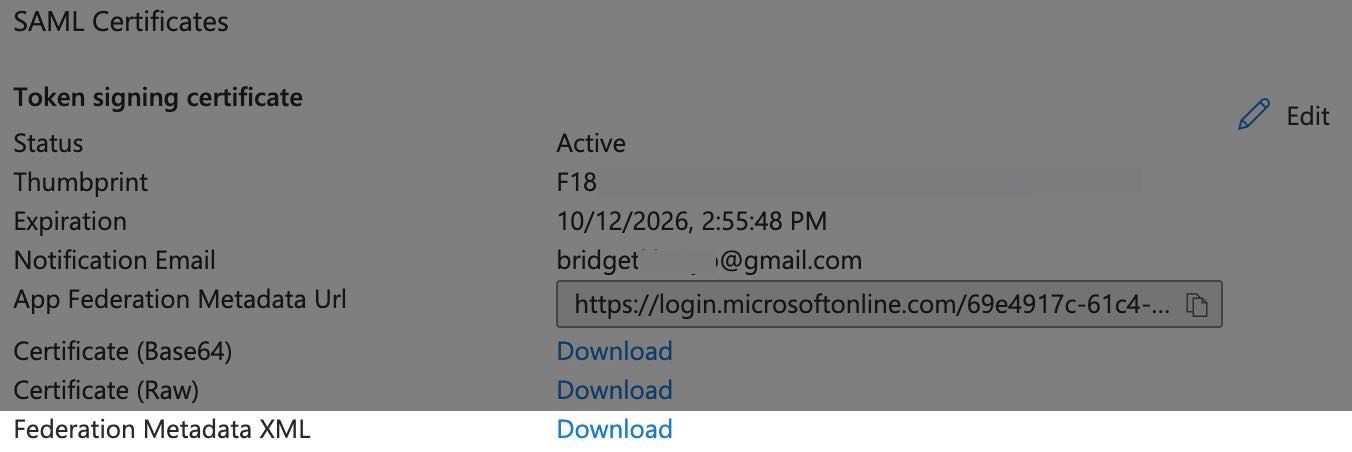
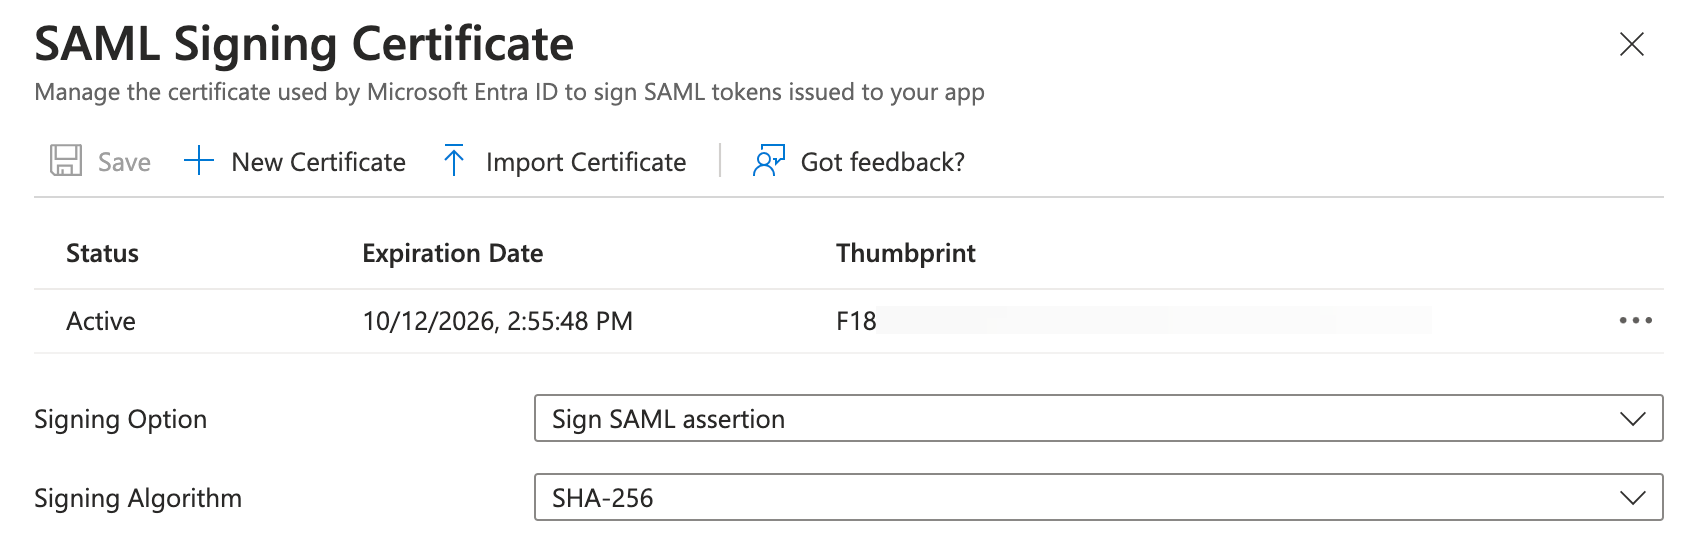
- Still within the SAML Certificates box, click Edit in the upper right.
- In the sidebar that appears on the right, check that the:
- Signing Option requires that the SAML assertion be signed (here, we set it to Sign SAML assertion). Note that signing the response is optional.
- Signing Algorithm is set to SHA-256.
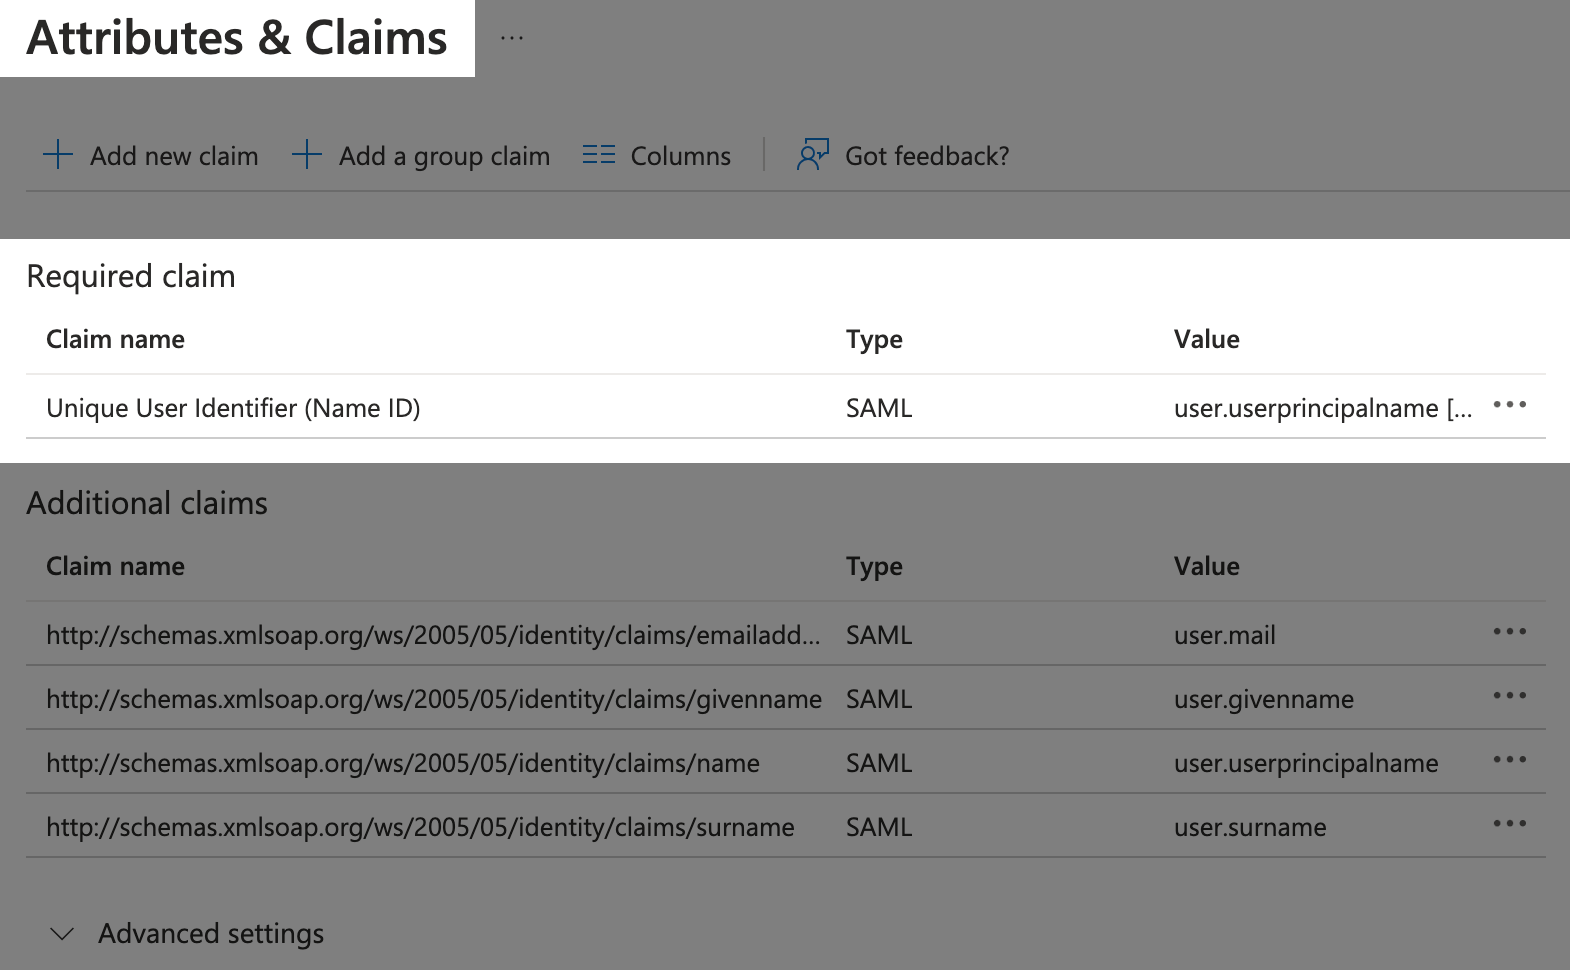
- Scroll back up to the Attributes & Claims box (step 2 on Single sign-on page in Entra) and click Edit.
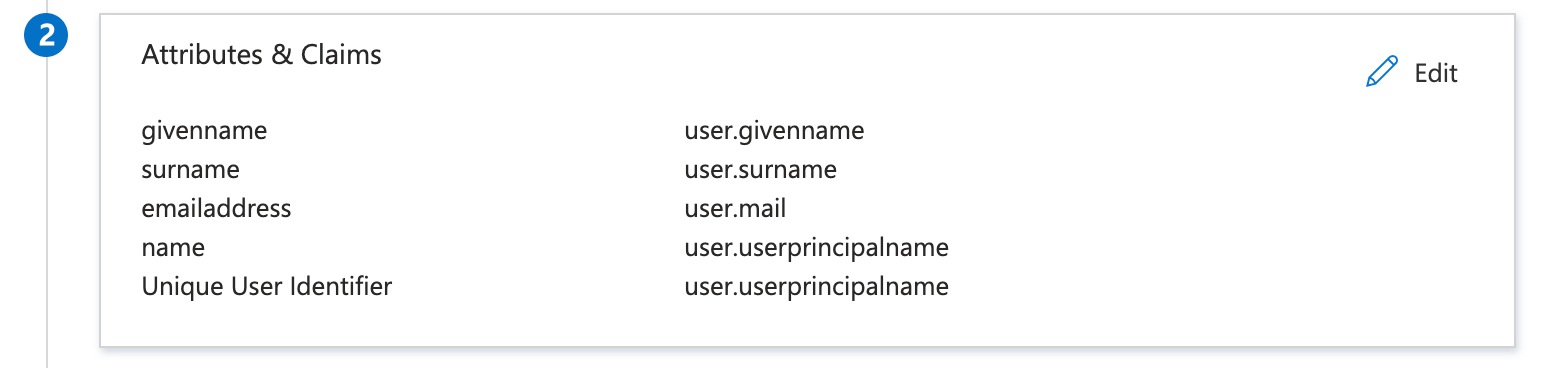
- Click Unique User Identifier (Name ID) in the Required Claim section.
- Click the Source attribute dropdown.
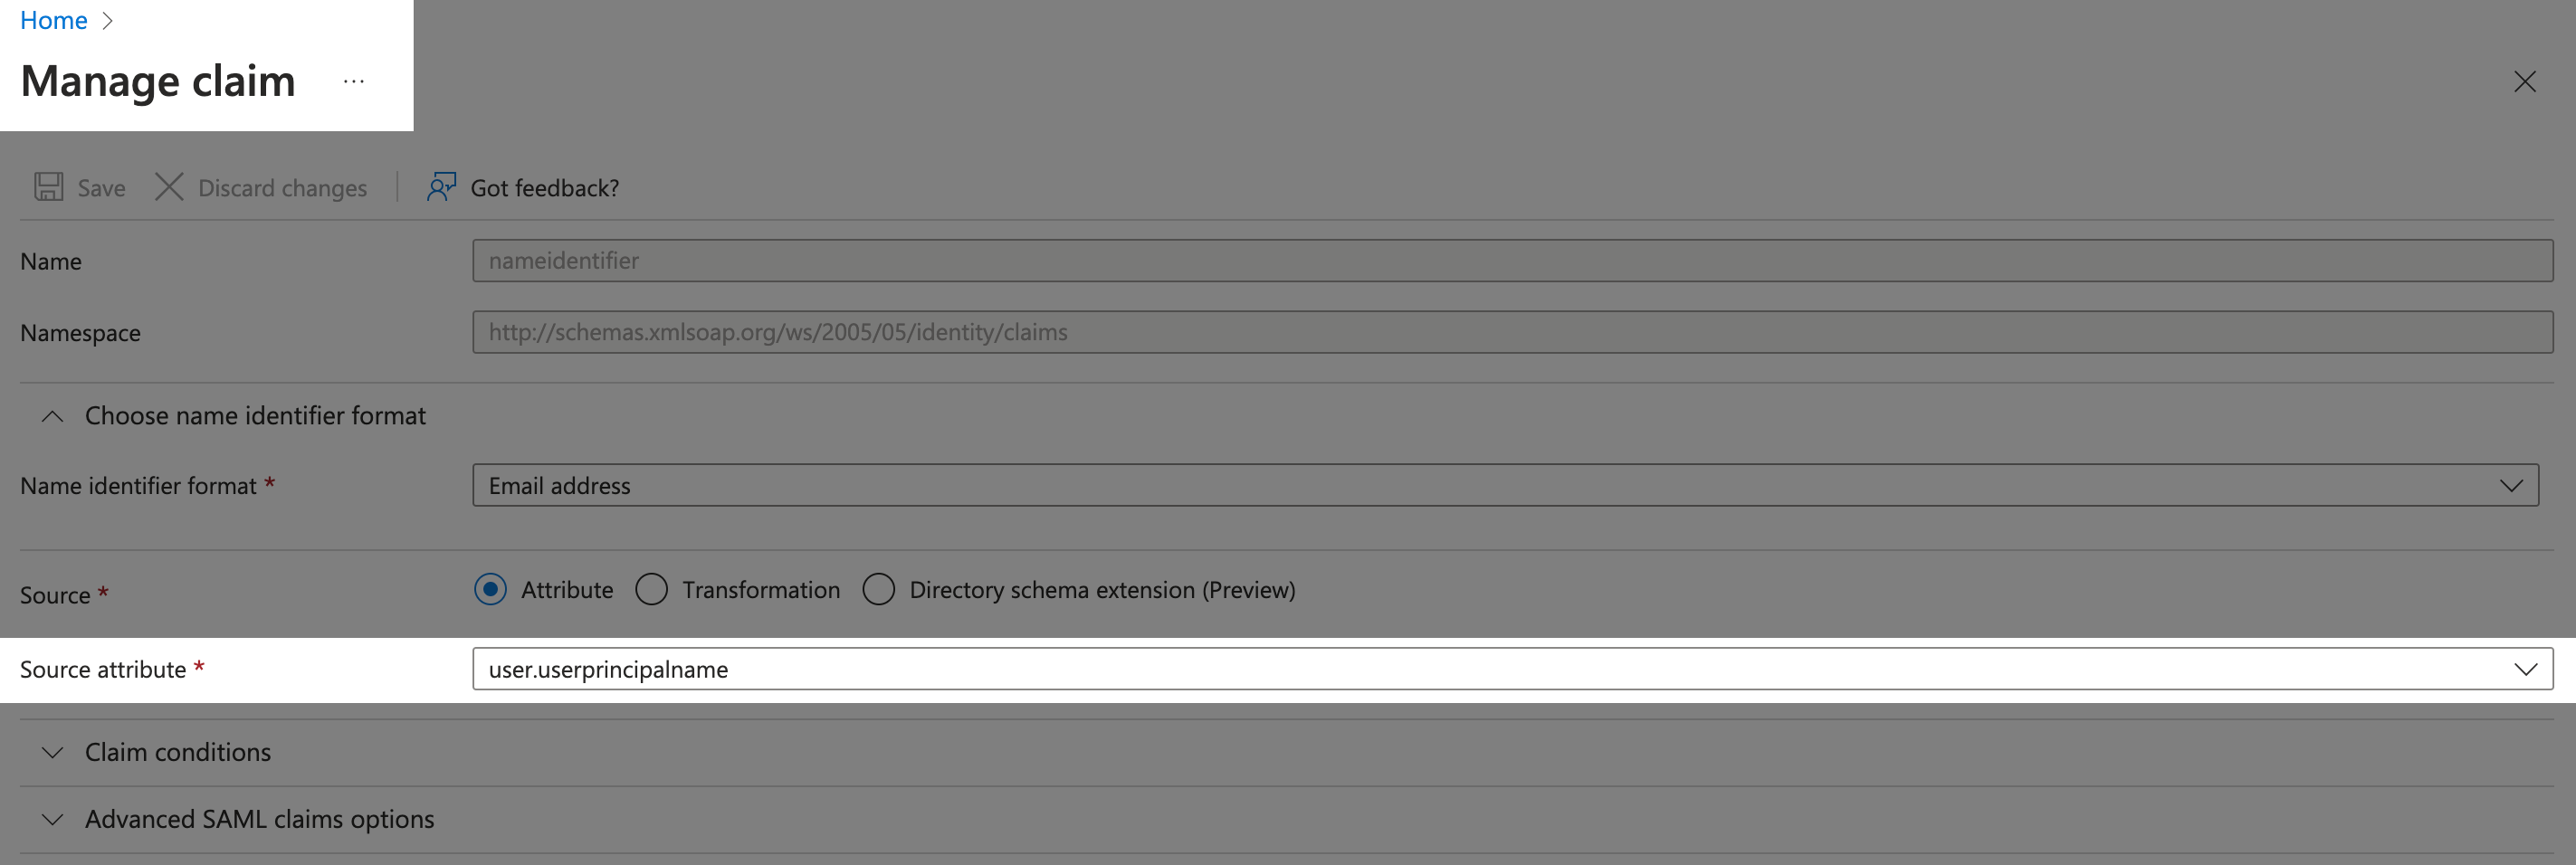
- Search for “user.mail” and then select it.

- Click Save in the upper left corner to go back to the Attributes & Claims page.
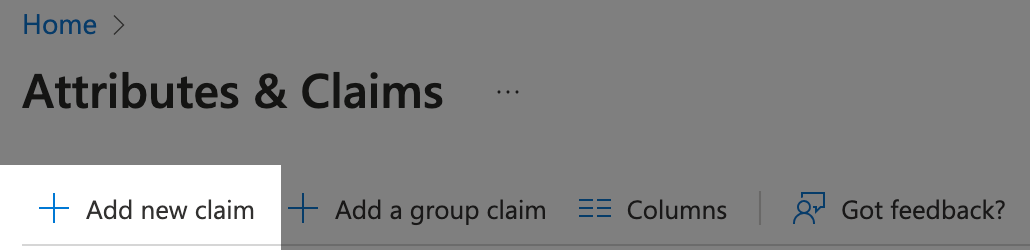
- Select Add new claim in the upper left.
- Enter “role” for the name.
- Change the Source attribute to "user.assignedroles."
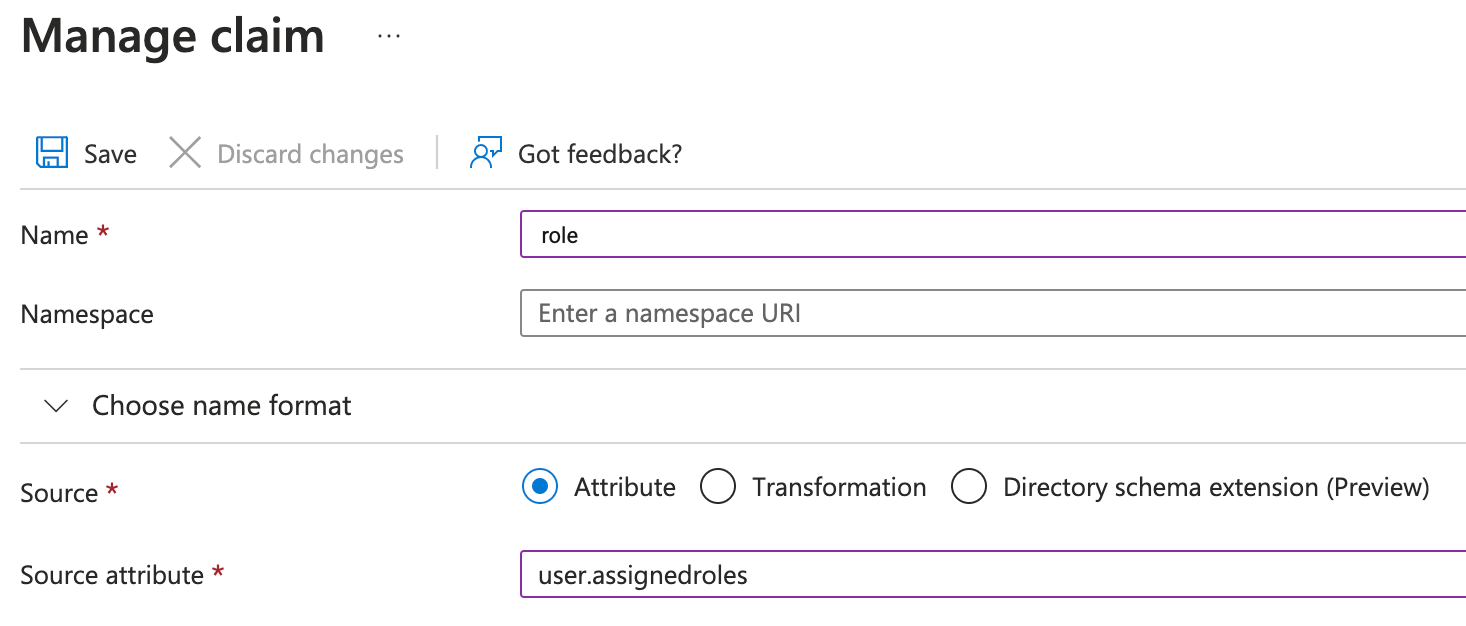
- Click Save.
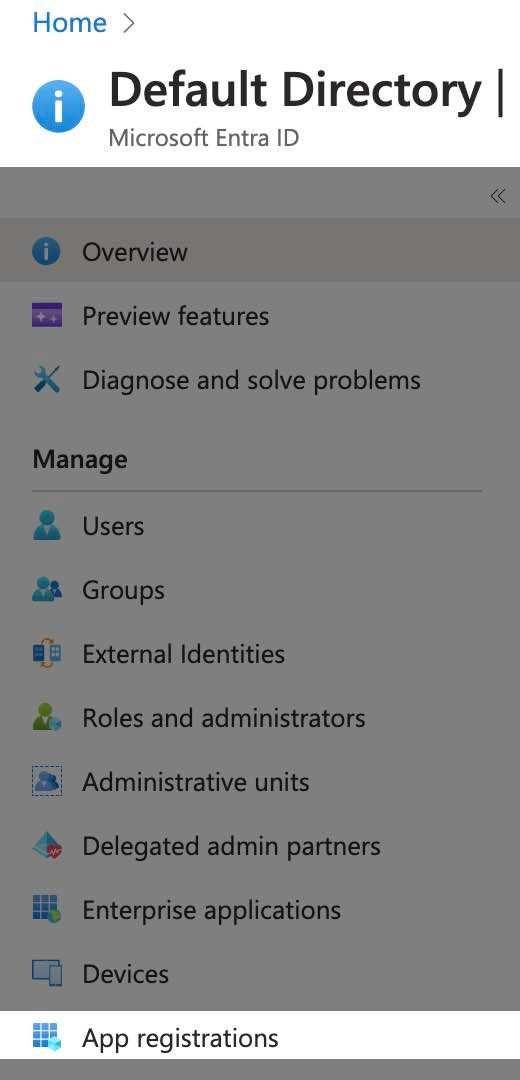
- Click Home to go back to the directory.
- In the left sidebar, click App registrations.
- Go to the All applications tab.
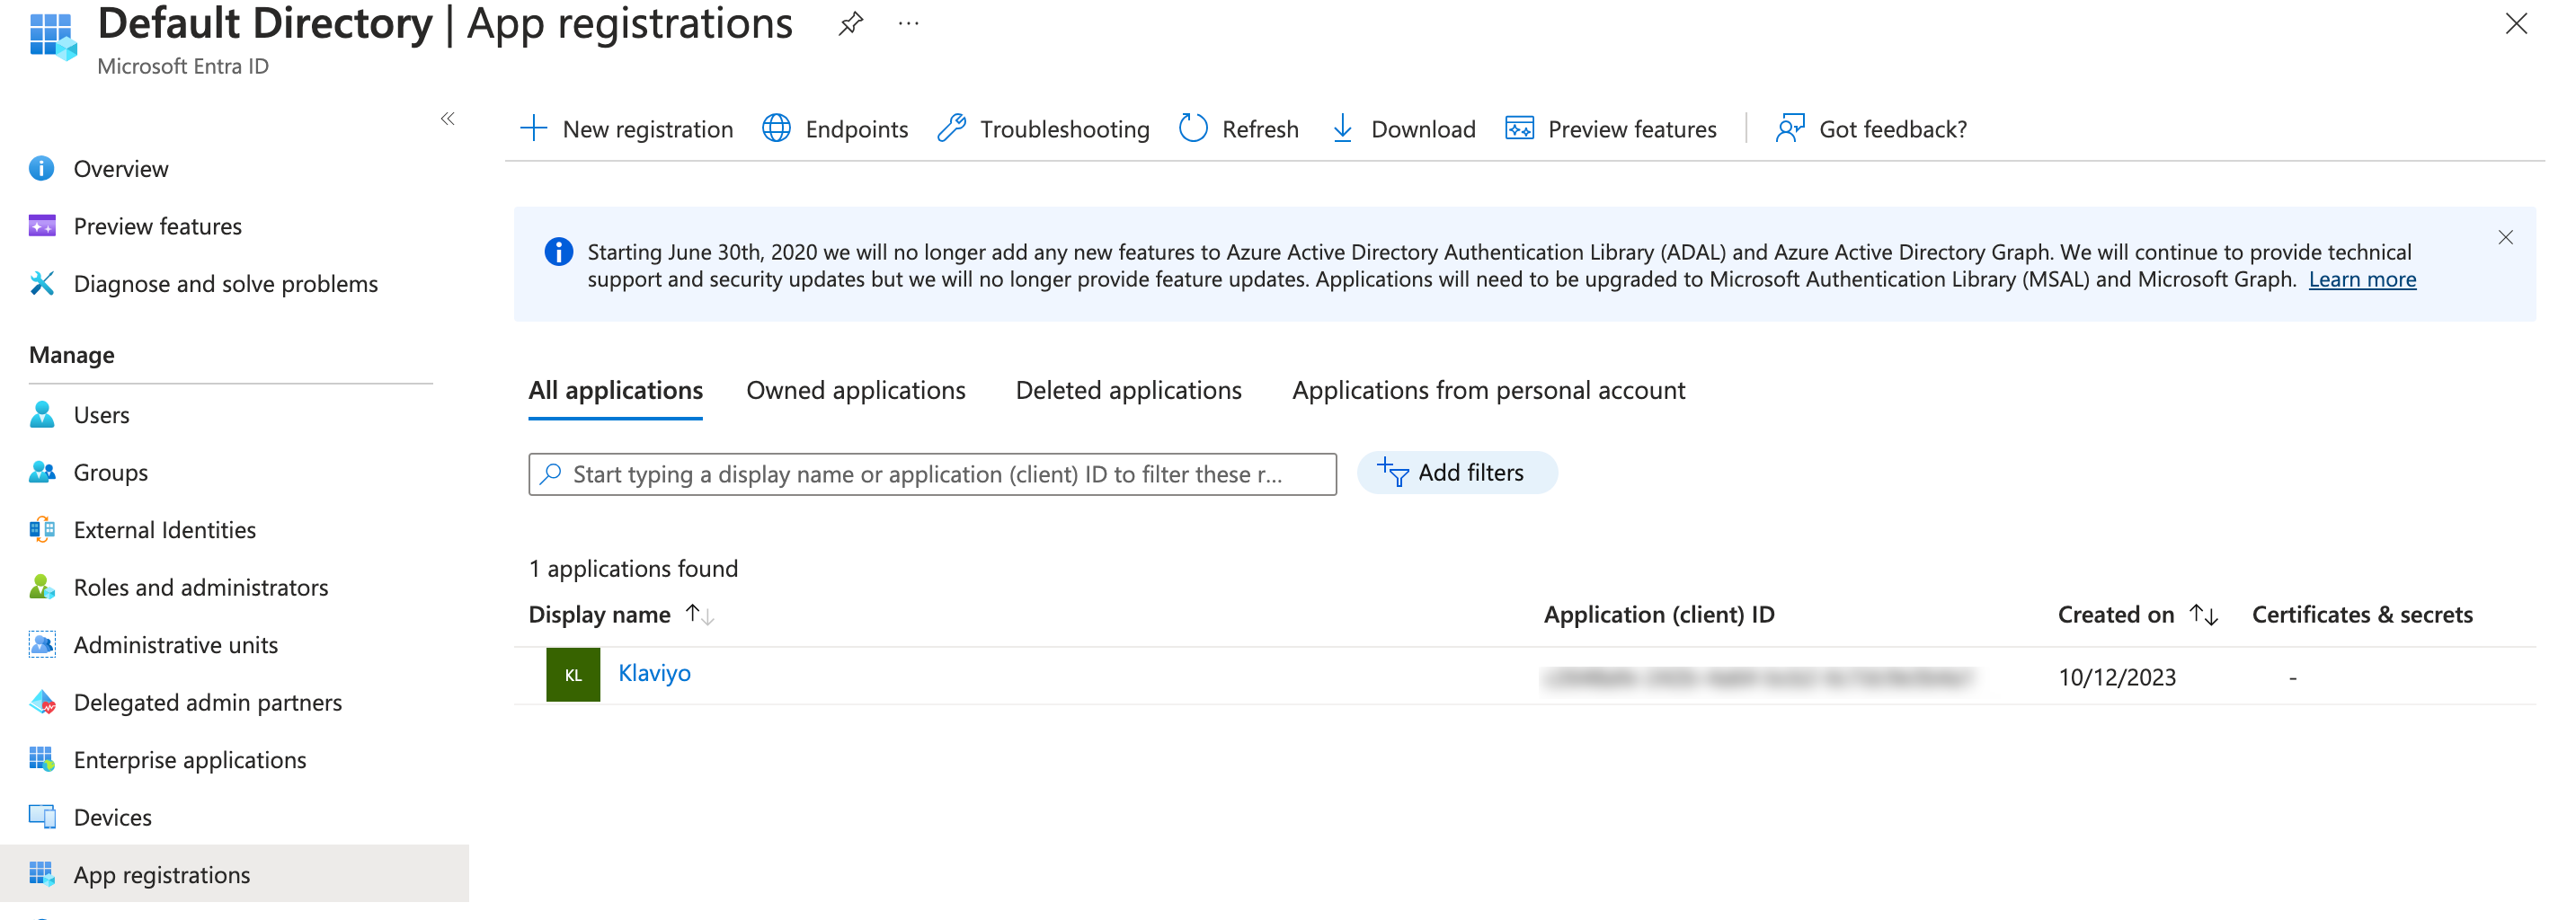
- Click into the Klaviyo app.
- Select App roles > Create app role.
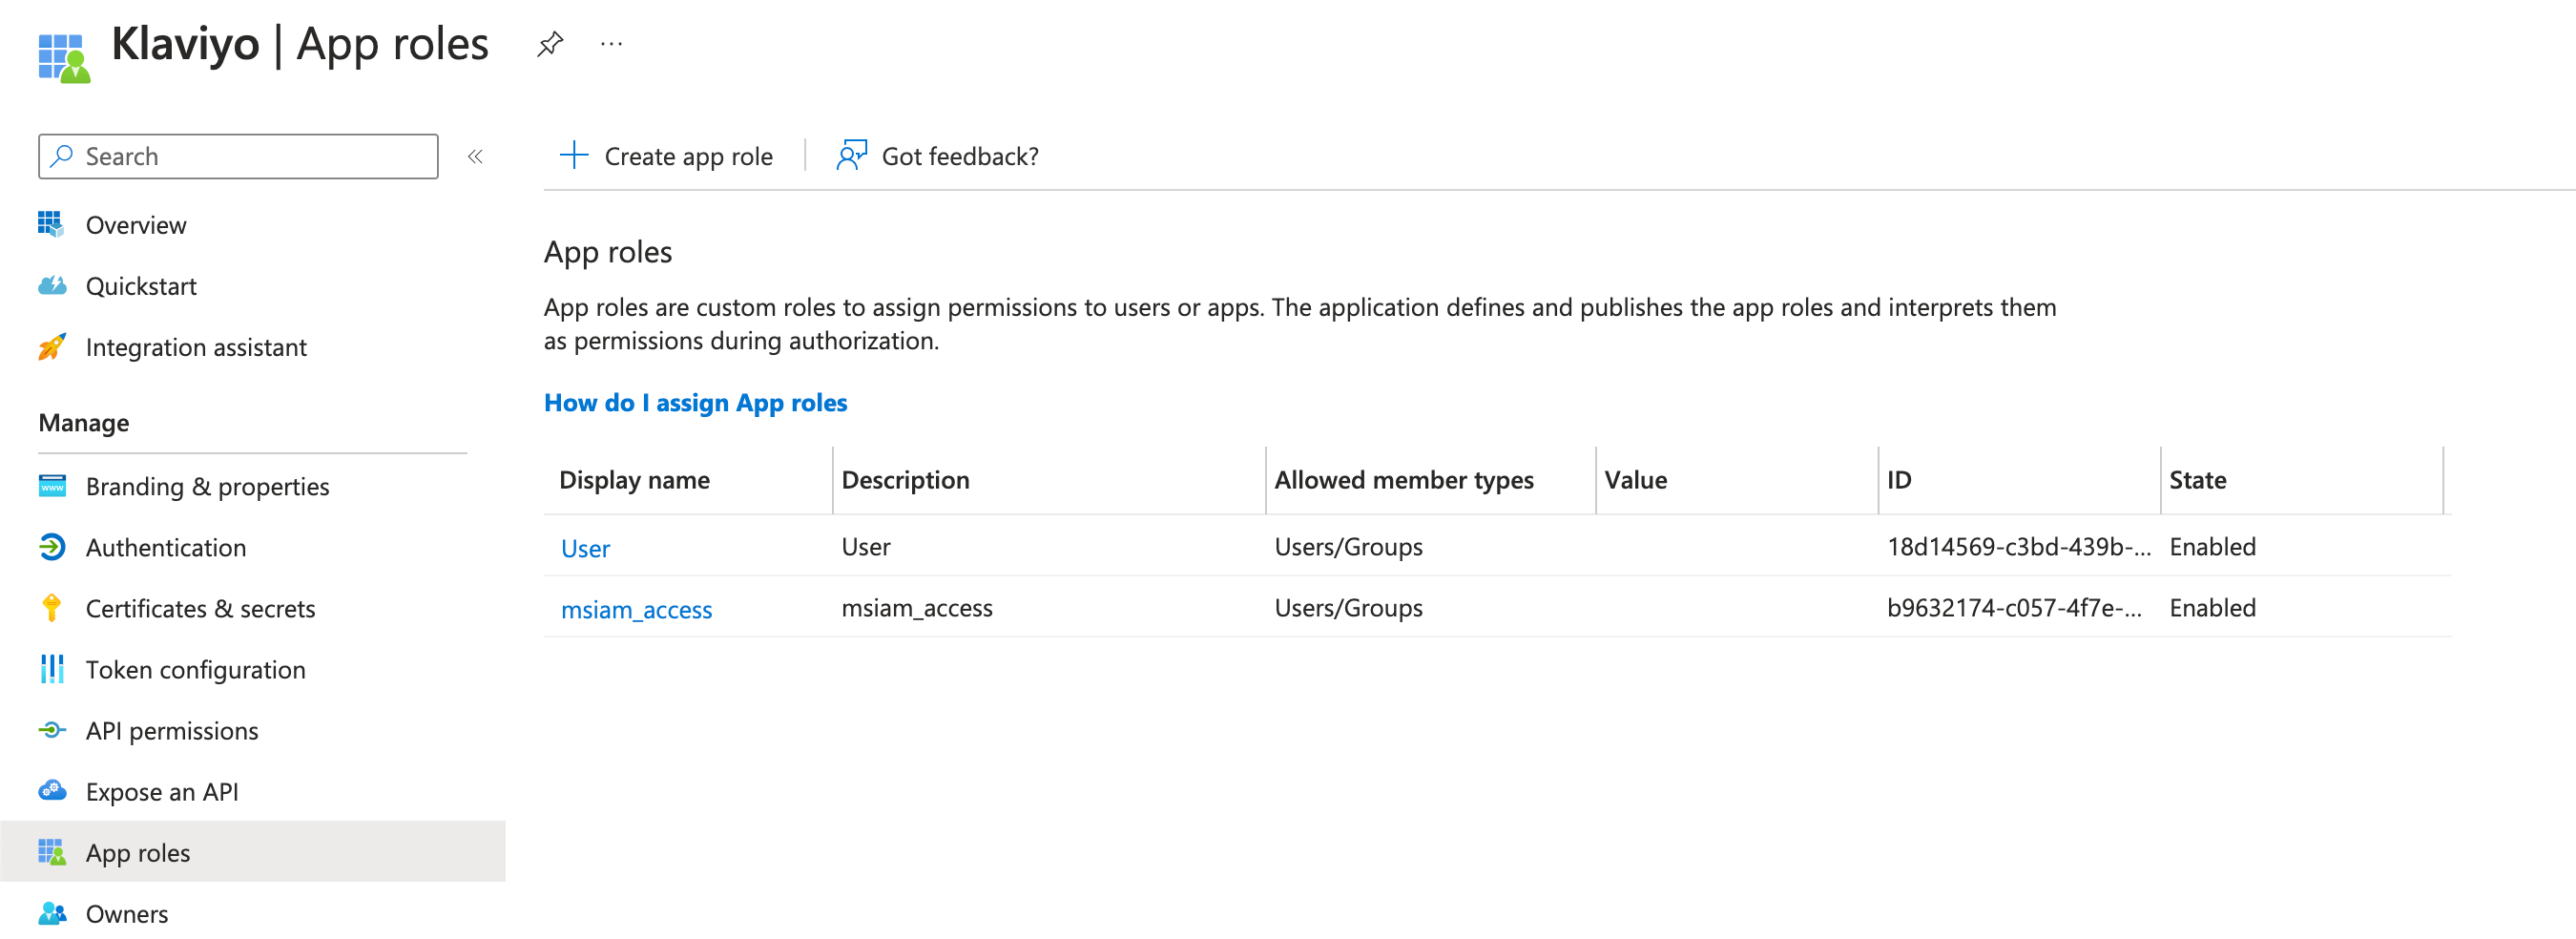
- Create the display name for each role.
- Select Users/Groups as the Allowed member types.
- Assign one of these values exactly how it appears below:
- admin
- manager
- analyst
- campaign_coordinator
- content_creator
- support
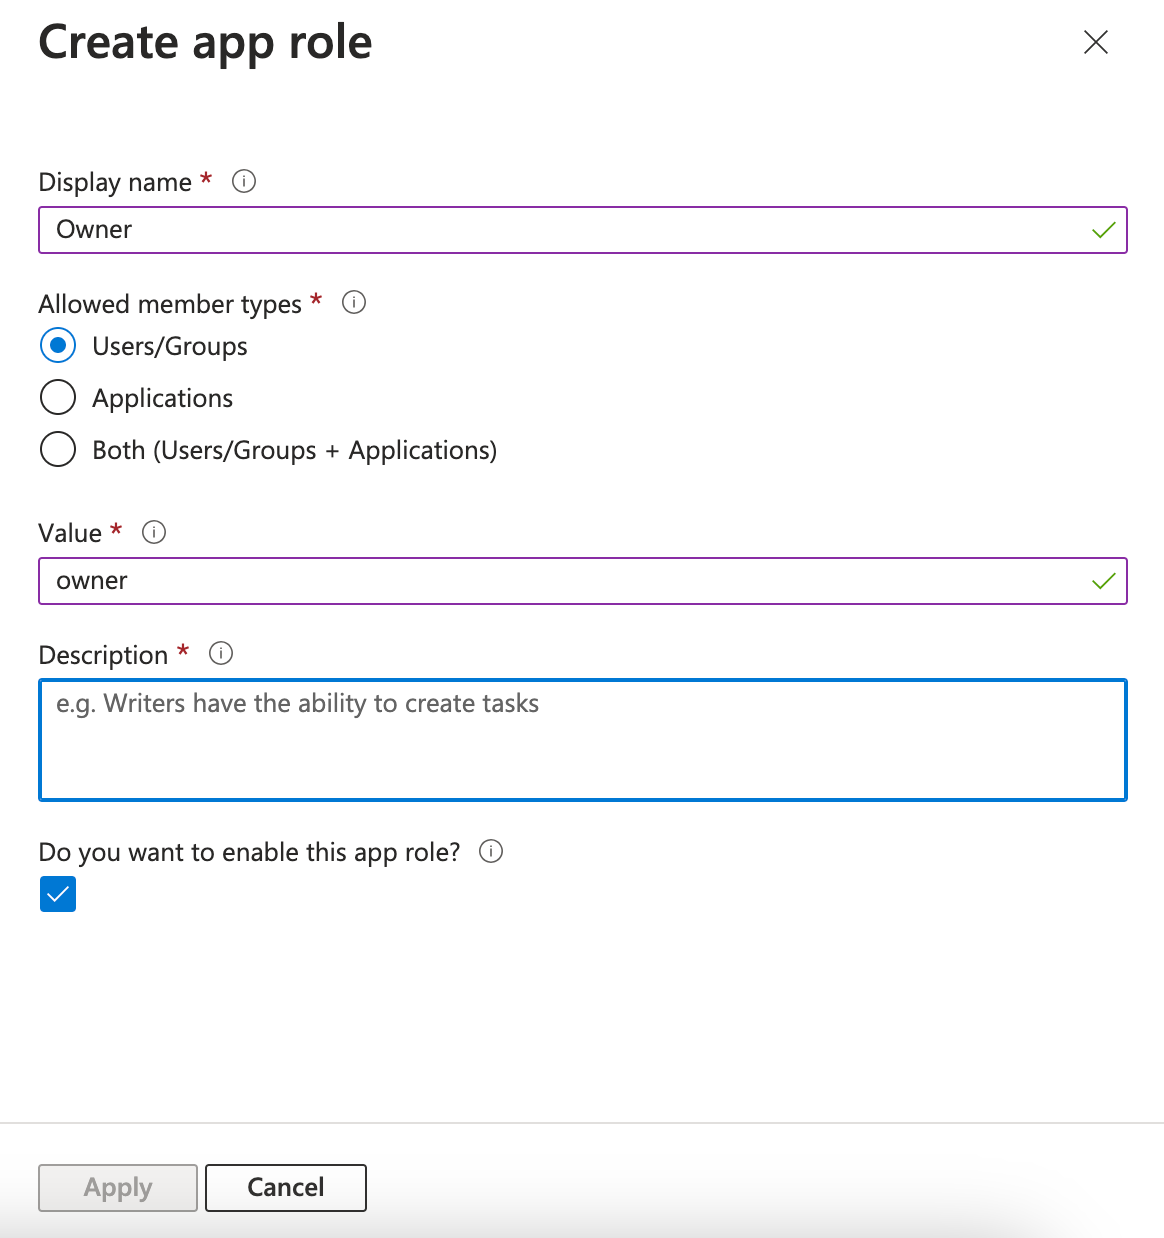
- Add a description, then click Apply.
Then, to assign users to the Klaviyo app, follow these steps:
- Navigate to Microsoft Entra ID > Enterprise applications.
- Click the Klaviyo app.
- Navigate to Users and groups > Add user/group.

- Click into Users to populate the right sidebar.
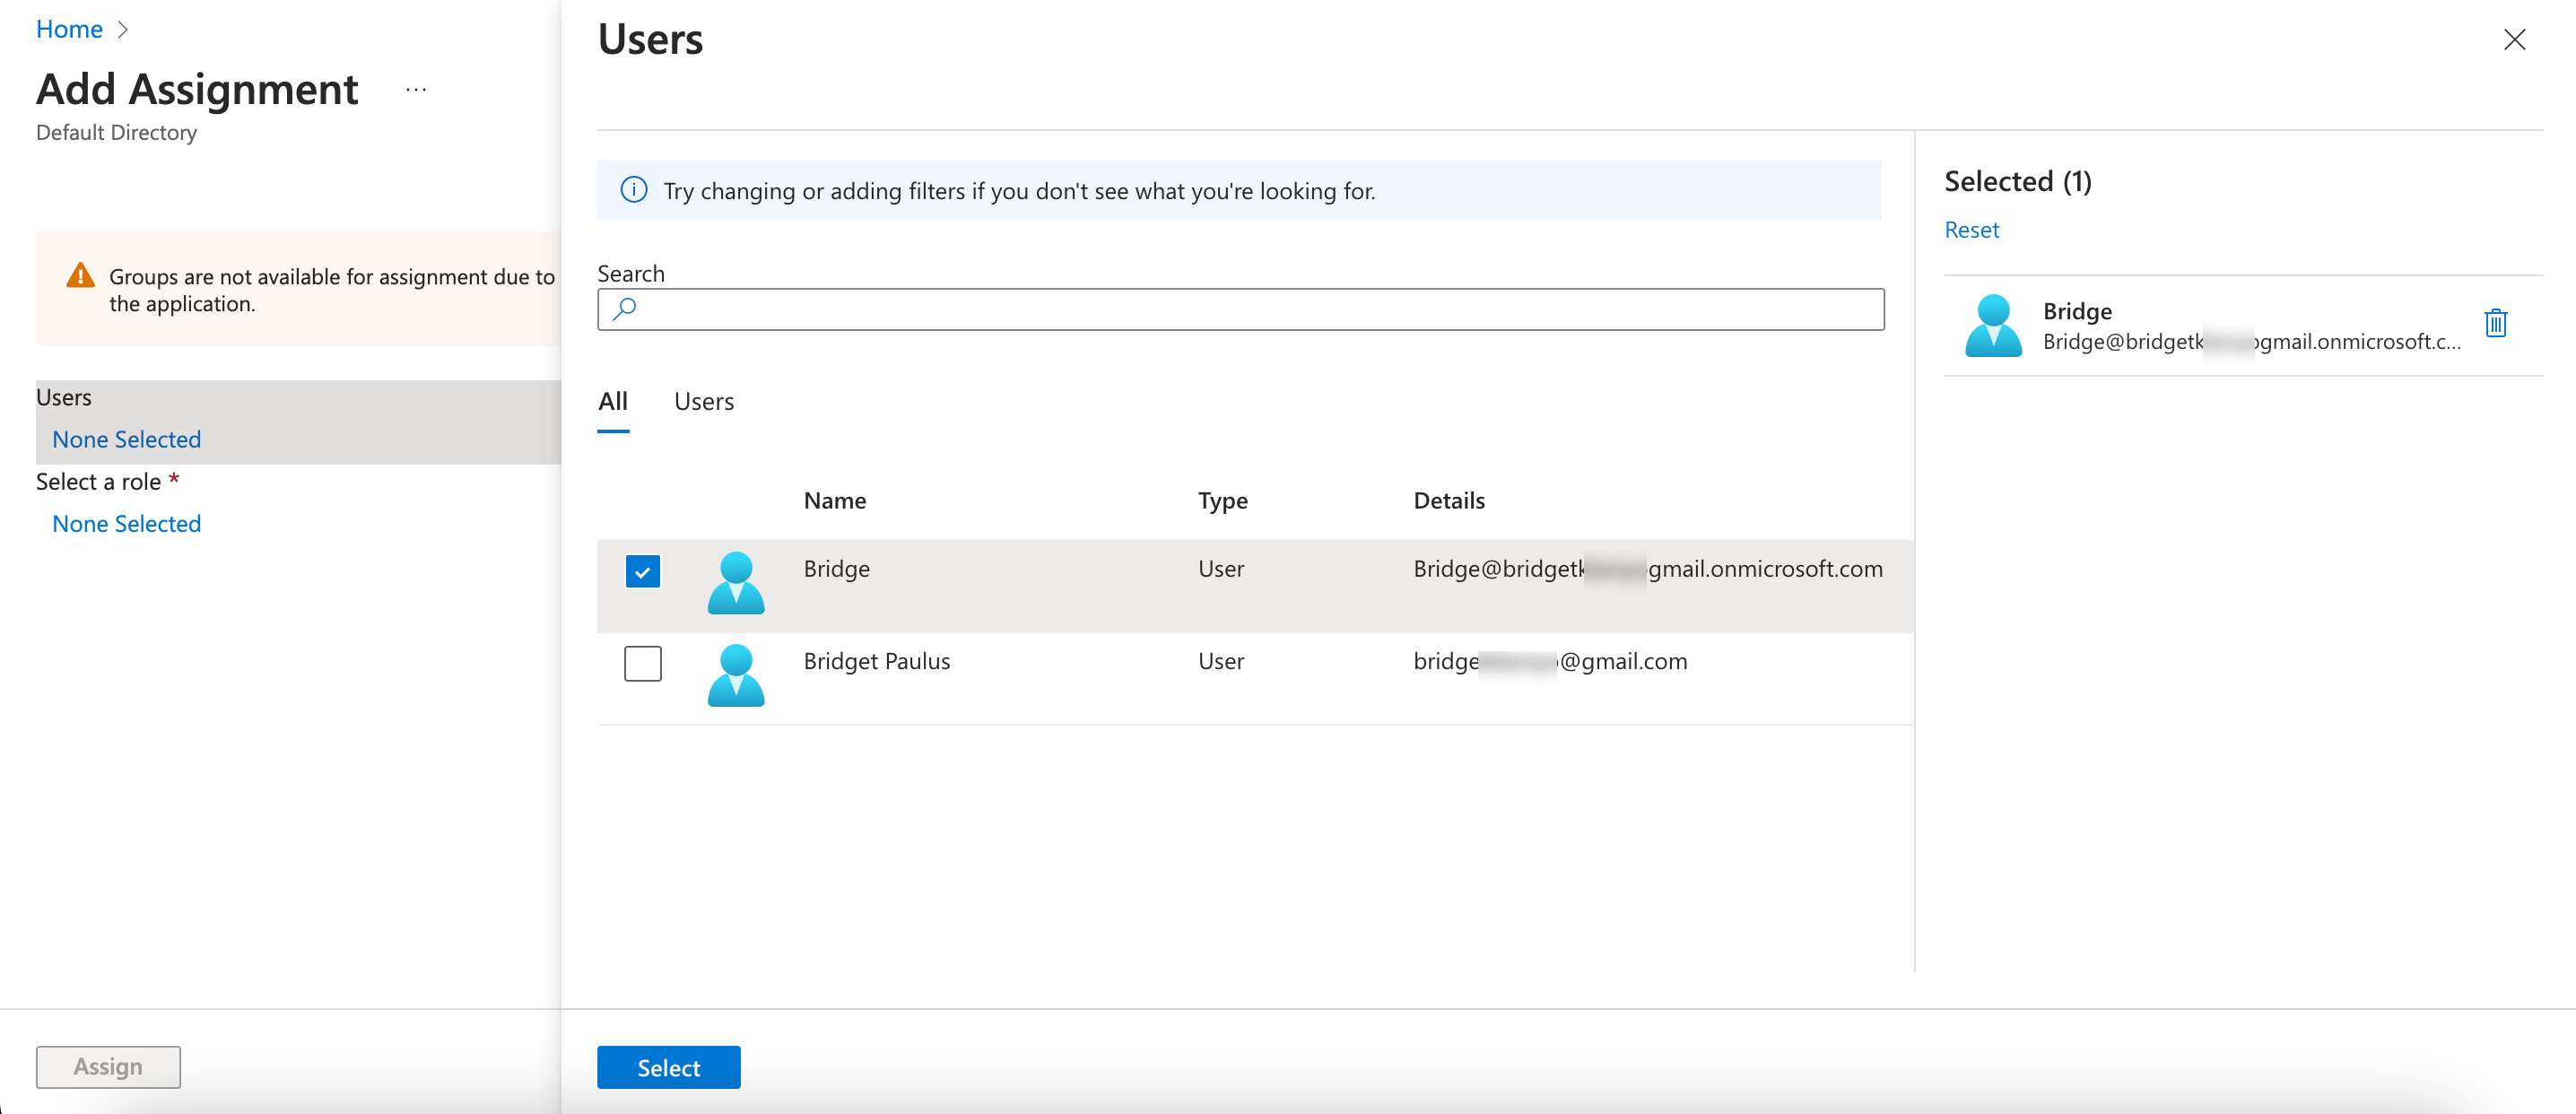
- Select the user(s) you want to add to the Klaviyo app.
- Click Select.
- Click into Select a role.
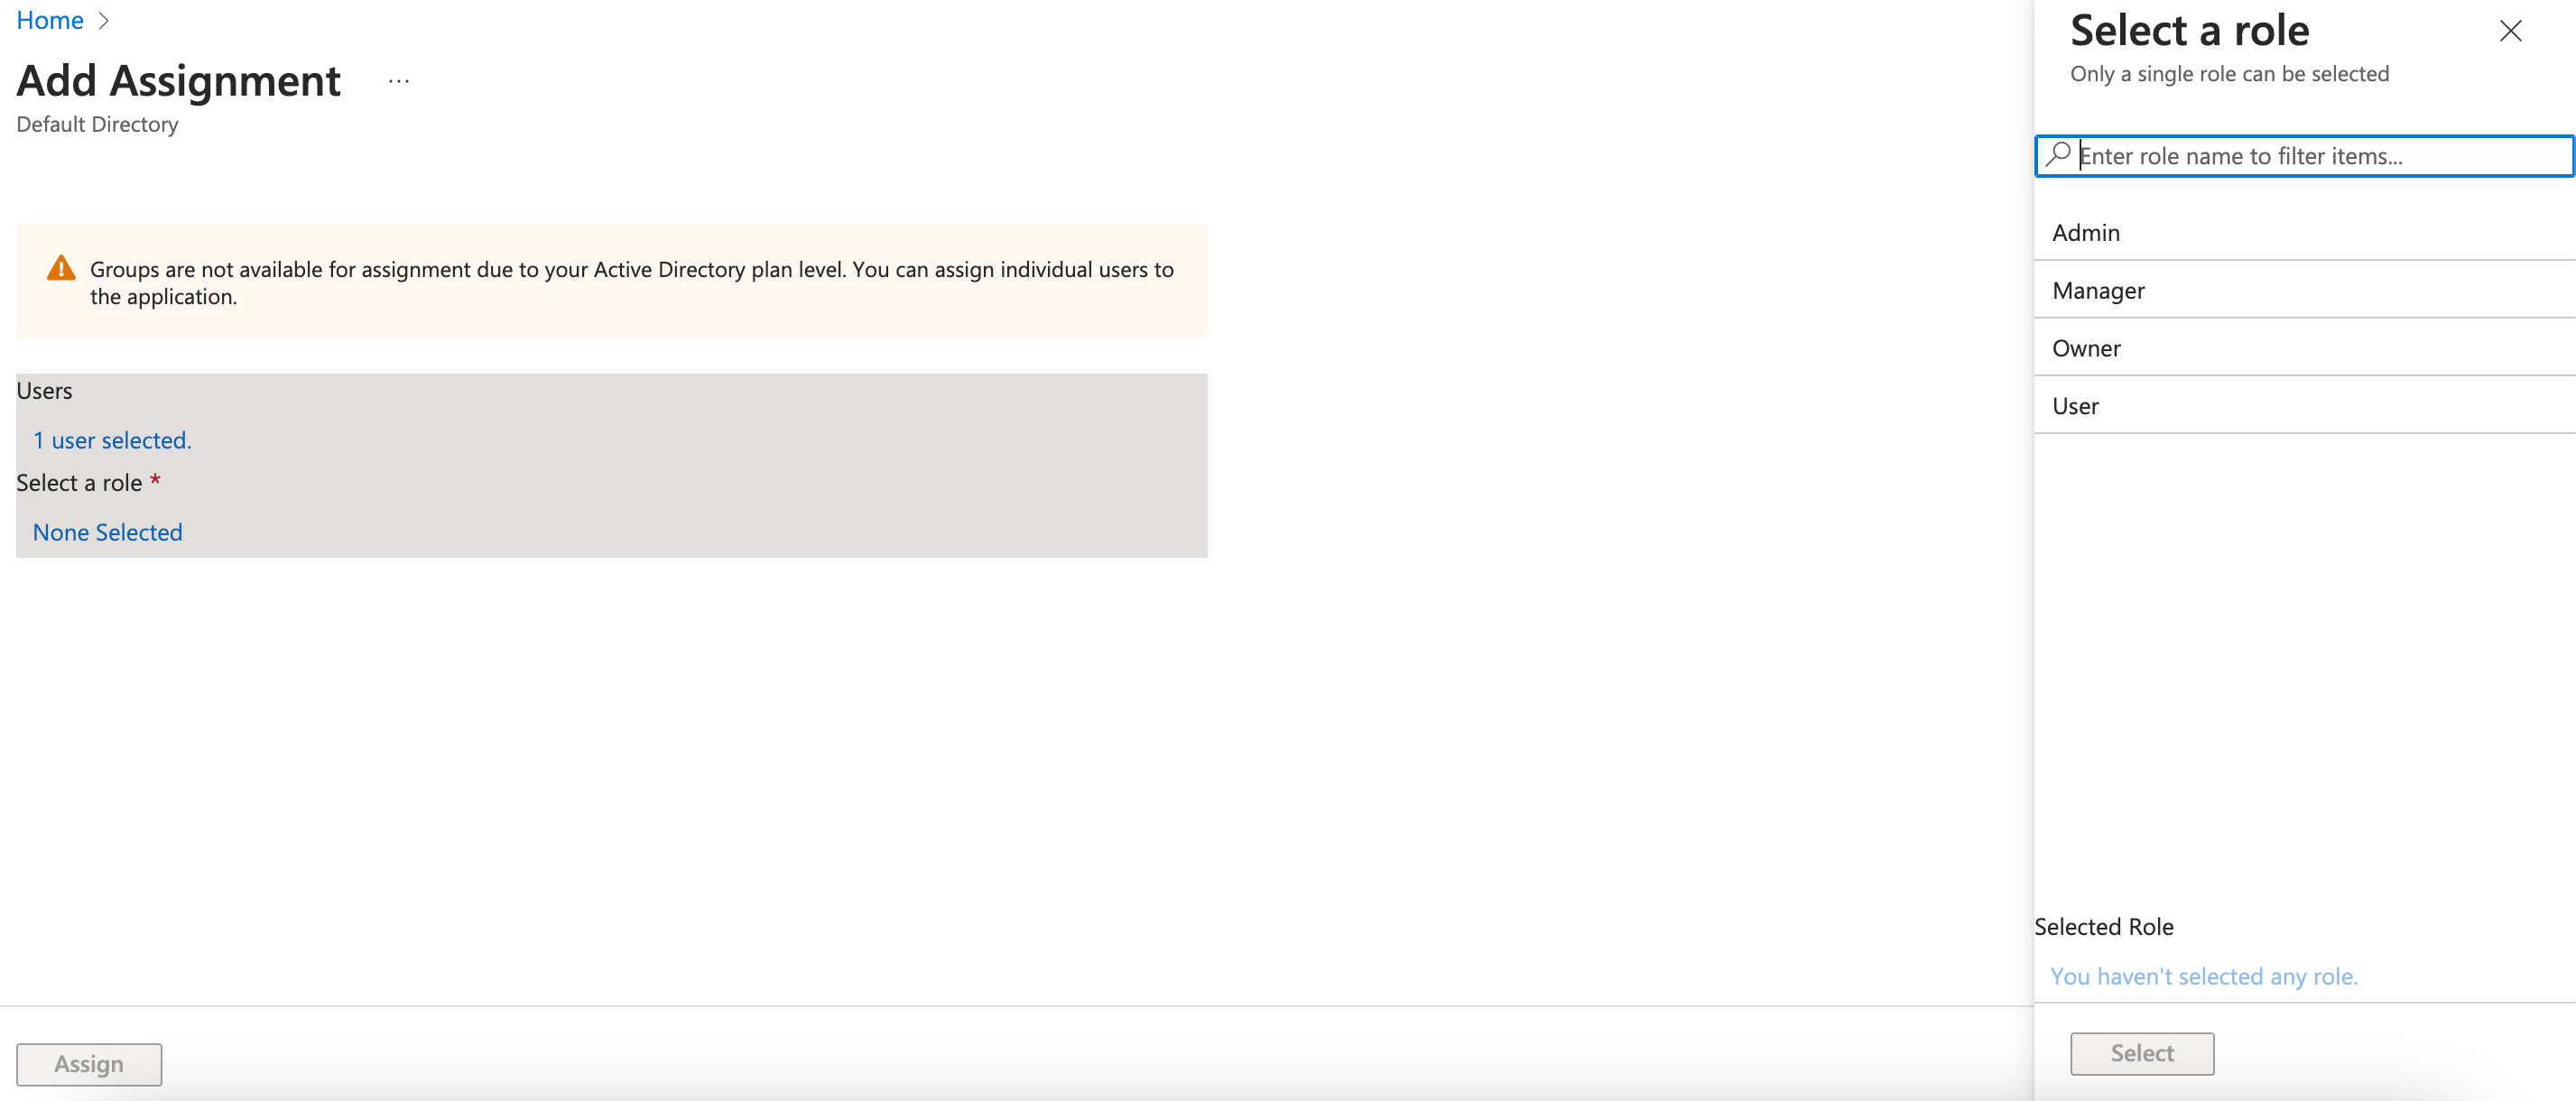
- Choose the role this user should have in Klaviyo.
- Click Select to confirm the role.
- Click Assign in the bottom left.
Finish setup in Klaviyo
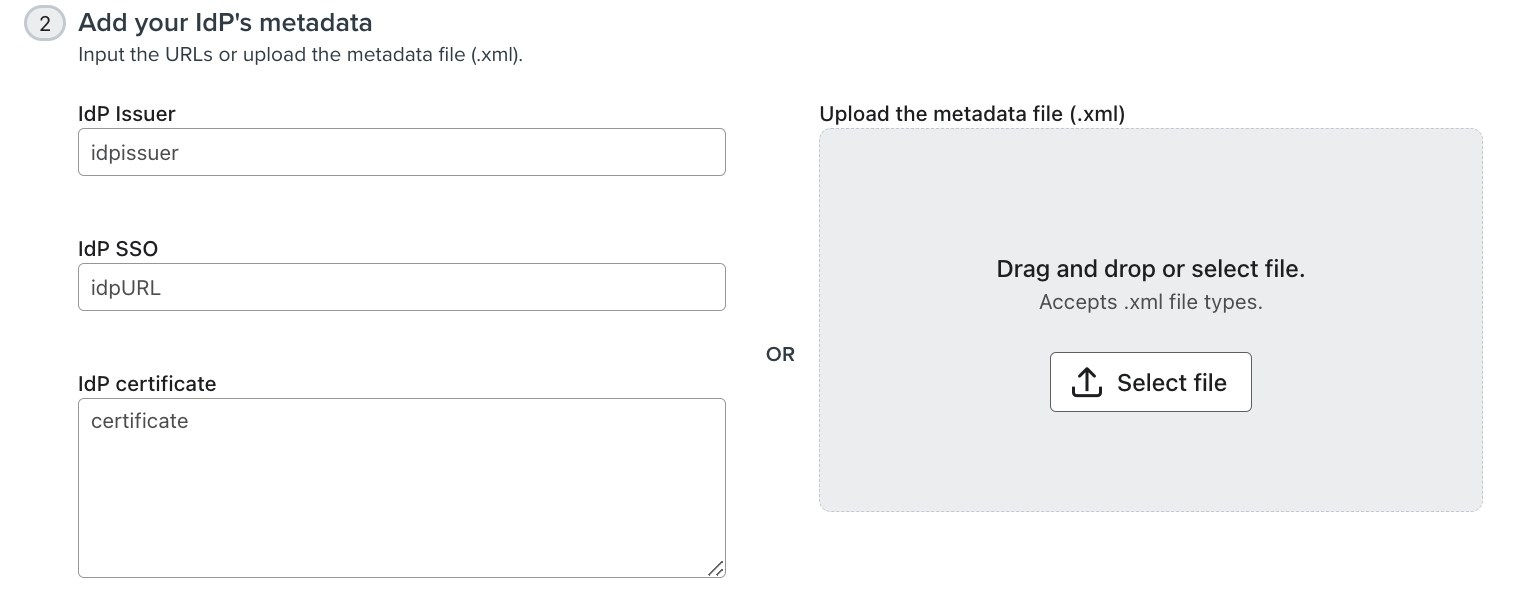
- Navigate back to your Klaviyo tab to the SSO Setup page.
- Choose to either:
- Add in your IdP issuer and SSO.
Or - Upload a file with this information.
- Add in your IdP issuer and SSO.
- Create your SSO login identifier (also called the workplace ID) for your SSO login; often, this is the same name as your company.
- The ID cannot be longer than 63 characters.
- The ID must be URL safe, so it can contain only upper- or lowercase letters, hyphens (-), periods (.), underscores (_), and tildes (~).
- The ID should be simple and easy for users to remember (such as your company name).
- For example, Klaviyo’s workplace ID is “Klaviyo.”
- Click Test SSO.
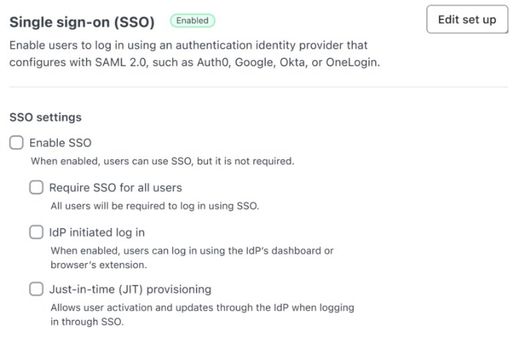
- Check the Enable SSO box.
- Optional: check one or more of the following boxes.
- Require SSO for all users.
- IdP initiated log in.
- Just-in-time (JIT) provisioning.
Outcome
Now you'll be able to log in to Klaviyo using your SSO provider.
Additional resources
- Troubleshoot SSO and SCIM errors
Learn how to troubleshoot errors for single sign-on (SSO) with Klaviyo. This article is meant for those familiar with SSO, such as IT professionals.
- How to set up multi-factor authentication (MFA)
Learn how to set up multi-factor authentication (MFA) to help make your Klaviyo account or portfolio more secure. With MFA enabled, you sign in using a username and password, then verify your identity (such as by entering a code).
- How to set up SCIM user provisioning
Learn how to set up a system for cross-domain identity management (SCIM) user provisioning in an account or portfolio.