How to use a coupon block in an email
You will learn
Learn how to add a coupon block to your emails using Klaviyo's drag-and-drop editor. The coupon block lets you display a coupon code in your emails so that all recipients receive the same offer, with built-in styling options.
Before you begin
You must have at least one coupon created in Klaviyo with available, unexpired codes. If you don't have any coupons yet, learn how to create them in Getting started with coupon codes in Klaviyo.
Add a coupon block
To add a coupon block to an email, open any email that uses the drag-and-drop editor. Then:
- Hover over the Coupon block in the Content sidebar.
- Click on the block and drag it into the canvas.
- When you're happy with the block's placement, release your cursor to drop the block in.
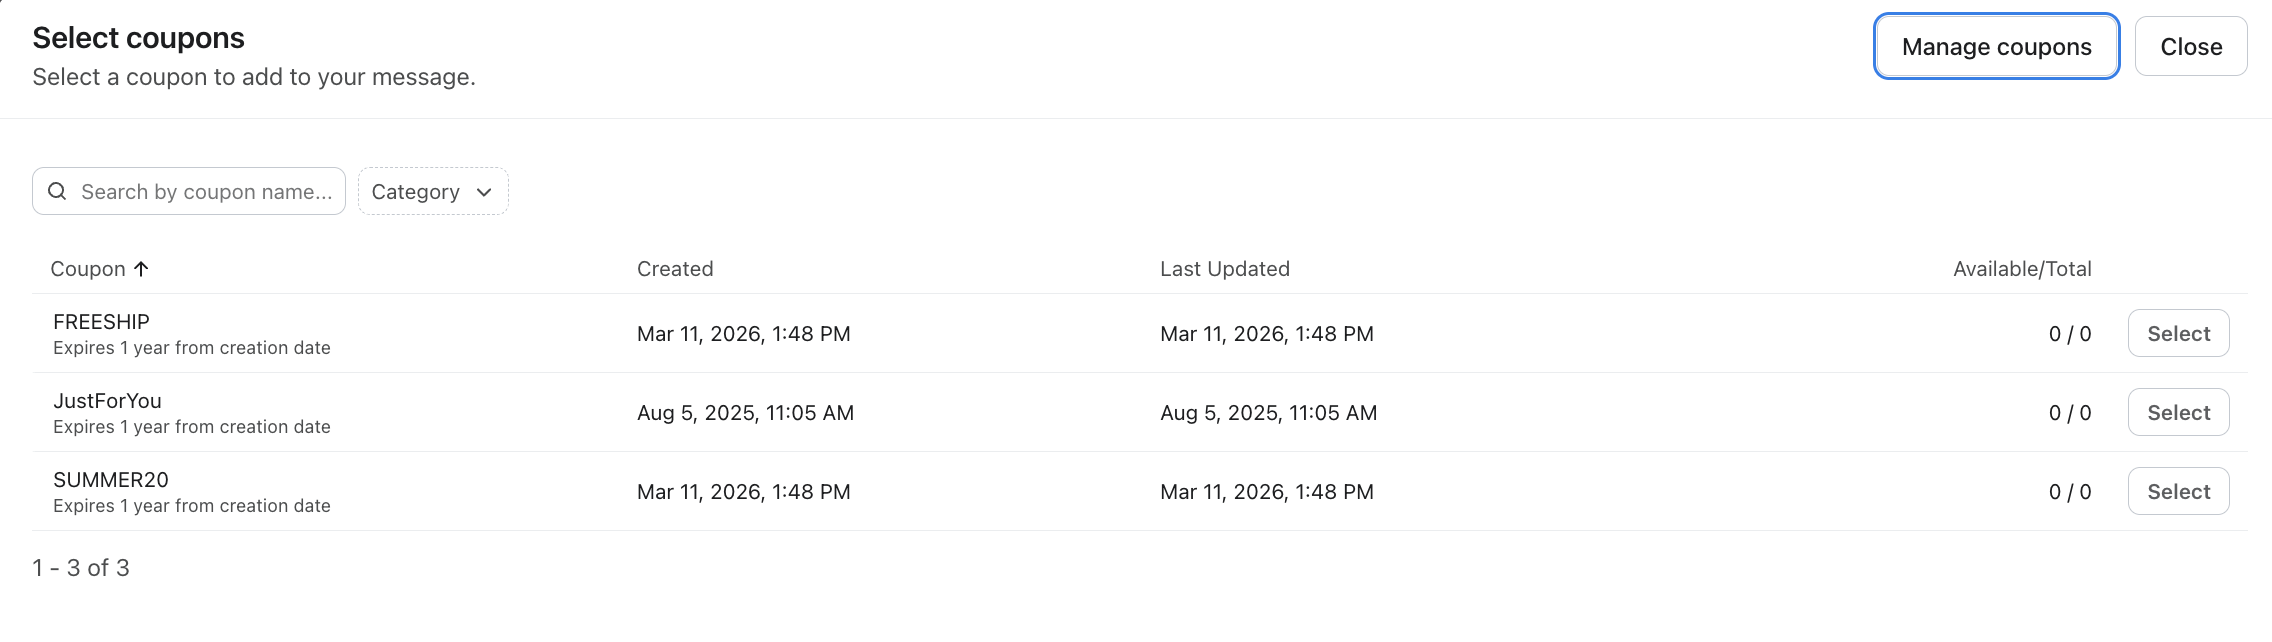
Select a coupon
Once the block is placed, select the coupon you want to display:
- Click the + button in the coupon block.
- In the Select coupons modal, browse or search for a coupon by name. You can also filter by Category. Only coupons that are unexpired and still have available codes will appear.
- Click Select next to the coupon you want to use.
The selected coupon code will display to all recipients of the email. If a recipient has not already been assigned this coupon code, it will be assigned to them automatically when the email is rendered. This behaves the same as inserting a coupon using a template tag.
If you need to create a new coupon, click Manage coupons in the top right of the selector to go to your coupons page.
Add header text
You can add a header to your coupon block to provide context, such as "Your exclusive offer" or "Don't forget your discount."
1. Check the Header text option in the block settings.
2. Enter your header text. Use the inline rich text editor to style the header.
Style a coupon block
To adjust the appearance of a coupon block, open the block's Styles tab. You can customize the following:
Style Option | Description |
Header text | Font, size, color, and alignment of the header |
Text area padding | Spacing around the text content |
Coupon text | Font, size, color, and alignment of the coupon code |
Coupon block style | Shape and layout of the coupon display area |
Coupon background color | Background color behind the coupon code |
Coupon border | Border style, width, and color around the coupon |
Block background color | Background color for the entire block |
Block padding | Spacing around the entire block |
Configure display settings
Like other blocks in the email editor, the coupon block supports standard display settings:
- Device visibility — Choose whether the block displays on desktop, mobile, or both.
- Show/hide logic — Use dynamic variables to show or hide the block for specific recipients.
- Content repeat — Use the content repeat feature to iterate over data.
Learn more about display options.
Save as universal content
You can save a coupon block as universal content for reuse across other templates. Click the star icon on the block to save it. Saved coupon blocks will appear in the **Universal** tab of the Content sidebar and can be filtered by the "Coupon Block" block type.
Learn more about universal saved content.
Best practices and limitations
- Coupon block limit. If your email contains more than 10 coupon blocks, a warning will appear during preview. Emails with an excessive number of coupon blocks may fail to deliver.
- Cross-account cloning. If a template containing a coupon block is cloned to another account, the coupon selection will be cleared. You will need to re-select coupons in the new account.
- Make sure you have enough codes. Ensure you have enough available coupon codes for all recipients. If a recipient cannot be assigned a code, the email may be skipped. Learn more about managing coupon codes.
Additional resources
Getting started with coupon codes in Klaviyo
How to edit coupons in Klaviyo
Guide to the email template editor
How to show or hide template blocks and sections based on dynamic variables