How to create an in-app form
You will learn
Learn how to show a form to users directly in your mobile app. You can use these forms to share information about new or back-in-stock products, sales, app updates, and more.
Your mobile app needs to be using at least v4.2.0 of the iOS SDK, v3.2.0 of the Android SDK, and v1.2.0 of the React Native SDK to use in-app forms.
Before you begin
In-app forms are messages displayed to mobile app users while they are actively using an app.
Currently, Klaviyo supports announcement-style forms that communicate information to app users and drive engagement from users. As of now, in-app forms:
- Are available as popups, full-page forms, and flyouts.
- Target all of your mobile app users or specific profiles in a list or segment
- Display based on triggers like opened app, opened a push notification or performed an event
You cannot use them to collect consent or profile information yet, but additional functionality similar to Klaviyo’s web forms is coming soon.
Build a form from the form library
Klaviyo provides a library of in-app form templates intended to provide design inspiration for a variety of form types and use cases. Filter the options by form style or template type to find the right template. Then easily edit the default designs to match your brand.
- From Klaviyo's main navigation, select Website > Sign-up forms.
- Select Create form from the top right corner.
- In the right sidebar, name the form and select In-app. Then click Create.
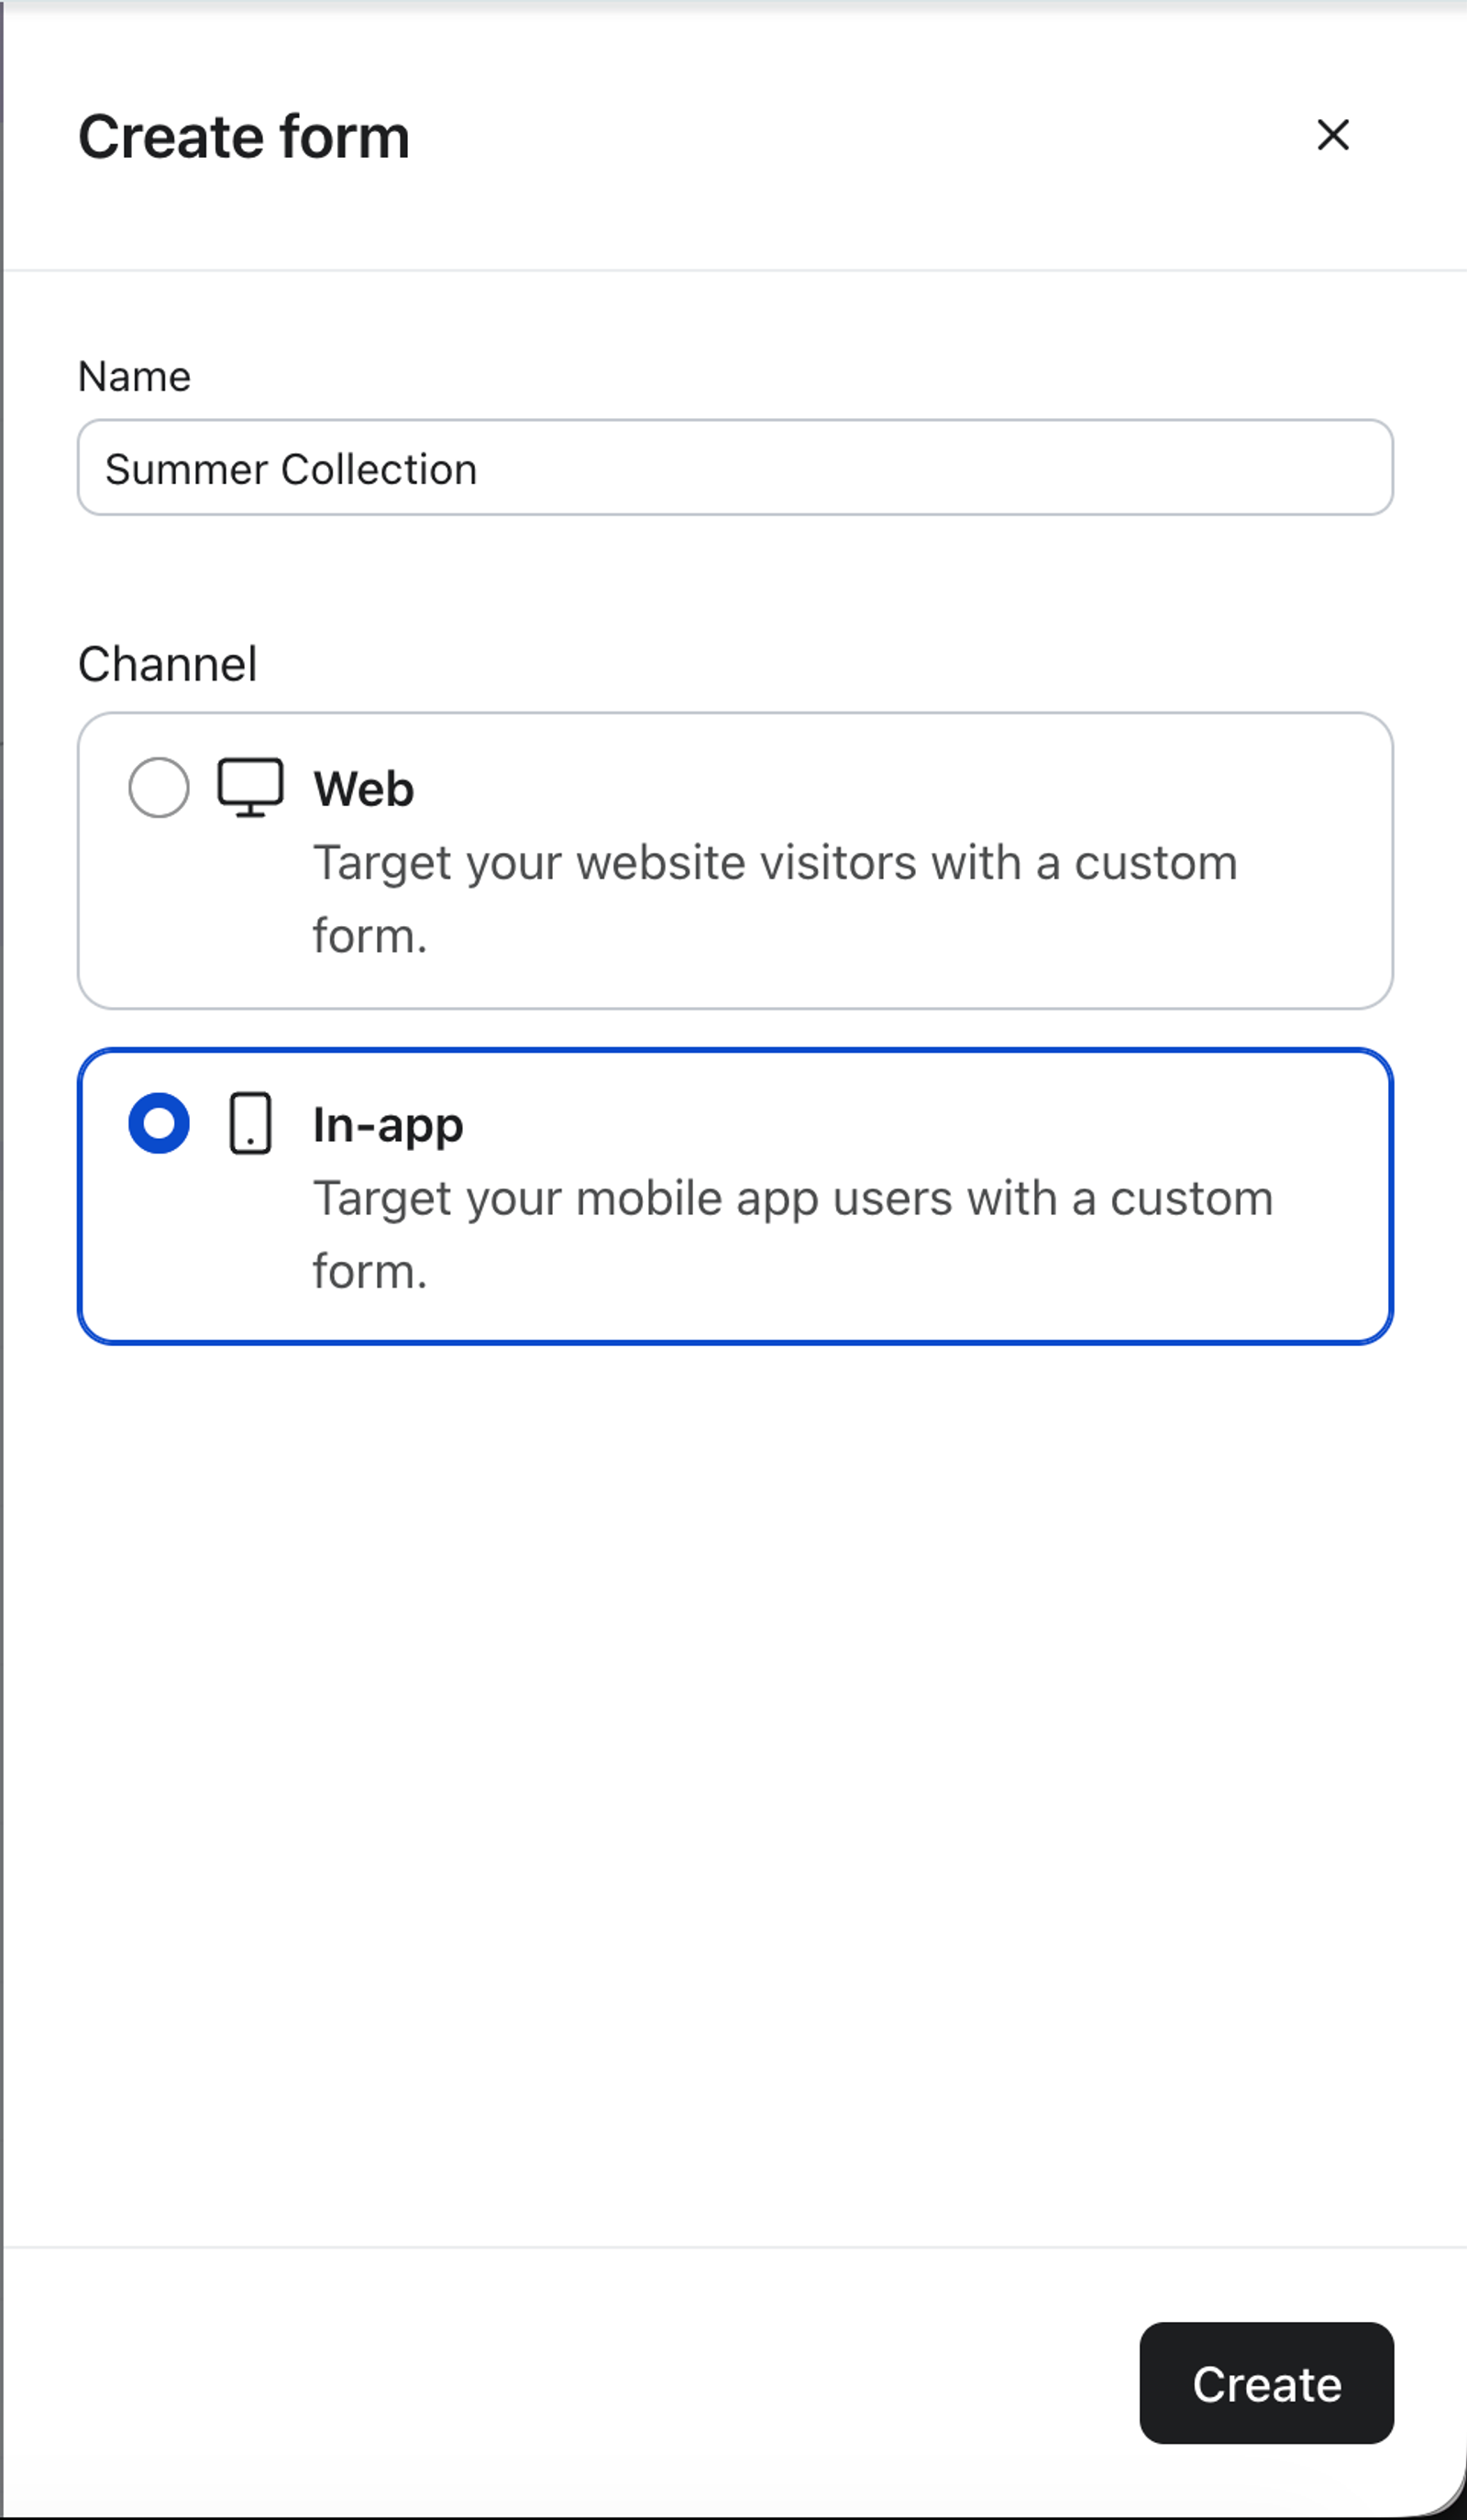
You will see the option to create an in-app form only if you have already set up push notifications in Klaviyo. For guidance, see our iOS, Android, or React Native guides.
- Browse the library of pre-built in-app form templates. You can also use the Form style and Template type dropdowns at the top to filter for templates by style, use case, or both.

- Select your form template.
- On the preview modal that appears, confirm or update the name of your form.
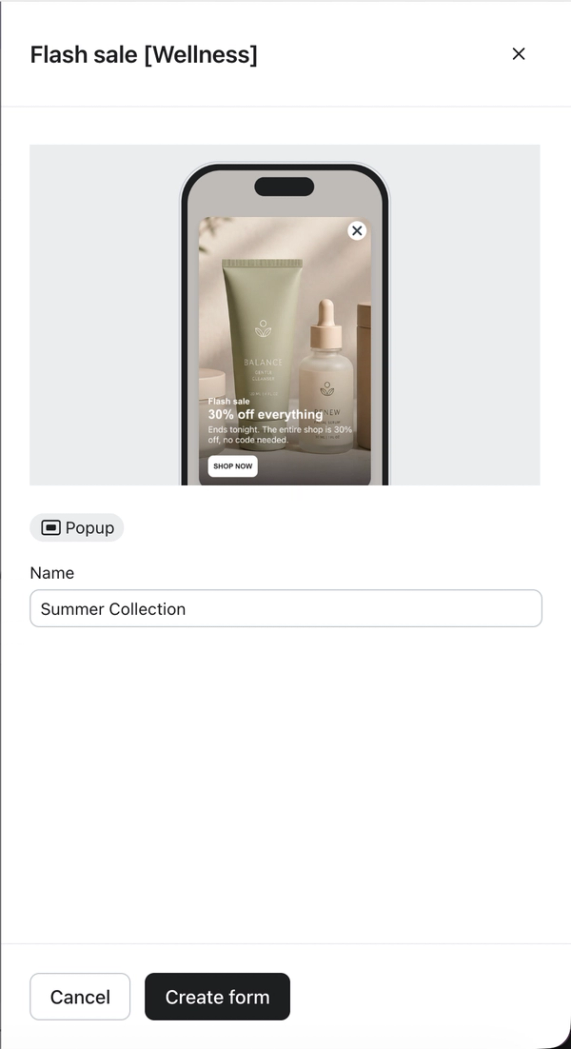
- Select Create Form to enter the in-app form editor where you can edit the content and design to fit your brand.
Create a new in-app form
If you would prefer to start with a basic in-app form template to customize, create a new sign-up form.
- Navigate to the Website > Sign-up forms tab.
- Select Create form.
- In the right sidebar, name the form and select In-app. Then click Create.
- In the top right corner, select Create blank form.
- On the details modal that appears, choose the following:
- A name for your in-app form
- The style of sign-up form that you'd like to use - popup, fullpage, or fly out.
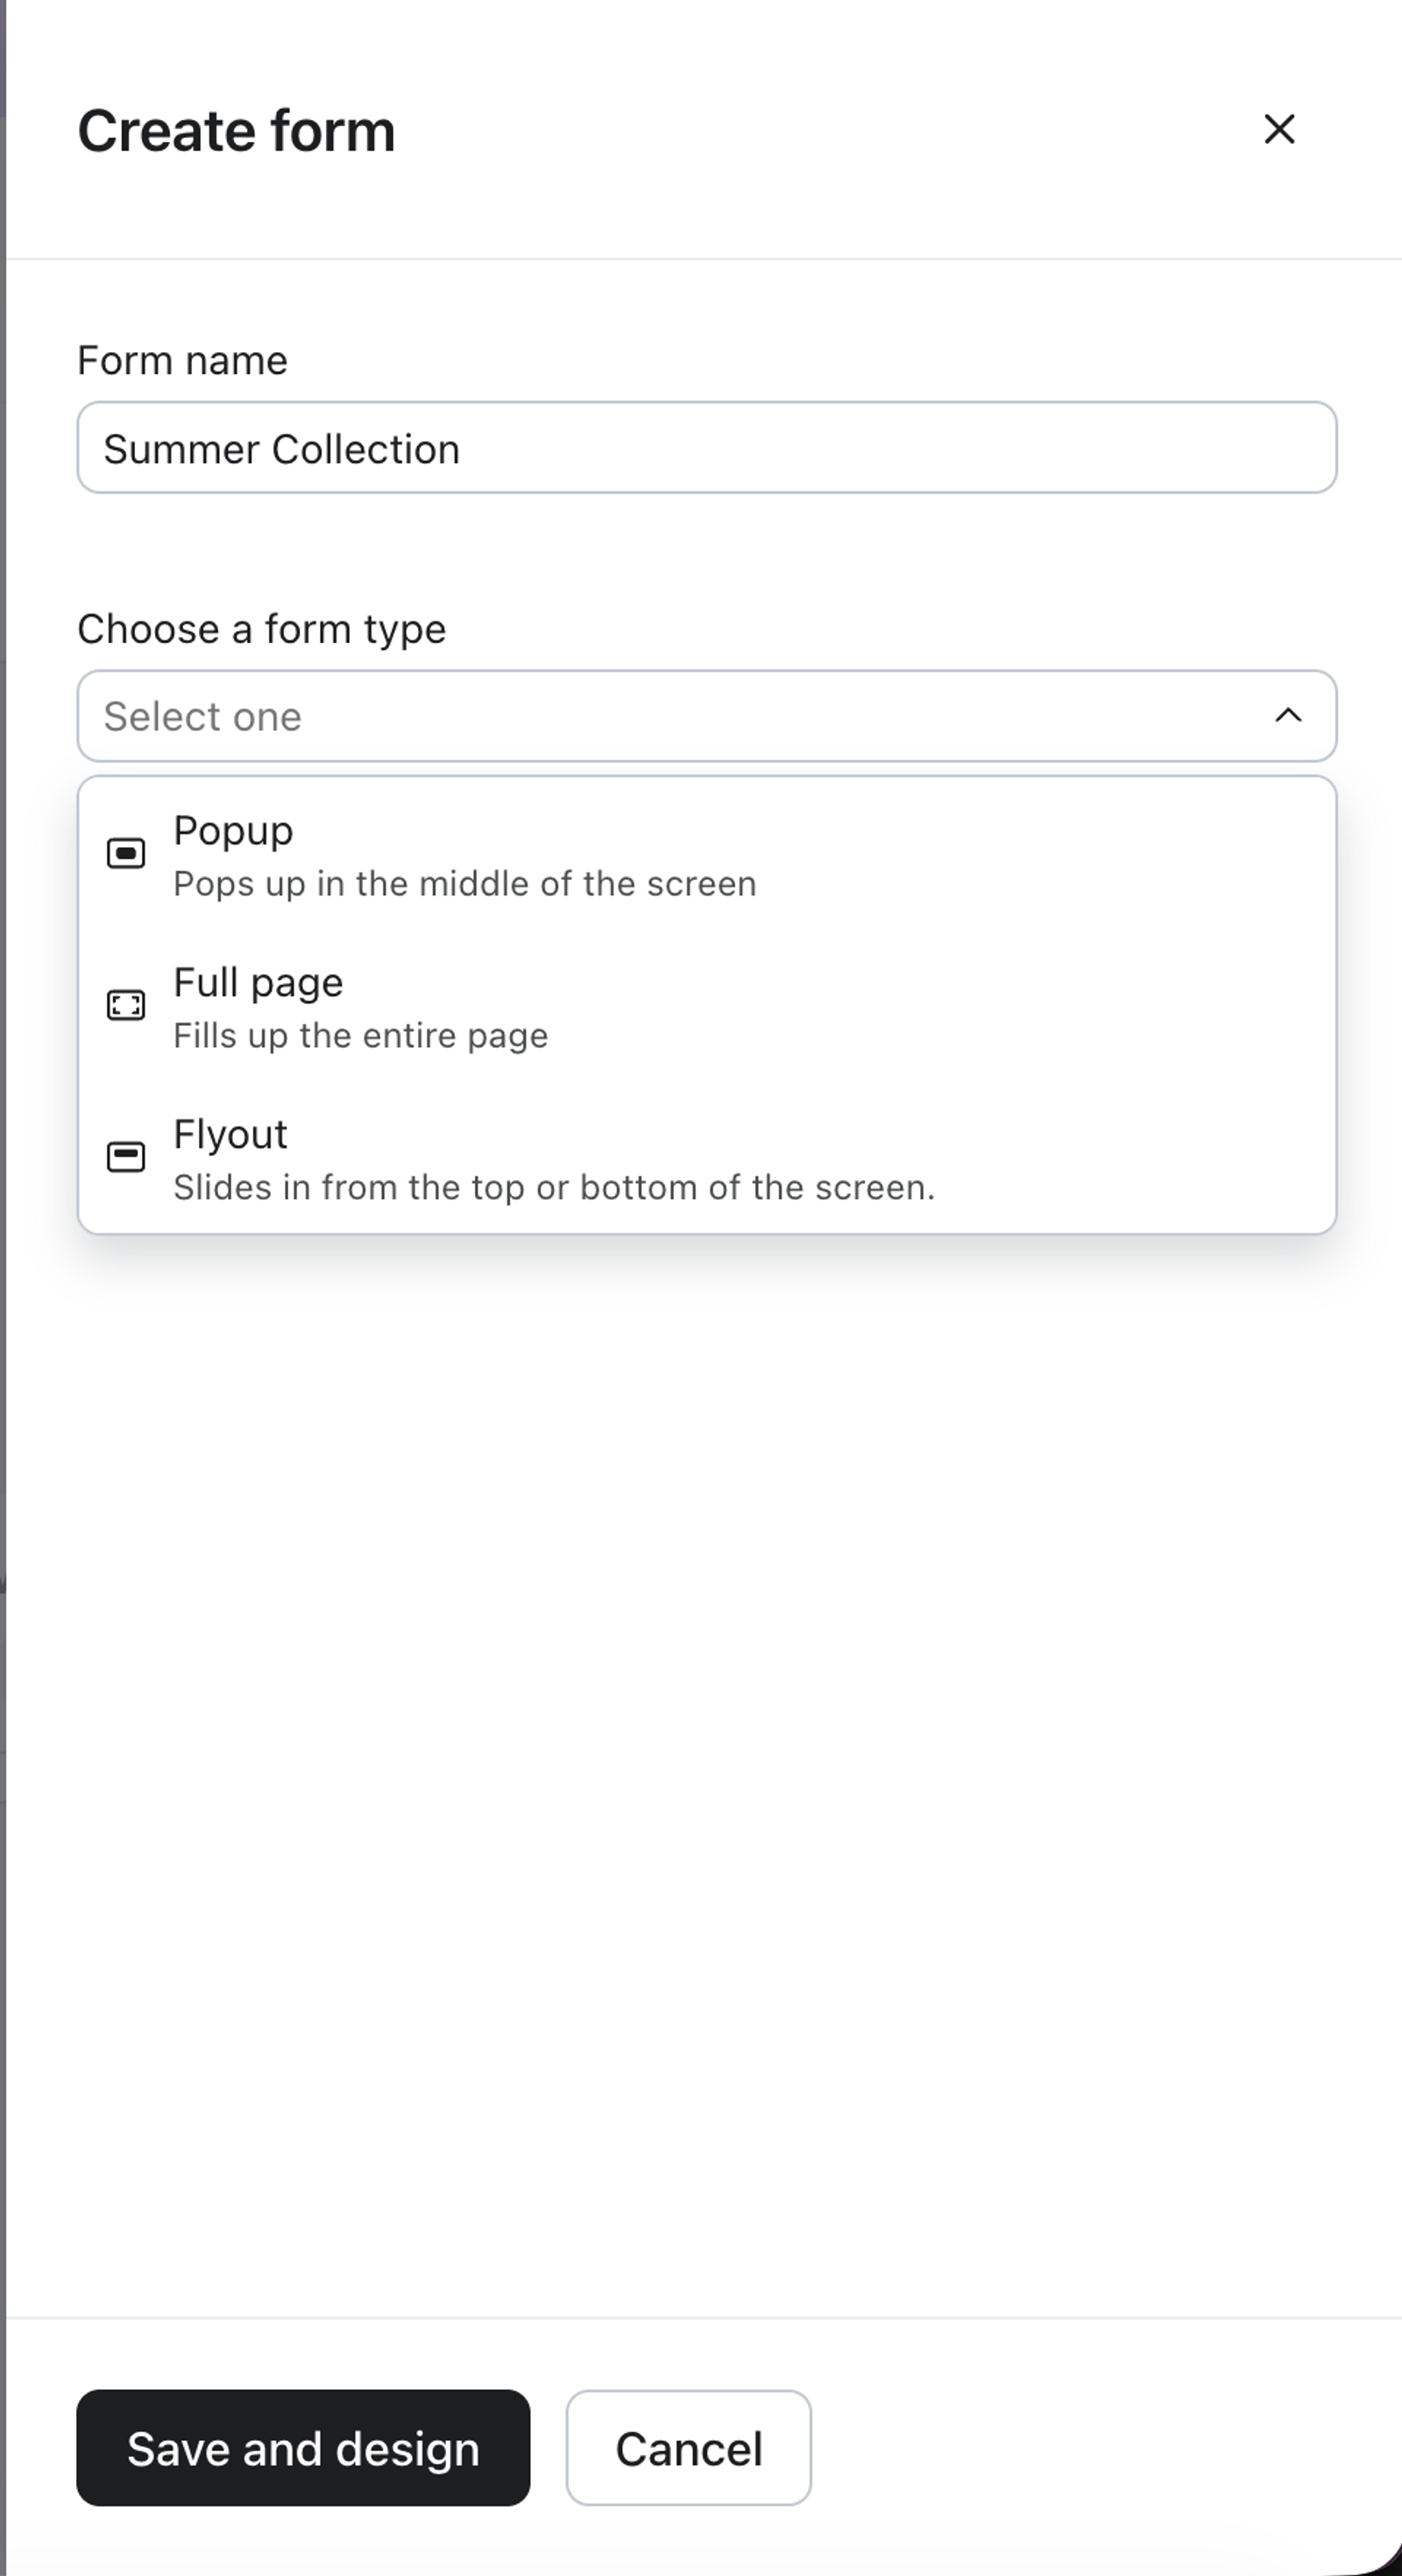
- Click Save and design to enter the form editor where you can customize your form's content and design.
Design your form
Once you've created your form, you can use the Add content and Edit styles sections in the editor to customize design and content of your form.
Add blocks to your in-app form
The types of content blocks that you add to your form will be determined by the goal that you set and the information you want to collect from site visitors. To add content, select the Add content tab in the form editor.
There are a variety of content blocks that you can drag and drop into your form. These include:
Elements:
- Text block
- Button block
- If you want the button to redirect a user to a different app screen, use a deep link to send them to a specific screen in your app (like the collection you’re advertising). For questions about deep links, please see using deep links in push notifications.
- Image block
- Coupon block
- Countdown timer block
- Review quote block
Style your sign-up form
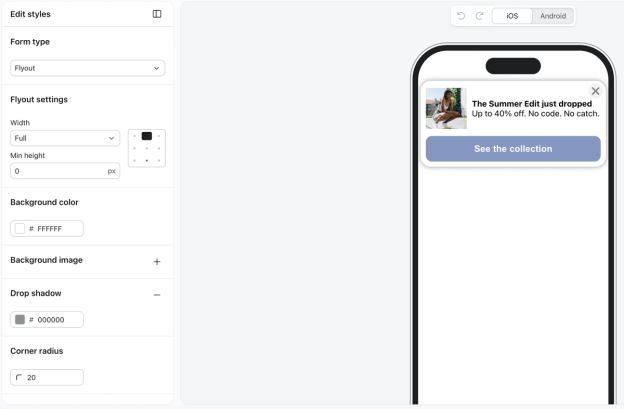
In the form editor, select the Edit styles section. Here, you can edit:
- Form type
- Popup
Appear in the middle of the browser window. Popups are eye-catching and high converting, but potentially disruptive to a visitor's experience. - Flyout
Appear to "fly out" from the edge of the screen. Flyouts are still noticeable, but they generally allow a visitor to keep browsing without having to interact with the form. - Full page
Display over the entire app screen, capturing your shoppers' full attention. These are high-converting forms since they cannot be easily overlooked; however, this also makes them more intrusive since shoppers' must interact with the form to close it. Consider using a full page form as a landing page if you want a designated opt-in page on your site.
- Popup
- Form size
- Background colors
- Form, text and input field styles
Adjust a form's display options
Display priority
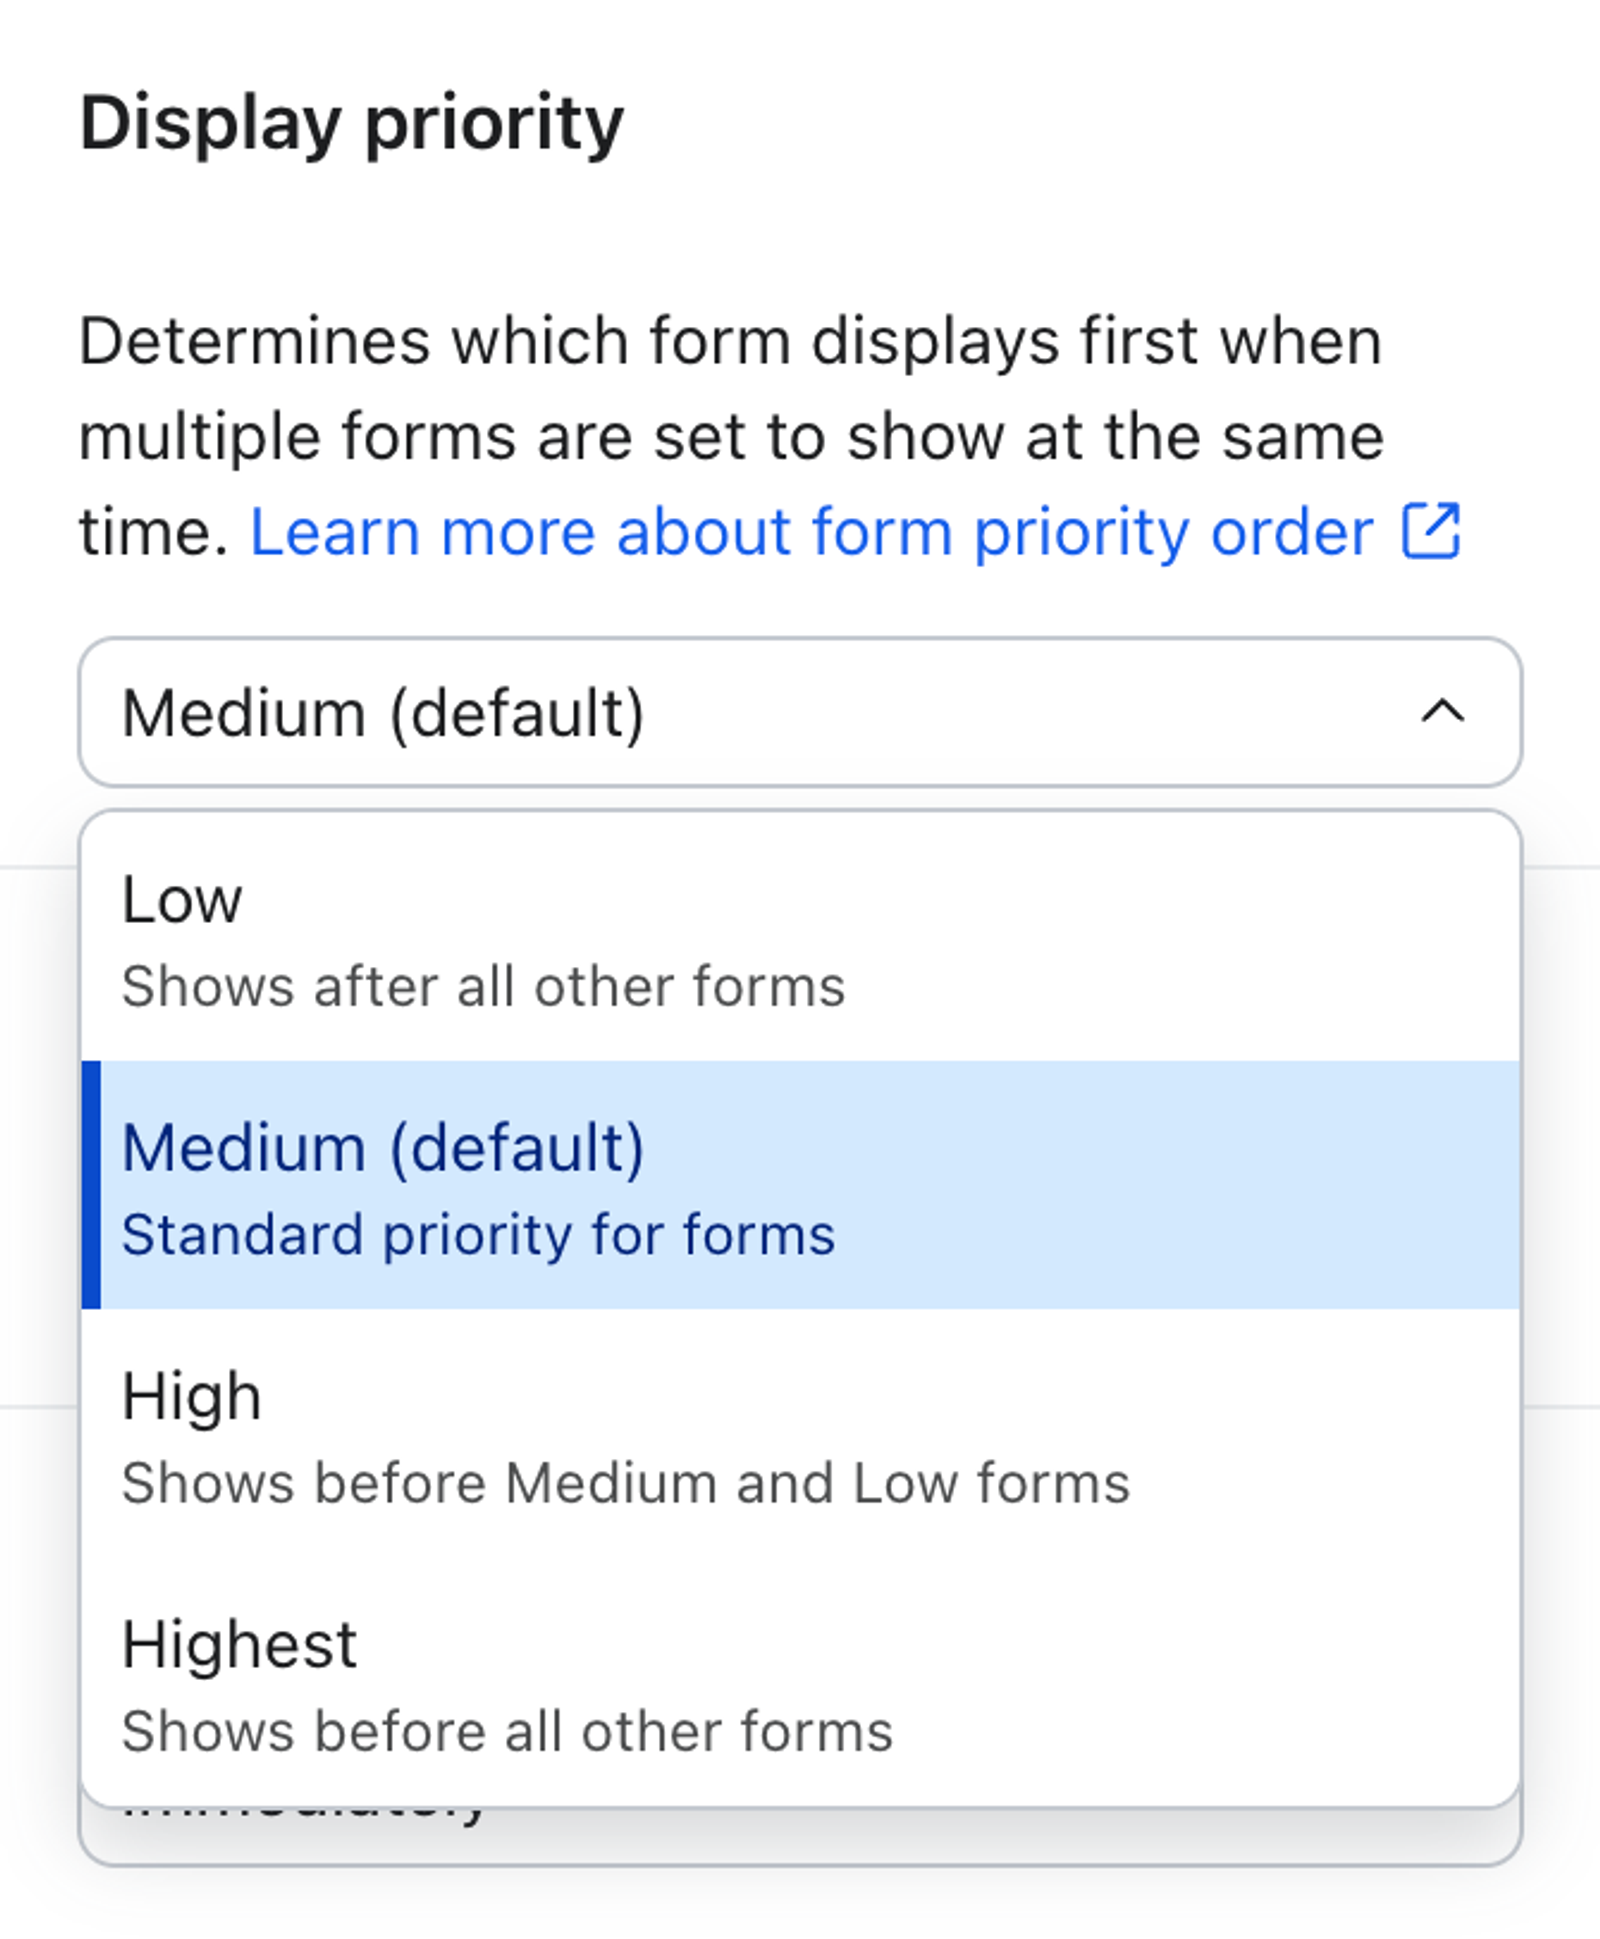
Use display priority to control which form appears first when multiple eligible forms could display for the same app user at the same time. Klaviyo compares queued forms by priority and shows the highest-priority form first.
This setting is most useful when you have overlapping forms, such as a general announcement form and a more specific promotion that can both qualify for the same user at the same time.
Choose from four priority levels:
- Low: The form appears after other eligible forms.
- Medium: The form follows standard behavior. This is the default.
- High: The form appears before Medium and Low forms.
- Highest: The form appears before all other eligible forms.
If multiple forms share the same priority level, Klaviyo does not guarantee the order in which they appear.
Trigger
Your mobile app must be using at least v5.1.0 of the iOS SDK, v4.1.0 of the Android SDK, or v2.1.0 of the React Native SDK to use trigger settings.
You can choose which action triggers the display of forms in your application.
- The default trigger is Opened app, meaning the form will display on app launch. You can also select Opened a push notification or Performed an event
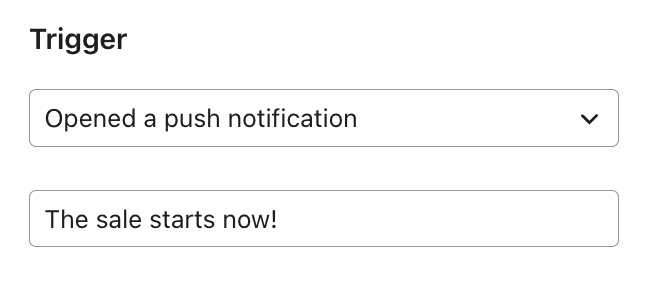
- If you select Opened a push notification:
- Enter the title of the push notification which will trigger the form when opened.
- You can also select a title from a dropdown of your recently created scheduled or draft campaigns.
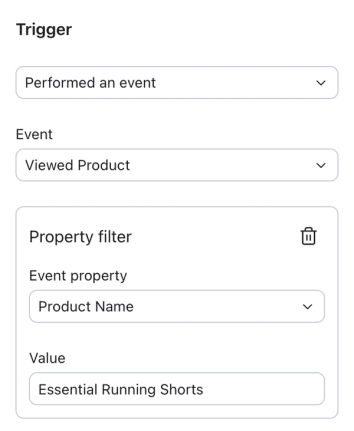
- If you select Performed an event:
- Use the dropdown to select an event from your account.
- The form will only trigger if the event was sent to Klaviyo’s mobile SDK via your mobile application. Events sent server-side will not trigger a form.
- To narrow the trigger further, you can add an event property filter. This filter causes the form to display only when the selected event occurs with a specific property value. For example, when a Viewed Product event occurs where Product Name equals Essential Running Shorts.
- Select Add filter below the event dropdown.
- Choose an Event property from the dropdown. Then enter the Value it must equal for the form to trigger.
- The filter uses an equals operator. The event property must exactly match the value you enter.
- Both the event property and value fields must be filled in together. If you select a property but leave the value empty, you will see a validation error when you try to save or publish the form.
- You can add one property filter per event trigger.
- To remove the filter, select the trash icon next to the property filter.
Timing
Your mobile app must be using at least v5.0.0 of the iOS SDK, v4.0.0 of the Android SDK, or v2.0.0 of the React Native SDK to use timing settings.
You can choose when forms are displayed in your application.
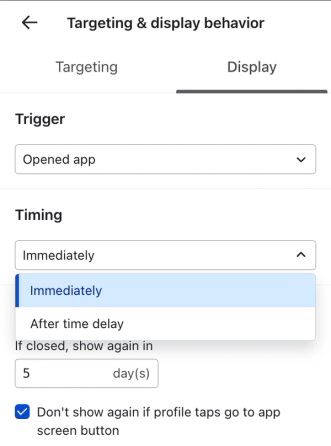
- By default, your form will show immediately after the selected trigger, meaning users will see your sign up form as soon as they open the app.
- You can also choose to show a sign up form after time delay. Set the number of seconds to wait before displaying the form, from 1 to 86,400 seconds (i.e., 1 day).
The display timer persists across app screens. This means that when users navigate to other pages within your app, the display timer continues to count down from when the trigger criteria is met.
Note that if the app session ends before your time-delayed form is shown, the form will not be displayed during the next session. The form will be shown again based on its current settings.
Frequency
Set how often a sign up form is shown to users of your application. When set to 0, the form will be shown every time a user opens the app.
Check Don’t show again if profile taps go to app screen button if you would like to prevent the form from showing for app users who have clicked through to another app screen.
Adjust a form's targeting settings
Targeting by app users
Your mobile app must be using at least v5.0.0 of the iOS SDK, v4.0.0 of the Android SDK, or v2.0.0 of the React Native SDK to use targeting.
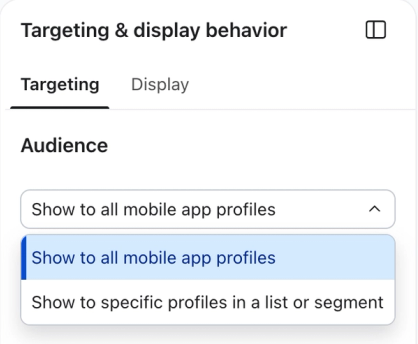
Define the set of app users that are eligible to see an in-app form in the Targeting & behaviors section of the form editor under Audience. You can choose from two targeting options to display a form only to certain users:
- Show to all mobile app profiles - This form will show to all app profiles that exist in your Klaviyo account.
- Show to specific profiles in a list or segment - Select whether to include specific profiles, exclude specific profiles, or both. You can choose a single list or segment, or multiple.
Note that a list or segment cannot be selected for both inclusion and exclusion. If a targeting conflict occurs, the exclusion rules will be used.
When your form appears the way you want, click Publish to set it live.
Outcome
Once you click publish, anyone who is part of the targeted audience will see this form according to the display conditions. Your form will continue to show until you unpublish it or until the user clicks the button in the form (depending on the form’s display settings).
Additional resources
- Understanding form blocks and fields
Learn how to use various content blocks from the form editor (i.e., elements and input fields) in your sign-up form to customize its appearance and the type of information you collect from subscribers.
- Understanding in-app forms
Learn about in-app forms and how you can use them to share important messaging with your mobile app users.
- How to use deep links in push notifications
Learn how to use deep linking in Klaviyo push notifications so that you can direct customers to a specific in-app screen. Deep links make it easy for your profiles to access the content they want with a simple tap.