How to set up Android push notifications
You will learn
Learn how to set up push notifications for Android in your Klaviyo account. After you've completed the steps in this article, you'll be able to send push notifications in your flows and campaigns. For notifications to actually be delivered to devices, you additionally need to install the appropriate Klaviyo mobile SDK in your mobile app code and then release a new app version with the SDK installed.
Before you begin
There are 4 prerequisites for using push notifications in Klaviyo; you must:
- Have your own native mobile Android app.
- Create a Google service account.
- Generate a Google service authentication key that will be uploaded to Klaviyo (more details below).
- Install the appropriate Klaviyo mobile SDK (Android, React Native, or Flutter) and set up event tracking and push notifications in your Android app.
Set up Android push notifications in Klaviyo
- Click your organization name in the lower left-hand corner.
- Navigate to Settings > Push notifications.
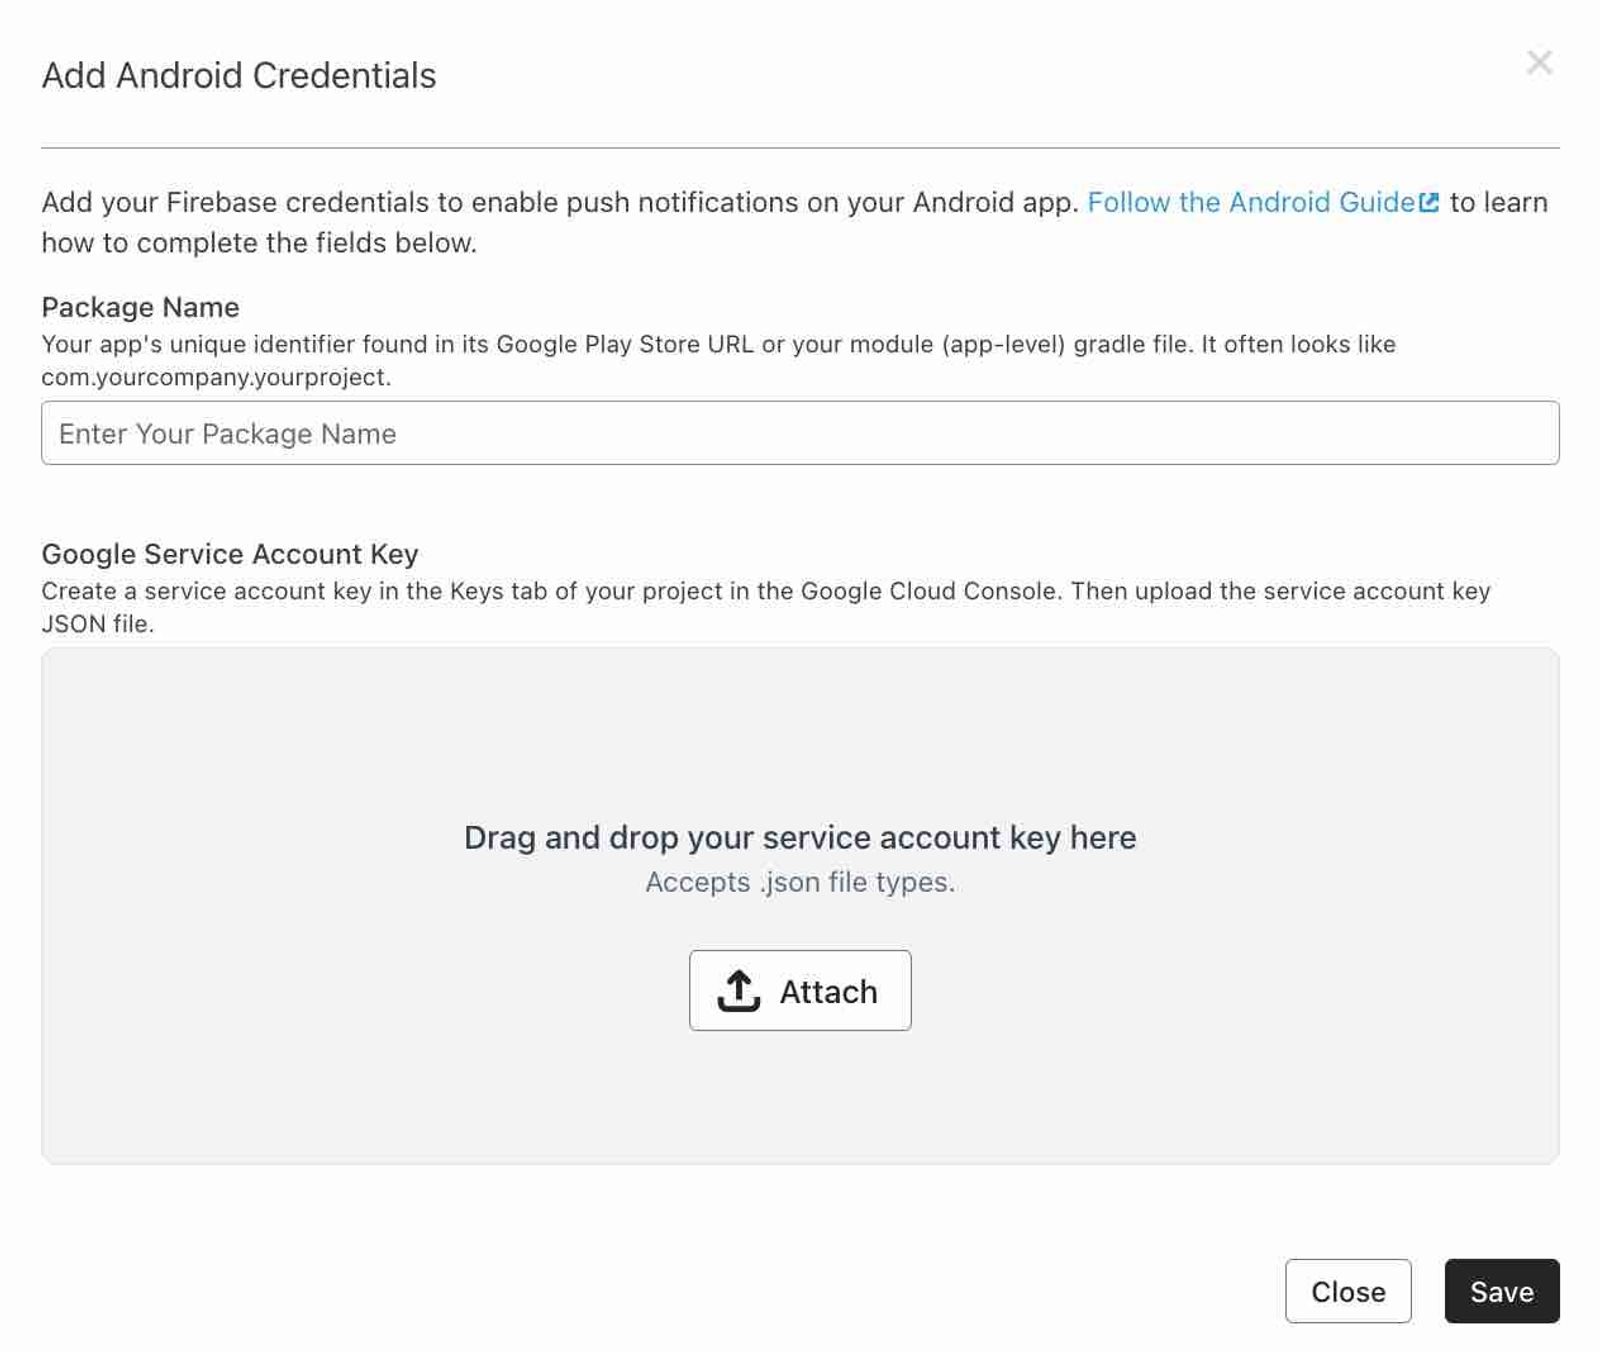
- On the Mobile app settings page, click Enable next to the Android option.
- Fill out the required information:
- Package name
Add in your package name, which you can find in the URL of your listing in the Google Play store. It looks like: com.yourcompany.yourproject. - Google service authentication key
Create your Google service authentication key and then upload the JSON file to Klaviyo. The JSON file for the key should look like:{ "type": "service_account",
"project_id": "PROJECT_ID",
"private_key_id": "KEY_ID",
"private_key": "-----BEGIN PRIVATE KEY-----\nPRIVATE_KEY\n-----END PRIVATE KEY-----\n",
"client_email": "SERVICE_ACCOUNT_EMAIL",
"client_id": "CLIENT_ID",
"auth_uri": "https://accounts.google.com/o/oauth2/auth",
"token_uri": "https://accounts.google.com/o/oauth2/token",
"auth_provider_x509_cert_url": "https://www.googleapis.com/oauth2/v1/certs",
"client_x509_cert_url": "https://www.googleapis.com/robot/v1/metadata/x509/SERVICE_ACCOUNT_EMAIL"}
- Package name
- Click Save to finish setting up push notifications for your Android app.
A green success callout confirms that your app has been connected to your Klaviyo account. You now can create push notifications in campaigns and flows.
Test sending a push notification
After you have configured push notifications in your Klaviyo account and have confirmed that the Klaviyo SDK is installed in your mobile app:
- Log into your mobile app, ideally with an email address or phone number that will make it easy to find your profile in Klaviyo.
- If prompted, enabled push notifications for your app. If you are not prompted, confirm that push notifications are enabled for the app in your device’s settings app.
- In Klaviyo, go to Audience > Profiles and find your test profile.
- Under Channel Consent, confirm that your profile is subscribed to mobile push notifications.
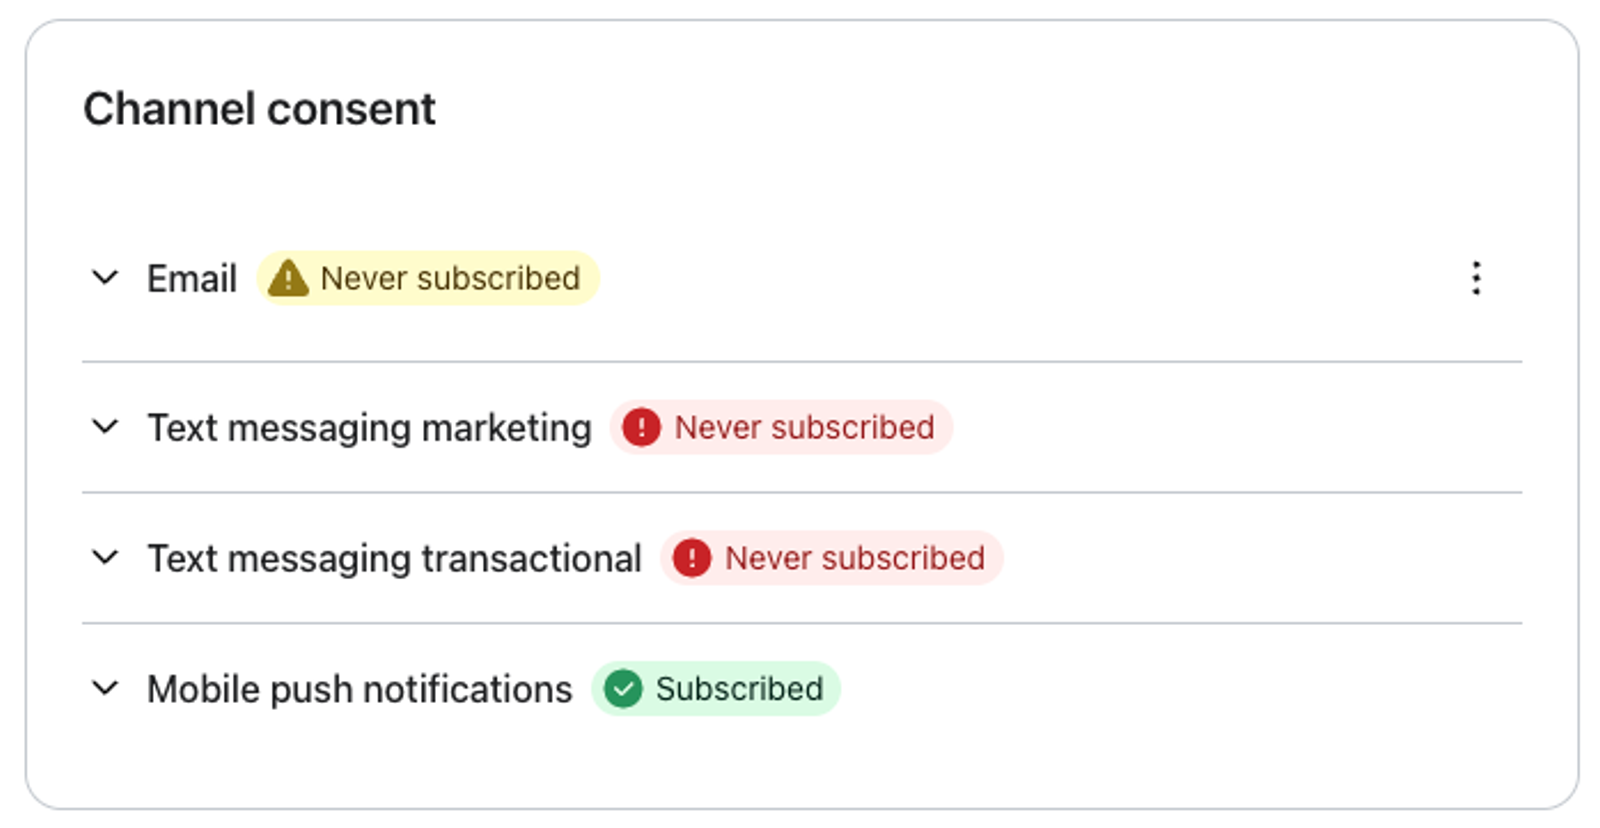
- Create a list or segment with only your profile.
- Send a push notification campaign to that list or segment.
- Confirm that the notification appears on the device.
- Tap the notification on your device to open your app.
- Check your profile’s Activity feed to confirm that you see both a Received Push event and an Opened Push event.
Troubleshooting
- Why do I not see a push token on my profile in Klaviyo? Similar to an email address for emails, push notifications are sent to push tokens. Your mobile app needs to forward a device’s push token to Klaviyo for you to be able to send push notifications to that device. Confirm with your app developer that they have implemented the code outlined in the Push Notifications section of our SDK documentation.
- Why am I not seeing Opened Push events even when I tap on a notification? You need to add code to your mobile app to track Opened Push events in Klaviyo. Klaviyo can automatically handle this code for you, or your developer can manually add this code. Confirm with your app developer that they have implemented the code outlined in the Push Notifications section of our SDK documentation.
Additional resources
- Also have an iOS app? Learn how to set up iOS push notifications.
- Is your app built with React Native? Learn how to set up push notifications for a React Native app.
- Learn how to use push notifications for campaigns.
- Check out how to use deep links in push notifications.