How to add a list update action to a flow
You will learn
Learn how to add a list update action to a flow to add or remove a profile from a list once they reach a specific part of the flow.
With this flow action you can:
- Add to list
- Remove from list
- Create list
By using the list update action, you can change what targeted lists someone is in without needing to manually update them or create segments. This allows a profile to start a new journey after completing their current one, and can reduce the amount of lists and segments used in your account.
You can use this action for various cases such as:
- Adding customers to a re-engaged list after they’ve opened emails in a winback flow.
- Adding customers to a VIP list after they’ve opened emails in a post-purchase flow.
- Adding subscribers to different lists after they’ve interacted with emails requesting content preferences.
Before you begin
Make sure you're aware of the following effects of the list update action:
- Adding a profile to a list through a list update action can trigger flows connected to that list, such as a welcome series. Whether the profile can enter a connected flow again depends on that flow’s Re-entry criteria. List-triggered flows default to No re-entry, but you can allow re-entry whenever a profile rejoins the list or after a specified time period. Learn more about re-entry settings for list-triggered flows.
- The list update action does not affect consent status.
- The list update action will add someone to a list regardless of the list's opt-in settings, i.e., even if the list is set to double opt-in, the list update action will still add the profile to the list.
Add the list update action
- Navigate to a specific flow.
- From the Actions sidebar, drag and drop a List update action into the flow.
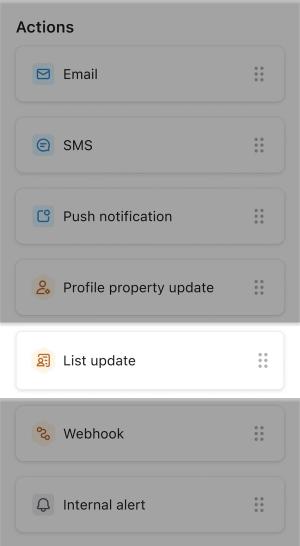
- In the side panel, name the update action and choose either Add to a list or Remove from a list.
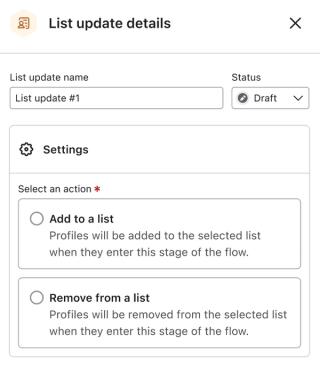
- Select a list from the dropdown. If you selected Add to a list, you can also create a new list:
- An existing list from your account that you want to add or remove the profile from.
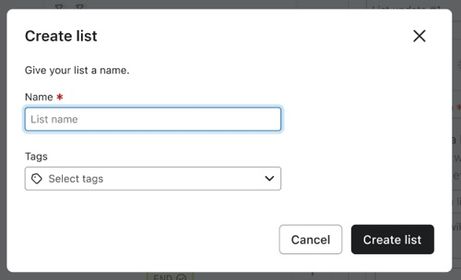
- To add profiles to a new list, click Create list, enter a name, optionally choose tags, and click Create list. The new list is then selected for the action.
- Click Save to save the action name and list selection. Once the action is configured, change its status from Draft to Live, or select Manual if you’d like to review profiles before changing their list membership. Profiles will skip this step if you leave it in Draft.
- Click Save again to apply the status change.
If you delete a list after it was selected for a list update action, the action will become unconfigured and will require you to set it up again. Otherwise, profiles will skip the unconfigured action.
View activity
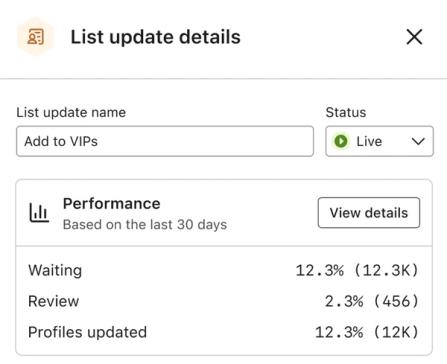
You can see a summary of who is waiting and who has moved through this step in the details sidebar after clicking on the action.
In the Performance section on the sidebar, you can see the following:
- How many profiles are scheduled or in Waiting
- How many profiles are in Review (if the flow component is/was in manual mode)
- How many profiles have successfully moved through the action, and had their profile updated
Click View details to see the activity page for more information on the profiles that will or have reached this action.
Additional resources
Learn about other flow actions: