Getting started with segments
You will learn
Learn how to create and use segments in Klaviyo, which are a powerful tool for understanding your audience and sending targeted messages.
Ready to build more custom segments? Head to Understanding segment conditions to learn how.
About segments
Unlike traditional subscriber lists, segments are groupings of contacts defined by a set of conditions. Lists are static, meaning they grow as people subscribe or are manually added.
Segments, on the other hand, are dynamic, meaning they grow as people meet the segments' conditions and shrink as people no longer meet them. Moreover, segments update in close to real time. Learn more about how segments update.
In Klaviyo’s analysis of emails sent by US-based customers from October through December 2017, highly segmented campaigns returned more than 3 times the revenue per recipient of unsegmented campaigns. Some examples of how you can use segments to identify different audiences include:
- Customers who purchase a new product, so you can watch the segment grow after launch
- Inactive subscribers who have been on your list for at least 6 months but have never opened or clicked an email
- VIP customers, which includes everyone who has purchased at least X number of times before or has spent over a certain amount of money
- Customers with a high predicted customer lifetime value (CLV) who are likely going to be future VIPs
When you build a segment with a certain set of conditions, it will pull from all of the contacts in your account. This means that segments don't necessarily have opt-in criteria in order for people to be added, which is important to keep in mind when you're planning on emailing a particular segment.
To limit an email segment to subscribers, use AND to add If someone can or cannot receive marketing > can receive > email marketing. Click Add filter and select Subscribed under because person.
How to create a segment
- Navigate to Audience > Lists & segments in your account.
- Click Create in the upper right corner.
- Select Segment.
- Enter a segment name. If you’re naming it in the Create segment panel, click Create segment to open the builder.
- Use the segment builder to add conditions and specify who should be included in your segment.
- Once you are satisfied with the definition you create, click Create segment.
Learn more in the Segment conditions section below.
Depending on the size of your segment, it may take a while to populate. If you're planning on sending a campaign to a segment, please allow time for your segment to populate before scheduling the email.
How to generate a segment definition using text
If you know what kind of segment you’d like to create, but aren’t sure how to build it, try AI in the segment builder. You can input a phrase or a few sentences describing the segment you’d like to create, and AI will generate conditions for you to review.
AI segment generation requires a paid Klaviyo account and is available for accounts hosted in the US.
- Navigate to Audience > Lists & segments.
- Click Create.
- Select Segment.
- Enter a segment name. If you’re naming it in the Create segment panel, click Create segment to open the builder.
- Type a sentence or phrase describing your desired segment directly in the condition selector.
- Select your text under Define with AI to generate the conditions.
- Review the generated conditions and edit them as needed. When you’re satisfied with the definition, click Create segment.
You can also use AI when editing an existing segment. Open a condition’s dropdown and select the option under Define with AI, then enter your prompt and select your text under Define with AI to generate conditions. Review the changes and click Update segment to save.
AI replaces the condition you’re editing and keeps your other conditions. To start again with a new definition, delete the conditions you no longer want.
Learn more about how to use the define with AI tool.
Segment snapshots
Segments dynamically grow and shrink as profiles meet the required criteria. However, there may be occasions where you'd like to capture all the profiles currently in a segment. You can use a segment snapshot to create a new list with all the profiles currently in your desired segment.
- Open your segment and select Manage segment > Create list of current members.
- Enter a List name, then click Create list.
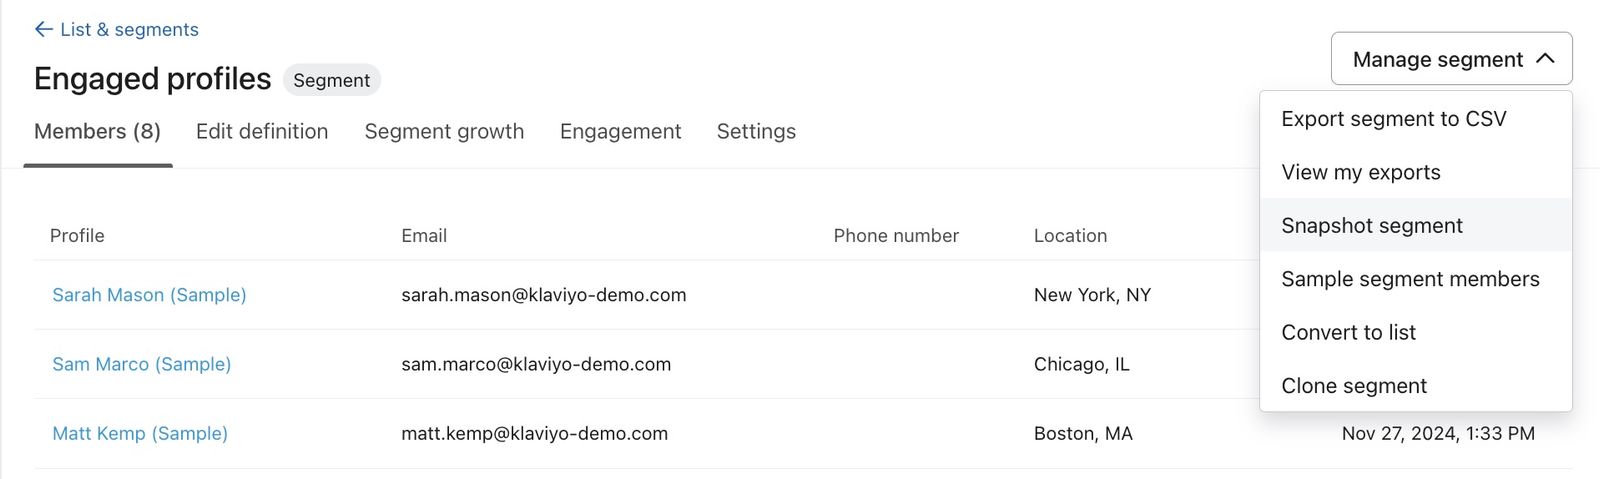
This creates a separate list containing the segment’s current profiles. Allow time for the list to populate before using it.
The original segment will continue to grow dynamically, but the list created from the snapshot will be static.
Segment conditions
Every segment consists of 1 or more conditions. You can select conditions based on who you'd like in the segment. For example, to create a segment of people who have taken a certain action, you'd use the condition What someone has done (or not done), then select the action (e.g., Placed Order).
Learn more about the segment conditions available in your account.
Filtering a segment condition
When building a new segment around what someone has done (or not done), you have the opportunity to filter this action to refine your segment. To use a filter to add specificity to a segment:
- Choose an action (e.g., What someone has done (or not done) > [Action or event]).
- Select the filter icon next to your condition.

- Choose a property from the dropdown menu that appears.
- Only top-level properties are available for segmentation, so nested data (i.e., second- and third-level data) will not appear in the dropdown menu.
- Next to equals or contains, choose the specific value you'd like to filter on.
Text values in event filters are case sensitive, so match the capitalization of the synced value. The Email profile property is not case sensitive: @Gmail.com and @gmail.com match the same email addresses.
Note that a value will only pre-populate if it has synced to Klaviyo along with a tracked event (e.g., a product name appears for a purchase metric after it syncs with a purchase event).
If you want to build a segment around a property value that does not yet exist in Klaviyo (for example, a new product that nobody has purchased yet), enter the exact value in the value field. For a field that accepts multiple values, select Create [your value]. For a single text value, click outside the field to apply it. If the value is identical to the value that will eventually sync to Klaviyo, the segment will work as expected.
While Klaviyo may sync many details about a given metric, not all synced properties are available for segmentation. For data management purposes, only the primary details of an event are synced as "top-level" properties, and only these top-level properties are segmentable.
If you view the raw data Klaviyo syncs for an event, you see key data points for the event. For a Placed Order event, for example, you can see the following top-level properties:
- Value
- Collections / Categories
- Item Count
- Items
- Source Name
You will see an array labeled Extra or Details. While the data in this array is available to insert within an email template, properties nested within this array are not segmentable.
Using AND vs. OR to join conditions
The AND/OR selector can be used to combine multiple conditions in a segment. To create another condition, select the Add condition button.
By default, the operator is set to OR but this can be toggled to AND at any time.
The AND connector between conditions will make a segment more exclusive and more strict. Each condition is checked separately and individually, and every condition must be true in order for someone to be included. Someone must meet all of the segment's conditions in order to be added.
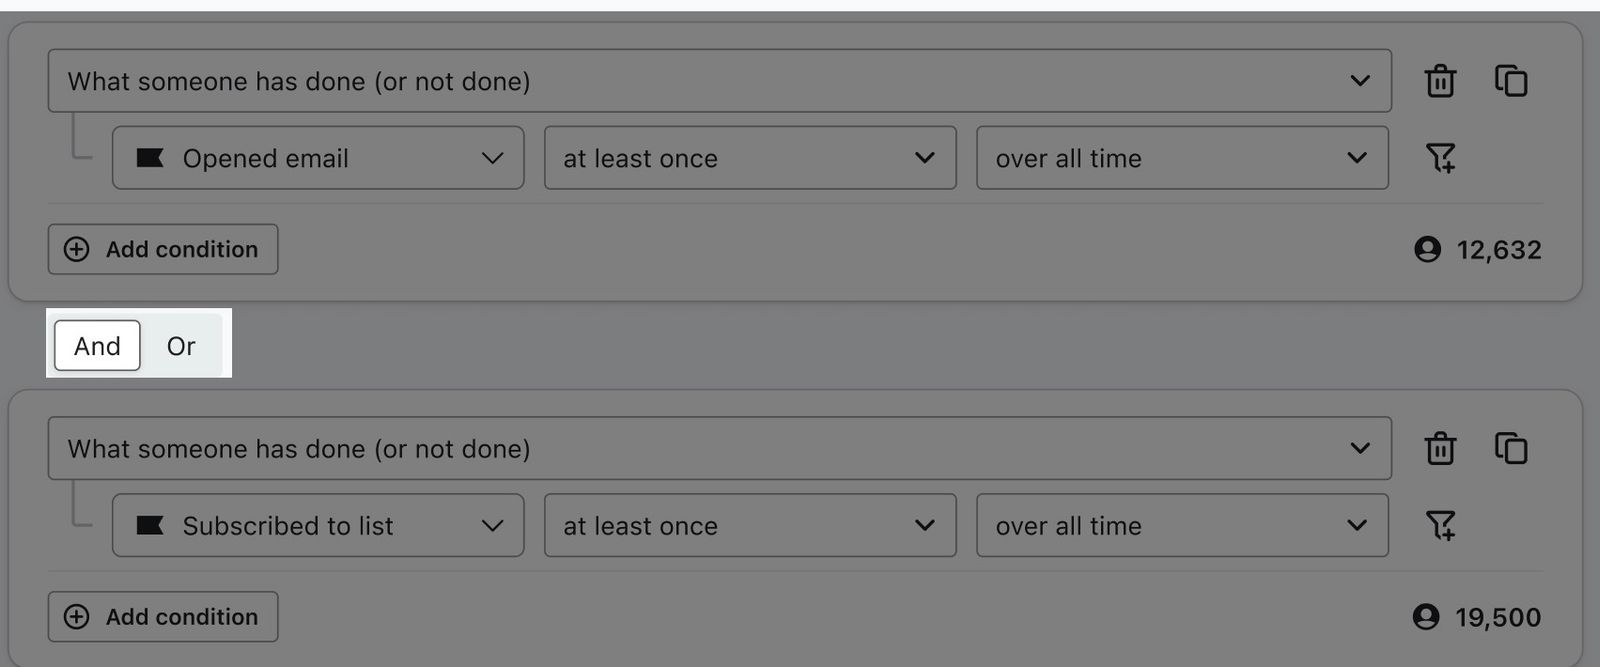
In the following example, only those who have placed an order AND subscribed to email marketing are included in the segment. If someone is subscribed but hasn't placed an order, they are not included.
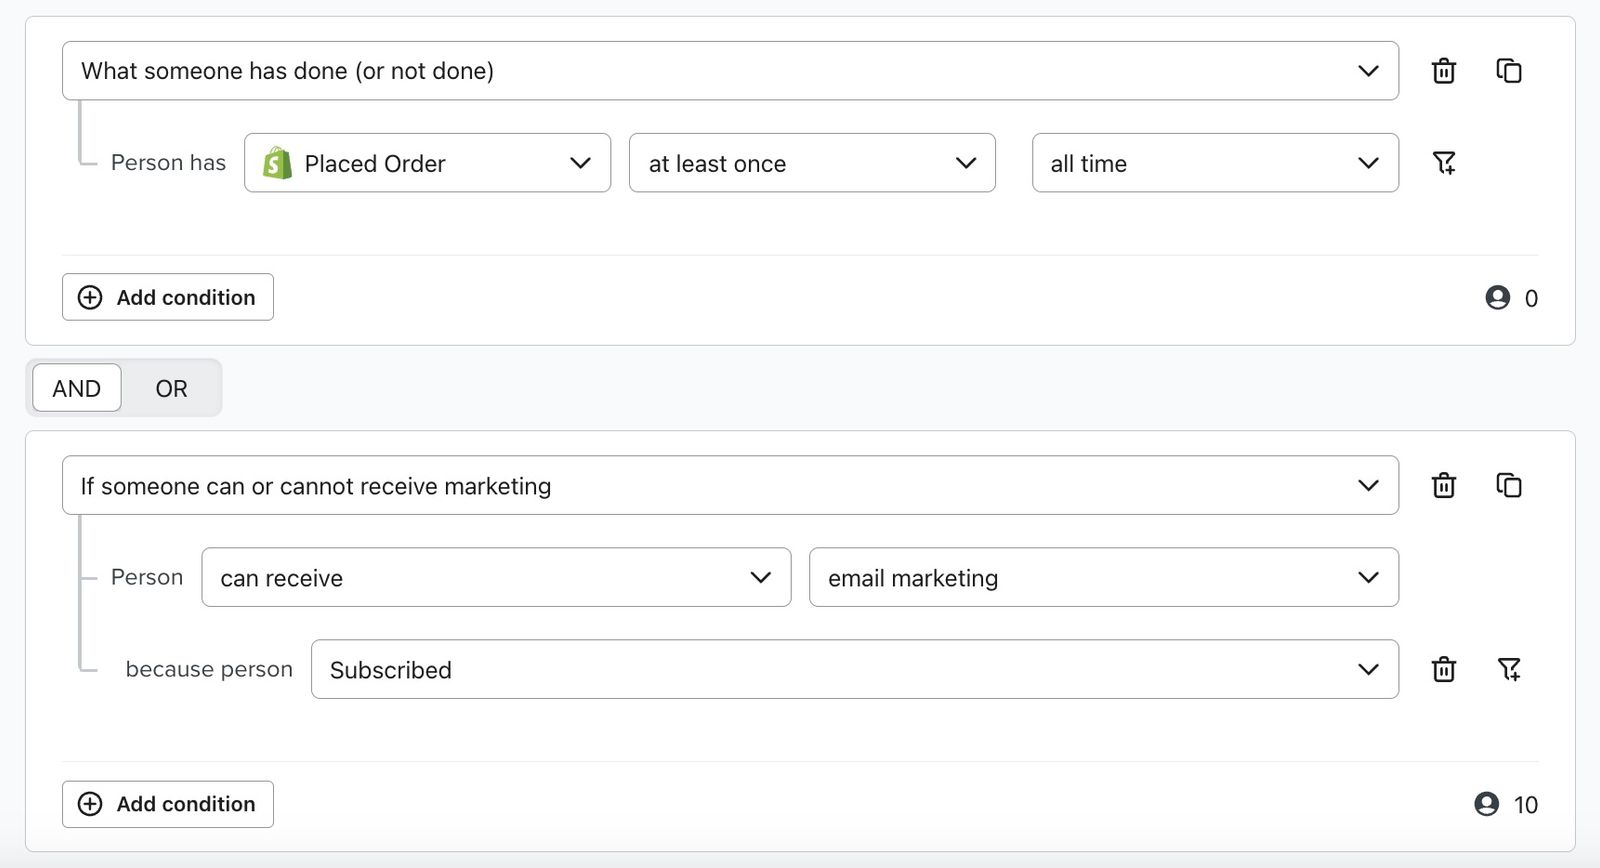
Meanwhile, the OR connector between a sequence of segment conditions makes the segment more inclusive and less strict. Each condition in the sequence is checked individually, meaning someone only has to meet 1 of the conditions in order to be added.
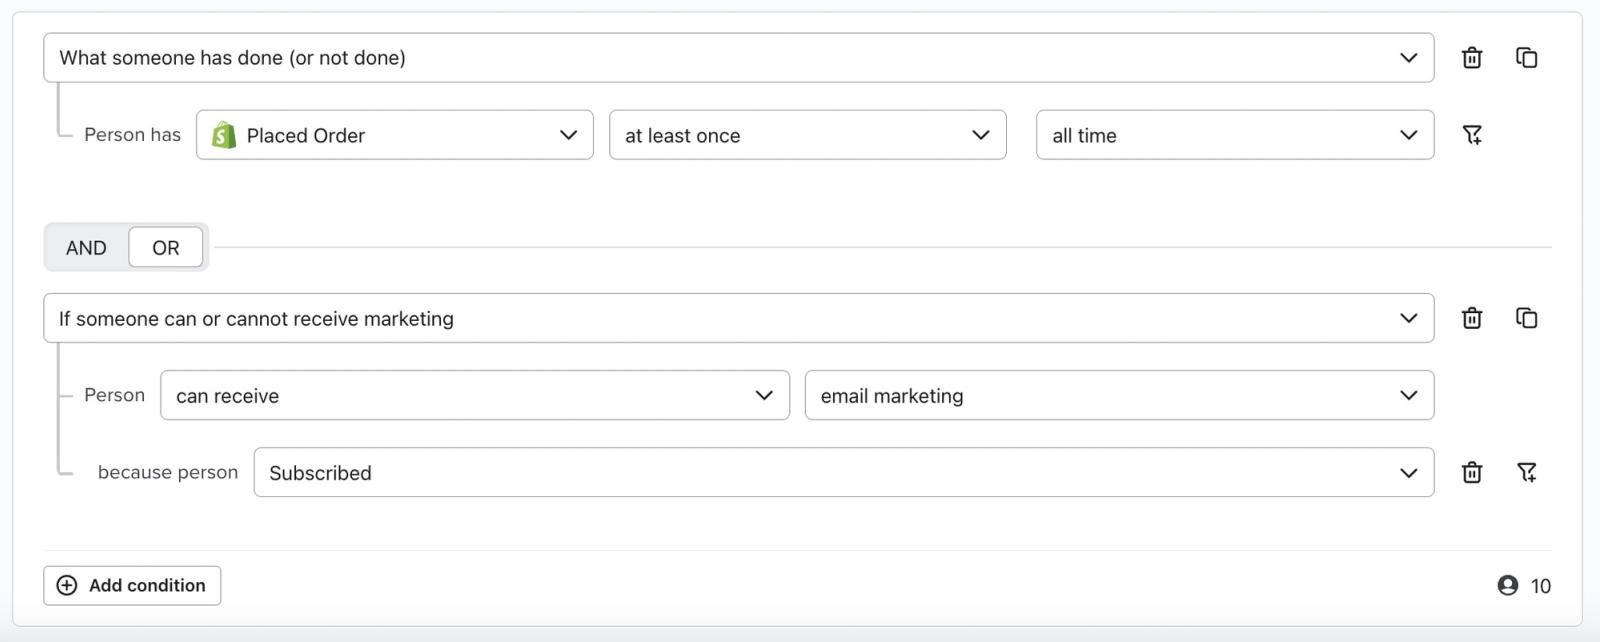
In the following example, anyone who is subscribed OR who has placed an order at least once will be included. So, this segment captures everyone who is subscribed to email as well as anyone who has ever placed an order, even if there is no overlap between them. Someone could place an order and not be subscribed, and vice versa, and still be included in the segment.
Using AND vs. OR with negative conditions
When using OR connectors, it's especially important to keep an eye on segments with negative conditions, e.g., someone has done X zero times over all time. Let's say, for example, that we'd like to create a segment of people who don't live in the US or Canada.
If we use an OR connector, contacts only have to meet 1 of the conditions in order to be added, not both. Someone who is in Canada, or Mexico, or Italy, and so on, is not in the US. So, people from Canada fulfill the first condition, and are therefore added to the segment (even though they don’t meet the second condition). Likewise, for the second condition, someone in the US is not in Canada, since no one can be in 2 places at once. So, people from the US, Canada, and every other country in the world are also added to this segment.
To exclude both countries, join Country doesn’t equal United States and Country doesn’t equal Canada with AND.
Learn more about AND vs. OR conditions.
Clone conditions
When building segments, you can clone conditions so that you can create multiple conditions more quickly.
To clone a condition, select the Copy icon next to it:

This duplicates the condition. Once cloned, you can modify either condition to fit your needs.
How to segment your audience
When to use a segment vs. a flow
Segments are great tools to identify cross-sections of your audience to send one-time campaigns to. You can also build a flow triggered when someone is added to a segment.
For example, if you would like to trigger an email when someone buys a specific product, you can accomplish this by creating a flow that is triggered by the Placed Order metric, and then add a trigger filter to the flow to only include people who purchased the specific item.
A metric-triggered flow starts when the selected event occurs. A condition such as “Placed Order zero times” does not itself trigger that flow. You can use profile filters, including Properties about someone, to narrow who qualifies after a flow is triggered.
Additional resources
Not sure which segments to start with?
- Use engagement tiers to identify different levels of interest within your audience, and then market to these segments accordingly.
- Check out our guide to creating a never engaged segment to identify subscribers who have never engaged and consider suppressing them as part of list cleaning to help protect your deliverability.
- Create email frequency segments to market to people based on how often they'd like to hear from you. This helps you keep contacts engaged by letting them choose how many emails they get.
- Segment based on someone's predicted customer lifetime value (CLV) to identify your future VIPs.
- Learn just how powerful segments can be with our Segmentation for ecommerce benchmark report.