How to allow subscribers to opt out of Mother's Day, Father's Day, and other holiday messages
You will learn
Learn how to offer your subscribers the option to opt out of emails and SMS related to specific holidays like Mother’s Day, Father’s Day, BFCM, or Christmas. Then, learn how to exclude those who opt out of those messages. Holidays can be a sensitive time of year for some members of your community, so allowing subscribers the option to opt out can be a way to build trust and provider a better customer experience.
Create a template with an opt-out button
You can offer your subscribers the option to opt out of holiday emails by sending a campaign with an update property link.
When using the code snippets provided below, make sure to use straight quotes (') rather than curly quotes (‘) to ensure the code renders correctly. This can be achieved by copying the code below and pasting it directly into your template using the "Paste as Plain Text" function (Ctrl+Shift+V or Cmd+Shift+V).
- Navigate to Templates > Create a Template, then follow the prompts to create a new email template.
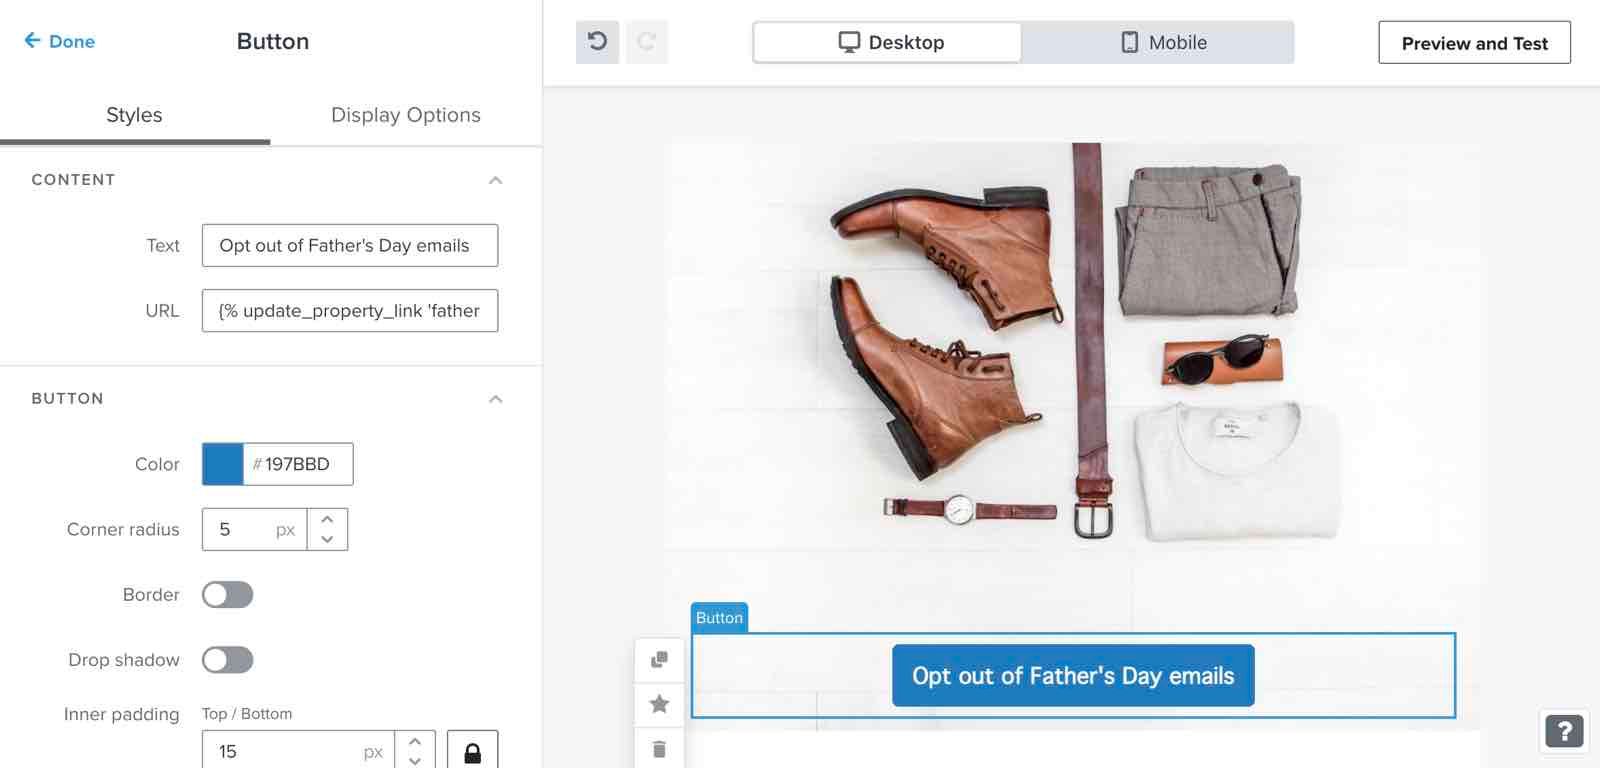
- Add a button block to your template.
- In the URL field of the button block, paste one of the following code snippets:
For Mother’s Day:{% update_property_link 'mothers_day_opt_out' 'True' 'REDIRECT_LINK' %}
For Father’s Day:{% update_property_link 'fathers_day_opt_out' 'True' 'REDIRECT_LINK' %}
Use other property names, like BFCM_opt_out, as needed.
update_property_link is not supported in SMS and MMS.
- Replace
REDIRECT_LINKin the pasted code with a link to a confirmation page built on your website. - Fill in the button text. Use a call-to-action that aligns with your branding and clearly indicates that clicking the button will opt you out of Mother’s or Father’s Day messaging.
Update property links work throughout the template editor, not just in button blocks. If your design requires it, you can use the update property link code in any URL field, or to hyperlink text in a text block.
Once you’ve added your opt-out button, finish designing your campaign so it’s ready to send.
Test the functionality and send a campaign
To make sure your button works, test the functionality by sending it to yourself. Follow the instructions below to send a live email with a functioning button. Do not send a preview email to yourself, as the update property URL in the preview message uses a placeholder link.
- Navigate to your profile in Klaviyo by searching for your own email address.
- Click Messages in the upper-right corner of your profile.
- Click Send Email from the Messages tab.
- Click Continue to Email, then follow the prompts and select the template you built in the last step, setting it to send right away.
- Once you receive the message in your inbox, click the opt out link.
- Navigate back to your profile like you did in step 1.
- In the Custom Properties section, locate the property mothers_day_opt_out: True or fathers_day_opt_out: True.
If you see the property in your own profile, you can be certain that the button works as intended. Send the campaign to your audience to collect their preferences around Mother’s or Father’s Day messages.
Create a segment and exclude it from holiday sends
After sending the opt-out campaign to your subscribers, create a segment to identify those who do not wish to receive marketing for that holidau. Use the following segment definition, replacing mothers_day_opt_out with your holiday opt out property:
Properties about someone > mothers_day_opt_out is True

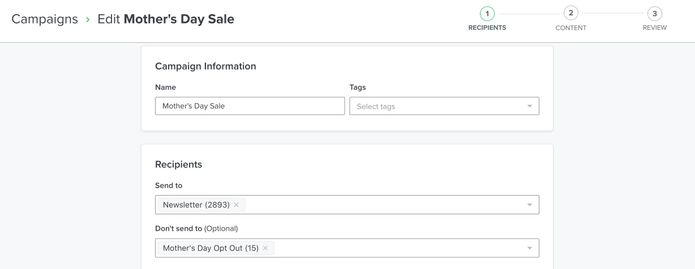
This segment will continue to update as additional subscribers share their preferences. When you’re ready to send holiday messages, select this segment under Recipients in the Don’t send to field. Make sure to select Determine recipients at send time when scheduling your message, so the most up-to-date version of the segment is used.
Additional resources
- Understanding custom profile properties
Learn about custom properties in Klaviyo that you can use to store information about the contacts in your account.Here are several examples of how you might use custom properties:
- Getting started with segments
Learn how to create and use segments in Klaviyo, which are a powerful tool for understanding your audience and sending targeted messages.