How to add a form teaser
You will learn
Learn how to add a teaser to your popup, flyout, or full page sign-up form. A teaser is a small widget that a visitor can click to open a form or reopen it after dismissing it.
Teasers can be used for popup, flyout, and full page forms. Teasers are not available for embedded forms or banners.
Add a teaser to a popup, flyout, or full page sign-up form
- Navigate to Website > Sign-up forms.
- Click Edit for an existing form, or create a new one.
- Click (+) Teaser in the form editor.

Choose a teaser style
Under Style, choose 1 of 3 teaser shapes:
- Rectangle
Use the rectangle shape for a tab-style teaser - Circle
Use the circle shape for a bubble-style teaser - Corner
Use the corner shape for a teaser tucked into a corner of your site
Under Layout, position your teaser on a side or corner of your site. Corner teasers can only be placed in a corner. The teaser’s size is optimized for a variety of devices. Be sure to view the desktop and mobile previews to ensure the teaser’s placement doesn’t conflict with other popup or teaser-style elements on your site.
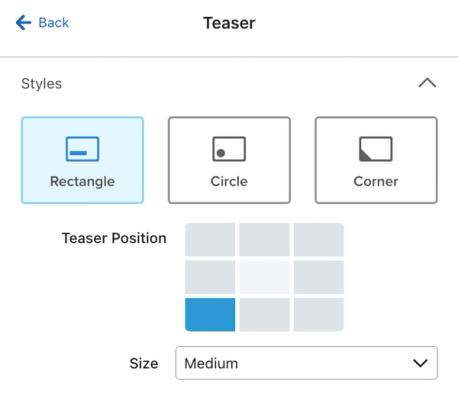
Under Layout, choose Small, Medium, Large, or Custom from the Size dropdown. If you choose Custom, enter a width in pixels.
On mobile, rectangle teasers positioned along the top or bottom of the page expand to the available width, allowing for their margins. This automatic width adjustment does not apply to rectangle teasers positioned on the left or right side. Check the mobile preview when choosing a size and position.
Edit the teaser's content
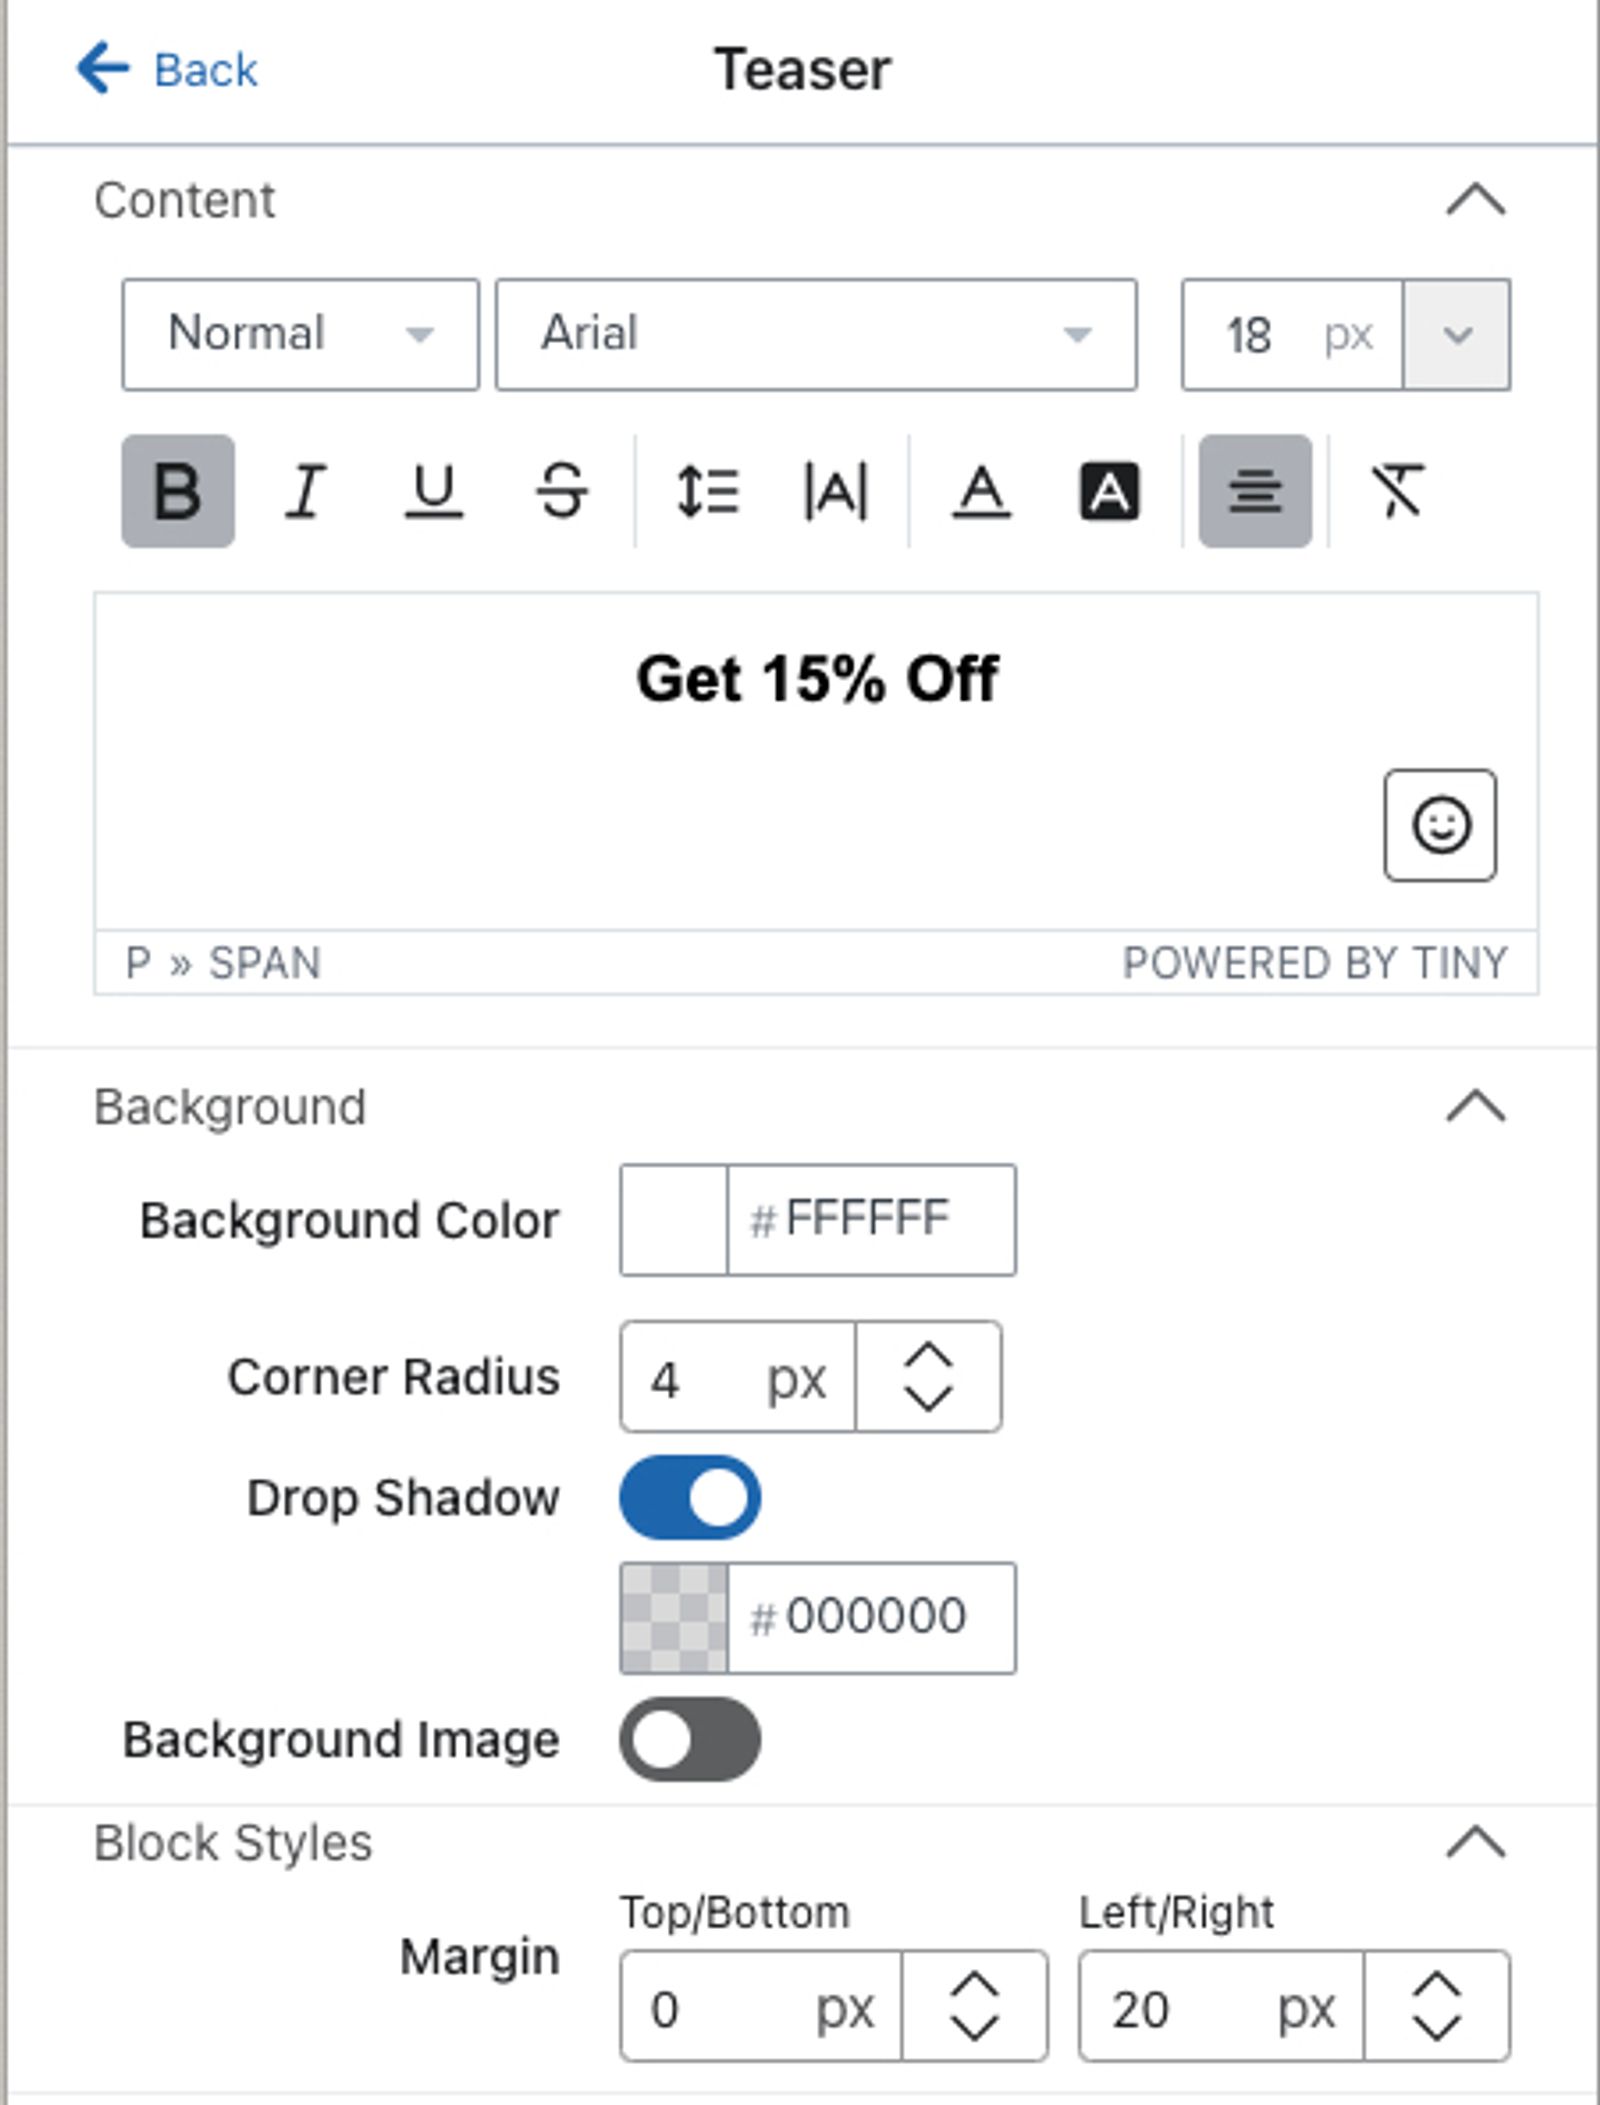
Under Text, add or edit text and text styles in your teaser. At a minimum, your teaser should hint at your form’s offer. Keep the teaser short for maximum impact. Use these examples of teaser text for inspiration:
- 15% off
- Redeem gift
- 🎁
- Enter giveaway
- Free shipping ➡️
If your teaser text mentions a specific offer, make sure to deliver that offer to subscribers either in your form’s success message or using a welcome series.
You can also edit your teaser’s design using Background color, Drop shadow, Background image, and Block margin. For rectangle teasers, you can also adjust Corner radius.
Set teaser behaviors
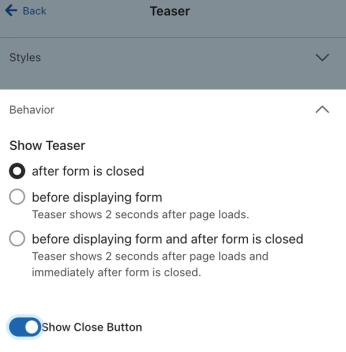
Under Display settings, choose 1 of the following options to determine when your teaser will appear:
- Show after form is closed
A teaser set to show after a form is closed will allow a visitor to reopen the form if they dismiss it, but will not appear before the form pops up. The teaser can continue to display on pages that meet the form’s targeting settings, unless the visitor dismisses the teaser. To stop future appearances after a primary conversion action, use the frequency setting described in Form teasers and primary conversion actions below. - Show before displaying form
A teaser set to show before displaying a form will appear 2 seconds after the page loads. It will display until a visitor clicks it, or until the form's display conditions are met (e.g., time delay or scroll percentage).
Note that if your form is set to display immediately on page load, or after less than a 2 second wait, the teaser will be skipped.
- Show before displaying form and after form is closed
A teaser with this setting will appear 2 seconds after the page loads, and will continue displaying unless the form is currently open or the visitor dismisses the teaser. The form’s frequency settings determine whether it appears again after a primary conversion action, as described below.
Your collision prevention settings can affect a teaser’s initial appearance. If another form has already appeared, a setting that allows only 1 form per session can prevent another form’s teaser from appearing, while a time delay can postpone it. For example, a 5-minute delay can postpone the next form’s teaser until that interval has passed. The teaser for the form the visitor just closed can appear without waiting for the collision delay.
In addition to the rules above, a teaser will only show to visitors who meet the form’s targeting settings found in the Targeting & display behavior section of your form. For example, a teaser set to show before displaying a form will only appear to visitors who meet the form’s targeting settings (i.e., list/segment membership, location, and URL). Once that form’s remaining triggers are satisfied (e.g., exit intent, scroll length, or time delay), the teaser will close and the form will appear.
Add a close button to your teaser
You can add a close button to your form teaser (the X button) to allow your shoppers to close the teaser if they are not interested in the form's content.
By default, your teaser will not include a close icon. Click the plus (+) icon beside Close icon to add one.
Note that if a shopper clicks on the X to close the teaser, it will follow the same rules for display frequency as the sign-up form that it is connected to. For example, if a shopper closes both a form and its teaser, and that form is set to show again 5 days after someone closes it, then both the form and its teaser will follow the behavior setting and show again in 5 days.
Form teasers and primary conversion actions
If a teaser on a multi-step form is set to show after the form is closed, visitors can use it to return to the form. To stop the form and teaser from appearing again after the visitor completes its primary conversion action, configure the form’s frequency settings. For a form that displays automatically:
- Open Targeting & display behavior and select the Display tab.
- Under Frequency, select Don’t show again if form was submitted or if go to URL button was clicked.
With this setting selected, the form and teaser stop appearing on later page loads after a primary conversion action. If you clear it, completing the action does not prevent future appearances. The primary conversion action depends on the form:
- For forms with email or SMS subscription actions, submitting an email or phone number counts as a primary conversion action.
- For forms containing both email and SMS fields across multiple steps, submitting whichever appears first in the form counts as a primary conversion action.
If a visitor submits the primary conversion step (e.g., the email step in a multi-step form) and then declines the second step (e.g., the SMS step), the teaser can still appear on the current page. With the frequency setting above selected, the teaser stops appearing after the visitor refreshes the page or navigates to a new page.
- For forms without an email or SMS subscription action (e.g., a flash sale popup with a “Go to URL” action), clicking the “Go to URL” button counts as a primary conversion action.
If a multi-step form’s primary conversion action has not been completed, clicking the form’s teaser on the same page will reopen the form on the last incomplete step.
Publish your changes
- Review your form and teaser in the desktop and mobile previews, and resolve any alerts that block publishing.
- Click Publish or schedule in the form editor.
- Select the Publish now option, then click Publish now to apply your changes to the live form.
Delete a teaser
Deleting a teaser removes all its settings. If you later re-add a teaser to the same form, it will be reset to the teaser defaults.
- In the form editor, click the 3 dots on the Teaser button, then click Delete.
- Click Delete teaser to confirm.
- Click Publish or schedule, select the Publish now option, then click Publish now to apply the removal to the live form.
