How to keep your account secure
You will learn
Learn how to make sure your Klaviyo account and data are as secure as possible.
Configuring your communication and assigning roles correctly is critical, especially when there's increased traffic to your site and messaging from your brand.
Before you begin
There are 2 crucial security checkups to review:
Public vs. private API key security checkup
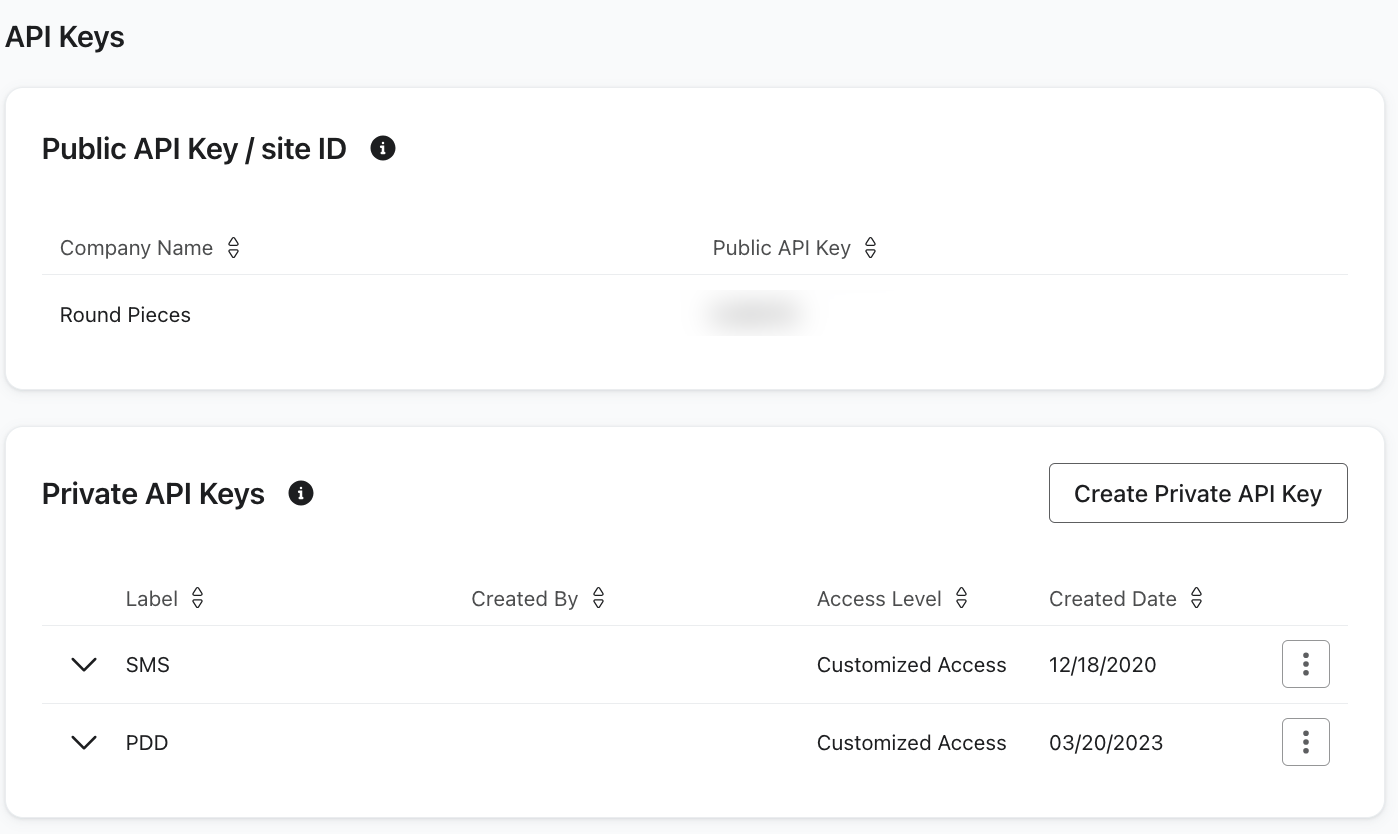
To access your account’s API keys:
- Click your organization name in the bottom left corner.
- Select Settings > API Keys.
Your public key, also called your site ID, is in the table in the first section of this page, whereas your private keys are listed in the second table labeled Private API Keys.
- Public API key
An API you can share with others so that they can get certain information from your API. Your public API key is your account identifier. Use your public API key, and not your private API key, when configuring and using the Klaviyo JavaScript library. - Private API key
An API key that reads data and manipulates sensitive objects (e.g., lists in Klaviyo). It’s important to keep private API keys private. Treat them like passwords, kept in a safe place and never exposed to the public.,
In Klaviyo, private API keys all start with the prefix “pk_” and are followed by 34 alphanumeric characters. For example, a private key will look something like: pk_abc123def456ghi789jkl0mno123pqrst4.
You will not be able view any private API key after creating it.
Why can't you use private API keys in place of public API keys?
Accidentally using a private API key instead of a public one can lead to abuse of your account if a malicious actor finds the private key. If you use the wrong API key within your JavaScript, you will also not be able to successfully collect or utilize the applicable data.
Verify that all client-side code uses your public API key
Have you written any custom code using the Learnq, klOnsite, or Klaviyo objects, code that calls our client-side API endpoints, or did you install Klaviyo.js manually? If yes to any of the above, it's important to verify that you're only using your public API key in these instances.
You'll want to check each page on your site with custom code. You can start with your homepage:
- Open your website.
- Right click and select View Page Source.
- When the new page opens, select Edit > Find > Find... and search for "pk_".
- Make sure that no private keys are used as a company_id, "token" value, or, in rare cases, account value.
- If you find any private API keys (value starts with “pk_”), review the section below on what to do when your private API key is exposed.
What to do if your private API key was exposed
If your private API key was used instead of your public API key:
- Record the private API key (you will need that later) and replace it with your public API key. This will allow your code to work as expected within the Klaviyo platform.
- Delete and replace the exposed key in order to protect your company and customer data from unauthorized exposure.
- Identify all private key integrations and applications you may have, including custom code.
- For each integration and application that uses an exposed private API key, create a new key in your account settings by selecting Create private API Key.
- Give the key a meaningful label for quick identification as well as a specific scope.
- After you create a unique private API key for each integration, update the integration(s) with the new private API key.
- Once all integrations that used the exposed key have been updated, hover over the exposed key and then click Delete.
- Be careful to select the correct key to delete, as there is no verification when the delete button is selected.
Once deleted, you will have protected your data from unauthorized access via the exposed private key.
For more information on API key security, head to Manage Your Accounts API Keys.
User management and data access checkup
It is important to understand who has access to different features and information in your account. To see all users who have access to your account:
- Head to your organization name in lower left corner.
- Select Settings.
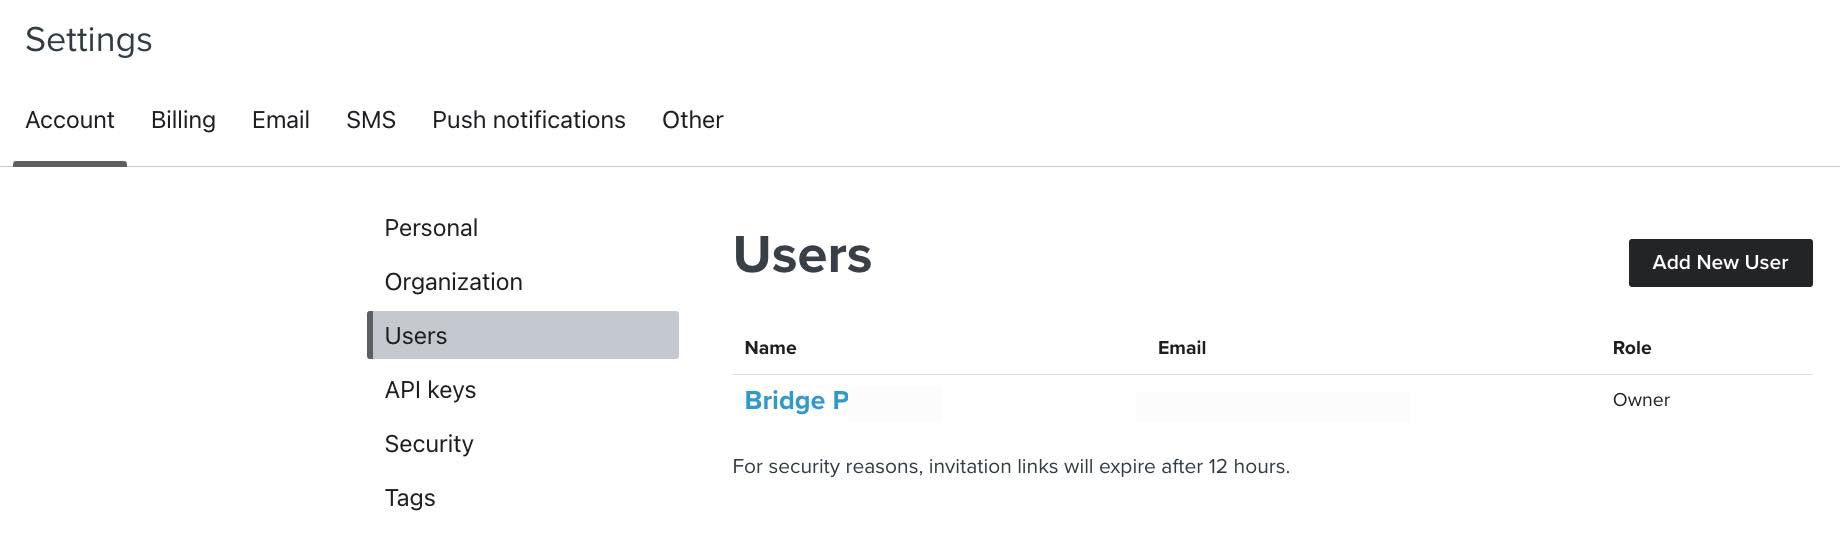
Periodically reviewing the users within your account and their access level is an important security activity. There are three activities that will help secure your account:
- User review
Review all users in your account and identify any who longer requires access. Delete any users that should no longer be active by selecting the X next to their email. Common reasons for removing access include:- Role change within the company
- Termination of an employee
- Contract expiration of a third-party vendor.
- Role review
Ensure that each user has appropriate permissions and can only access the data and functionality that is required to execute their job. For information around what user roles have access to, head to User management and privileges. - Multi-factor authentication
Multi-factor authentication adds an additional layer of security for your account by requiring a one-time password in addition to your standard username and password. This protects against password guessing and phishing attacks, and is a general security best practice. In the Users tab (Settings > Users), toggle on the option to Require two-step authentication for all users. Users will then be required to configure multi-factor authentication for their account if they have not done so already.
Additional resources
- How to manage your account's API keys
Find out how to access and manage your API keys for your Klaviyo account.
- User management and privileges reference for Static User Roles
Learn about the different Klaviyo user roles, their account permissions and access, as well as their potential restrictions inside the platform. Depending on your role, the view of Klaviyo may look different. For instance, Owners see different account setting options than Admins do.