How to build a flows performance report
You will learn
The flows performance report provides a thorough analysis of flow-specific engagement and conversion information. This report helps you get up and running quickly by including standard engagement and deliverability metrics. You can group results by flow or individual message and tailor the report to your needs by customizing the metrics you want to analyze and focusing that analysis using tags and time range filters.
The flows performance report can help you answer questions like:
- How has my welcome series performed over the last year?
- How has each message within my abandoned cart flow performed across multiple engagement metrics in the last month?
- Are any flows seeing more or less sending activity than usual over the last 90 days? Is this present in my recent Placed Order Rate and revenue generated?
In this guide, you will learn more about the Flows Performance Report, where to find it in Klaviyo, and how to customize it to better serve your brand.
Build the report
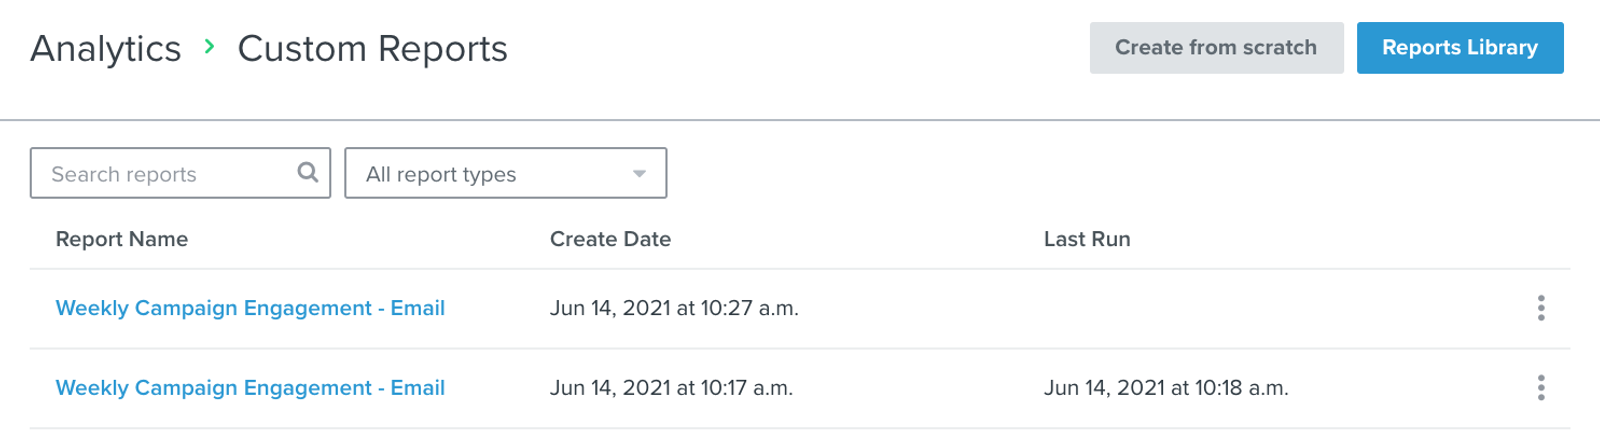
1. Navigate to Analytics > Custom reports.
2. Click Create from scratch. If you see Create custom report instead, click it, then select Create New Report if the report library opens.
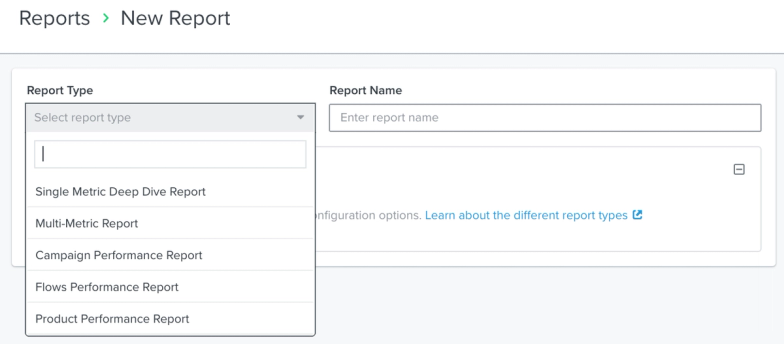
3. Under Report Type, select Flows Performance Report from the dropdown and give your report a name.
To start with a pre-built report instead, open Reports Library from the Custom Reports page, choose a flows report, and review its description. If a Data Required notice appears, resolve the listed requirements first. Click Create Report, then continue with the customization options below.
Customize the report
Once you have chosen your report, you can customize it to best serve your business needs. By default, the report is pre-populated with the standard deliverability and engagement metrics related to your channels in Klaviyo. If you employ both SMS and email, you will see both SMS and email metrics appear.
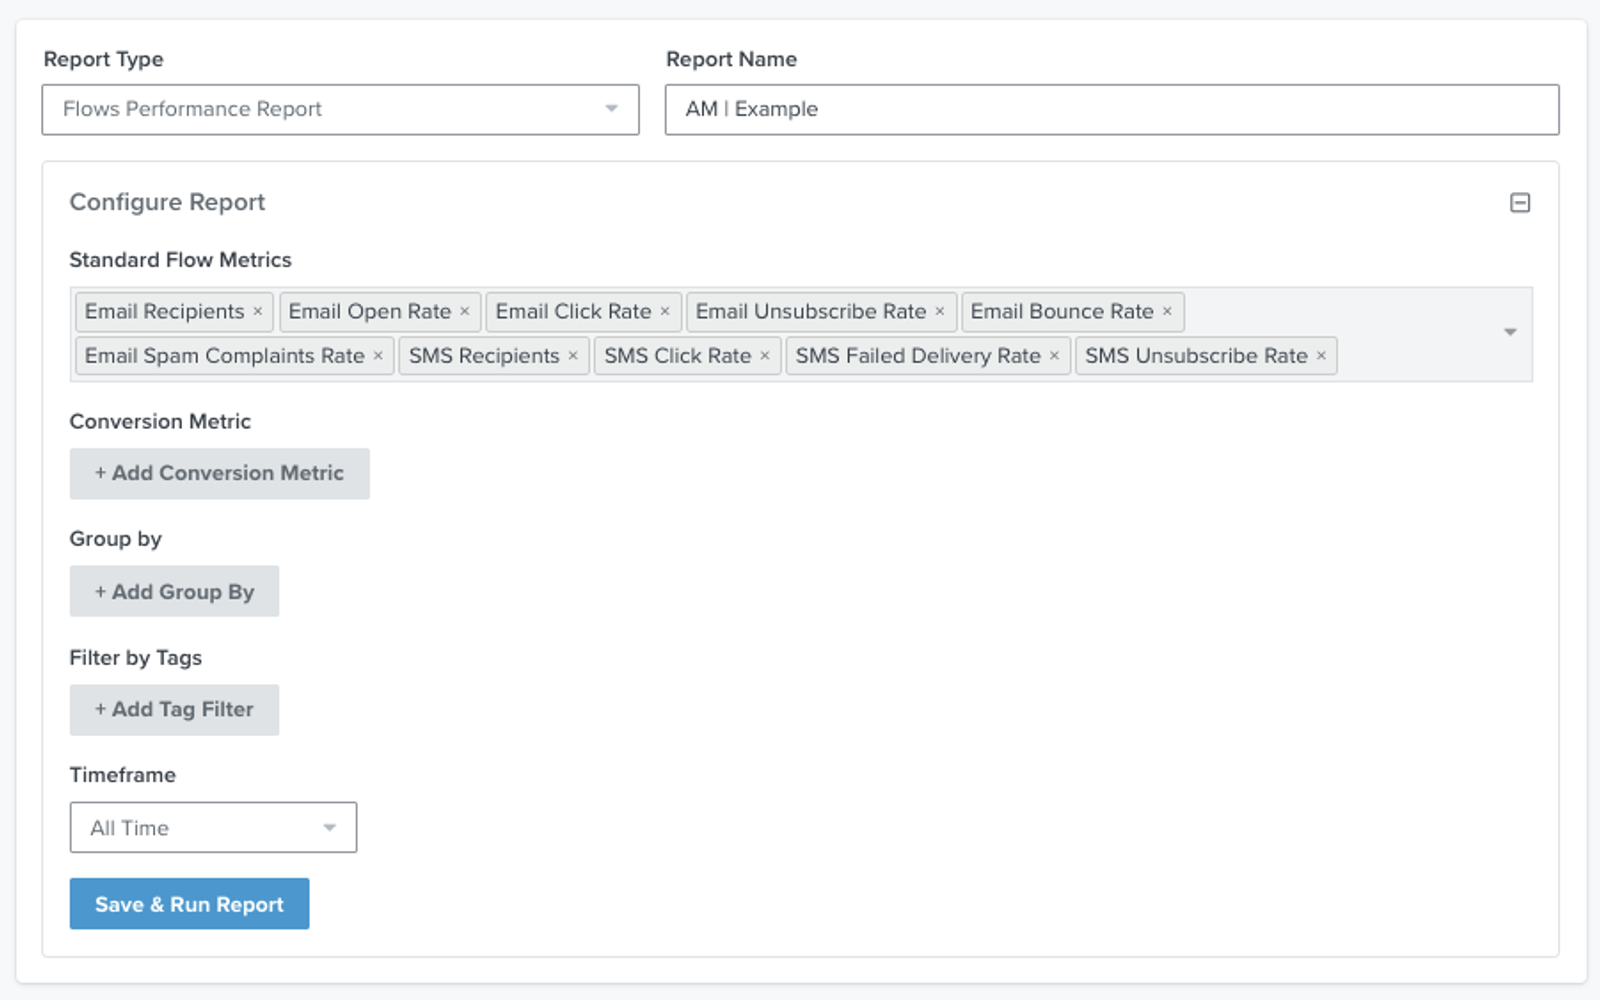
1. If any pre-populated metric is irrelevant to your needs, you can remove it by clicking the X to the right of the metric’s name. To re-add any of these defaults, click within the gray box and re-select them from the dropdown menu.
You may also add up to 10 conversion metrics in addition to the pre-populated set that comes with the report. This includes both standard conversion metrics (e.g., Placed Order) and conversion rates (e.g., Placed Order Rate) that are attributed to your messages.
To leave archived and deleted flows out of the results, select Exclude archived and deleted flows under Standard Flow Metrics.
Email Recipients includes email deliveries plus bounces. Email Open Rate is the number of unique opens divided by deliveries.
Text ROI, Text Credit Usage Amount, and Text Spend data are available for messages sent on or after October 1, 2025. Text ROI and Text Spend are only available for non-contracted SMS customers; contracted SMS customers see 0 for these 2 metrics for all time periods. Text ROI uses attributed revenue from the mapped revenue metric.
2. Click + Add Conversion Metric, then select the conversion metric you want to analyze from the dropdown.

3. Choose how to measure each conversion metric. Except for rates, conversion metrics have 2 dropdowns to customize your analysis:
- Total, Unique Profiles, Value, or Rate
You can report on the total number of instances of an event (Total) or the unique number of profiles that performed that event (Unique Profiles). If the metric you select has a monetary value associated with it (e.g., Placed Order), you can also report on the value of the events (Value). Select Rate to report on unique conversions divided by deliveries. Rate does not have a SUM or AVG option. - SUM or AVG
You can choose 1 of 2 aggregations: SUM or AVG. SUM shows you the total for your selected measurement. For example, if there are 2 Placed Order events within the time span you select, both with a $15 value, Value with SUM will be $30 and Total with SUM will be 2. AVG depends on the measurement: Value averages the event value, while Total averages the number of events per unique profile. For example, if there are 2 Placed Order events within the time span you select, both with a value of $15, Value with AVG will be $15.
4. You can add a modifier to group and filter your report by specific values. This allows you to build a more tailored report around your selected metrics, specific to your business needs. These modifiers include:
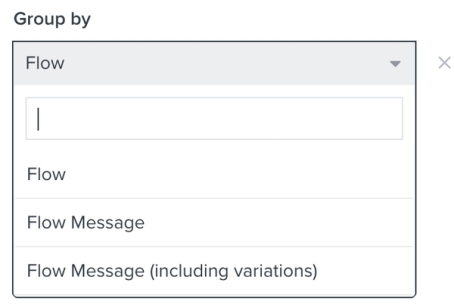
- + Add Group By
Click this button to choose a grouping, such as Flow, Flow Message, or Flow Message (including variations). Without a group by selection, results are combined across flows by channel and, when selected, time interval. Select Flow to compare individual flows.- Flow
Rates will appear as weighted averages of each metric to account for overall flow performance. For example, a weighted average of the open rates to account for each message’s performance in a welcome series. - Flow Message
Data will be grouped by the individual messages of your flows. For example, Open Rate will be displayed for each message in a welcome series rather than the flow performance as a whole. - Flow Message (including variations)
Data will be grouped by each flow message and its A/B test variations. For example, Open Rate will be displayed separately for each variation of a message in a welcome series, so you can compare their performance.
- Flow
- Filter by Tags
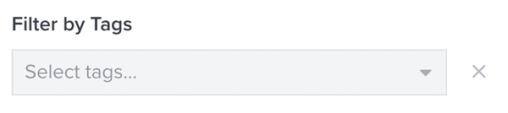
The flows performance report supports filtering by tag. Click + Add Tag Filter, then select the tags to include. To view only 1 flow, use a tag assigned only to that flow. You can select multiple tags; a flow must have all selected tags to be included (AND logic).
5. Finally, customize the timeframe of your report so that it only shows the data you care about. To adjust the timeframe, choose your selected time range and grouping from the associated dropdowns.
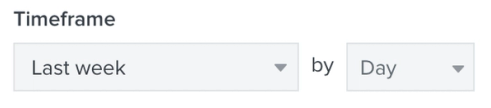
You can adjust the time range to:
- All Time
- Sent Today
- Sent Yesterday
- Sent This Week
- Sent in Last 7 Days
- Sent Last Week
- Sent This Month
- Sent in Last 30 Days
- Sent Last Month
- Sent This Year
- Sent in Last 90 Days
- Sent in Last 365 Days
- Sent Last Year
- Custom
Depending on the selected time range, you can group the data by:
- Day
- Week
- Month
- Entire Range
For Custom, the choices are Day and Entire Range. All Time combines the full range and does not show a separate time-grouping dropdown.
Note that timestamp data within your reports, including exported reports, will display in your account's local time from your settings. Additionally, if you are using custom date ranges, the maximum time range is 2 years. If you attempt to create a report with over 2 years' worth of data, an error will appear.
Run and export the report
Once you customize your flows performance report to include all of your desired engagement, deliverability, conversion metrics, and filters or modifiers, you’re ready to run your report.
A message ID identifies the flow message. A variation label identifies an A/B test version in UTM tracking. When you group by Flow Message or Flow Message (including variations), the CSV includes Message ID. The variations grouping also includes Variant Name and A/B test details, but not a variation ID. The message and variation values included in tracking links depend on your UTM settings.
1. Click Save & Run Report. This will process your report and save it in your account.
While it may take some time to populate your results, when it is complete, you will see a robust summary of your report. Your new report will automatically be saved, so you may navigate away and return to your report from within the Analytics tab at any time.
Once your report populates, you can review the results below the configuration section. A timestamp of when the report was last run will appear above your results. Larger reports show a preview only; export the report to analyze the full results.

2. To export the results of your report for further analysis, click Export CSV.
Schedule your reports
After saving and running the report, click Schedule Report above the results to set up weekly or monthly runs and email notifications. Choose a start date, delivery frequency, and delivery time, then click Schedule Report to save the schedule. The email links to your report for download.
Learn how to schedule reports automatically in Klaviyo.
Update report results
Saved results stay unchanged until the report runs again, either manually or on its schedule. To see when a report was last updated, look at the Last Run timestamp on the Custom Reports page or above the results within the report.
1. To update your report to display the latest data, reopen it and click Save & Run Report.
2. If you need to see historical report results from previous runs, go to Custom Reports and open the Actions menu (3 dots) beside the report.
3. Choose View History from the dropdown menu.
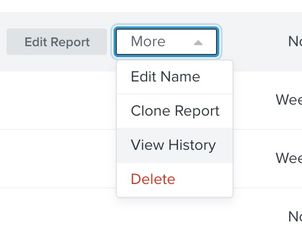
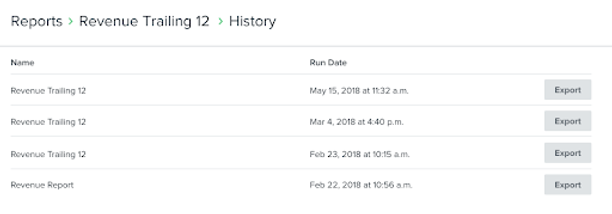
This shows the available completed runs for your report.
4. To download a previous run, open its Actions menu (3 dots) and select Export.
Clone and rename reports
If you have an existing report that you would like to copy, use the clone option.
1. Go to Custom Reports and find the report that you want to clone.
2. To the right of the report, open the Actions menu (3 dots) and then choose Clone Report from the dropdown menu.

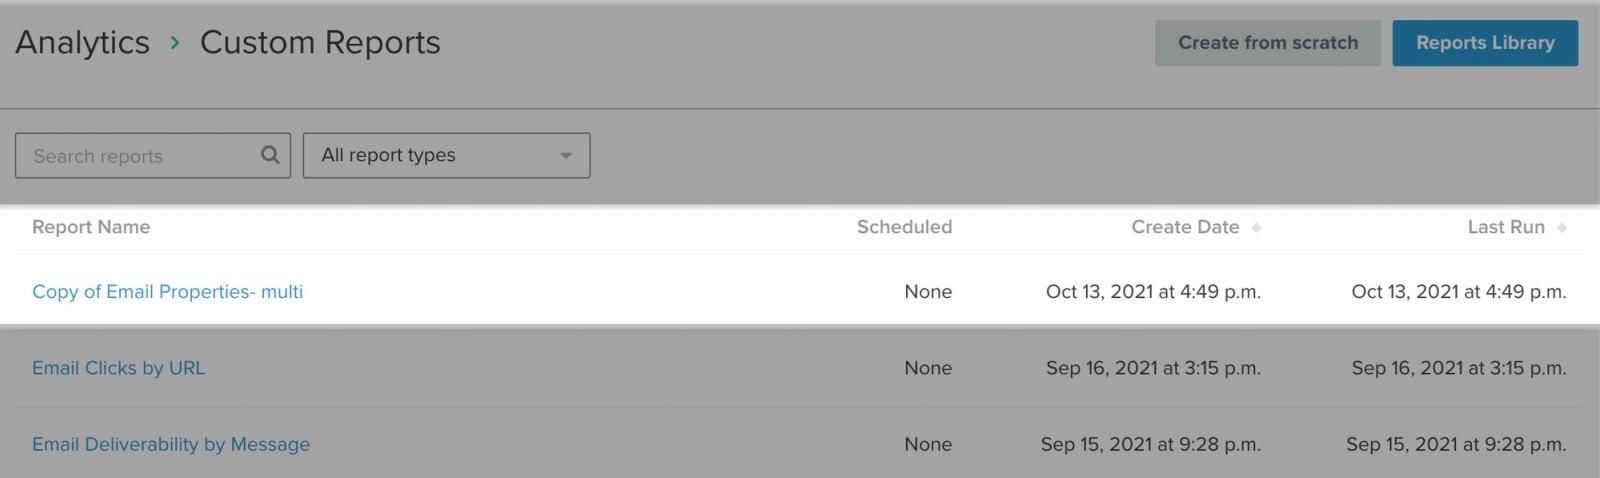
Note that cloned reports do not include scheduling preferences from the original report. If you would like to schedule your copied report to deliver to you on a regular cadence, head to our guide on how to schedule custom reports.
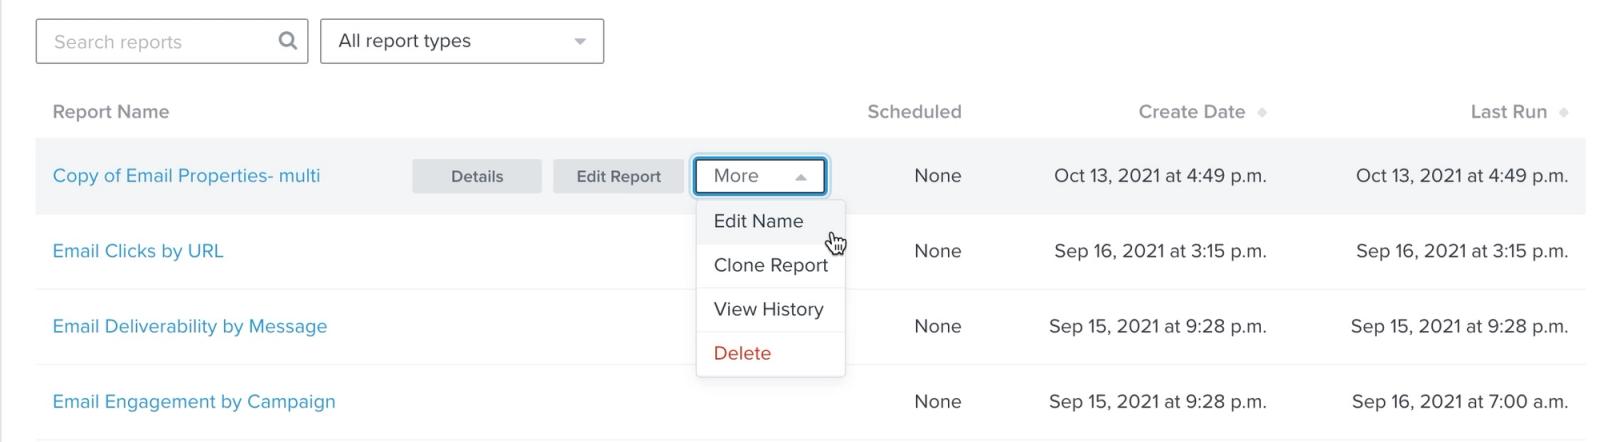
3. If you would also like to rename your cloned report, open the Actions menu (3 dots) to the right of the report.
4. Choose Edit Name from the dropdown menu.
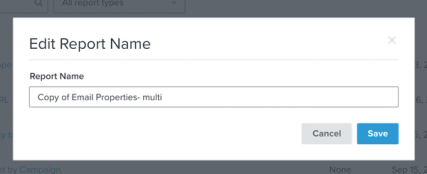
5. Rename your report in the modal that appears. Once you have renamed your report, click Save.
Additional resources
- Getting started with custom reports in Klaviyo
Learn how to use Klaviyo custom reports to monitor your business' health across each of your marketing channels and individual products or services. By using these reports, you can leverage your data to uncover trends in customer behavior, align your team around a cohesive marketing strategy, and grow your business as you act upon new insights.Just starting out with Klaviyo reporting? Learn more about feature-specific reports and get a general overview of Klaviyo’s analytics tools.
- Understanding flow analytics
Learn how to review the performance of your Klaviyo flow messages, including open, click, and conversion rates.
- How to build a campaign performance report
Learn more about the campaign performance report, where to find it in Klaviyo, and how to customize it to better serve your business. The campaign performance report lets you deep dive into campaign-specific engagement and conversion data. This reports helps you get up and running quickly by providing a pre-made report that includes all standard engagement and deliverability metrics neatly grouped by campaign name. Tailor it to your needs by customizing the metrics you want to analyze and focusing that analysis using tags and time range filters.
- Getting started with reporting
Learn about the different robust Klaviyo reporting tools available in your account. Klaviyo is built to help your business grow and strengthen your relationships with your audience by putting data to work. Segmentation and automation tools allow you to personalize and target your communication efforts across channels to boost engagement and drive business growth. However, in order to understand how well your business strategies and marketing efforts are working, you need proper reporting to measure and analyze performance trends over time.