How to integrate with Zoho
You will learn
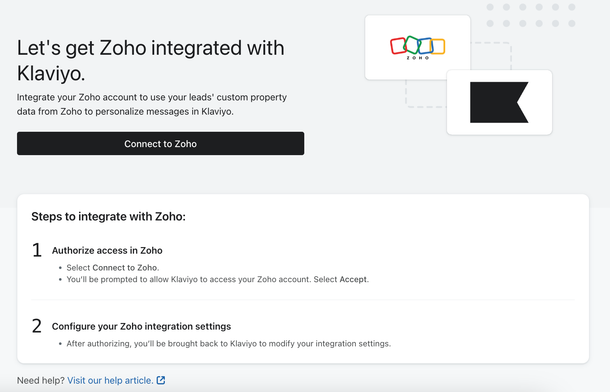
Learn how to integrate Klaviyo with Zoho's CRM service. After completing these steps, you'll be able to use your leads' custom property data from Zoho to personalize messages in Klaviyo.
Before you begin
Please note that Klaviyo's Zoho integration only syncs Zoho leads, and not Zoho contacts/customers.
Add the Zoho integration
- In Klaviyo, select the Integrations tab.
- Click Explore apps, search for Zoho, and click the card. Then, click Install.
- Click Connect to Zoho.
- Log in to Zoho if needed, select the organization you want to connect, and accept the permissions.
- Back in Klaviyo, select your Zoho CRM timezone from the dropdown. This must be the same timezone as your Zoho account.
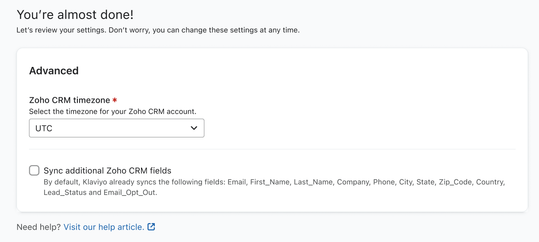
- Add any additional fields you want to sync from Zoho by checking the box and inputting a comma-separated list. Ensure there are no spaces between commas.
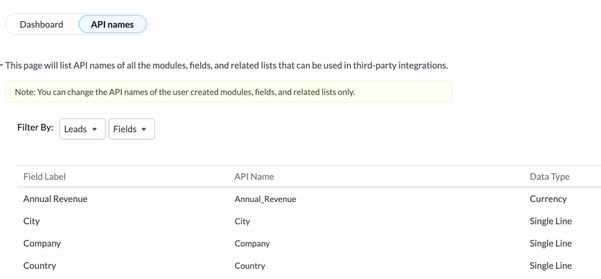
- The Field API names input must use the API names for the fields from Zoho. Locate the API field names by clicking on the gear in the top right-hand corner of your Zoho account. Then, under Developer Space, select APIs > API Names. Click on Leads to see the field names, along with their corresponding API names.
- The Field API names input must use the API names for the fields from Zoho. Locate the API field names by clicking on the gear in the top right-hand corner of your Zoho account. Then, under Developer Space, select APIs > API Names. Click on Leads to see the field names, along with their corresponding API names.
- When you are done, click Complete setup.
Monitor the Zoho sync and verify data
Allow at least fifteen minutes for the Zoho sync to complete. Following the initial integration setup, your Zoho leads data syncs with Klaviyo once an hour.
Once you integrate and sync Zoho with Klaviyo, all of your Zoho leads will be imported to Klaviyo with the default customer properties, as well as any optional fields you set in the integration settings.
To verify this, create a segment of the Zoho leads using the Lead Status property. This will group all the profiles in your account that were imported from or updated with data from Zoho.
- In Klaviyo, navigate to Audience > Lists & Segments.
- Click Create List/Segment and choose Segment
- Give your segment a descriptive name and any tags you'd like
- Set the segment definition to: Properties about someone > Lead status > is set.
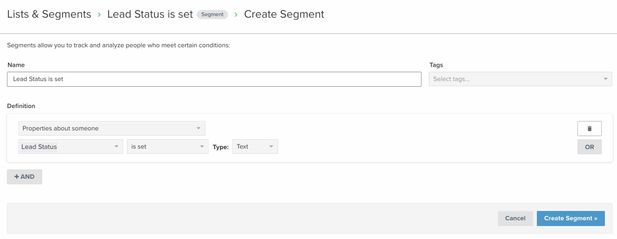
- Click Create Segment.
- Compare the people in this segment with the leads in your Zoho account; the lists should match.
Zoho metrics
Unlike other integrations, there is no viewable metric from Zoho, but Klaviyo does sync the following information for each Zoho lead:
- First Name
- Last Name
- Company
- Phone
- City
- State
- Zip Code
- Country
- Lead Status
- Email Opt Out
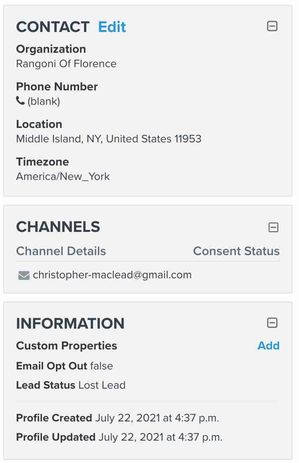
This information is viewable in each Klaviyo profile synced from Zoho. To view all Zoho leads at once, you can use the Lead Status segment discussed above.
Update to our new Zoho integration
Having issues with your Zoho integration? You may be using our old integration which has been deprecated. Klaviyo has released a new Zoho integration to improve security and stability.
To update to the new integration, you need to re-authenticate Klaviyo with Zoho:
- In Klaviyo, click the Integrations tab.
- Select Zoho from the list of enabled integrations.
- In the upper right corner, click Manage integration.
- Select Re-authenticate.
- Click Accept on the Zoho permissions page.
Your integration has now been updated.
While not necessary, you may wish to remove the deprecated Klaviyo app from your Connected Apps in Zoho. To do so, follow Zoho's guidance on revoking OAuth tokens.
Outcome
You've now integrated with Zoho and reviewed your synced data.
Additional resources
- Getting started with flows
Learn how to use flows, also known as automations or drip campaigns, in Klaviyo for personalized and automated communications to your customers, and learn how to set your first flow live.
- Getting started with segments
Learn how to create and use segments in Klaviyo, which are a powerful tool for understanding your audience and sending targeted messages.
- Understanding the types of information exchanged between Klaviyo and apps
Learn about what types of data are exchanged between Klaviyo and external apps, and where that data is found in your Klaviyo account. When you integrate a third-party application with Klaviyo, the two platforms exchange information. Most data exchange with Klaviyo is one-way; data is pulled into your Klaviyo account so you can leverage a broad scope of your customers' data within Klaviyo.