How to add an email to a flow
You will learn
Learn how to use the email component in the flow builder to add automated emails into your series. After dragging a new email card into a flow, you'll be able to configure your content and update key settings on the details sidebar.
Add an email
To add a new email into a flow:
- Drag the email component from the sidebar and drop it on any drop point on the flow canvas.
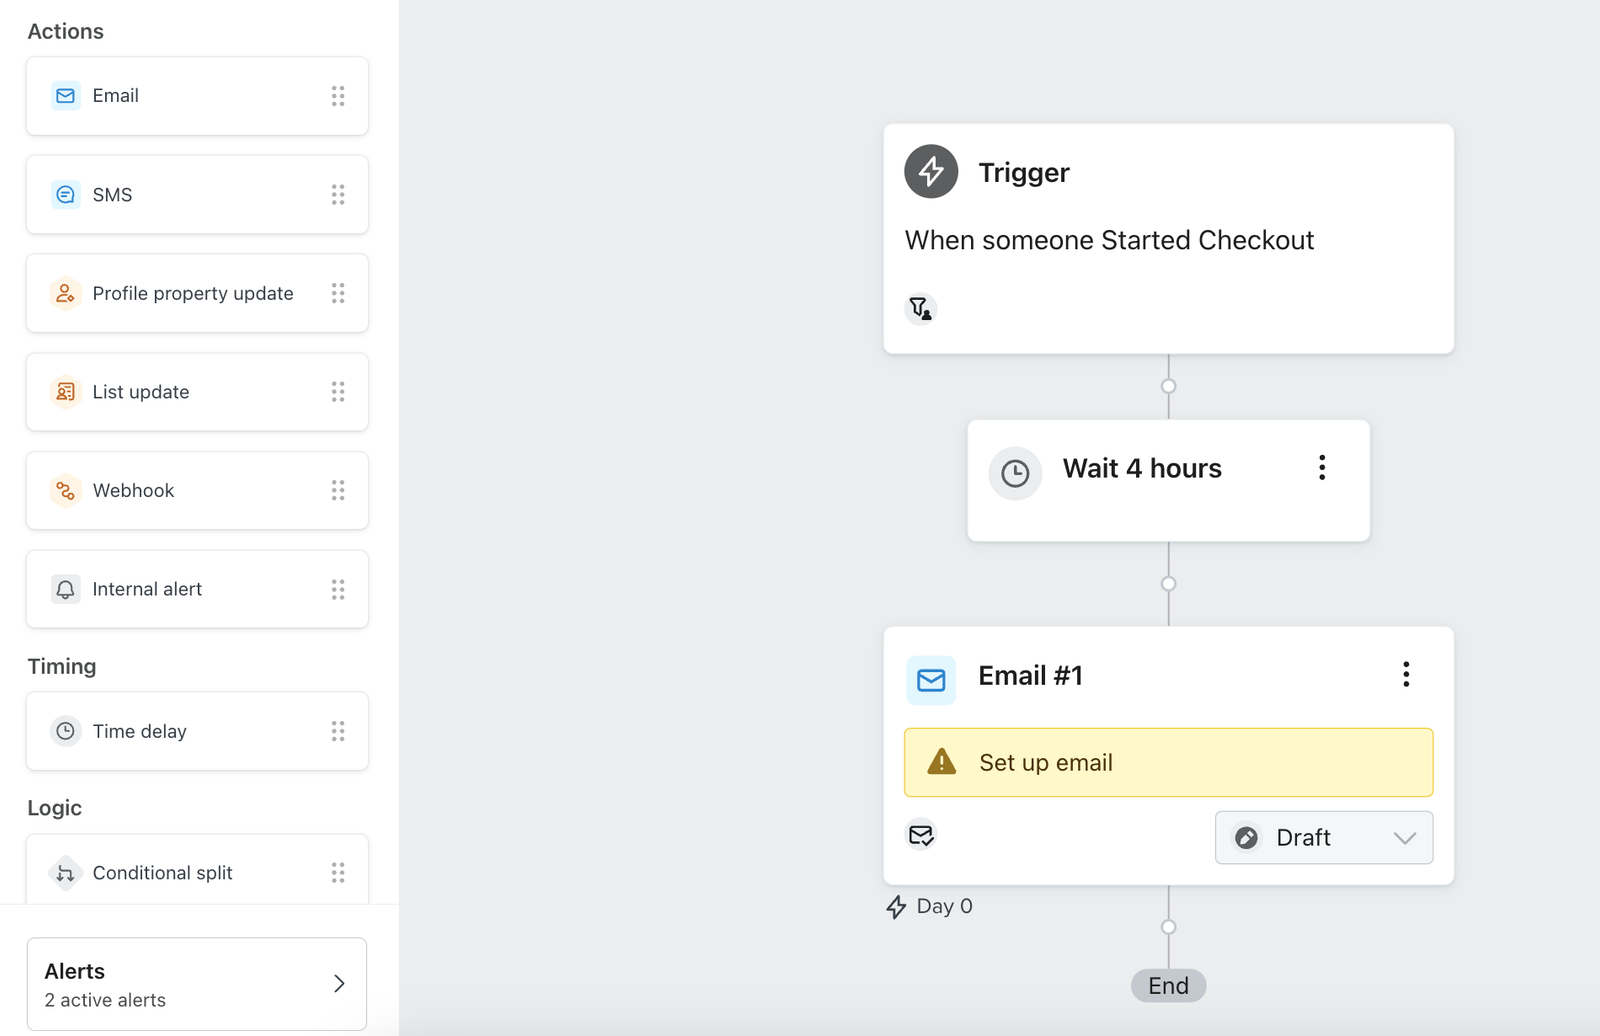
- After adding the new email to your flow, click the card.
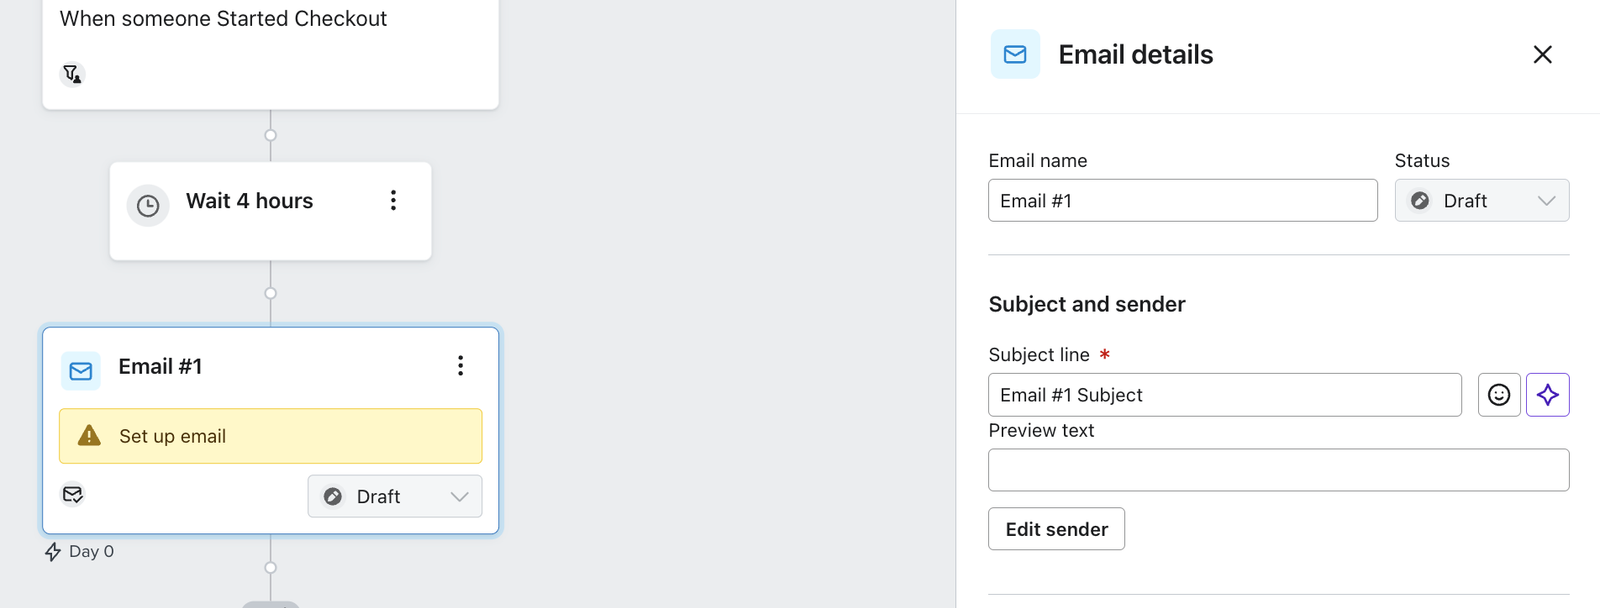
- In the sidebar, you can edit the email name, subject line, and preview text. Click Edit sender to edit the:
- Sender name (From label)
- Sender email address / Reply-to address
- You can also add a separate reply-to address
- CC / BCC
- Click Save to save any changes you made to the email details. Then create your email content by clicking Select template.
Configure email settings
There are three key settings you can choose to configure for your email:
- Skip recently emailed profiles
Enable Smart Sending to skip over recipients that have already received an email from you too recently. This is on by default. - UTM Tracking
Including UTM parameters is useful for tracking clicks in Google Analytics. This is off by default. - Additional filters
Add additional filters to an email to further restrict who will receive it. This is off by default.
In the email details sidebar, turn Skip recently emailed profiles and Enable UTM Tracking on or off, or add or remove Additional filters. Click Save to apply your changes. In some accounts, Smart Sending appears under Personalization rather than Settings.
Change an email's sending status
After you've created the content for your new flow email and previewed it, you are ready to turn your email from draft to manual or live:
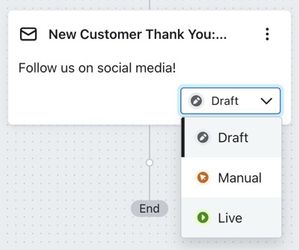
- Draft
This is the default status for a new email and is the status you should use while you're still configuring your content and adjusting settings. When an email is in draft, nobody will be queued up or receive the email. - Manual
When you are done configuring a new email and want to review messages before they send, place it in manual mode. The email is active in your flow, but scheduled emails are not sent automatically. You must review and send them manually. - Live
To "turn on" an email in a flow series, you will need to change the email's status to live. A live email is active in your flow and is sending automatically.
Note that every new email is in a draft state by default. Until you configure your email content, you will be unable to adjust the status to manual or live.
You can change the email's status from the dropdown in its details sidebar or from the dropdown on its card on the canvas. If you change it in the details sidebar, click Save to apply the change. Changing it from the canvas card applies the change directly.
Additional resources
Learn more about flow actions:
- How to add a time delay to a flow
You will learn how to add a time delay component within the flow builder which is used to create delays (or wait periods) between messages or other components in your flow series.
- How to add an SMS action to a flow
Learn how to add an SMS action into a flow and about the settings for this action.
- How to add an update profile property action to a flow
Learn how to add an update profile property action into a flow so that you can collect and track profile data.