OneTrust を Klaviyo の Cookie で設定する方法
このページで学べること
OneTrust の Cookie 管理ツール(Auto-BlockingTM 機能や Cookie Pro 製品を含む)を、Klaviyo のトラッキングとオンサイト機能と連携するように設定する方法を学びましょう。
Klaviyo.js は、アクティブ オン サイト トラッキングとサインアップフォームを有効にする Klaviyo の JavaScript スニペットです。このトラッキングは、E コマース外部連携を通じて有効にするか、コードをサイトのテーマに貼り付けて有効にすることができます。通常、Klaviyo の JavaScript が有効になっている場合、__kla_id Cookie はサイト訪問者を追跡し、識別できます。ブロックされていない場合、この Cookie には個人を特定できる情報が一時的に保持され、訪問者が特定されると(例:Klaviyo から送信されたメール内のリンクをクリックした場合)、この Cookie 付き情報が Klaviyo に渡されます。ただし、OneTrust では、この情報を確実に取得し、準拠した形で Klaviyo に送信できるようにするため、追加の設定手順が必要です。
この記事では、OneTrust が訪問者情報を適切に取得し、それを Klaviyo に送信していることを確認する手順を説明します。このガイドのすべての Cookie セットアップ手順を完了し、以下に示す順序で実施する必要がある点にご注意ください。
要チェック
Cookie が既知の訪問者情報をさまざまな方法で取得する仕組みについて詳しくは、Klaviyo ウェブトラッキング ガイドをご覧ください。
また、Klaviyo.js をすでに有効にしていることが重要です。これは、E コマースの外部連携で直接設定するか、手動で設定できます。
Klaviyo と OneTrust のツールの設定
OneTrust のツールは、訪問者が OneTrust 経由で明示的に同意していない限り、自動的に Cookie をブロックします。これらのツールは Cookie をブロックできますが、トラッキングが不要なフォームも含めて、Klaviyo フォームがまったく機能しなくなる原因にもなり得ます。
このコンプライアンス プロトコルに準拠し、特定のフォームを機能させるために、Klaviyo は同意なしにイベントをトラッキングしない方法で OneTrust と連携するように設定する必要があります。Klaviyo のトラッキングには、次の内容が含まれます:
- 訪問者がサイト上でアクティブな場合、サイトのリファラー URL
- 訪問者が商品を閲覧する、またはカートに商品を追加する(これを個別に有効にしている場合)。
同意に基づくトラッキングを OneTrust と Klaviyo の両方で互換性のある状態にし、サインアップフォームの一部機能も引き続き動作させるには、OneTrust の CookiePro ツール内で以下の手順に従う必要があります。
ウェブサイトを CookiePro に追加する
まだの場合は、CookiePro アカウントにウェブサイトを追加する必要があります。
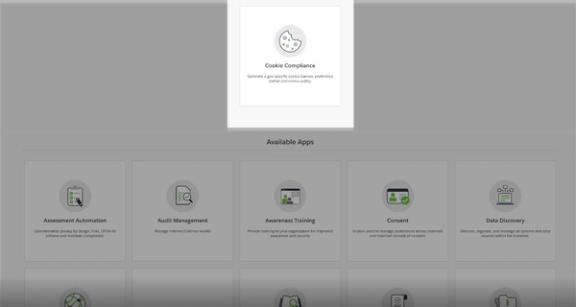
1. CookiePro アカウント にログインし、[My Apps] の [Cookie Compliance] セクションをクリックします。
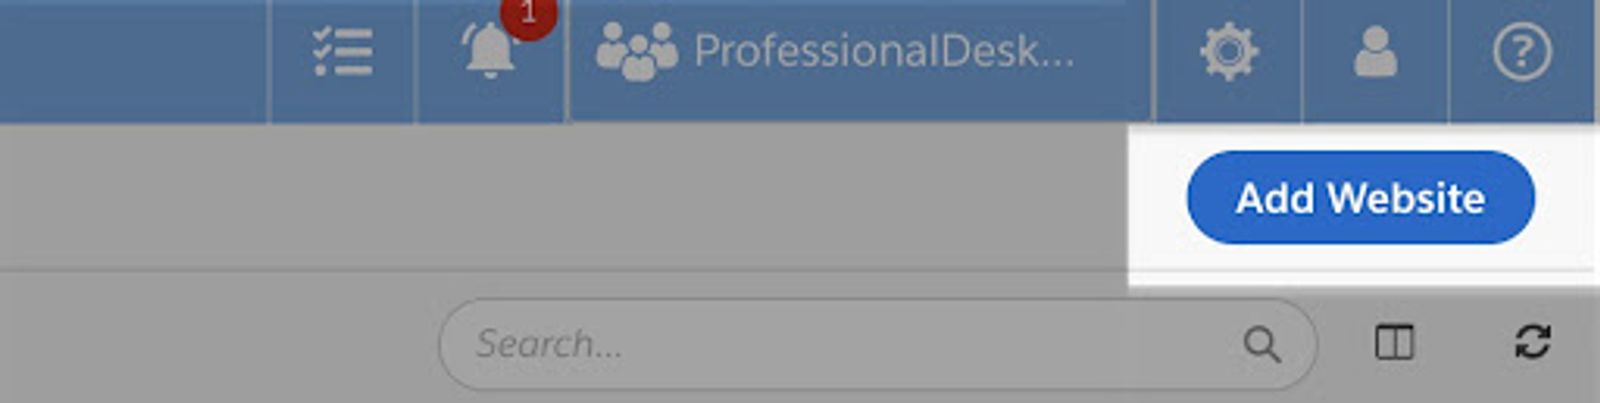
2. 右上にある [ウェブサイトを追加] をクリックします。
3. ここでは、ウェブサイトとスキャンの詳細を設定して追加するためのセクションが表示されます。最初の 2 つのフィールドに、ウェブサイトの URL と組織名を入力します。
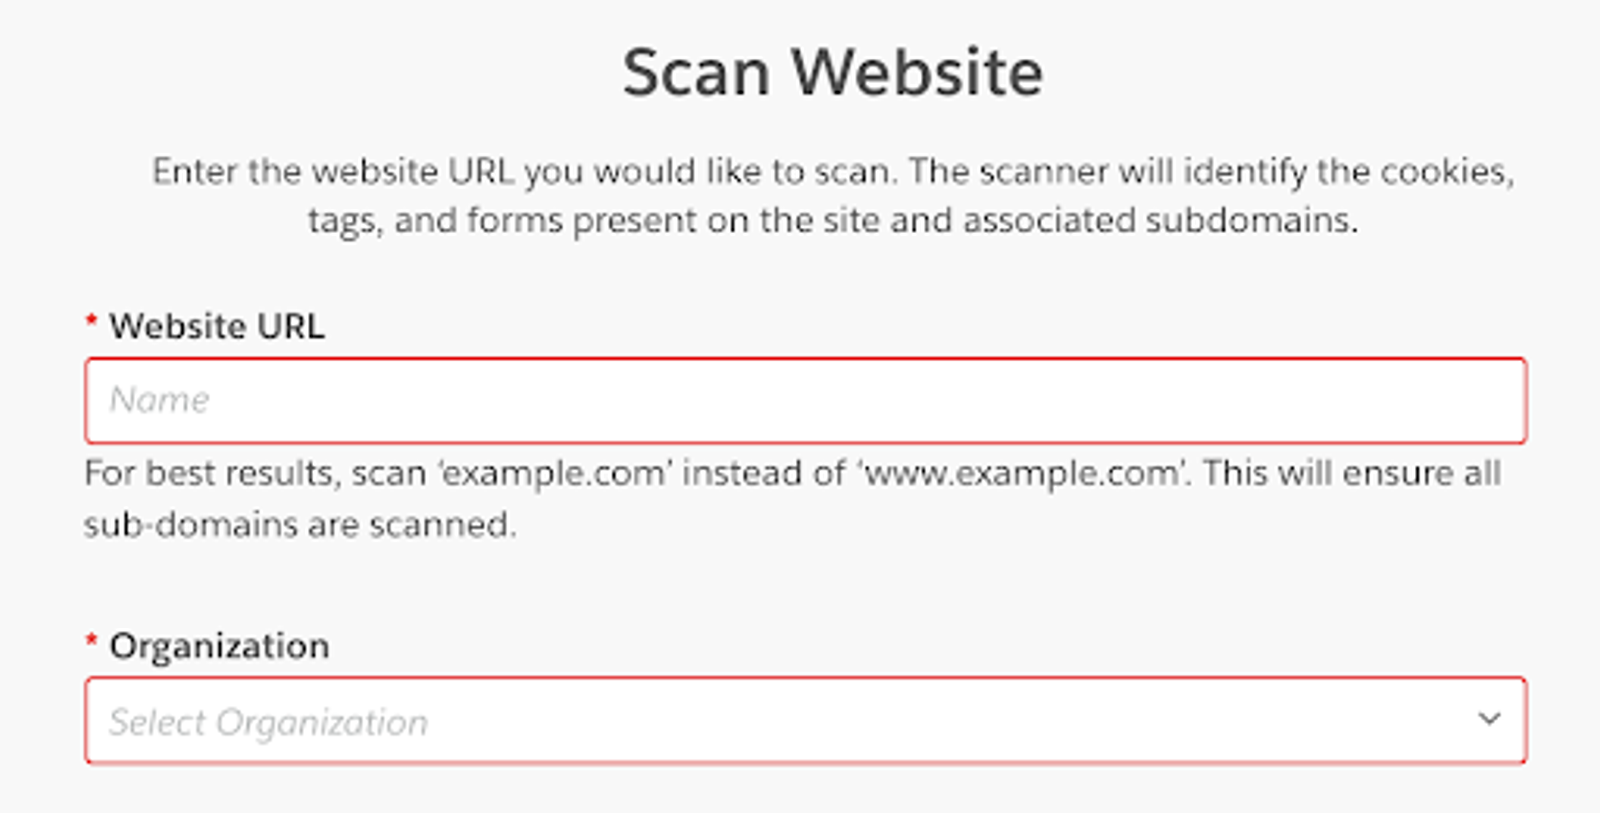
CookiePro アカウントに関連付けられた組織がすでにある場合は、ドロップダウンにオプションとして表示されます。
4。Advanced Options セクションで、スキャン設定を調整または追加できます。
5。Limit scan to の数値を変更することで、CookiePro がスキャンするウェブサイトページ数を調整できます。デフォルトでは、CookiePro は最初の 1,000 ページをスキャンすることを推奨します。
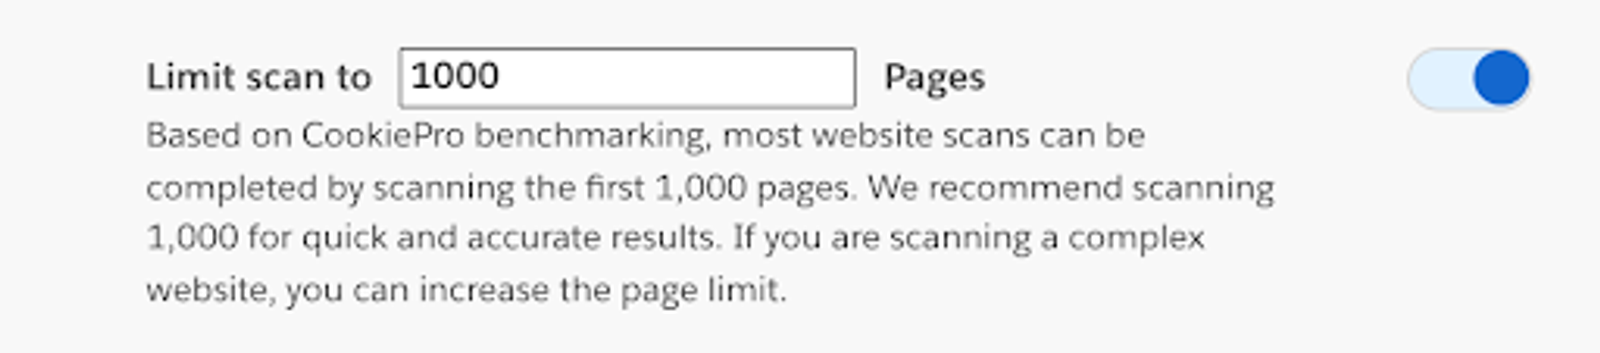
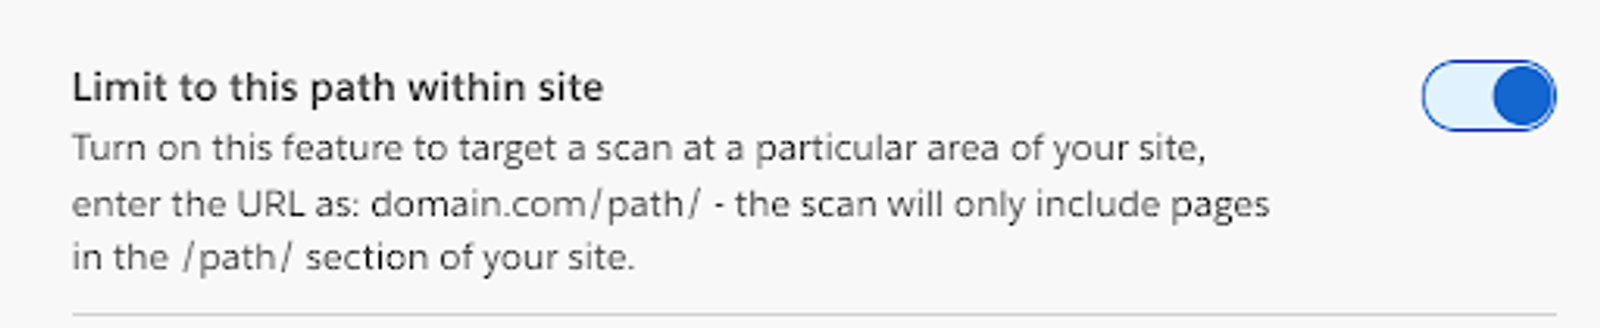
6.CookiePro スキャンをサイトの 1 つの領域に限定することもできます。これを行うには、[このパスに限定] [サイト内] の横にあるオプションをオンに切り替えてください。上のウェブサイト URL がこの URL パス(例:retail.com/signups)を反映していることを確認してください。
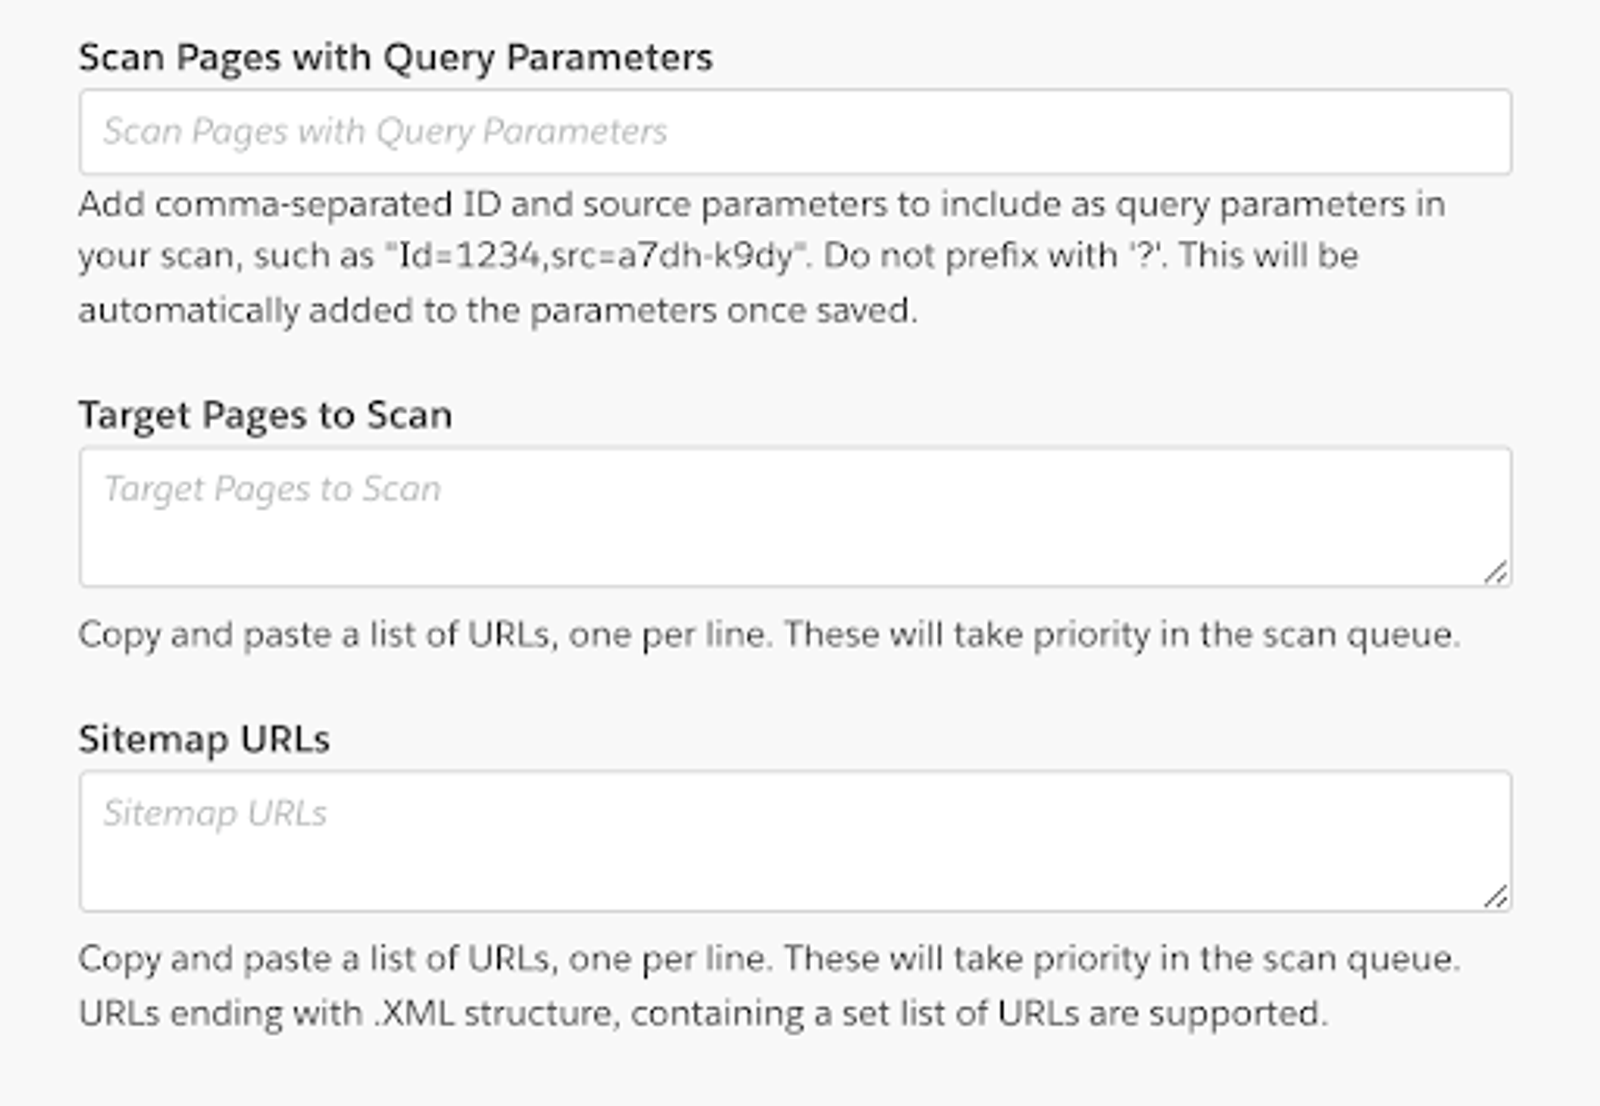
7. 最後に、CookiePro にスキャンさせたい特定のページまたはページタイプがある場合は、次のいくつかのフィールドに追加できます。ID 番号でページをスキャンするには、ページ ID をカンマ区切りで クエリパラメーター フィールドに追加します。
スキャン対象ページフィールドにこれらの URL を追加すると、URL でページをスキャンすることもできます。
URL のリストが長い場合やサイトマップがある場合は、それらをコピーして サイトマップ URL フィールドに貼り付けることができます。これらの URL は、スキャンキューで最初にスキャンされます。
8. すべての設定が完了したら、右下隅の[スキャンして設定]をクリックします。
静的トラッキング Cookie の設定
以下のセクションでは、サードパーティ Cookie を収集し、それらを Klaviyo に渡せるように、静的トラッキング Cookie を設定する手順を説明します。
1. ウェブサイトを追加したら、左側のナビゲーションで Cookiepedia > Categorizations に移動します。
2. 上部のフィールドで検索するか、以下のリストをスクロールして、Klaviyo の静的トラッキング __kla_id Cookie を探します。static-tracking.klaviyo.com のホスト名が付いた「Persistent」とラベル付けされたオプションである必要があります。
3. __kla_id Cookie オプションをクリックします。

4. Cookie Details ページに移動したら、[Categorization] タブに移動します。
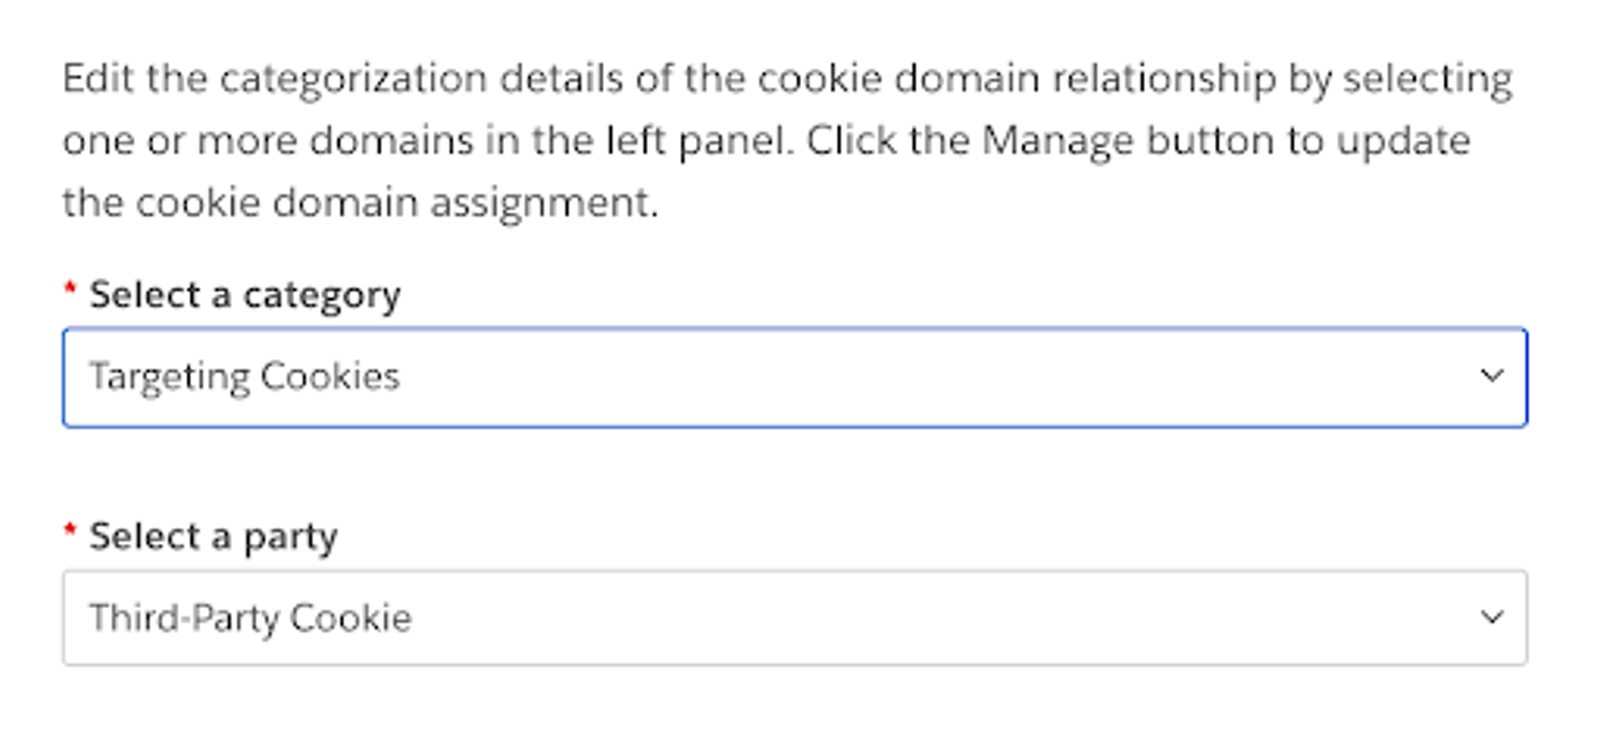
5.Klaviyo と OneTrust でまだスキャンを実行していない場合は、 Select a category ドロップダウンから[ターゲティング Cookie] を選択してください。Select a party ドロップダウンに Third-Party Cookie がすでに入力されていることを確認してください。
6. これらの更新を行ったら、右下の [保存] をクリックします。
7.この同じエリアで、[ソース] タブに移動します。以下の例に示すように、リストにウェブサイト URL が表示されます。
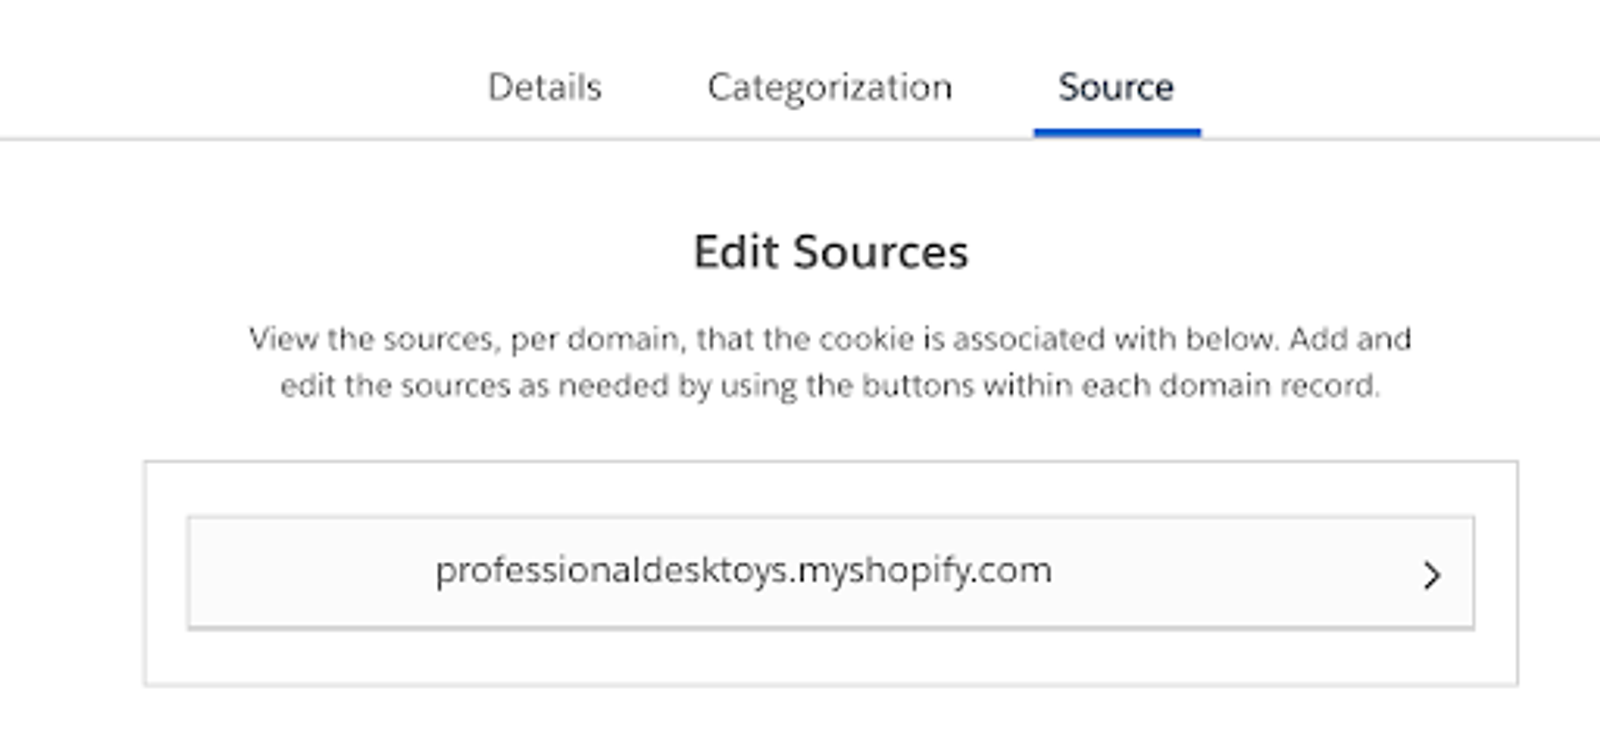
8. ウェブサイト URL をクリックします。
9. 新しい URL を含むドロップダウンが表示されるので、右側の鉛筆アイコンをクリックします。

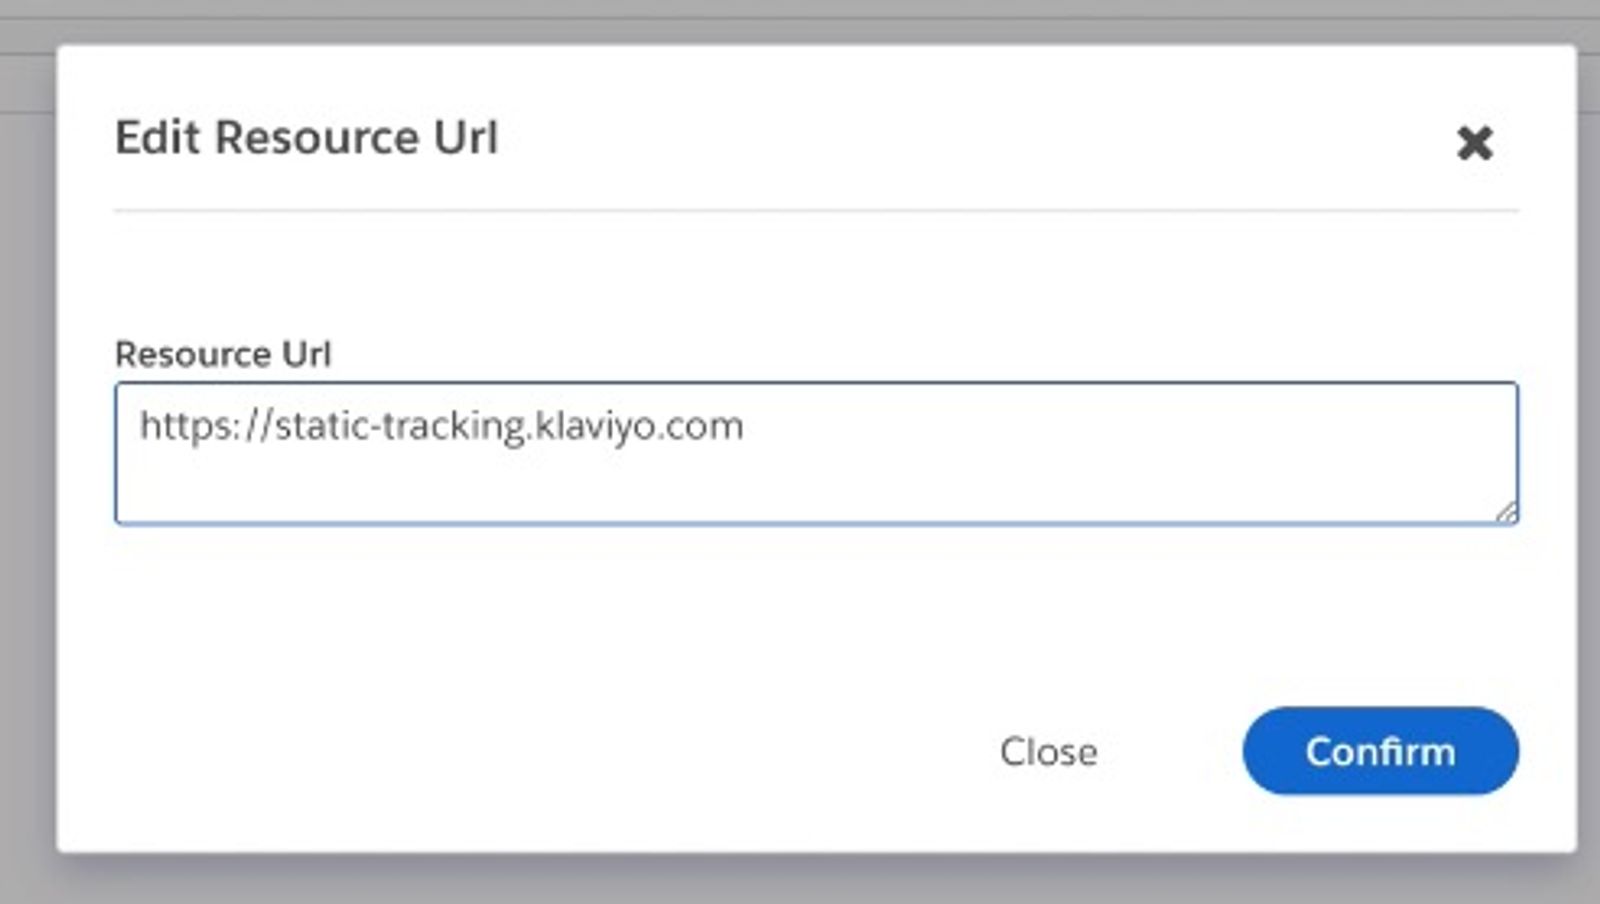
10。モーダルで、現在の URL を削除し、次の URL に置き換えてください:https://static-tracking.klaviyo.com。
11。URL を更新したら、[確認] をクリックしてください。
12. Klaviyo の Cookie が更新されたことを確認するには、左側のナビゲーションで Cookpedia > Categorizations に移動します。1
3. [Cookie] タブをクリックします。
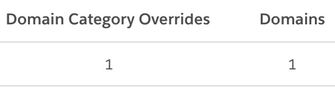
14.ここから、__kla_id Cookie では、Domain Category Overrides 列と Domains 列の両方に「1」が表示されているはずです。
Static.Klaviyo Cookie の設定
以下のセクションでは、サードパーティ Cookie を収集してそれらを Klaviyo に渡せるようにするために、static.Klaviyo Cookie を設定する手順を説明します。
1. 左側のナビゲーションで Cookiepedia > Categorizations に移動します。
2. 上のフィールドで検索するか、以下のリストをスクロールして、static.Klaviyo __kla_id Cookie を探します。static.klaviyo.com のホスト名で、「Persistent」とラベル付けされたオプションであるはずです。
3. この __kla_id Cookie オプションをクリックします。

4.[Cookie の詳細] ページで、[分類] タブに移動します。
5.[カテゴリを選択] ドロップダウンから[ターゲティング Cookie] を選択します。Select a party ドロップダウンで、Third-Party Cookie がすでに入力されていることを確認してください。
6. これらの更新を行ったら、右下隅にある [保存] をクリックします。
7.同じ領域で、[ソース] タブに移動します。以下のリストにウェブサイト URL が表示されるはずです。
8. ウェブサイト URL をクリックします。
9. 新しい URL を含むドロップダウンが表示されます。右側に表示される鉛筆アイコンをクリックします。

10。モーダルで現在の URL を削除し、次に置き換えます:https://static-tracking.klaviyo.com.
11.URL を更新したら、[確認] をクリックします。
12. Klaviyo Cookie が更新されたことを確認するには、左側のナビゲーションで Cookiepedia > Categorizations に移動します。
13.ここから、__kla_id Cookie は Domain Category Overrides と Domains の両方の列の下に “1” が表示されるはずです。
ウェブサイトのファーストパーティ Cookie を設定する
以下のセクションでは、E コマース サイトでイベントをキャプチャするために、ウェブサイトまたはファーストパーティ Cookie を直接設定する方法を説明します。
1. 左側のナビゲーションで Cookiepedia > 分類 に移動します。
2. 上のフィールドで検索するか、下の一覧をスクロールして、ウェブサイト固有の __kla_id Cookie を探します。ホスト名がウェブサイト URL の「Persistent」としてラベル付けされているオプションであるはずです。
3. この __kla_id Cookie オプションをクリックします。

4.[Cookie の詳細] ページで、[分類] タブに移動します。
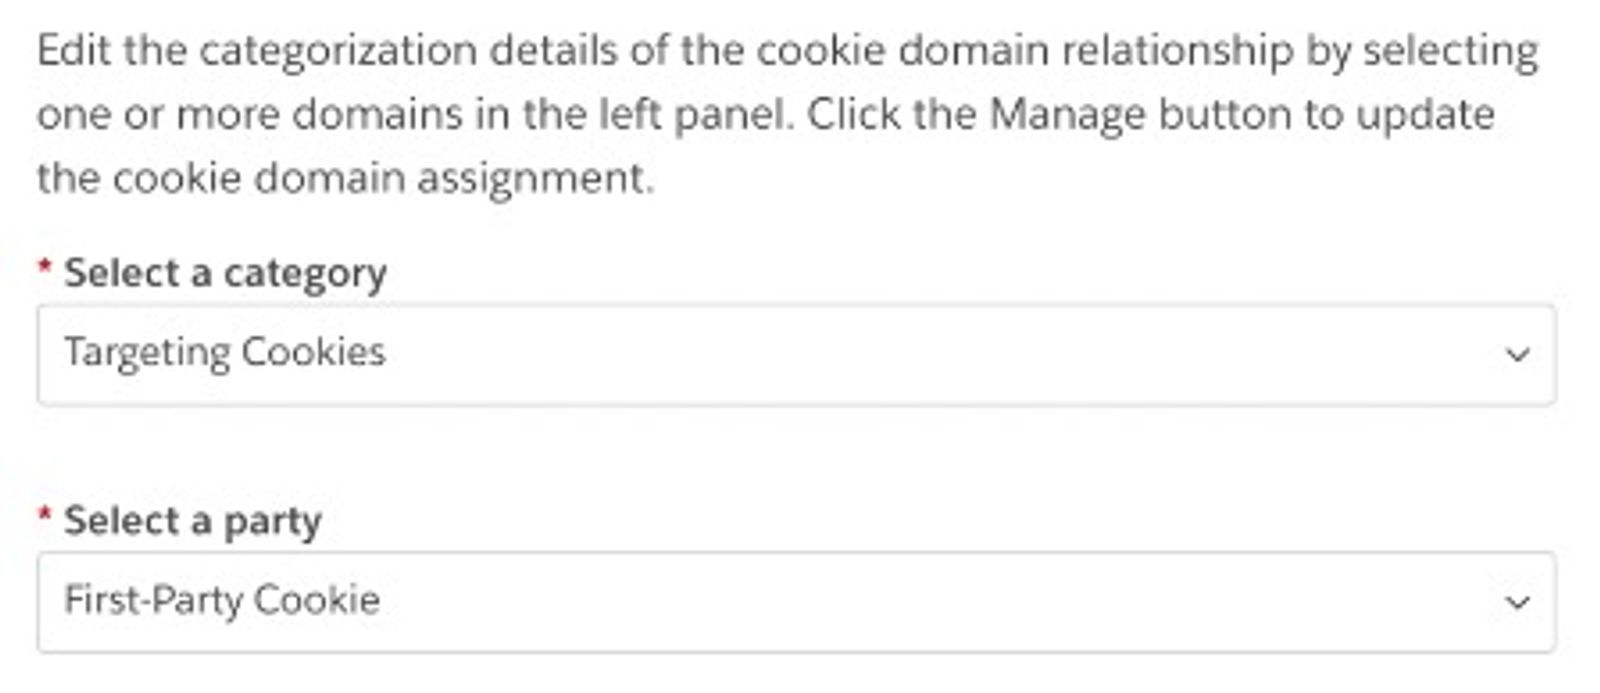
5.[カテゴリを選択] ドロップダウンから[ターゲティング Cookie] を選択します。[当事者を選択] ドロップダウンに [ファーストパーティ Cookie] がすでに入力されていることを確認します。
6. これらの更新を行ったら、右下隅にある [保存] をクリックします。
7.同じ領域で、[ソース] タブに移動します。以下のリストにウェブサイト URL が表示されるはずです。
8. ウェブサイト URL をクリックします。
9. 新しい URL を含むドロップダウンが表示されます。右側に表示される鉛筆アイコンをクリックします。

10。モーダルで現在の URL を削除し、次に置き換えます:https://static-tracking.klaviyo.com。
11。URL を更新したら、[確認] をクリックしてください。
更新した Cookie のプレビュー
1. 左側のナビゲーションで Scripts に移動します。
2. Scripts ページで、下に表示されている ウェブサイト URL をクリックします。

3.次に、右上隅にある [本番環境に公開] をクリックします。
4. 表示される右側のサイドバーで [確認] をクリックします。
5. レビュー タブで、下にスクロールして [続行] をクリックします。
6.最後に、[確認] と [公開] タブで [テストを公開してプレビュー] をクリックします。プレビューの読み込みには数秒かかる場合がありますが、準備ができると下に緑色のチェックが表示されます。
7. この成功メッセージが表示されたら、下の [確認] をクリックします。
更新した Cookie を公開する
Cookie を公開する前に注意すべき点として、本番スクリプトがウェブサイトに反映されるまで最大 4 時間かかる場合があります。以下の手順に従ったら、これらの更新が反映されるまで最大 4 時間お待ちください。
1. 左側のナビゲーションで [ウェブサイト] に移動します。
2. Websites ページで、下のリストから ウェブサイト URL をクリックします。
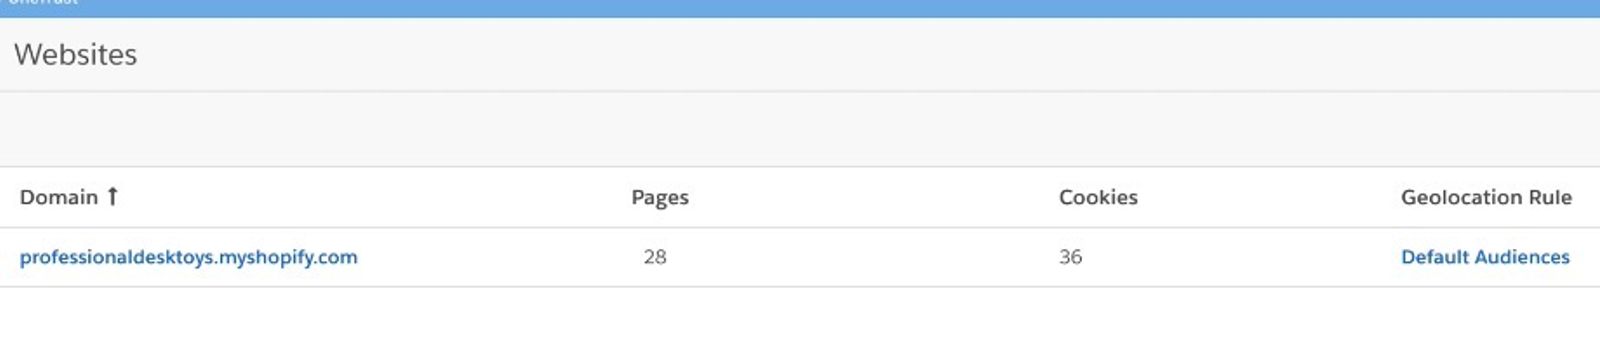
3. ここから右上の 公開 をクリックします。
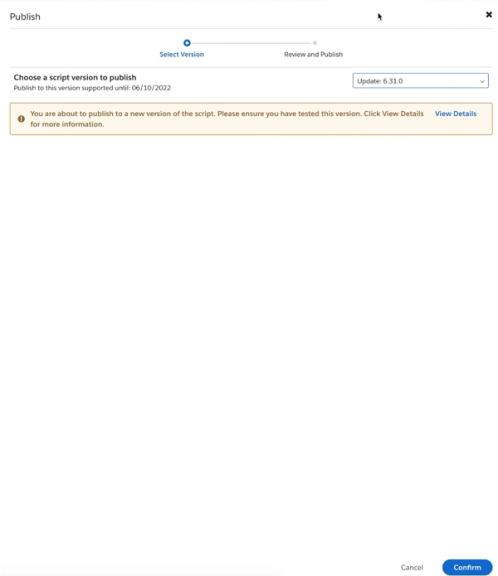
4. 公開するバージョンを確認するサイドバーモーダルが表示されます。右下隅の [確認] をクリックします。
5. 同じモーダル内で、Review and Publish 画面に進みます。[Cookie の自動ブロックを有効にする] のトグルをクリックします。
CookiePro の自動ブロック機能については、同社の ガイド で詳しく確認できます。
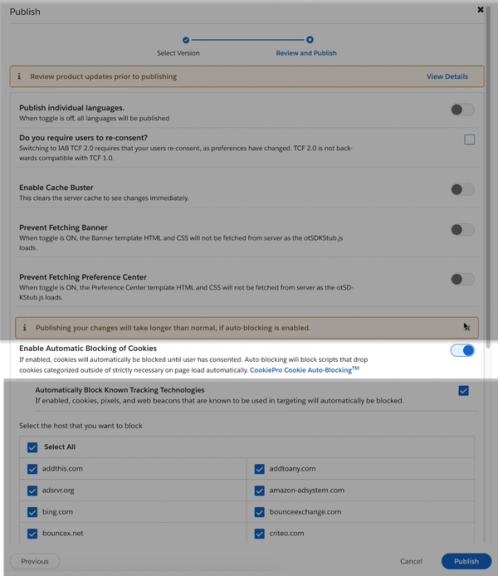
6. 右下隅の [Publish] をクリックします。
7. Production Scripts が表示されたポップアップが表示されます。[Copy Scripts] をクリックします。
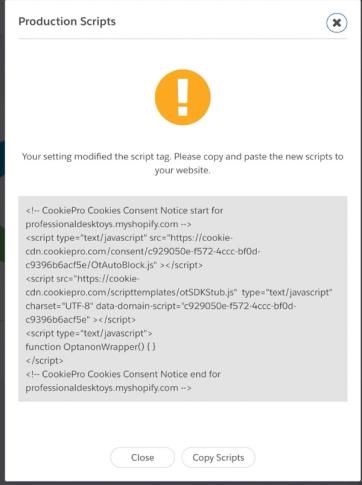
8. これらのスクリプトを E コマース ウェブサイトの html 内に配置します。これらのスクリプトを E コマース ウェブサイトに配置する方法について詳しくは、CookiePro のステップバイステップ ガイドをご覧ください。
達成できること
OneTrust の Cookie トラッキングソフトウェアの設定が正常に完了し、訪問者情報がキャプチャされてコンプライアンスに準拠した形で Klaviyo に送信されるようになりました。
その他のリソース
- Klaviyo の Cookie を理解する
Klaviyo がウェブトラッキングの一環として Cookie をどのように使用し、情報を収集してコンバージョン率やメールのパフォーマンス向上に役立てているかについて、詳しくはこちらをご覧ください。この記事では、Klaviyo が使用する特定の Cookie とその目的を説明し、顧客がどのようにトラッキングされるかを理解できるようにします。この情報は、Klaviyo がどのようにデータを収集するか、またそれが顧客のプライバシーやコンプライアンス法にどのような影響を与える可能性があるかを理解するのに役立ちます。
- Klaviyo オンサイトトラッキングのスタートガイド
Klaviyo で対応している E コマースサイトのオンサイトトラッキングについて説明します。主なオンサイトトラッキングは以下の 2 つです。