How to manage email suppressions and delete profiles in bulk
You will learn
Learn how to suppress a group of profiles in Klaviyo in bulk, remove suppressions in bulk, or delete profiles in bulk, and how the suppression modal helps you avoid suppressing recently active, high‐intent profiles.
You will also learn how suppression recommendations on the Suppressed profiles page help you safely suppress low‐value, long‐term inactive profiles based on standard sunset flow criteria.
Deleting vs. suppressing profiles
Klaviyo gives you the option to either delete profiles from your account entirely, or suppress them, in which case they remain in your account but cannot receive marketing messages. Depending on your use case, you may want to either delete or suppress profiles.
Deleting or suppressing profiles will not automatically change the Email subscription plan on your account. To change the subscription plan, your account must be manually downgraded. The only exception to this is an auto-downgrade enabled account.
Deleting
When you delete profiles in Klaviyo, they are removed from your account entirely along with their profile data. You will no longer be able to view these profiles or their engagement with your brand or messages. Deleted data cannot be recovered.
Note that because a deleted profile’s data is also deleted, they can potentially enter your Klaviyo account as a new profile if they engage with your website after their profile has been removed from your account (e.g., submitting a sign-up form).
You should delete profiles in your account when you are certain you no longer need their profile data, or a profile has requested that their data is deleted.
Suppressing
When you suppress profiles in Klaviyo, they remain on your account but are no longer considered active. In the suppressed state, profiles cannot receive marketing emails and do not contribute to your account’s plan limits. A suppressed profile cannot receive marketing messages, even if they have provided consent and indicated they want to receive emails.
You should suppress profiles in your account when you no longer want them to receive any marketing emails, but would still like to use their profile data for analysis and to maintain a complete picture of your customer base.
Bulk suppress profiles
In Klaviyo, you can bulk suppress the profiles in a list or segment. To bulk suppress a group of profiles:
Once a profile is manually suppressed, if that same profile becomes unsuppressed, it cannot be manually suppressed again within 90 days. This rule is inactive for the first 30 days after a new account is created.
- Navigate to the Lists & segments page under the Audience tab in Klaviyo.
- Next to the list or segment you’d like to suppress, open the action menu.
- Select Suppress current members to suppress all the members of the group.

- Suppress only inactive profiles (the option that does not suppress the recently active profiles)
- Suppress everyone (current behavior)
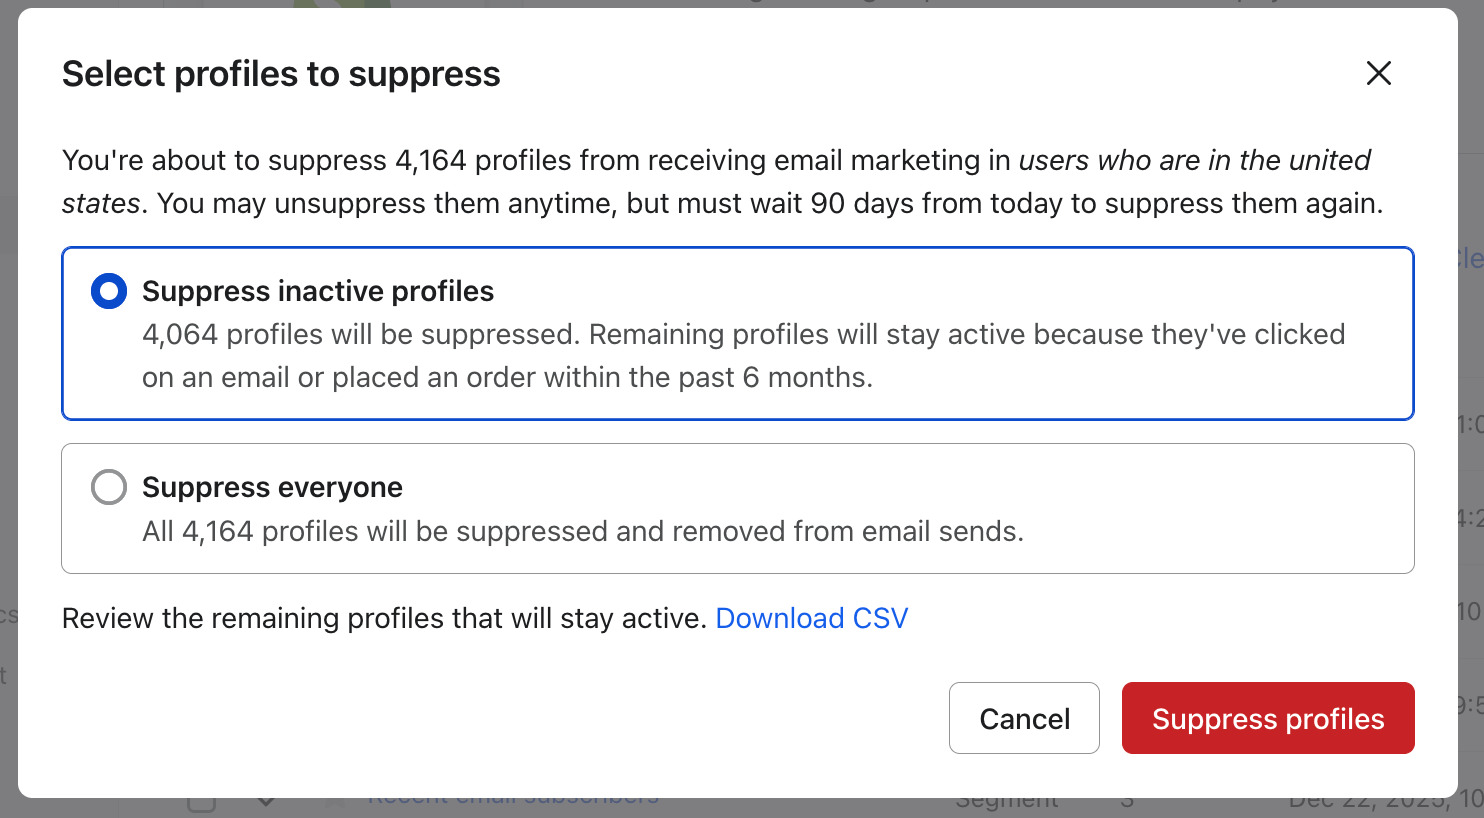
From the modal, you can download a CSV of the profiles that will remain active, including name, email, profile ID, phone number, and last active date, for audit or re‐import workflows.
This action applies to all the profiles within the list or segment at the time of suppression, and does not impact profiles that join after. If a profile in the group is already suppressed, their status is not be impacted.
Suppressing the profiles in a list only impacts their ability to receive emails. Profiles' ability to receive SMS messages and push notifications is not be impacted.
When there are no profiles to keep active
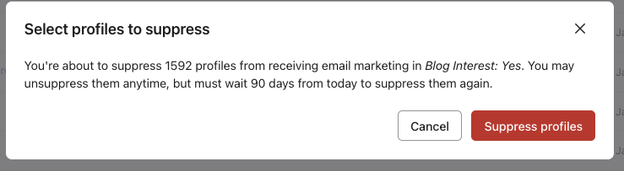
If no profiles in the list or segment meet the recent‐activity rule (no verified clicks or orders in the last ~6 months), the modal shows a single option to Suppress everyone. In this case:
- There is no separate “keep active” group, and
- The behavior is equivalent to the existing bulk suppression flow, without any recommended exclusions.
Review the profiles that you can keep active
The bulk suppression modal uses the same logic that is found in the segment builder. When you suppress a list or segment, Klaviyo identifies “active” profiles as those who:
- Are in the list or segment you’re suppressing, and:
- Profile is subscribed to receive email marketing
- AND the profile has not marked any emails from you as spam
- AND the profile has a human verified email click (non-bot) OR purchase within the last last 6 months
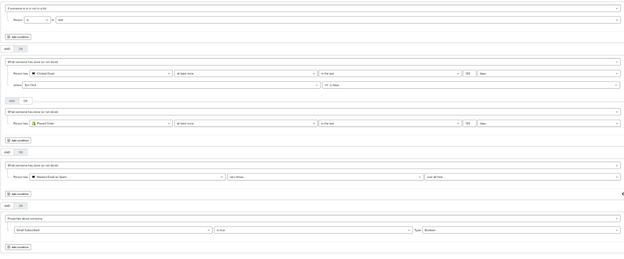
To recreate the set of profiles the modal recommends keeping active, you can build a segment such as:
Suppress using a CSV upload
If you want to keep a group of contacts in your account and suppress them so that they stop receiving emails from you, you can also upload them to your account's suppression list.
- Create a list or segment of those you want to suppress.
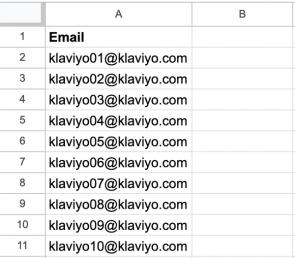
- Export this list or segment to a CSV file.
- Remove all columns in the spreadsheet except for the column with the header Email.
- Navigate to the Profiles tab.
- Click the View suppressed profiles button in the upper right of that page.
- Select Import.
Suppression Recommendations
In addition to bulk suppression from Lists & segments, Klaviyo also highlights long‐term inactive profiles to be considered for suppression from the Suppressed profiles page.
These recommendations are based on the existing sunset‐style definition of inactivity, and are designed to help you reduce active profile counts without suppressing recent buyers or clickers.
How Suppression Recommendations Work
When your account has profiles that meet the sunset segment criteria, you will see a banner at the top of the Suppressed profiles page that summarizes how many profiles are recommended for suppression.

Recommended profiles must meet the following criteria:
- Were created at least 180 days ago
- Have received 5 or more emails over roughly the last 72 weeks
- Have never opened or clicked an email from you
- Have never visited your website or made a purchase.
Profiles that still show recent verified engagement (like a human click or order in the last ~6 months) are not included in these recommendations and remain protected by your existing guardrails.
Review and Suppress Recommended Profiles
To act on suppression recommendations:
- Navigate to Audience → Profiles, then click View suppressed profiles.
- If a suppression recommendation is available, review the banner text summarizing how many profiles are recommended for suppression.
- Click "Review and suppress" profiles to view the recommended profiles and suppress them.
After you confirm, Klaviyo suppresses only the profiles included in the recommendation modal. Other active profiles in your account are not affected.
Bulk unsuppress profiles
You can also bulk unsuppress the profiles in a list or segment. To bulk unsuppress a group of profiles:
- Navigate to the Lists & segments page under the Audience tab.
- Next to the list or segment you’d like to unsuppress, open the action menu.
- Select Unsuppress current members to unsuppress all the members of the group.

Only non-deliverability suppressions can be removed. If a profile is suppressed due to a hard bounce or 7 consecutive soft bounces, the suppression cannot be removed to protect your deliverability.
This action applies to all the profiles within the list or segment at the time of unsuppression, and does not impact profiles that join after. If a profile in the group is already unsuppressed, their status is not be impacted.
Bulk delete profiles
When you delete people, these profiles are completely erased and no history is kept. Generally, you should aim to suppress rather than delete profiles.
To permanently remove a group of people from your account:
- Create a list or segment that contains these contacts.
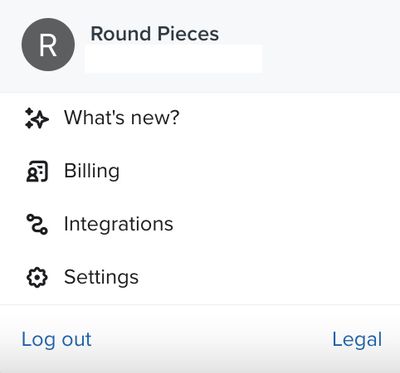
- Select your Account dropdown in the bottom left corner of your screen and click Settings.
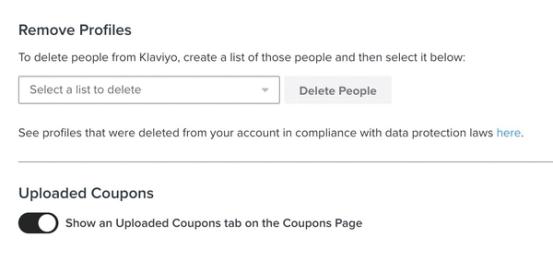
- Navigate to Other > Profile maintenance.
- In the Remove Profiles section, choose the list or segment you wish to delete from the dropdown menu.
- Click Delete People
- On the confirmation modal that appears, confirm the number of profiles that you would like to delete by typing the value in the field.
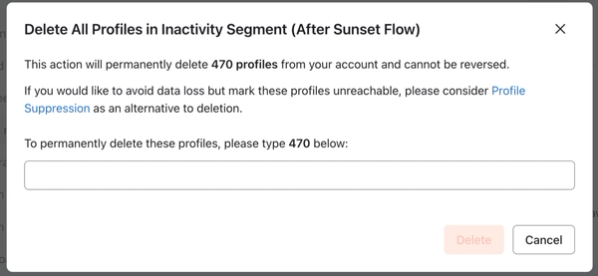
- Select Delete.
Outcome
Once you suppress a list or segment, all the profiles in the group will be in the suppressed state.
- If you used the bulk suppression option on the Lists and Segments page and chose suppress only inactive profiles, only profiles that did not meet the recent‐activity criteria are suppressed.
- If you used suppression recommendations banner from the Suppressed profiles page, only the profiles you confirmed in that recommendation are suppressed.
Other profiles in your account remain unchanged and can still receive emails according to their consent status. Suppressed profiles are not reachable by email, and do not contribute towards your Klaviyo billing plan. A suppressed profile cannot receive marketing messages, even if they have provided consent and indicated they want to receive emails.
When you unsuppress a list or segment, all the profiles in the group will be able to receive emails unless they have previously opted-out. Unsuppressing a profile will not impact their consent status, so if a profile has previously unsubscribed they will still not be able to receive emails because they have opted out.
If you delete profiles, they are completely erased and no history is kept. This is a permanent action, and cannot be reversed.
Additional resources
- Understanding suppressed email profiles
Learn about suppressed email profiles, including how they differ from active profiles and how you can use these profiles to better understand your audience.
- Understanding explicit vs. implicit consent
Learn more about the different types of consent (explicit vs. implicit) in Klaviyo and who you can or cannot email. Being able to email a subscriber basically boils down to having the proper consent.
- How to create a sunset flow
Learn how to set up a sunset flow that is designed to phase out customers who are no longer engaging with your brand. You can use this flow as a last-ditch effort to win back their business, and then delete or suppress anyone who is not responsive. You will also see how this recommended sunset segment definition connects to the prebuilt Sunset (Email) segment in the Segment Library. This will help you maintain a clean list and avoid having inactive customers contribute towards your Klaviyo billing plan.