Amped.io form migration reference
You will learn
Learn how to migrate your Amped.io (now under Mailchimp) forms to Klaviyo. Beginning August 15, 2025, Amped.io will no longer support third-party integrations like Klaviyo. This guide acts as a reference to help you to identify and document key elements of your existing forms so you can easily rebuild them in Klaviyo.
Before you begin
Since you’ll have to recreate your forms in Klaviyo, we recommend that you take screenshots or otherwise document your Amped.io forms and styles for reference. Repeat this process for each Mailchimp form you intend to migrate to Klaviyo, and for each step that a form may have.
Form elements
To accurately recreate your forms in Klaviyo, thoroughly document the appearance and settings of your existing forms. Generally, be sure to document or screenshot the following key elements, along with their style settings.
Input fields
Document or screenshot every field on the form, including the standard email field. This can also include fields like phone number, date of birth, and any other information you are collecting from customers.
Make sure to screenshot:
- Field labels
The visible label for each field (e.g., "First Name," "Favorite Color," "Birthday"). - Field types
Note the type of each field (e.g., text, number, date, radio buttons, checkboxes, dropdown). - Merge tags
The Mailchimp audience fields associated with each field. This is how you'll identify the custom properties to create in Klaviyo. - Placeholder text
Any example or instructional text that appears inside an input field before a user types in it.
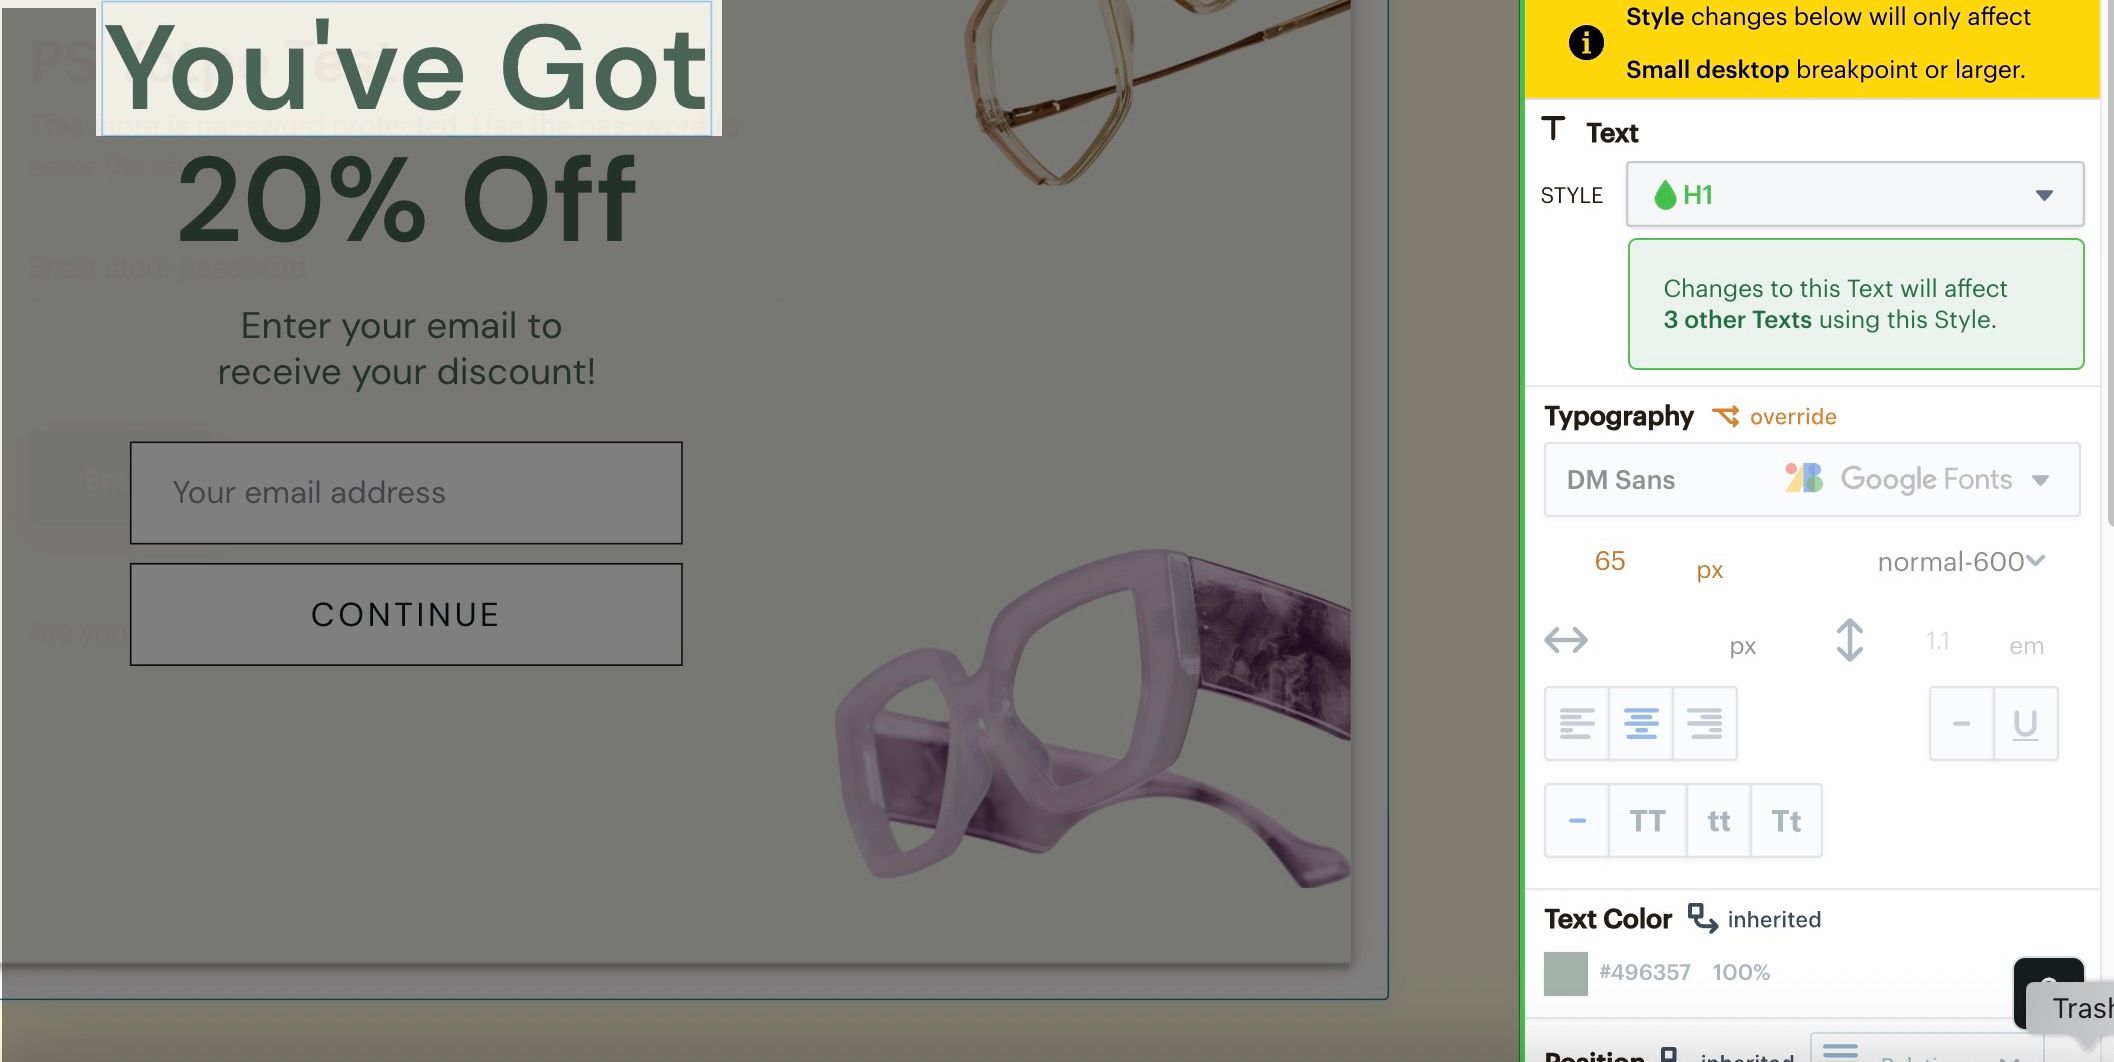
In Mailchimp, you can access this information by clicking directly on a field in the form editor. A panel will open on the right side that has the input field’s settings.
Here, you can find information on the data associated with the field, as well as all the styles applied. Screenshot or otherwise document these settings so you can reference them when rebuilding forms in Klaviyo.

Form copy
You should also create a record of all the copy (i.e., the text and messaging) on your form. Make sure to document:
- Form heading
The main heading of the form (e.g., "Join Our Newsletter," "Get 10% Off"). - Body text
Any descriptive text that explains the value of subscribing, what they'll receive, or any instructions. - Button text
The text on any buttons (e.g., "Subscribe," "Claim Your Offer," "Sign Me Up"). - Confirmation message
The message shown to a user after they submit the form. - Disclosure language
Any disclosure language on your form letting customers know the details of what they are subscribing for and how your brand will use their information.
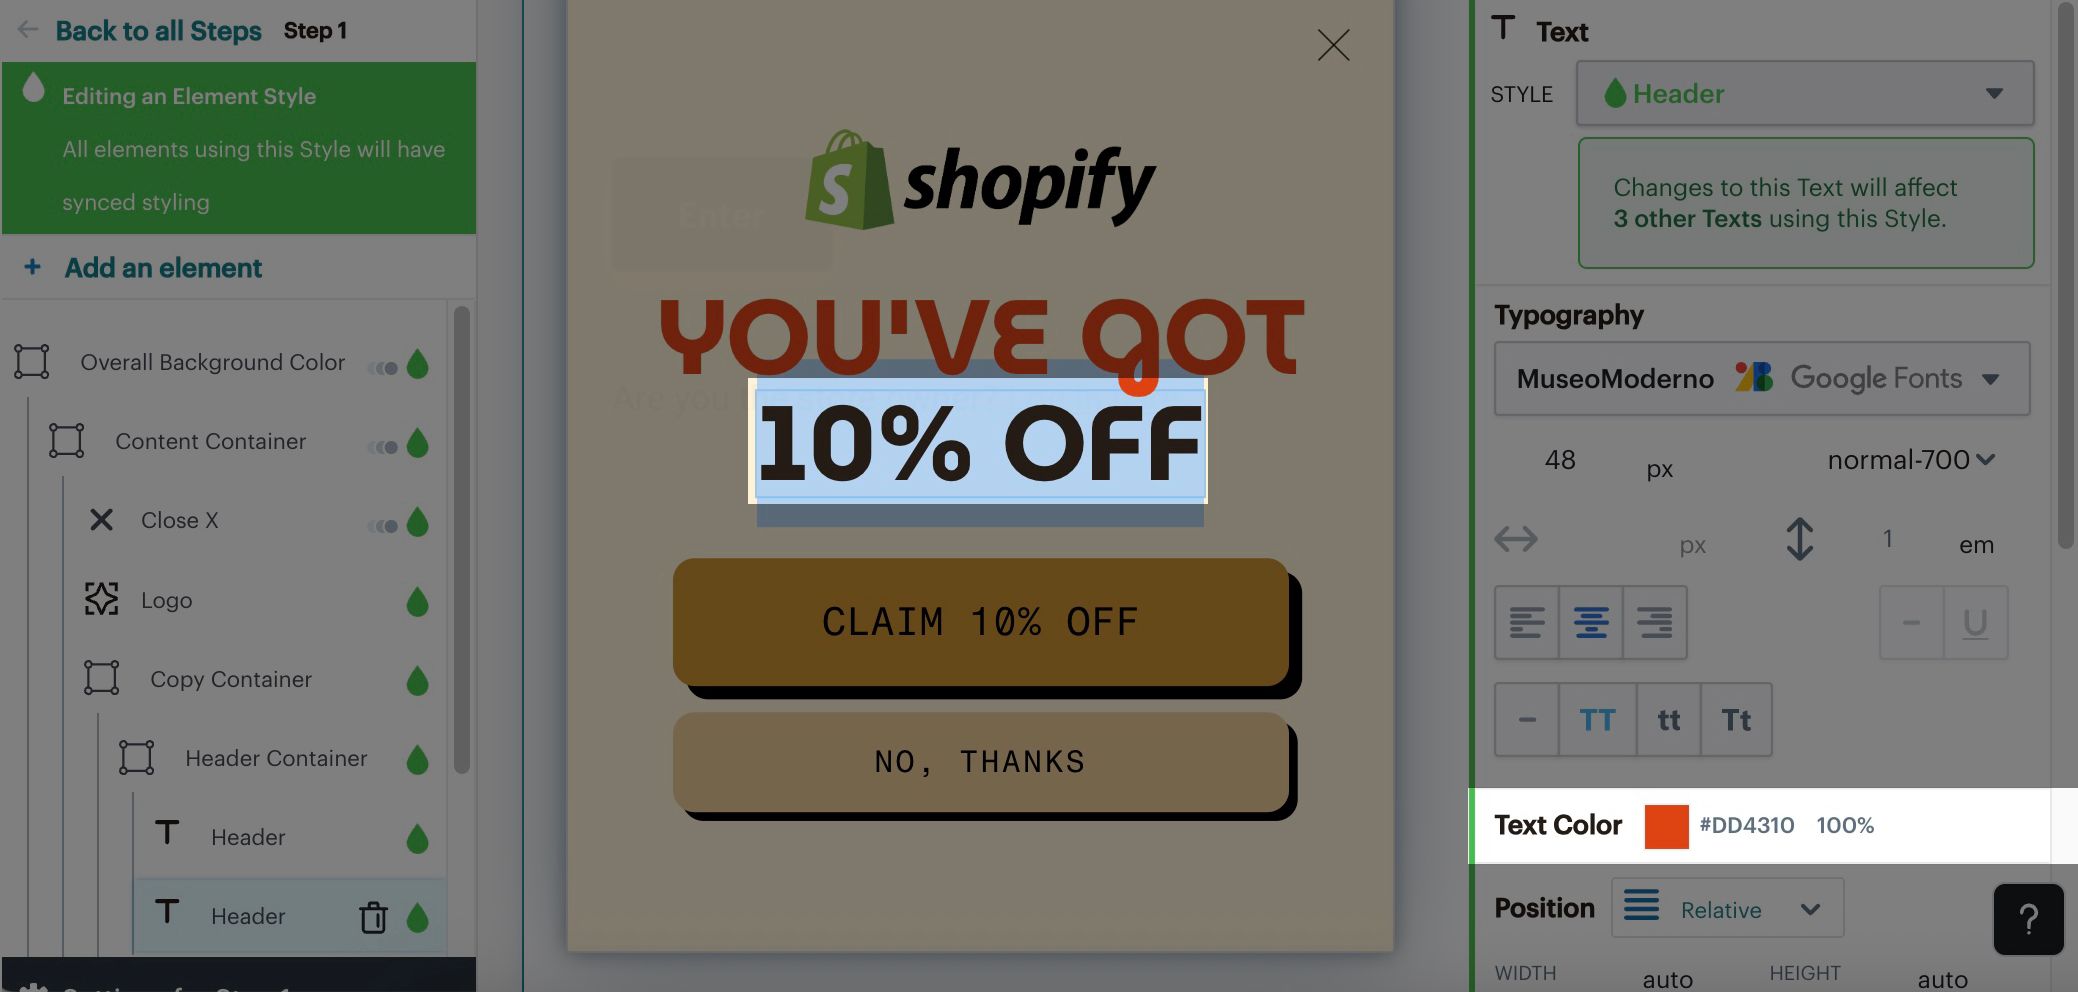
In Mailchimp, you can view the settings for a piece of text by clicking on it in the form editor. A panel will open on the right side where you can find all the styles applied. Screenshot or otherwise document these settings so you can reference them when rebuilding forms in Klaviyo.
Buttons
Buttons are another key element of your form. You may have a few buttons if your form has multiple steps so make sure to record the settings for all them. Make sure to document:
- Design and style
Your buttons’ colors (e.g., text colors, background colors, etc.), padding, and fonts. - Labels
The text on your buttons (e.g., "Submit," "Sign Up," "Claim Your Discount," "Next"). - Button behavior
The behavior of your buttons when customers click on it (e.g., go to the next step, submit, redirect, etc.) - Data collection
If you have any buttons that collect information from customers (e.g., radio buttons), document the audience tags they relate to in Mailchimp so you can recreate them as custom properties in Klaviyo. - Disabled state
What does the button look like when it is disabled (e.g., before all required fields are filled out)? This includes a change in color and cursor style.
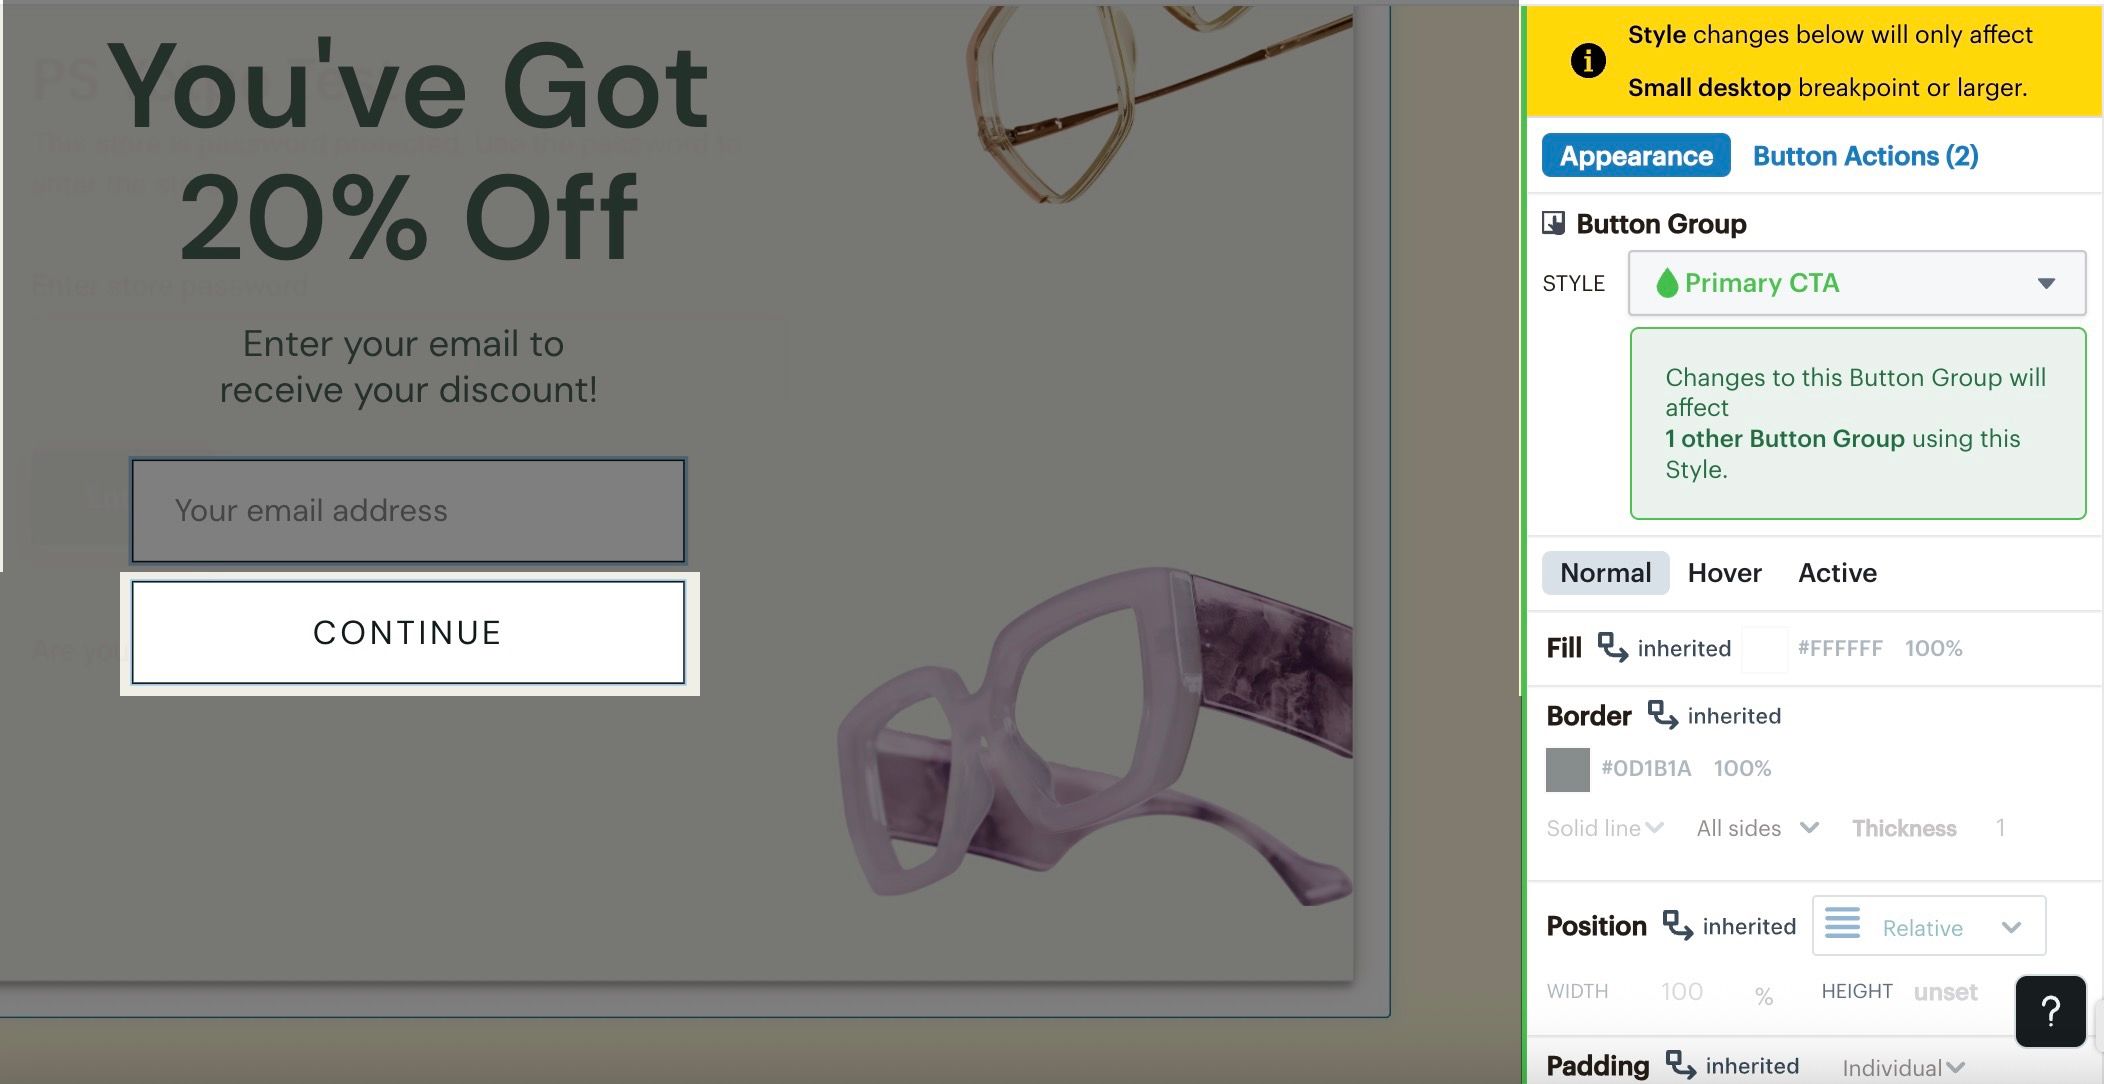
In Mailchimp, you can view the settings for a button by clicking on it in the form editor. A panel will open on the right side that has the button’s settings. Here you can find information on the button behavior, as well as all the styles applied. Screenshot or otherwise document these settings so you can reference them when rebuilding forms in Klaviyo.
Teasers
If you have a form teaser enabled in Mailchimp, document the content and appearance so you can rebuild it in Klaviyo. Take screenshots of or otherwise document:
- Teaser content
Any copy or images on the teaser and call to action. - Teaser design and styling
Take note of design and styling details like where the teaser appears on the screen, its shape and size, colors, and fonts. - Teaser display and behavior
Document the display and behavior settings for the teaser like the trigger, frequency, and visibility settings.
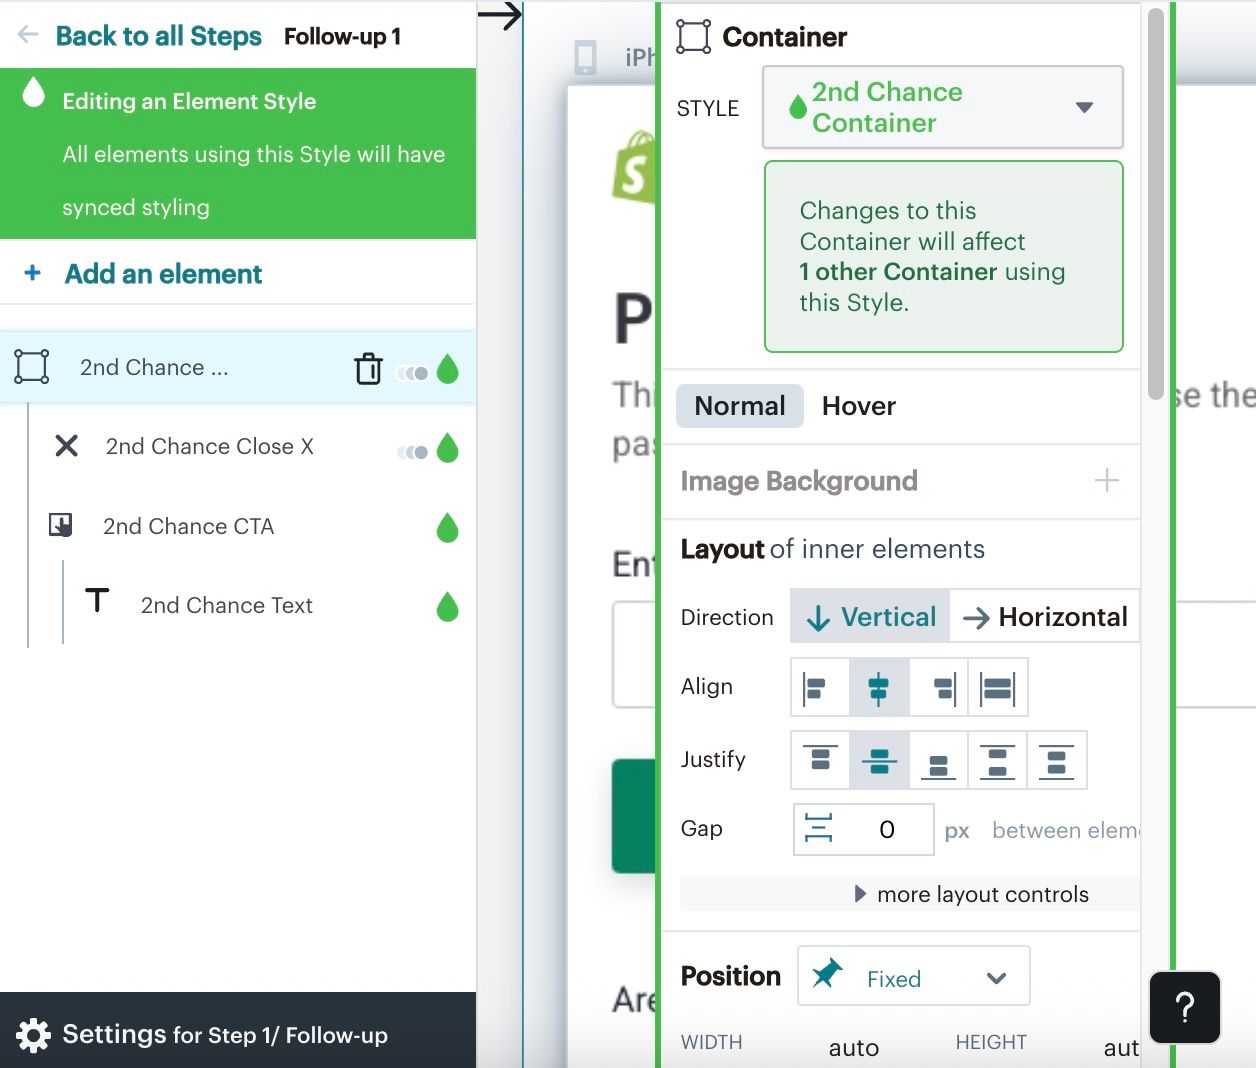
In the Mailchimp form builder, teasers are called Second-chance elements. To view your teaser’s settings:
- In the Steps panel, click Follow-up.
- Click 2nd Chance Container.
- View and document the teaser settings in the right-hand panel.
Behavior and functionality
Once you've recorded the visual elements of your Mailchimp form, the next step is to capture its behavior and functionality. Make sure to document the following settings on your Mailchimp forms:
- Display timing
Document how and when the form appears (e.g., on page load, after a delay, on exit-intent, on scroll percentage). - Display frequency
Note how often the form is shown to a user (e.g., show once per session, show every time). - Special interactivity callouts
Include any specific interactions or triggers (e.g., something happens when another thing happens). - Targeting rules
- URLs
What pages should the form appear on and which should it be excluded from? - Devices
What devices should the form be shown on (i.e., mobile, desktop, or both)? - Visitor type
Should the form target new or returning profiles? - Geo-targeting
Is the form targeted to specific geographical locations? - UTM parameters
Is the form triggered by specific UTM parameters?
- URLs
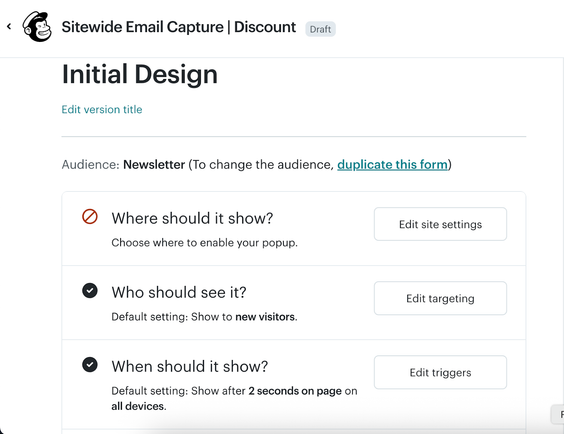
To view the behavior and functionality settings for a Mailchimp form:
- Select Edit next to the form on the Forms page in Mailchimp.
- Select Edit site settings for Where should it show?
- Select Edit targeting for Who should see it?
- Select Edit triggers for When should it show?
- Document or screenshot your settings for each of these.
Assets
Images and logos
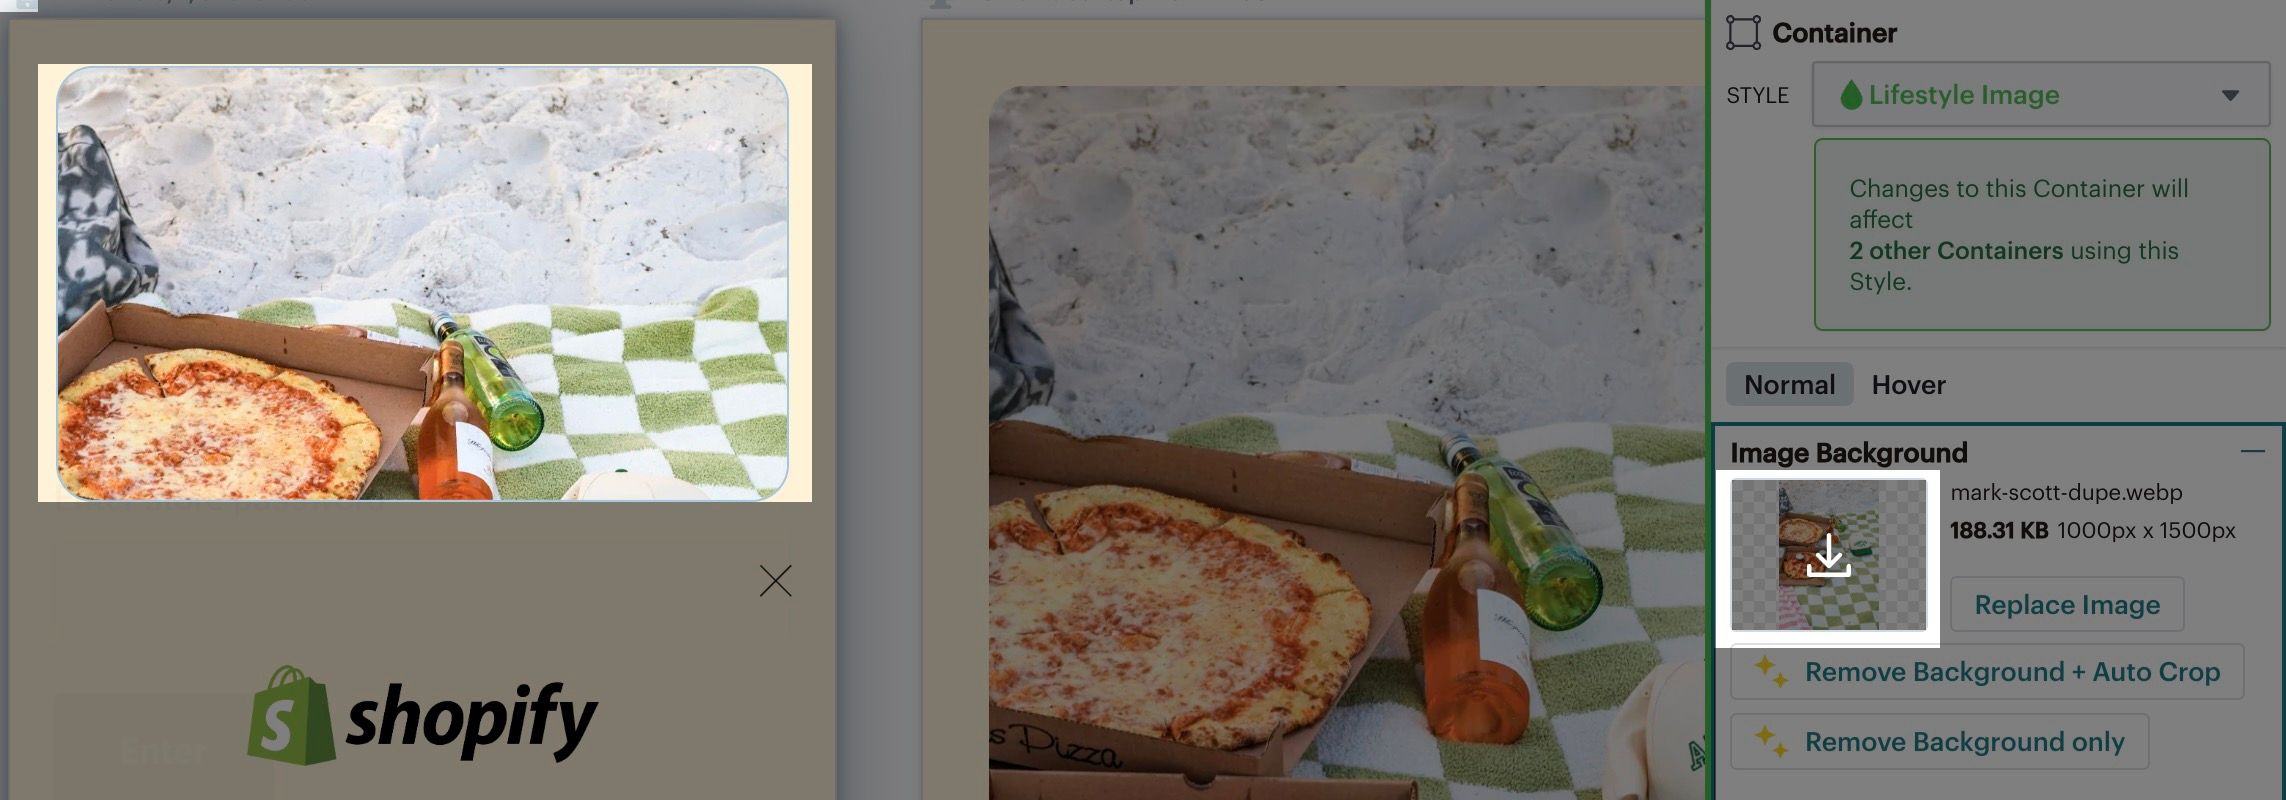
Make sure to export any images and logos you have in your Mailchimp forms that you’d like to bring over to Klaviyo.
To export an image from a Mailchimp form:
- Select the image in the Mailchimp form editor.
- Click the download button in the right side panel.
Fonts
Make sure to document the fonts for any text elements in your Mailchimp form. Note that each piece of text (e.g., headings, button labels, etc.) can each have their own fonts.
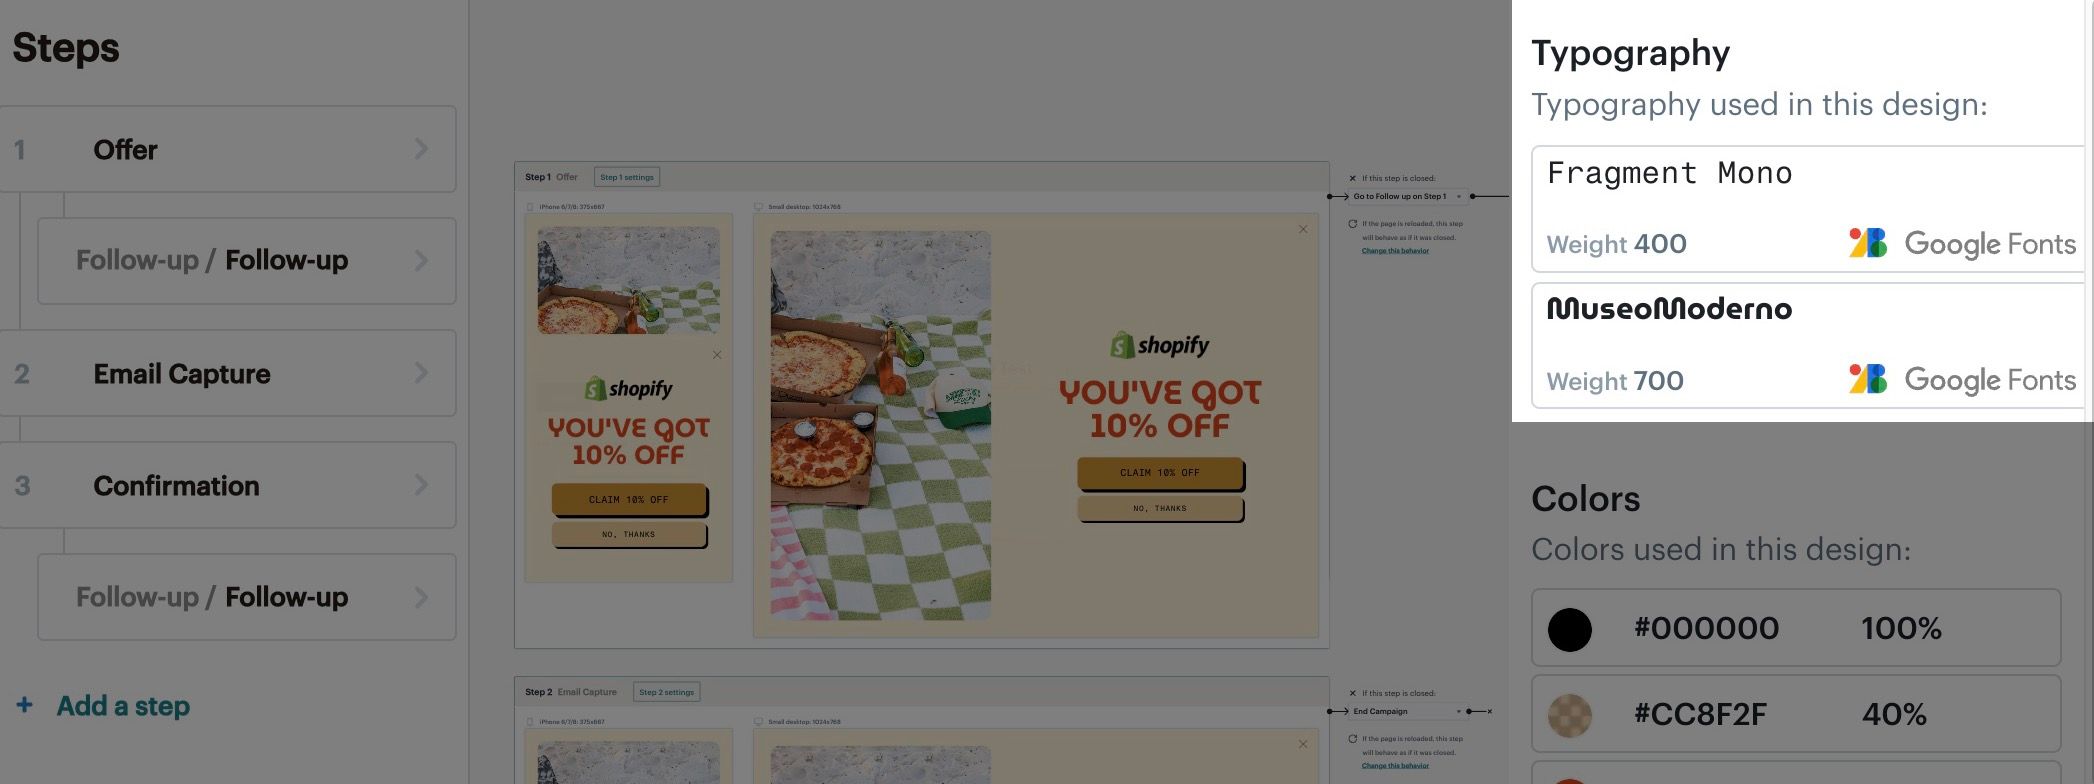
You can view a list of all the fonts used in a Mailchimp form from the overview page in the form builder.
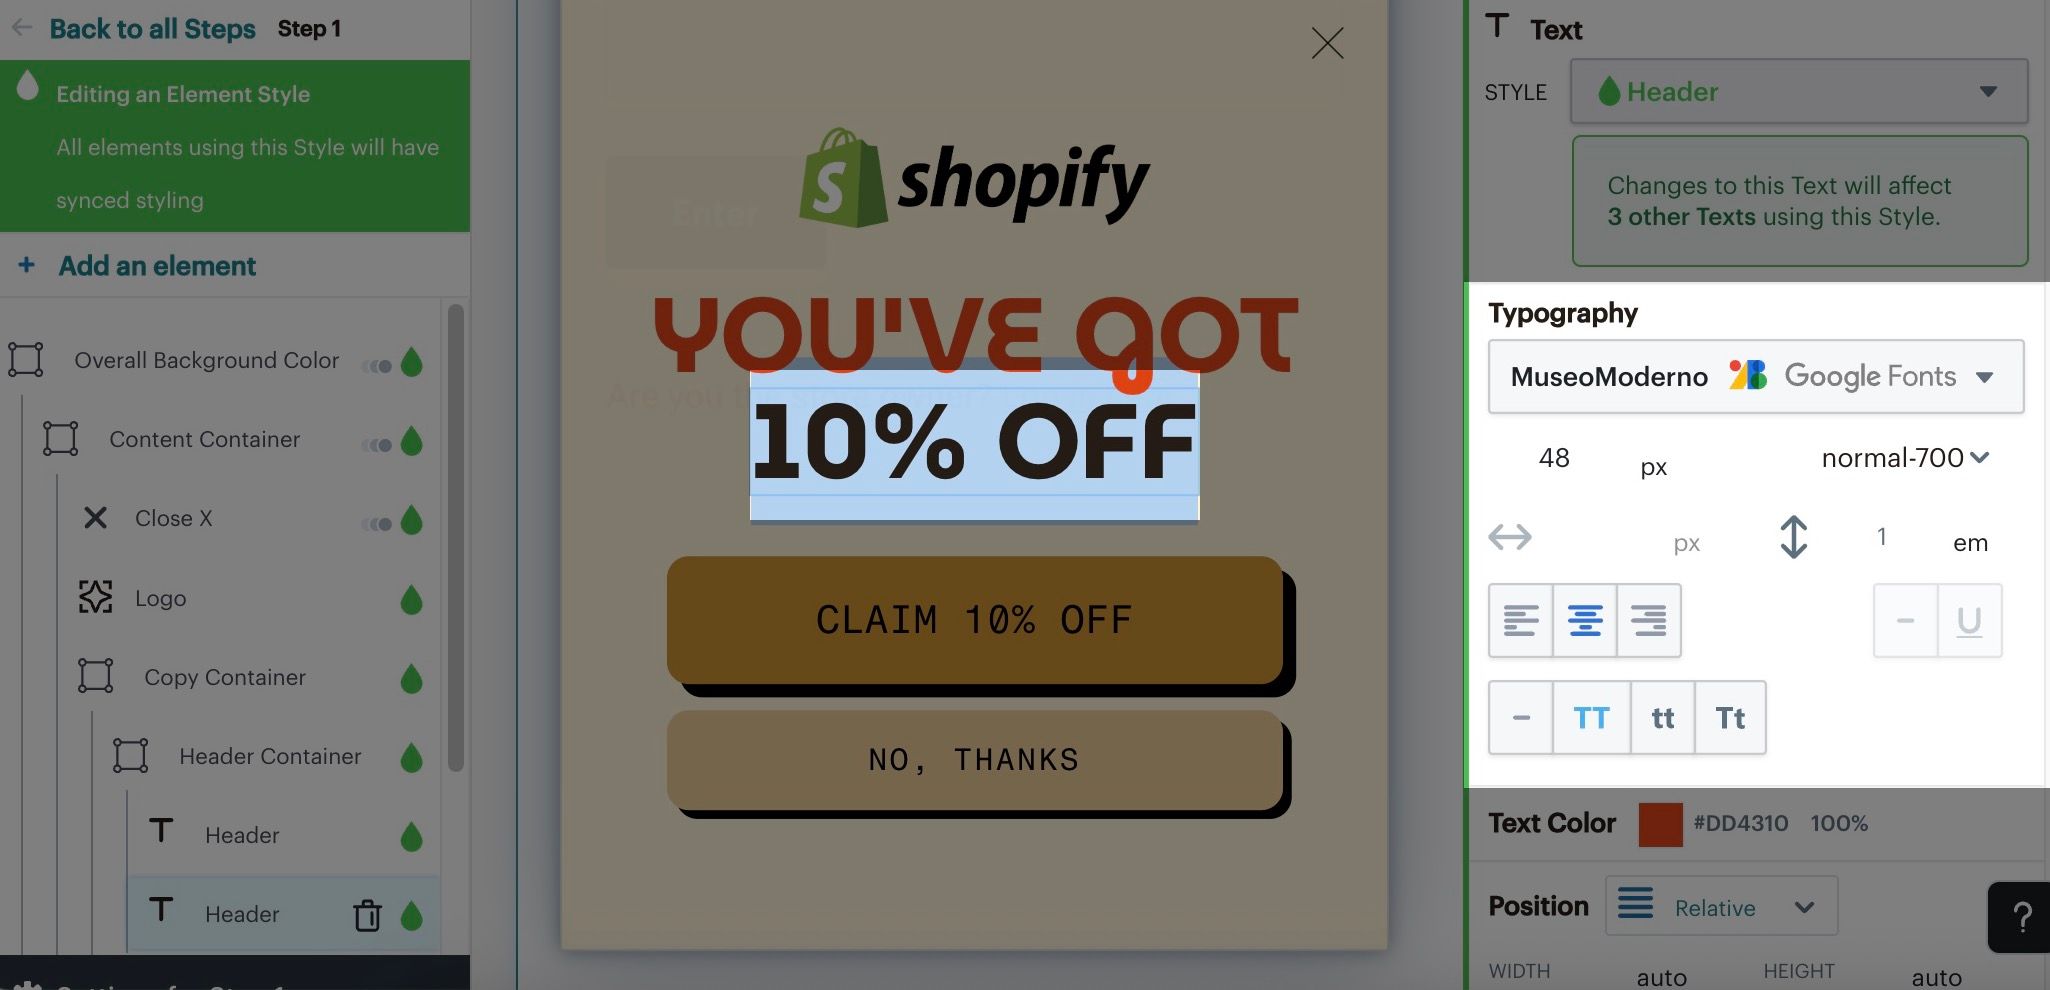
You can also see the font used for a specific element by clicking into it. The styles and font used will be displayed in the right-side panel.
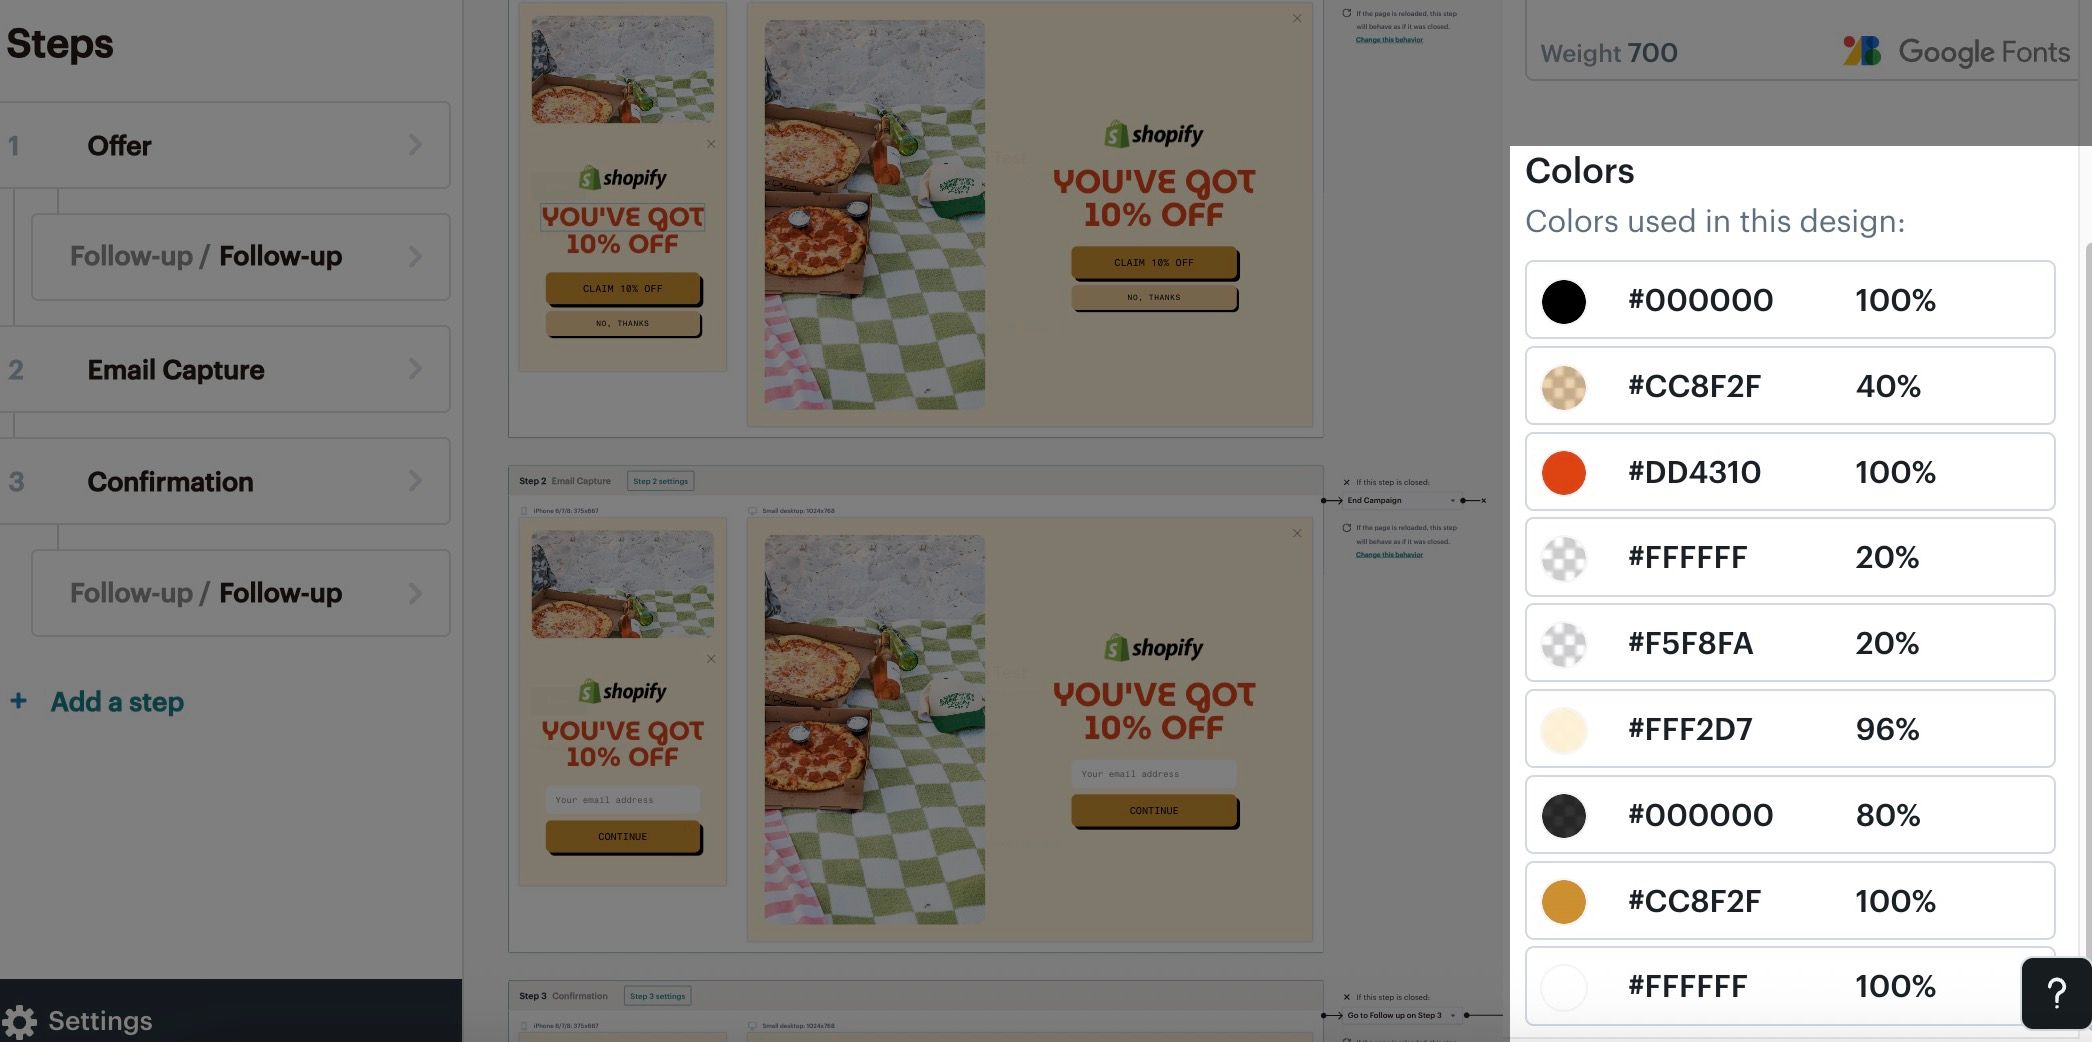
Colors
If you want to use the same colors in your Klaviyo forms, copy each color’s hex code from your Mailchimp forms. Each hex code represents a specific color, allowing you to recreate your forms in Klaviyo using the same exact colors.
You can view a list of all the colors used in a Mailchimp form and their hex codes from the overview page in the form builder.
You can also see the colors used for a specific element by clicking into it. The styles and font used will be displayed in the right-side panel.
Building forms in Klaviyo
Once you have gone through the steps above and documented the key components of your forms in Mailchimp, you can use the process below when you are ready to rebuild forms in Klaviyo.
Recreate the form in Klaviyo
To get started with rebuilding your form in Klaviyo account,
- Navigate to the Sign-up forms tab and click Create sign-up form.
- Choose a form type
Select the form type that matches your Mailchimp form (i.e., popup, flyout, full page, or embed). - Add content and input fields
- Use the information from your checklist to add text blocks, image blocks, and input fields.
- For custom fields, you can create new profile properties directly in the form editor.
- Style the form
- In the Styles section of the form editor, adjust the colors, fonts, and layout to match your brand and the original Mailchimp form.
- You can add background images and side images.
- Relevant guides: Understanding styles for a sign-up form
Configure targeting and behavior
To configure targeting and behavior settings for your form in Klaviyo:
- Select the Targeting and behavior button on the overview page of the form builder.
- Set Display Rules
In the Targeting & Behaviors tab, configure when and how the form should appear.- Set the Display Timing (e.g., on page load, after a delay, on exit-intent, on-scroll percentage).
- Set the Display Frequency (e.g., show once per session, show every time).
- Define Your Audience
- Target specific URLs if the form should only appear on specific pages.
- Specify Devices (i.e., desktop, mobile, or both).
- Set Visitor Type (i.e., new or returning).
- Apply Geo-targeting if the form is set for customers in specific locations
- Use UTM Parameters if the form is triggered by specific UTMs.
Next steps
Once you've successfully rebuilt your Mailchimp forms in Klaviyo, there are some next steps to ensure a smooth transition.
- Trigger a welcome flow
Ensure that your welcome flow is triggered by the list you've connected to the form. - Set up form coupons
You can either display coupons in the success message of the form or include them in your welcome email.
Publish and replace
Once your forms are ready in Klaviyo, you can get ready to publish them and remove any old Mailchimp forms.
- Publish the Klaviyo form
Once you're happy with your form, click Publish.- Install the Klaviyo embed code (if necessary):
- For popup, flyout, and full-page forms, you need to have Klaviyo's onsite tracking (i.e., Klaviyo.js) installed on your site.
- For embedded forms, you'll need to copy the provided embed code and paste it into your website's HTML where you want the form to appear.
- Install the Klaviyo embed code (if necessary):
- Remove the Mailchimp form
Deactivate or remove the corresponding form from your Mailchimp account to prevent both forms from appearing. - Test
Visit your website in an incognito window to ensure the new Klaviyo form is displaying and functioning correctly.
Additional resources
- Getting started with sign-up forms
Learn how to create and customize sign-up forms in Klaviyo to publish on your website so you can engage shoppers, collect emails and phone numbers, and build long-lasting customer relationships.
- Understanding styles for a sign-up form
Learn how to use Klaviyo’s sign-up form builder to design your form by editing the design settings available in the Styles section. Style settings apply across your sign-up form, including in all of a form’s steps and in its success message.
- Understanding targeting and behavior settings for sign-up forms
Learn about the Targeting & behavior section of the sign-up form editor, where you can control and change when a form appears on your site, and who sees it. Open the form editor for an existing sign-up form, then select Targeting & behavior to adjust the display and targeting settings covered in this guide.