How to create a back in stock flow for Shopware
You will learn
Learn how to create a back in stock flow for Shopware 6 to alert customers about inventory. This flow will use the Subscribed to Back in Stock event synced from your Shopware store.
Before you begin
Make sure to do the following:
- Integrate with Shopware 6 (see Getting started with Shopware to learn how). As part of the integration process, make sure you:
- Have Track Back in Stock toggled on in your extension settings, which will sync Subscribed to Back in Stock events to Klaviyo.
- Have Track Back in Stock toggled on in your extension settings, which will sync Subscribed to Back in Stock events to Klaviyo.

- Sync your Shopware 6 product catalog to Klaviyo.
Customize your Back in Stock button and form in Shopware
The Back in Stock form appears on product detail pages only when the product is out of stock and marked for Clearance sale.
If you’re tracking back in stock (via your extension settings in Shopware), you’ll also be able to customize the “Notify me when back in stock” button (which appears for items that are out of stock) and form on your site. Customers must click the button and fill out the form to receive back in stock notifications.
To customize these elements:
- Log in to your Shopware admin.
- Navigate to Settings > Extensions > Klaviyo.
- Scroll down to Back-In-Stock Pop-up styles, where you can customize the text color and background of the Back in Stock pop-up opening button, pop-up close button, and subscribe button.
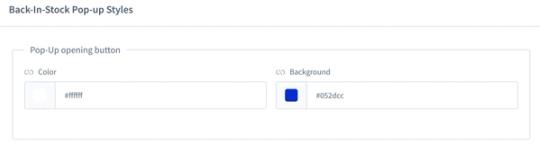
- Click the square, then use the selector to choose a color, or, if you have the hex color codes for your brand’s colors, paste it in the corresponding box.
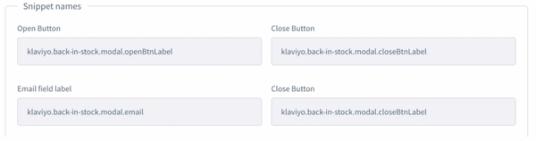
- Under Snippet names, you’ll find a reference for how to refer to different back in stock components in HTML, if you wish to customize them within your site code.
- When you are finished, click Save.
Configure your back in stock settings in Klaviyo
Next, configure your back in stock settings in Klaviyo: both minimum inventory rules and customer notification rules.
- Minimum inventory rules refer to how many items need to be restocked before you notify subscribers.
- Customer notification rules allow you to choose how many customers to notify and how long to wait between notifications.
Create the flow
- In Klaviyo, select the Flows tab.
- Click Create Flow, then Create from Scratch.
- Name your flow, then click Create Flow.
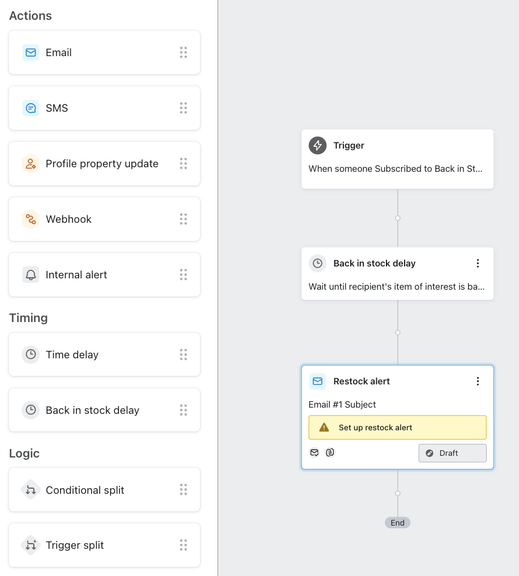
- In the flow builder, choose the trigger option Metric, then select the Klaviyo metric Subscribed to Back in Stock. Do not add any trigger or flow filters, and click Save.
- Directly after the trigger, drag in a Back in Stock Delay. Recipients who enter your flow will wait at this delay until their item of interest is restocked. After this occurs, they will move on to the next step in your flow, which in this case is an email message that you add after the delay.
- Design your back in stock email with dynamic variables to pull product information for this notification. Learn how to personalize flows with dynamic event data.
- Typically, you will only need a single message in this flow as a notification that the item is back. Turn Smart Sending off for this message to ensure everyone gets the alert.
- You do not need to add any additional time delays to this series, as the back in stock delay will ensure each person that enters your flow waits until the item they subscribed to goes back in stock before moving forward.
- To learn about flow statuses and how to set your flow live, read Getting started with flows. For more guidance on back in stock flows, read How to build a back in stock flow.
Outcome
You’ve created a back in stock flow for Shopware 6. Now, you can better personalize your customer communications and drive revenue.
Additional resources
- Understanding how back in stock flows work
Learn about how back in stock flows work, how contacts move through them, and how they appear different from most other metric-triggered flows. For instance, they have the back in stock delay component, which is unique to this type of flow.
- Shopware data reference
Learn what data is synced from Shopware 6 to Klaviyo, how to view this data, and what properties Shopware events contain.
- How to use event data to personalize email and SMS flows
Learn what dynamic event data is, when to use it, where to find it, and how to include it in your flow messages. Learn about the different actions your customers take, and how you can use that data for creating personalized messaging flows in Klaviyo. For instance, you could use event data in an abandoned cart flow message to show individuals what product they left behind, an image of the item, and more. This allows for a more personalized experience for the customer, as well as a higher chance of conversion.