How to migrate from Constant Contact
Only Klaviyo account owners or admins can perform a full migration from Constant Contact.
You will learn
Learn how to migrate from Constant Contact to Klaviyo. While Klaviyo does not have a pre-built integration with Constant Contact, you can export your data from Constant Contact and upload it into Klaviyo.
Before you begin
This guide will walk you through migrating your data from Constant Contact to Klaviyo. When migrating, ensure that you:
- Upload all of your subscribers and contacts, and any important information about them.
- Record any opted-out contacts (i.e., keep them as unsubscribed in Klaviyo).
Checklist
Below, we provide a series of steps that will help you migrate from Constant Contact to Klaviyo. While not all of these tasks may be relevant to you, we recommend reviewing each section:
- Change your SMS sending number
- Migrate your email and SMS subscribe lists
- Migrate your email and SMS unsubscribe lists
- Migrate your email engagement data
- Export other relevant data
- Set up sign-up forms and list growth tools
- Recreate your email templates
- Recreate campaigns and email automations
- Discontinue Constant Contact use
Change your SMS sending number
Are you sending SMS with Constant Contact (or another provider) and are looking to migrate to Klaviyo? Constant Contact only offers local numbers, which are not portable to Klaviyo, so you’ll need to change your sending number.
With Klaviyo, there are many types of numbers to choose from. You’ll want to start early, because requesting a new number may take time. You should also consult requirements and best practices around informing subscribers of your change in number.
Migrate your email and SMS subscriber lists
Export your email and SMS lists from Constant Contact
First, you’ll need to export your subscribers from Constant Contact into a spreadsheet. Learn how to export them on Constant Contact’s Help Center:
- You’ll want to export one spreadsheet for email subscribers and one for SMS subscribers, using the Export contacts by email or SMS status method in the article linked above.
- If a contact is subscribed to both email and SMS, they will end up on both lists, and those profiles will be merged automatically in Klaviyo (but exist on both lists).
- When you export your lists from Constant Contact, we recommend using the All Subscribed status for email, and the SMS Subscribed status for SMS.
- Make sure to include email addresses and phone numbers in your exports. You should also include any other customer data you want to bring into Klaviyo; see the next section for details on what data can be uploaded and how to format it.
Format your CSV files
You'll need to format each CSV file before importing it into Klaviyo:
- Column headings should be in the first row of the CSV file.
- If there is an email address: the first column should be Email or Email Address.
- If there is no email address: the first column should be Phone Number.
- You may want to include columns for:
- First name.
- Last name.
- Any custom profile properties (e.g., Birthday). If you are including a custom property that contains multiple values, you should format it as an array (i.e., [“value 1”, value 2, “value 3”]).
- For email: Engagement data (e.g., last click).
- You can export a Contact source field in Constant Contact indicating the method of subscription. Leave this field intact on the CSV file - you should map it to Klaviyo's Source field when you upload the CSV to Klaviyo.
- For SMS: Make sure each phone number includes the country code or a separate column containing the country, and is in an accepted format. If you only send to one country, you can easily add a column with the same information for each contact.
Below is an example of a properly formatted CSV file of email subscribers:
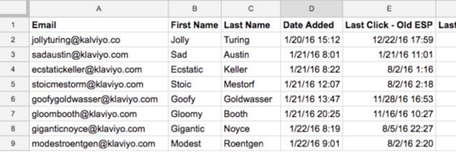
Review your CSV file carefully, editing and deleting column headings and contact entries as appropriate. Remember, it's much easier to parse and edit data within a CSV file before it is uploaded into Klaviyo. For more detailed instructions on formatting CSV files, head to our article on creating and adding contacts to a new list.
For more specific info on uploading SMS contacts, check out our SMS upload article.
Import your CSV file to a Klaviyo list
After you've formatted your data, you'll import it to a list in Klaviyo. You should create 2 separate lists in Klaviyo - one for email, one for SMS.
Do you have any live flows in Klaviyo? When you upload a CSV, any flows triggered by a list or subscription metrics will begin sending to newly uploaded subscribers. To prevent this, set your flow to manual before importing. After the import is complete, wait a few hours before going back into the flow, cancel any pending sends for the imported contacts, then switch the flow back to live.
- Navigate to Audience > Lists & segments.
- Select the list that you want to add subscribers to. This should be your main email list for email, and your main SMS list for SMS, respectively.
- If needed, you can create new lists in the Lists & segments tab by clicking Create New > List.
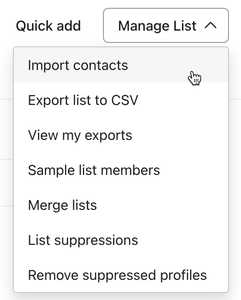
- Click the Manage list dropdown in the upper right-hand corner of your list.
- You must be an Owner or Admin in Klaviyo to see this option.
- Click Import contacts.
- Click Upload and select your CSV file of subscribers.
- Map each column from your CSV to an appropriate property in Klaviyo.
- If a property doesn't yet exist in Klaviyo, type in a new property name and click Create New Field.

- Click Next.
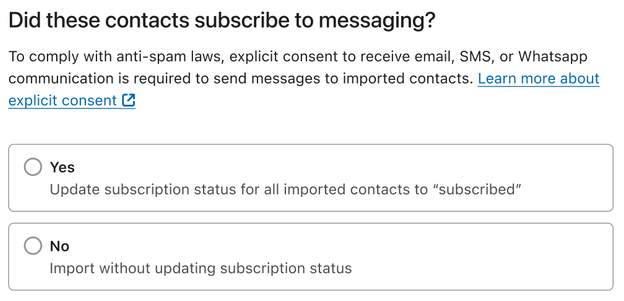
- Under Did these contacts subscribe to messaging, select Yes to add consent.
- Check the boxes for the types of consent to apply: Email or SMS.
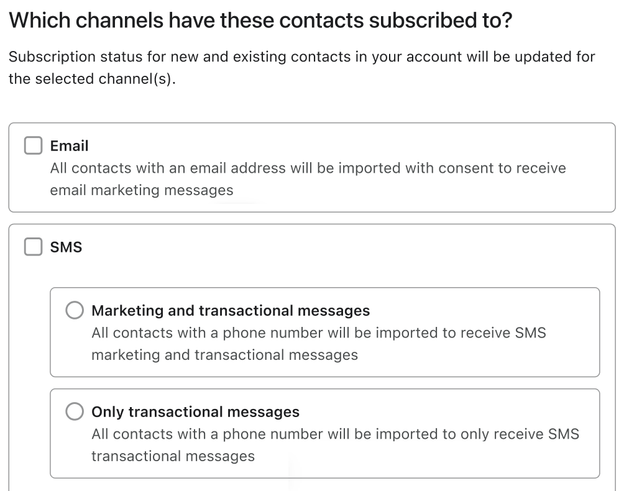
- For SMS: Choose the type of consent to apply. Your export from Constant Contact contains consent to SMS marketing messages, which also implies consent for transactional messages. Thus, we recommend choosing Marketing and transactional messages
- When ready to proceed, click Import.
Migrate your email and SMS unsubscribe lists
It is important to add your Constant Contact unsubscribes to Klaviyo's suppression list to ensure compliance with spam laws and keep your deliverability high. To export unsubscribes from Constant Contact:
- Export a list of contacts by email status to a spreadsheet, like you did for your email list.
- Under Email status, select Unsubscribed.
- You will only need the Email address field.
Format the suppression list so that it contains a single column of email addresses.
Then, import your unsubscribes into Klaviyo:
- Navigate to Audience > Profiles in Klaviyo, and click View suppressed profiles on the upper right.
- Select Import.
- Click Upload to select the CSV file containing your Constant Contact unsubscribes. Then, click Upload.
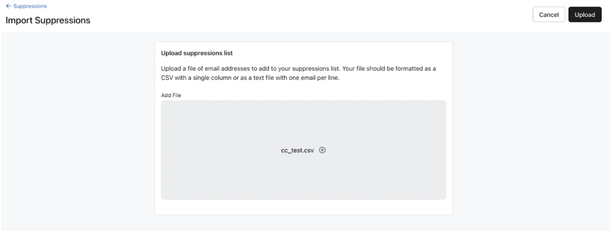
- Your Klaviyo suppression list will now reflect your import.
SMS
To finish formatting your SMS unsubscribes and uploading them to Klaviyo, follow the steps in our SMS unsubscribe guide. Start by doing the following:
- Export a list of contacts by SMS status from Constant Contact to a spreadsheet, like you did for your subscribers.
- Under SMS Status, select SMS Unsubscribed.
- You’ll need phone numbers (with country codes) in one column, and the contact’s country in another column.
- Format your CSV according to the Klaviyo guide linked above.
- Upload your unsubscribes to Klaviyo.
Migrate your email engagement data
In order to migrate email engagement data to Klaviyo, you’ll need to do the following:
- Export your pre-built engagement segments from Constant Contact. Make sure to export the Most Engaged, Somewhat Engaged, and Least Engaged segments.
- Format each CSV and upload it as a list in Klaviyo. These will need to be new lists, separate from the email and SMS subscriber lists you created above. These lists will be used temporarily to create Klaviyo segments based on engagement, since segments cannot be directly uploaded to Klaviyo.
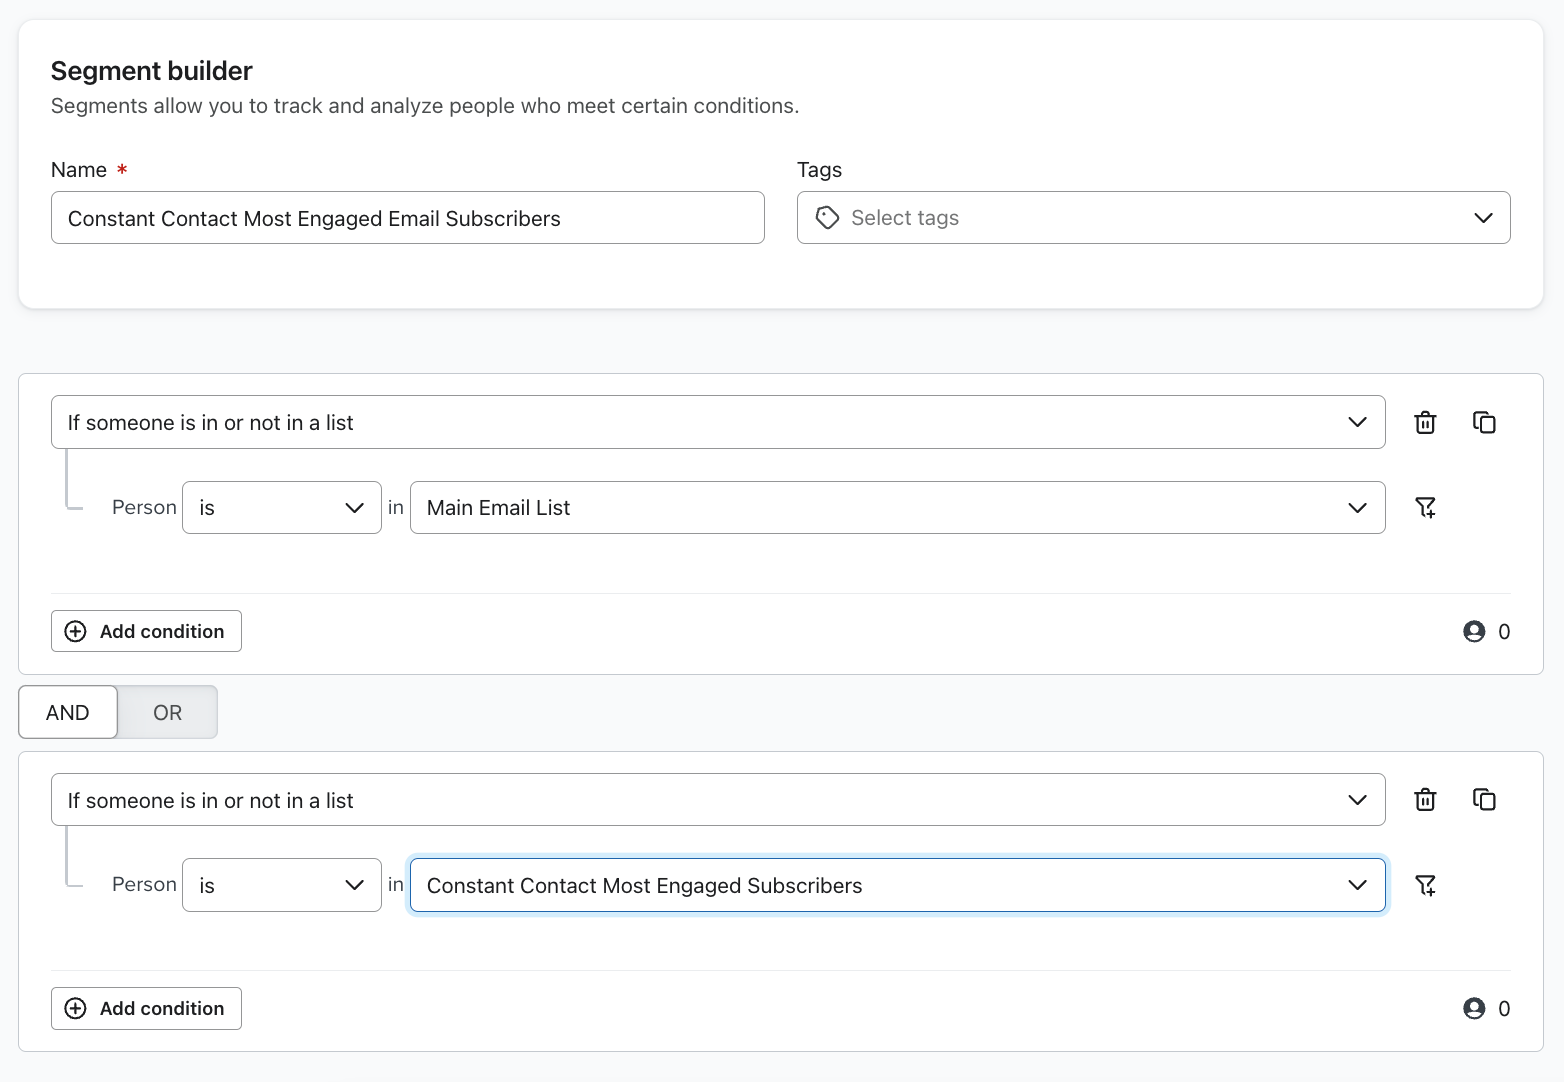
- Create segments in Klaviyo where you include members who are in both your main email list in each engagement tier from Constant Contact. As an example, your Most Engaged email segment in Klaviyo may look like:
- If someone is in or not in a list > is in > Main Email List AND
- If someone is in or not in a list > is in > Constant Contact Most Engaged
You can then use these segments to warm your sending domain in Klaviyo. In the future, you’ll be able to create new engagement segments based on data collected in Klaviyo. We recommend setting yourself a reminder for 1 to 2 months after you start sending with Klaviyo - at that time, start using Klaviyo data to craft new engagement segments.
Export other relevant data
You may also want to export other relevant data from Constant Contact:
- While we migrated engagement segments in a previous section, you can also download email reports by campaign from Constant Contact if you wish to reference them in the future.
- If you have specific contact lists you want to upload to Klaviyo, other than those we exported above: Learn how to export a list from Constant Contact and then follow our guidance on adding subscribers to a new list in Klaviyo.
- Do you have contact segments you’ve created in Constant Contact that you want to use in Klaviyo, beyond your engagement segments? We recommend recreating any segments from Constant Contact using Klaviyo’s segment builder, since segments cannot be uploaded to Klaviyo. Since you uploaded your email and SMS subscribers in the previous step, you will be able to segment these in Klaviyo.
Set up sign-up forms and list growth tools
You should recreate any Constant Contact sign-up forms in Klaviyo so that your list continues to grow in Klaviyo, rather than in Constant Contact. You can use the Klaviyo sign-up form builder to recreate your forms from scratch or use a third-party list growth tool that integrates with Klaviyo.
If you are already using third-party list growth tools, make sure that these sync to Klaviyo. Klaviyo integrates with a number of tools for list growth and landing pages. Check out our directory of Klaviyo-built integrations to find the tool that you're using. If you don't see it listed, consider using Klaviyo's native sign-up form builder to create your forms, or try switching to a different third-party tool.
If you’re using a custom-coded form, ensure your contacts sync to Klaviyo by having your custom form sync new subscribers directly to your ecommerce platform, and make sure your ecommerce platform is integrated with your Klaviyo account.
If you’re using SMS, you’ll also want to set up SMS keywords and SMS subscribe links.
Lastly, you'll want to de-activate your Constant Contact sign-up forms.
Recreate email templates
Klaviyo offers an intuitive drag-and-drop template builder that you can use to recreate your Constant Contact email templates. We highly recommend using this method to rebuild your templates because it will ensure that they are mobile-optimized, responsive, and easy-to-edit moving forward. You can use email templates in both flows and campaigns in Klaviyo. Check out our guide to using Klaviyo's template editor.
Recreate email automations and campaigns
Klaviyo refers to automated workflows as "flows," which allow for more advanced and targeted sequences. It is important to recreate these in Klaviyo so that you don't need to continue to use Constant Contact to send automated messaging.
As you move from Constant Contact, it may be a good time to refresh and update your automated messaging. We recommend that you turn on your welcome series and abandoned cart flows as soon as possible. A welcome series is particularly important to engage new subscribers, and abandoned cart flows have the highest ROI of any other type of flow. We also recommend recreating high-performing flows from your Constant Contact account in Klaviyo.
Once your Klaviyo flows are live, you'll want to turn off all of your automated messaging in Constant Contact to ensure that you're not double-emailing people.
Additionally, if you have any upcoming campaigns, you'll want to recreate these in Klaviyo as well.
Discontinue Constant Contact use
Once you’ve completed the steps above and started sending with Klaviyo, you can discontinue using Constant Contact.
Before you close your Constant Contact account, double-check that everything is working as expected:
- Enter a test email and phone number into your sign-up form and other list growth tools, then review your double opt-in and welcome messages.
- Abandon a cart and see if your emails and SMS contain the right information.
- Go to the Profiles tab in your Klaviyo account (found under Audience) to make sure that the information in the profile reflects accurately.
After you've taken these steps, you can close your Constant Contact account.
Next steps with Klaviyo
Once your data is migrated from Constant Contact, you can work toward your first Klaviyo send by following our Getting started with Klaviyo course.
Outcome
You've now migrated from Constant Contact to Klaviyo and have learned best practices for migration.
Additional resources
- Troubleshooting list imports
Learn how to troubleshoot errors that occur when uploading a CSV of contacts to a new or existing list in Klaviyo. Uploading reviews? Head to our article on how to import reviews.
- Understanding email deliverability
Learn about email deliverability, including the steps you can take to establish a strong sender reputation so that your emails are delivered to the inbox.