How to create and send an email campaign
You will learn
Learn about the basics of email campaigns, including what they are and how to send them in Klaviyo.
An email campaign is a one-time send to a pre-established target group of contacts — think regular newsletters, sale announcements, or promotional sends. An individual campaign can be created and sent immediately, or a campaign can be prepared and then scheduled to send at a later time.
Before you begin
Before you start sending, do the following things:
- Create a list or segment of engaged subscribers
- Spend time creating a series of base templates that you can leverage for all future campaigns — this can be a big time saver (think a base newsletter template set with your logo, colors, header, footer, and preferred layout)
Campaigns vs. flows
In Klaviyo lingo, it is important to distinguish between flows and campaigns.
Campaign | Flow |
Send to a target list that you build in advance | Send one or more automated messages, curated based on certain triggers and filters |
Manually created and scheduled | Triggered every time a certain behavior occurs |
Example: monthly emails for a newsletter list, or a flash sale announcement sent to existing customers via text | Example: automated welcome email or SMS that sends to new subscribers immediately after they sign up |
Build a new email campaign
Klaviyo’s campaign wizard guides you through the steps for creating your campaign.
- Navigate to the Campaigns tab
- Choose either:
- Create to define all the campaign details yourself.
- Library to quickly launch a campaign with pre-built drafts tailored to your goals.
- Choose Email.
- Click Continue.
Set up your campaign
When you click Create campaign, the sidebar allows you to choose the following:
- Campaign name
The date of the campaign is auto-populated as the name of the campaign, but this can be changed to whatever you'd like. A campaign name is required. - Type
The option of email, SMS, or push, depending on what is available for your account. - Tags
Optional tags that can help organize your created campaigns.
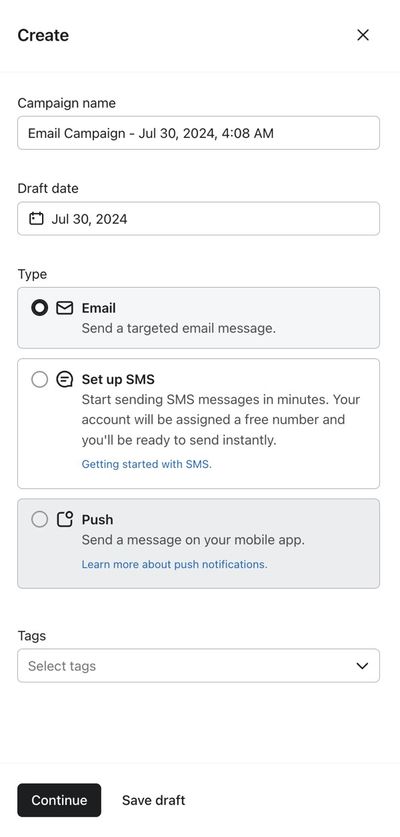
Once you have chosen your options in the sidebar, click Continue to move onto the Recipients screen or click Save draft to return to the Campaigns tab.
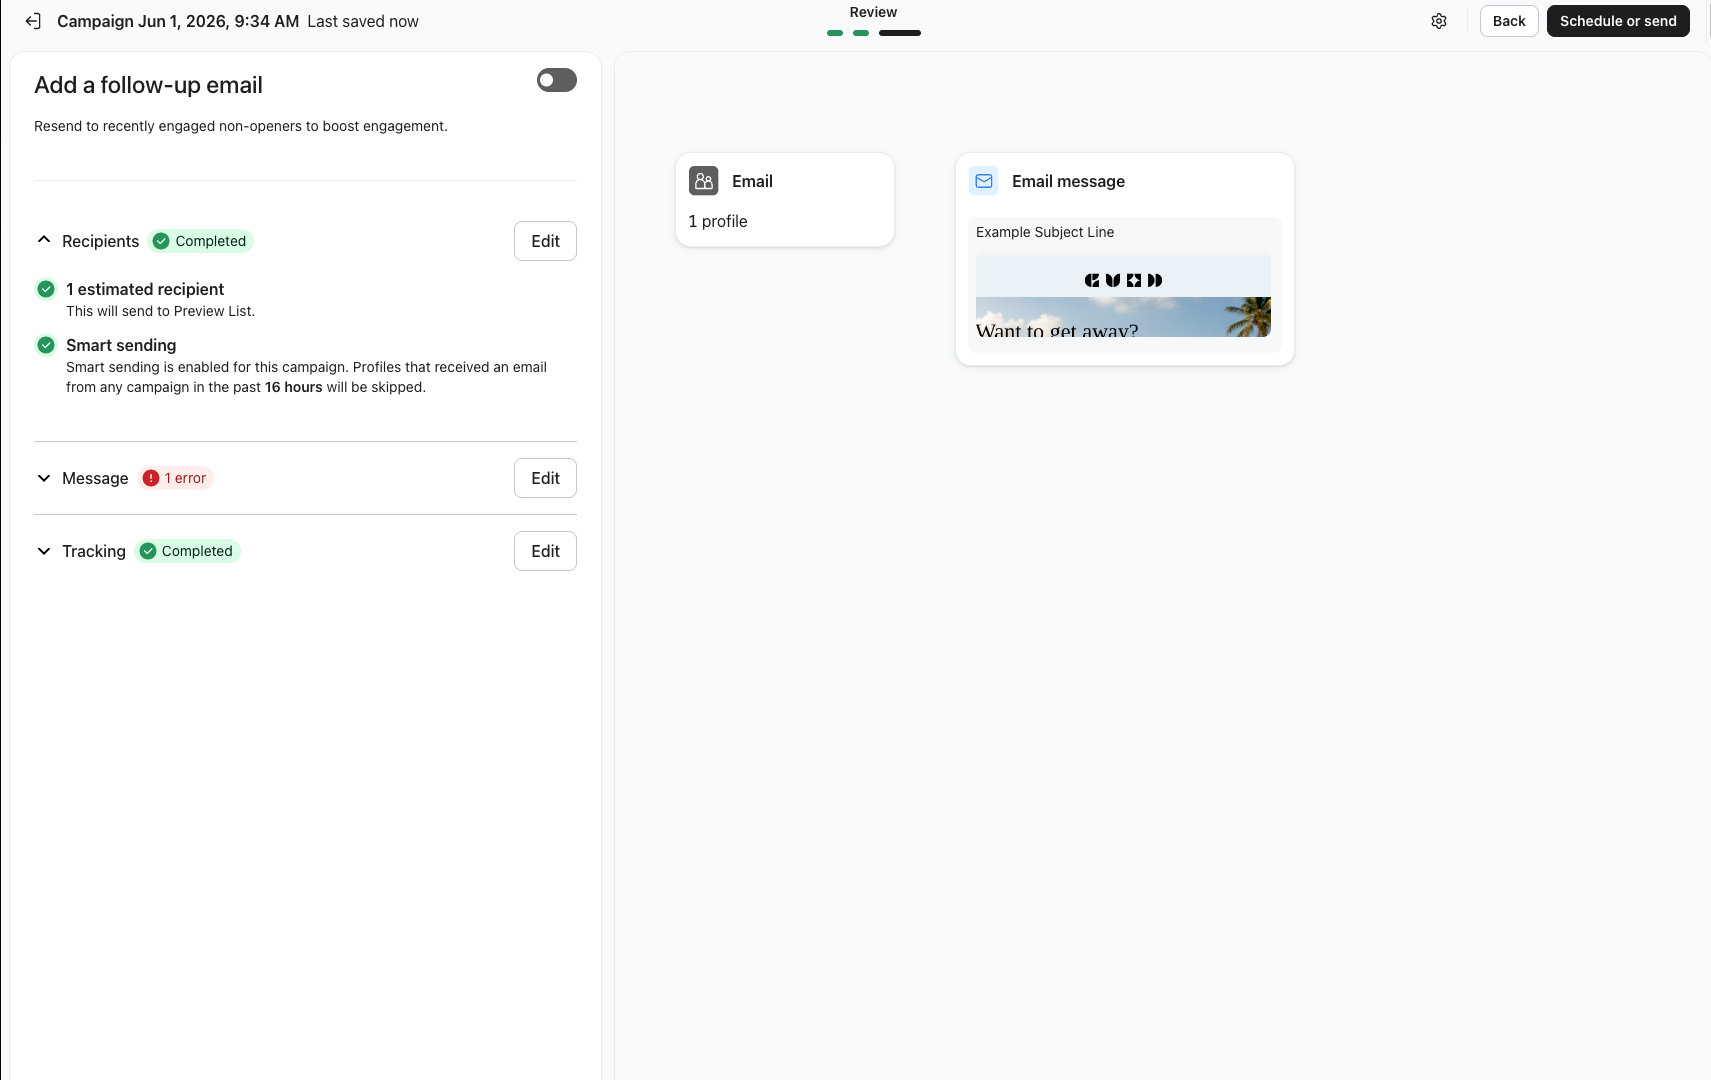
Add recipients
The next screen covers who you send to, and details about how you send. A campaign needs at least 1 recipient in order to send, otherwise it will be automatically canceled.
- Choose an existing list or segment to target. Klaviyo recommends sending primarily to engaged subscribers (i.e., those who have opened or clicked an email recently). If you already have flows sending in Klaviyo, then you have enough data in your account to create an engaged segment.
- If you want to send to multiple lists/segments, select which lists/segments you would like to include or exclude. You can send a single campaign to a maximum of 15 segments/lists. Learn more about Klaviyo's multi-list sending feature.
- Make note of the expected recipient count — this estimate removes duplicate profiles, excluded profiles, and suppressions.
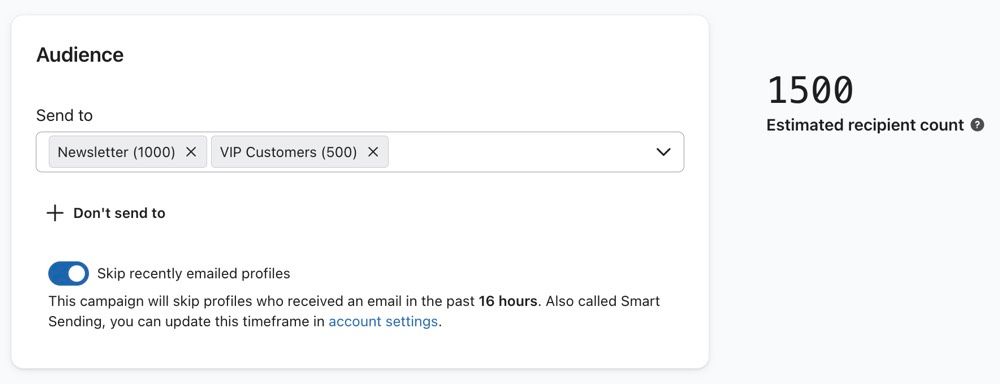
- Optional:
- To avoid sending to certain groups, add a segment under Don't send to.
- To avoid sending to certain groups, add a segment under Don't send to.
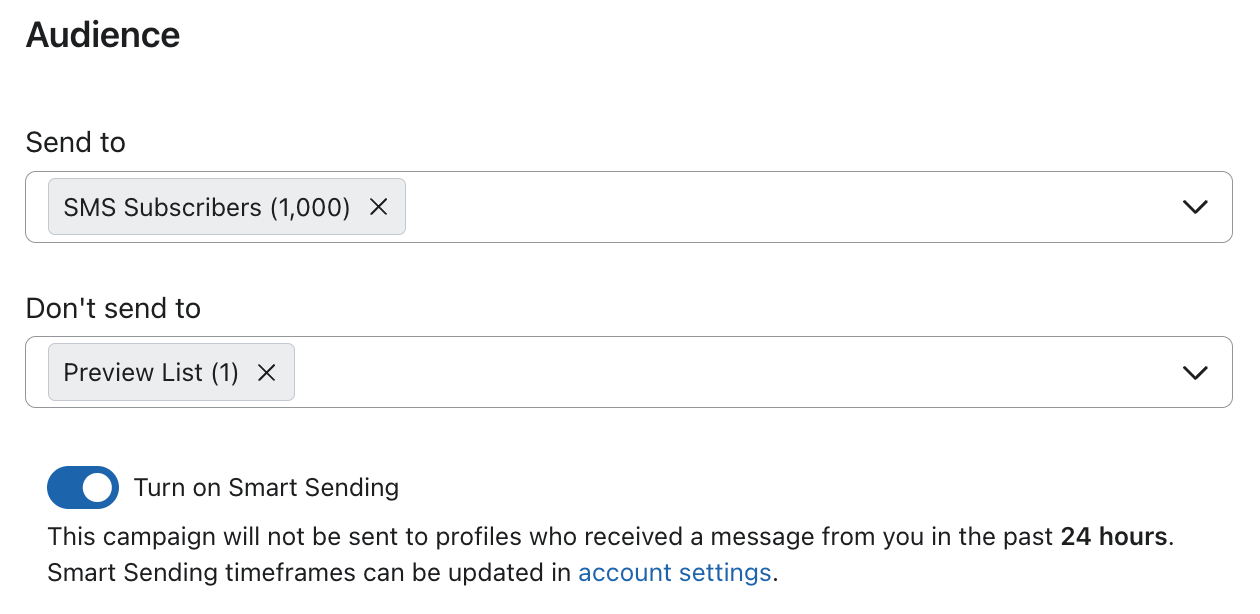
- To avoid sending recipients too many emails at once, turn on Smart Sending to skip profiles who have recently received an email from your account.
The option to skip based on message type is only available for SMS campaigns.
- Choose whether recipients who have recently received another message via this channel should be skipped or not.

- Click the gear icon to edit the name and tags of the campaign if desired.
- In the sidebar, click the Tracking tab to enable or disable tracking parameters (i.e., UTM tracking). Make sure to click Save to save your changes.

Create the email content
The next screen in the wizard is where you build your email template. Create a new template or choose a template from the template library. At this step, you can also choose to add a variation to your email to A/B test your campaign.
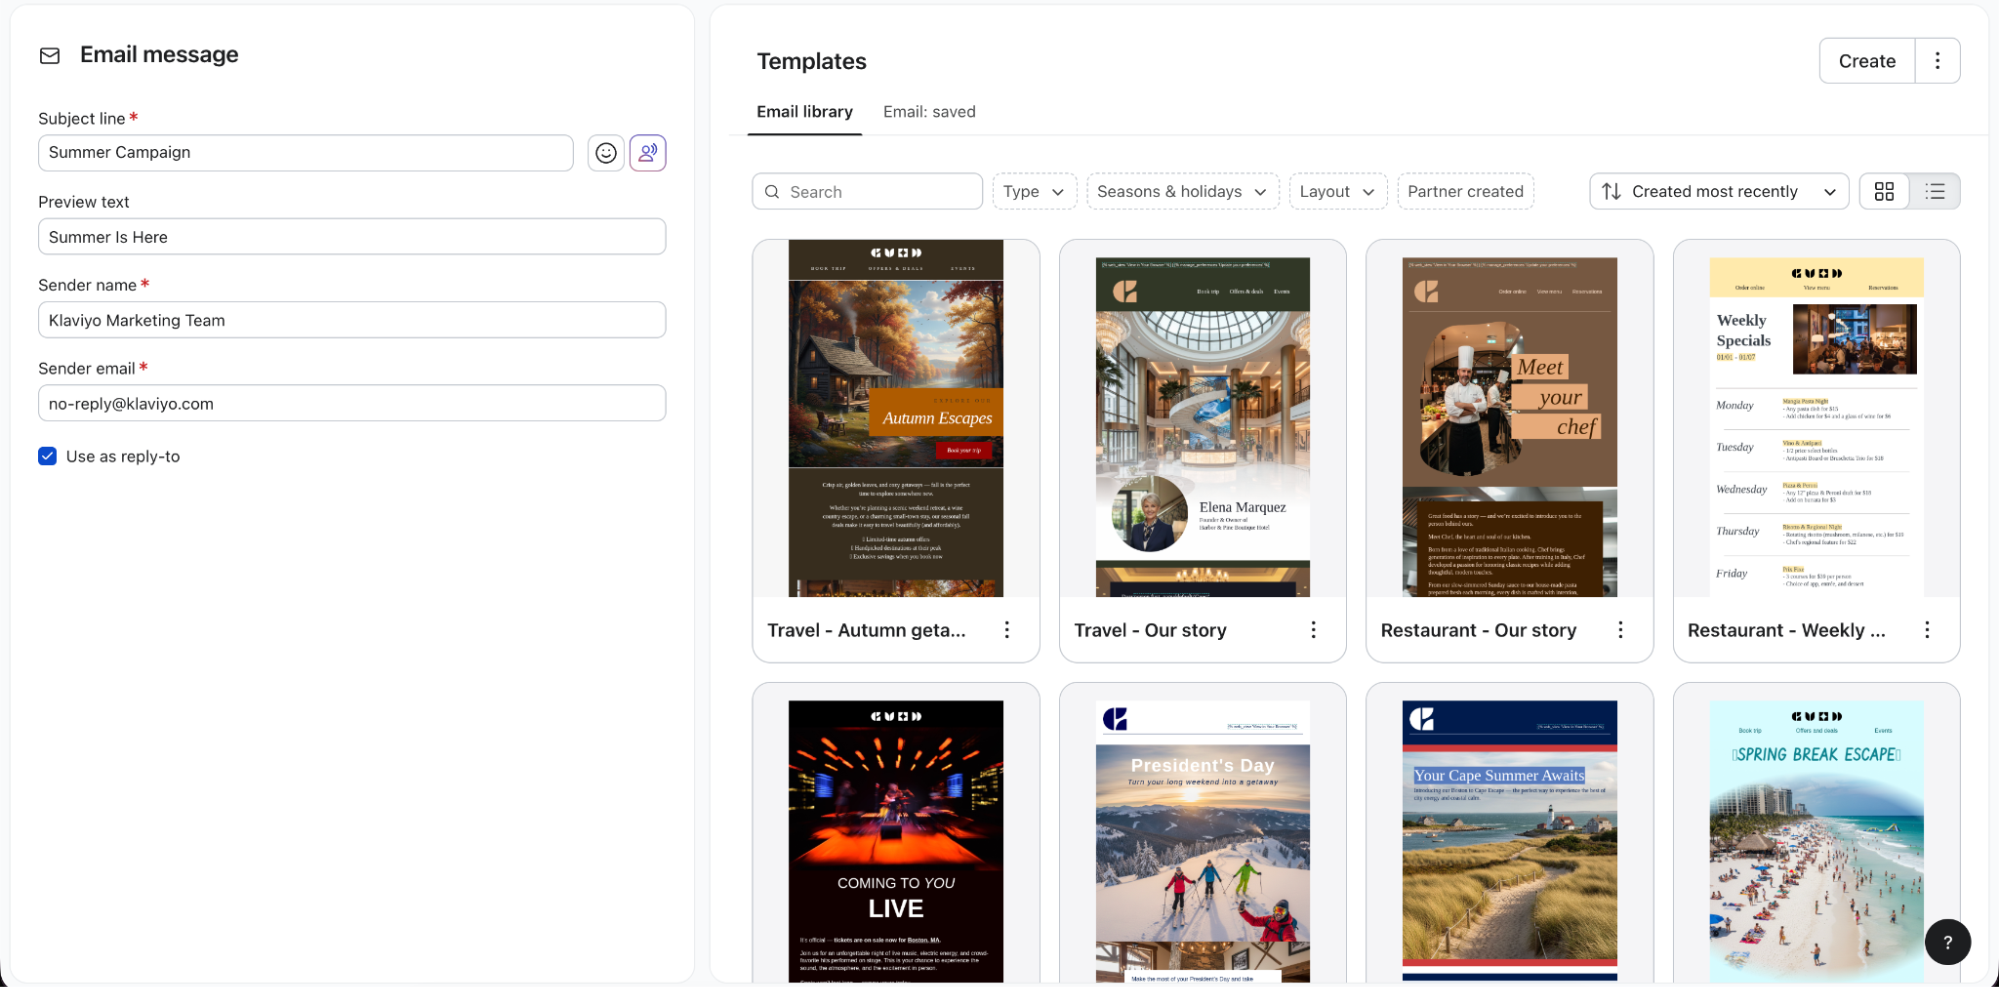
- Double-check the subject line, sender name, and sender email address; you can add a different reply-to email address if you would like responses to go to a different inbox (for example, if you want your Klaviyo email to come from a personal email but responses to go to a support inbox).
- Select how you would like to create campaign content:
- Saved templates
Choose one of the templates you have created and saved before shown on the right. - Email library
Browse the library for different drag-and-drop template options. - Text Only
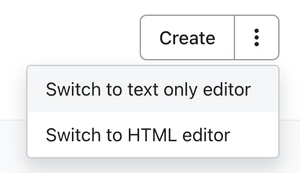
Click the action button and select Switch to text only editor. If you'd like to send a text-only email, this is the option you're looking for. This is a good choice for sending an email that looks like it came directly from you rather than your organization.
- HTML
Click the action button and select Switch to HTML editor. If you have your own HTML email template you're importing, or you want to code an HTML template from scratch, this is the option to choose. - Create a blank email
Use the drag-and-drop editor to make changes to your design and click Next.
Schedule and send your campaign
The third and final screen of the wizard allows you to review, schedule, and send your campaign. At this step in the wizard, you can choose to add a variation to your email to A/B test your campaign.
- After editing your campaign's content, click Next.
- Review all sections and correct any issues that are indicated in the sidebar. If everything is ready, click Schedule or send at the top of the page.
- Schedule or send your campaign.
Select when you would like to send your campaign and it will be queued and sent within a few minutes after the time you set. You can either send immediately or send at a later date and time. Learn more about campaign schedule and send options.
When you schedule a campaign email, Klaviyo begins to add in the recipients, determining who to include based on any excluded lists and the settings you've chosen. For campaigns targeting hundreds or thousands of recipients, this process can take several minutes during high-volume sending periods. Learn how to cancel or reschedule a campaign.
Example email campaigns
- New or featured
Highlight curated products that are new or in-season, or feature what's new with your company or organization. - Storytelling
Your business or organization is one of many out there. Explaining what makes it unique, and featuring the people "behind the brand," can build brand loyalty and community by helping your subscribers feel more connected to what you do and who you are. - Highlight interesting content
Provide a short lead into a recent blog post, or another piece of content you’ve created, and send subscribers a link to read more. Developing your company's voice as a relevant go-to source for new and interesting content in your industry is a great way to keep subscribers and customers coming back for more. - Promotions
Announce a special promotion or sale your business is offering. Even better if it's exclusive to email subscribers — creating a sense of urgency and exclusivity drives action.
Review your results
Your first few campaigns are critical for building healthy email deliverability. Use Klaviyo's campaign reporting tools to see how your campaign performed and identify areas of improvement. Learn about deliverability and the importance of sending to engaged subscribers in order to maximize your revenue over time.
Additional resources
- How to create and send an SMS campaign
Learn how to create and send an SMS campaign in Klaviyo. Note that the process is almost exactly the same for MMS campaigns. The only difference is that you add an image or GIF during the content creation stage.
- How to cancel a scheduled or sending campaign
Learn how to cancel a campaign that has been scheduled or partially sent. Campaigns that have already been fully sent cannot be cancelled. If you don't see the option to cancel a campaign by following the steps below, then sending is already complete and it can no longer be cancelled.
- Understanding available campaign analytics
Learn how to use Klaviyo's campaign reporting to gather insights on how your messages are performing and what happens after someone opens or clicks. Use these campaign analytics to dig deeper into website activity, checkouts started, and revenue that is directly attributabed to each message.
Learn about another way to send emails:
- Getting started with flows
Learn how to use flows, also known as automations or drip campaigns, in Klaviyo for personalized and automated communications to your customers, and learn how to set your first flow live.