Understanding flow branching
You will learn
Learn how flow branching helps you personalize flows so that you can send individuals down different paths depending on what you already know about them.
Flows allow you to automate timely touchpoints with your contacts without losing any of the relevance and personalization required to build an impactful marketing strategy. For example, an abandoned cart flow doesn't just send a generic follow-up email to all cart abandoners — using Klaviyo's default abandoned cart flow, all shoppers will receive an email personalized with each item they left behind.
Flow branching helps you take this personalization to the next level. Klaviyo supports multi-branch splits, which route profiles down different paths — up to 20 in a single split. Learn more in the multi-branch split help article.
The multi-branch split
With a multi-branch split, you define conditions for each path using the same logic you see in our segment builder. In this way, splits look similar to flow filters. Unlike flow filters and segments, however, splits don't keep certain people in your flow and filter the rest out — everyone continues through the flow, just down different paths.
In the visual flow builder, splits are a configurable component. A split creates multiple paths — up to 20 (19 you configure, plus an "Everyone else" path). On the canvas you'll see a path card for each. Klaviyo evaluates the paths in the order you arrange them — Check first, Check second, and so on, ending with Otherwise — and sends each profile down the first path whose conditions it matches. A profile that doesn't match any configured path goes down the "Everyone else" path.
When using splits, it's important to think about the placement of your time delays. For instance, if you want to change the time someone receives a message depending on what path the profile goes into, place a time delay directly after the split in each path. However, you may want to split based on whether someone performs a certain action within a given timeframe, such as waiting a week to see if someone placed an order before sending an email. In this case, the time delay must go before the split.
There's a single split action. Each path is defined by conditions you build in the filter builder. You can branch on profile data — properties, activity, location, list membership, and more — and, in metric-triggered flows, on data from the flow's trigger event.
Conditions based on the trigger event are available in metric-triggered flows only.
Best practices
Abandoned cart flow
Let's say we'd like to create unique paths for those that have over a certain value left behind in their cart.
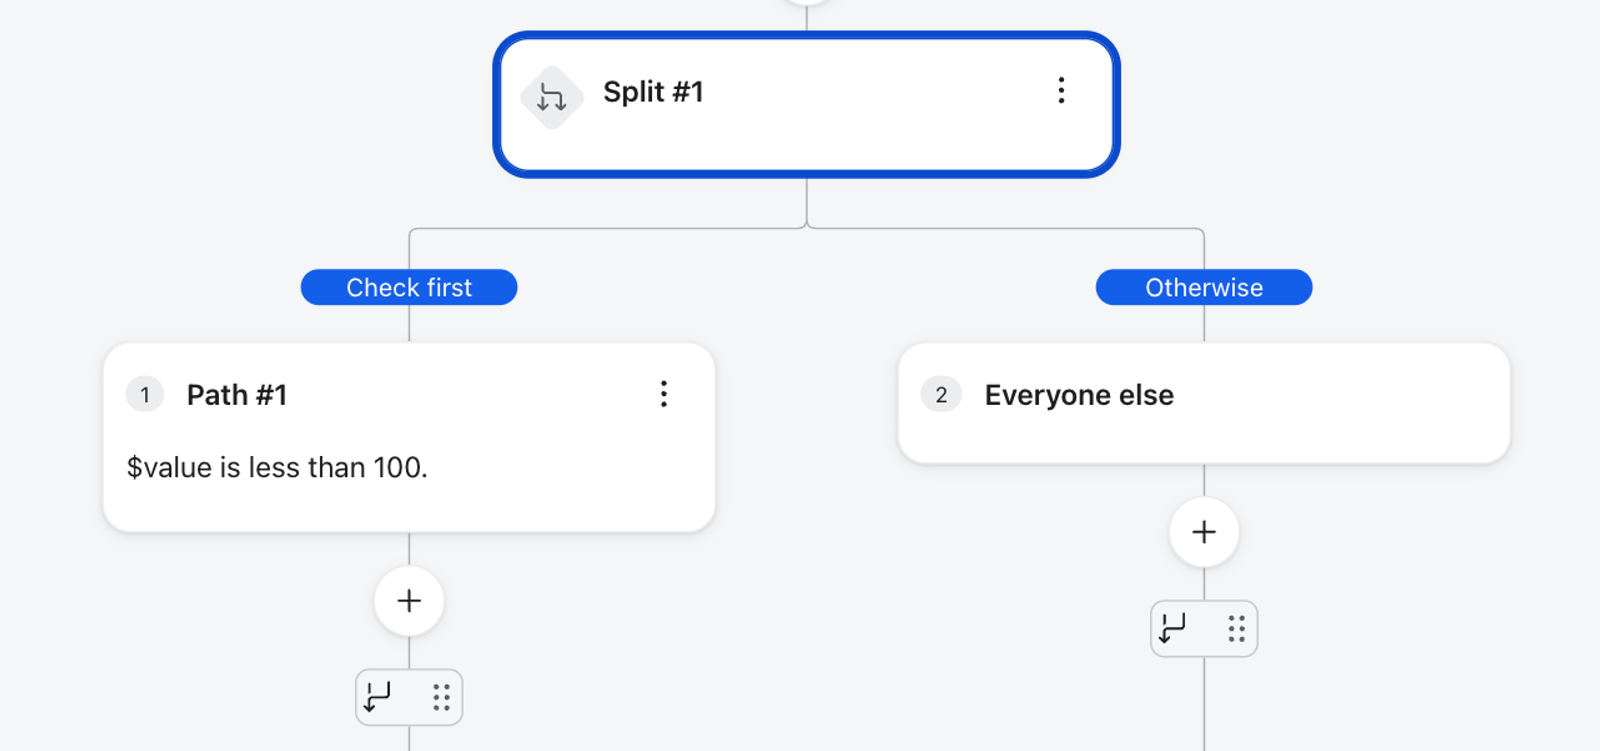
For those who left behind high-value carts, you may want to offer a greater incentive for recovery — for example, free shipping, or a percentage off their order if they complete their purchase. For shoppers that left less valuable carts behind, you certainly want to follow up, but you may not want to offer a discount given the expected ROI.
By adding a multi-branch split into an abandoned cart flow, you can immediately create 2 paths for cart abandoners based on their cart. This data point (cart value) is captured in the Started Checkout event that serves as the flow's trigger.
Post-purchase flow
Let's say you'd like to create unique paths for first-time buyers and repeat purchasers in a flow triggered by Placed Order. The diagram below uses Viewed Product as its trigger; for this post-purchase example, use Placed Order instead.
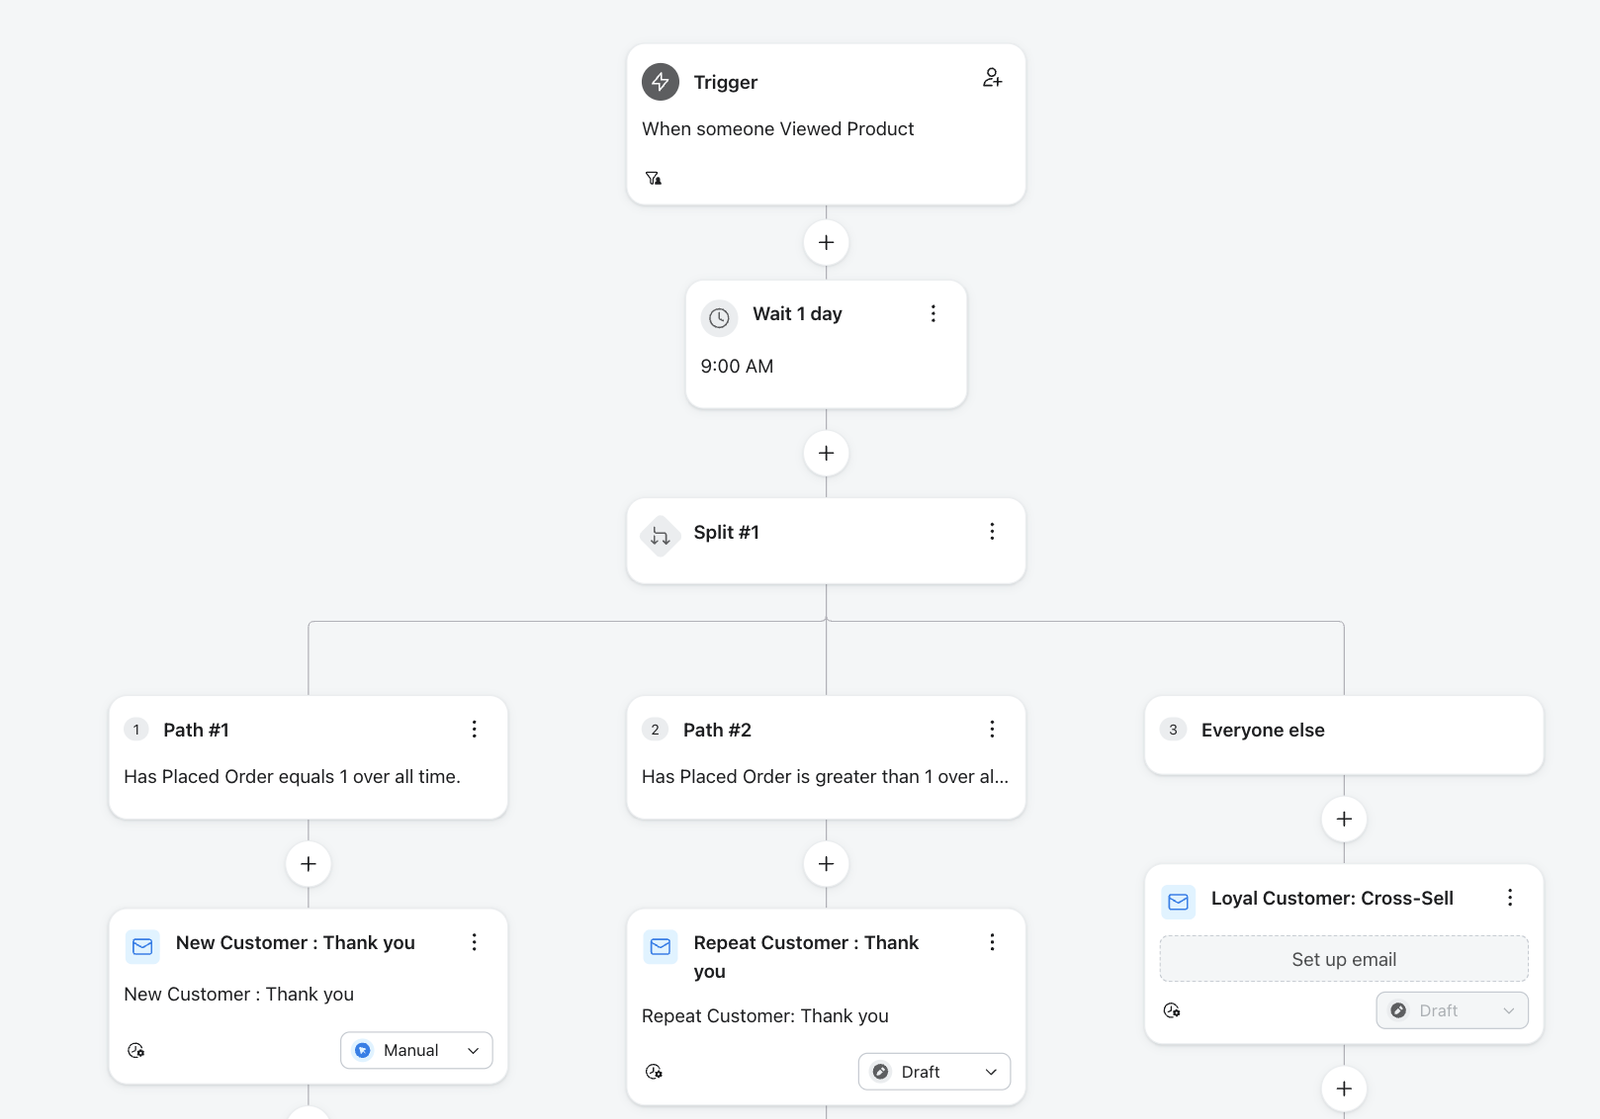
When someone buys from you, this is a great time to reach out and strengthen your relationship.
When a customer buys from you for the first time, it is important to recognize they've just gone through a process of discovering your business, evaluating your products, and making a decision to purchase from you. Follow-up that validates this choice and fosters a positive customer experience is essential.
Those who place an order but have already ordered before in the past are farther along in their relationship with you. In the customer lifecycle, you're working to retain them and inspire them to become not only loyal customers but also loyal promoters and advocates. Your content in a post-purchase series should be different for these repeat purchasers than for your first-time buyers.
To treat first-time buyers and repeat buyers differently in a Placed Order flow, use one split with three paths: Check first: has Placed Order exactly 1 time over all time; Check second: has Placed Order 2 or more times over all time; Otherwise: Everyone else. Count the purchase that triggered the flow: a first-time buyer has placed 1 order, not 0. You don't need to chain splits to create these groups.
Tip: To create more groups, add more paths to the same split (up to 20). Don't place another split under the "Everyone else" path to get extra branches — that recreates the old workaround multi-branch splits replace.
Browse abandonment
In your browse abandonment flow, you may want to create different paths for people who have viewed products more than 3 times during a chosen time period and everyone else.
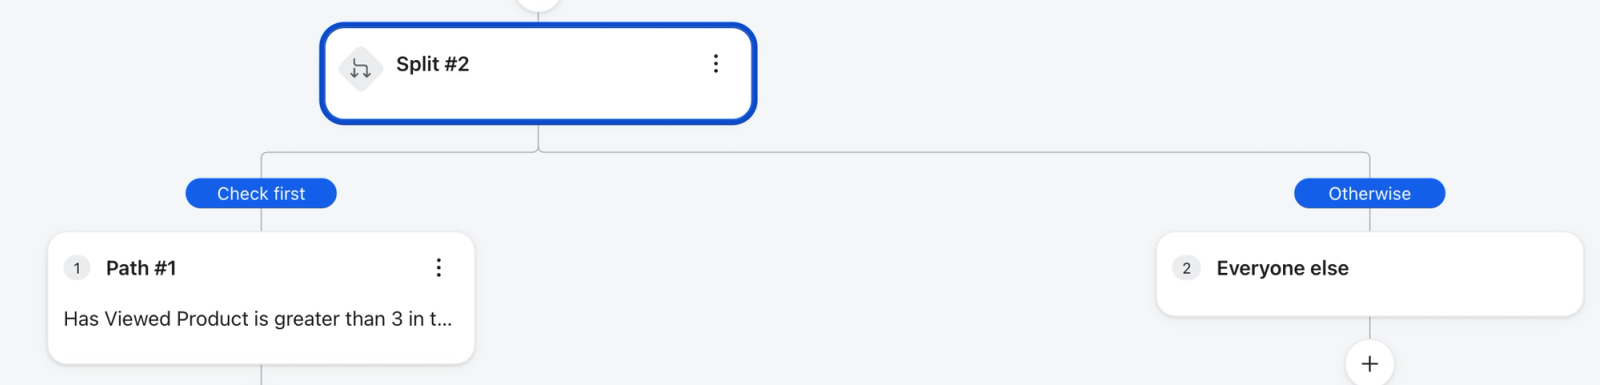
There are 2 key types of visitors to your website: those who know exactly what they want when they get there, and those who are there to browse. Targeting your site visitors with the right messaging based on their browsing behavior can yield high returns.
Those who only visited a single product page may have arrived through a direct search or otherwise knew how to land right where they wanted — your follow-up should focus mainly on that specific item, with the goal to get that shopper to come back and buy it (or a similar recommended item).
Those who viewed products more than 3 times, on the other hand, may be comparing options or returning to the same item. Depending on what they viewed, you could promote popular items, show more of a specific collection, or provide social proof to encourage them to take another look.
If you create a browse abandonment series and add a multi-branch split to target these 2 primary types of visitors, you can put your data to work early to drive deeper engagement starting with the very first page view.
Troubleshooting
If a flow branch is not behaving as expected, such as if profiles are going down the wrong path, check the following:
Make sure that the split has a condition set up
An unconfigured path shows Add path criteria and is skipped when profiles reach the split. If no path has criteria, every profile goes down Everyone else. Configure each path's criteria before setting the flow live.
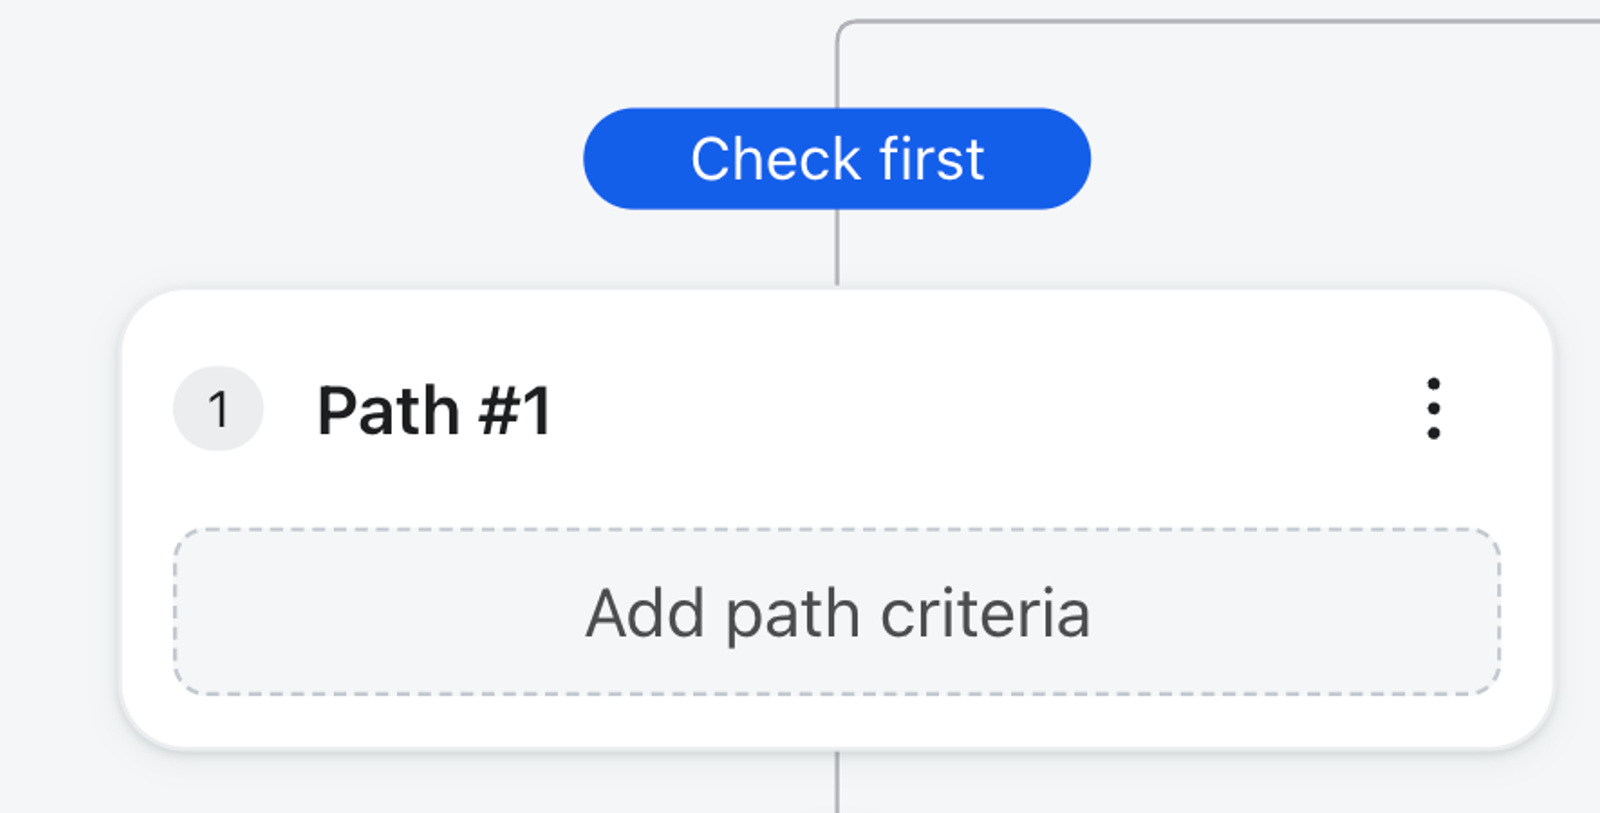
Click the split to open its settings, then select Add path criteria or Edit path for the path whose conditions you want to change.
Make sure there is enough time for the split to check the profile
If you're encountering problems where your split fails to evaluate actions like profile clicks or data additions such as custom properties, it's often because there isn't sufficient time between the action processing or data being added to the customer profile by the time the customer meets the split.
In order to make sure there's enough time before your customers are evaluated by the split, you will need to add a time delay right before the split. For example, if you want to add a split to filter customers who clicked a link in your email, there needs to be a long enough time delay to allow the customer a chance to click. If the customer clicks after they were already evaluated by the split, they will go down the path for customers not clicking the link.
If profiles seem to take the wrong path, compare when they reached the split with when they took the action or acquired the profile property used in your criteria. Click the multi-branch split and, if you have access to flow reporting, select View details in the Performance section to review its recipients. Then open the profile you're investigating and compare the relevant activity timestamp. For a custom property, compare when the action that set the property took place.
Make sure that the paths have the correct messages
Drag and drop individual messages into the correct path. If a split has exactly 2 paths and the actions are on the wrong path, click the 3-dot menu on the split card, select Flip split, then confirm Flip split to swap the actions between the paths.
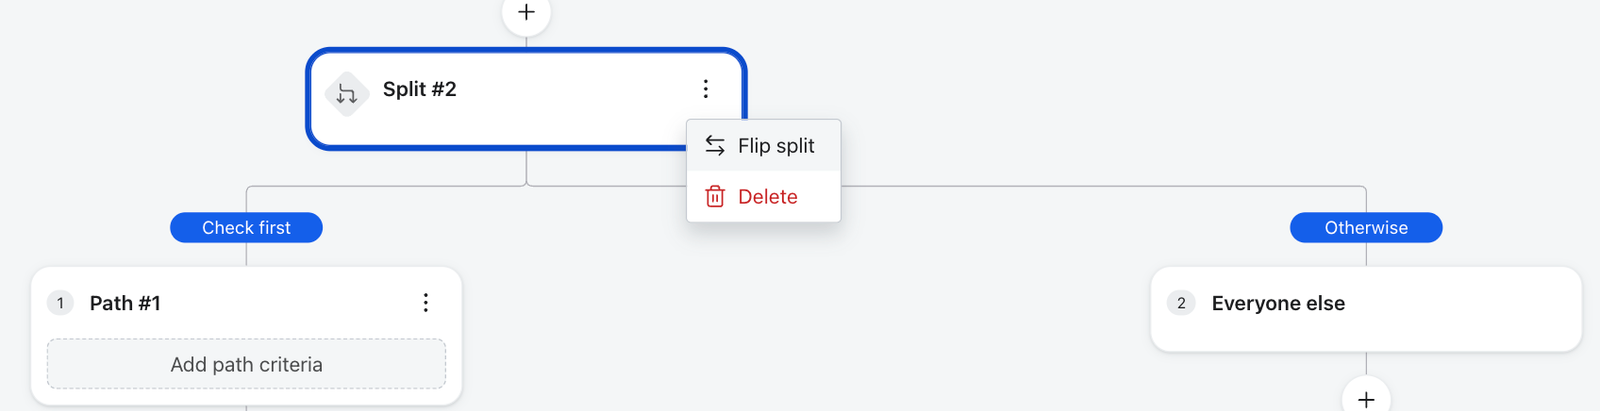
Flip split is available only when a split has exactly two paths. Flipping swaps the components between the condition path and the 'Everyone else' path.
Any recipients already scheduled and waiting will not be impacted. Only new people entering your flow will be scheduled on the flipped paths.
Make sure that the condition of the split says exactly what you intended
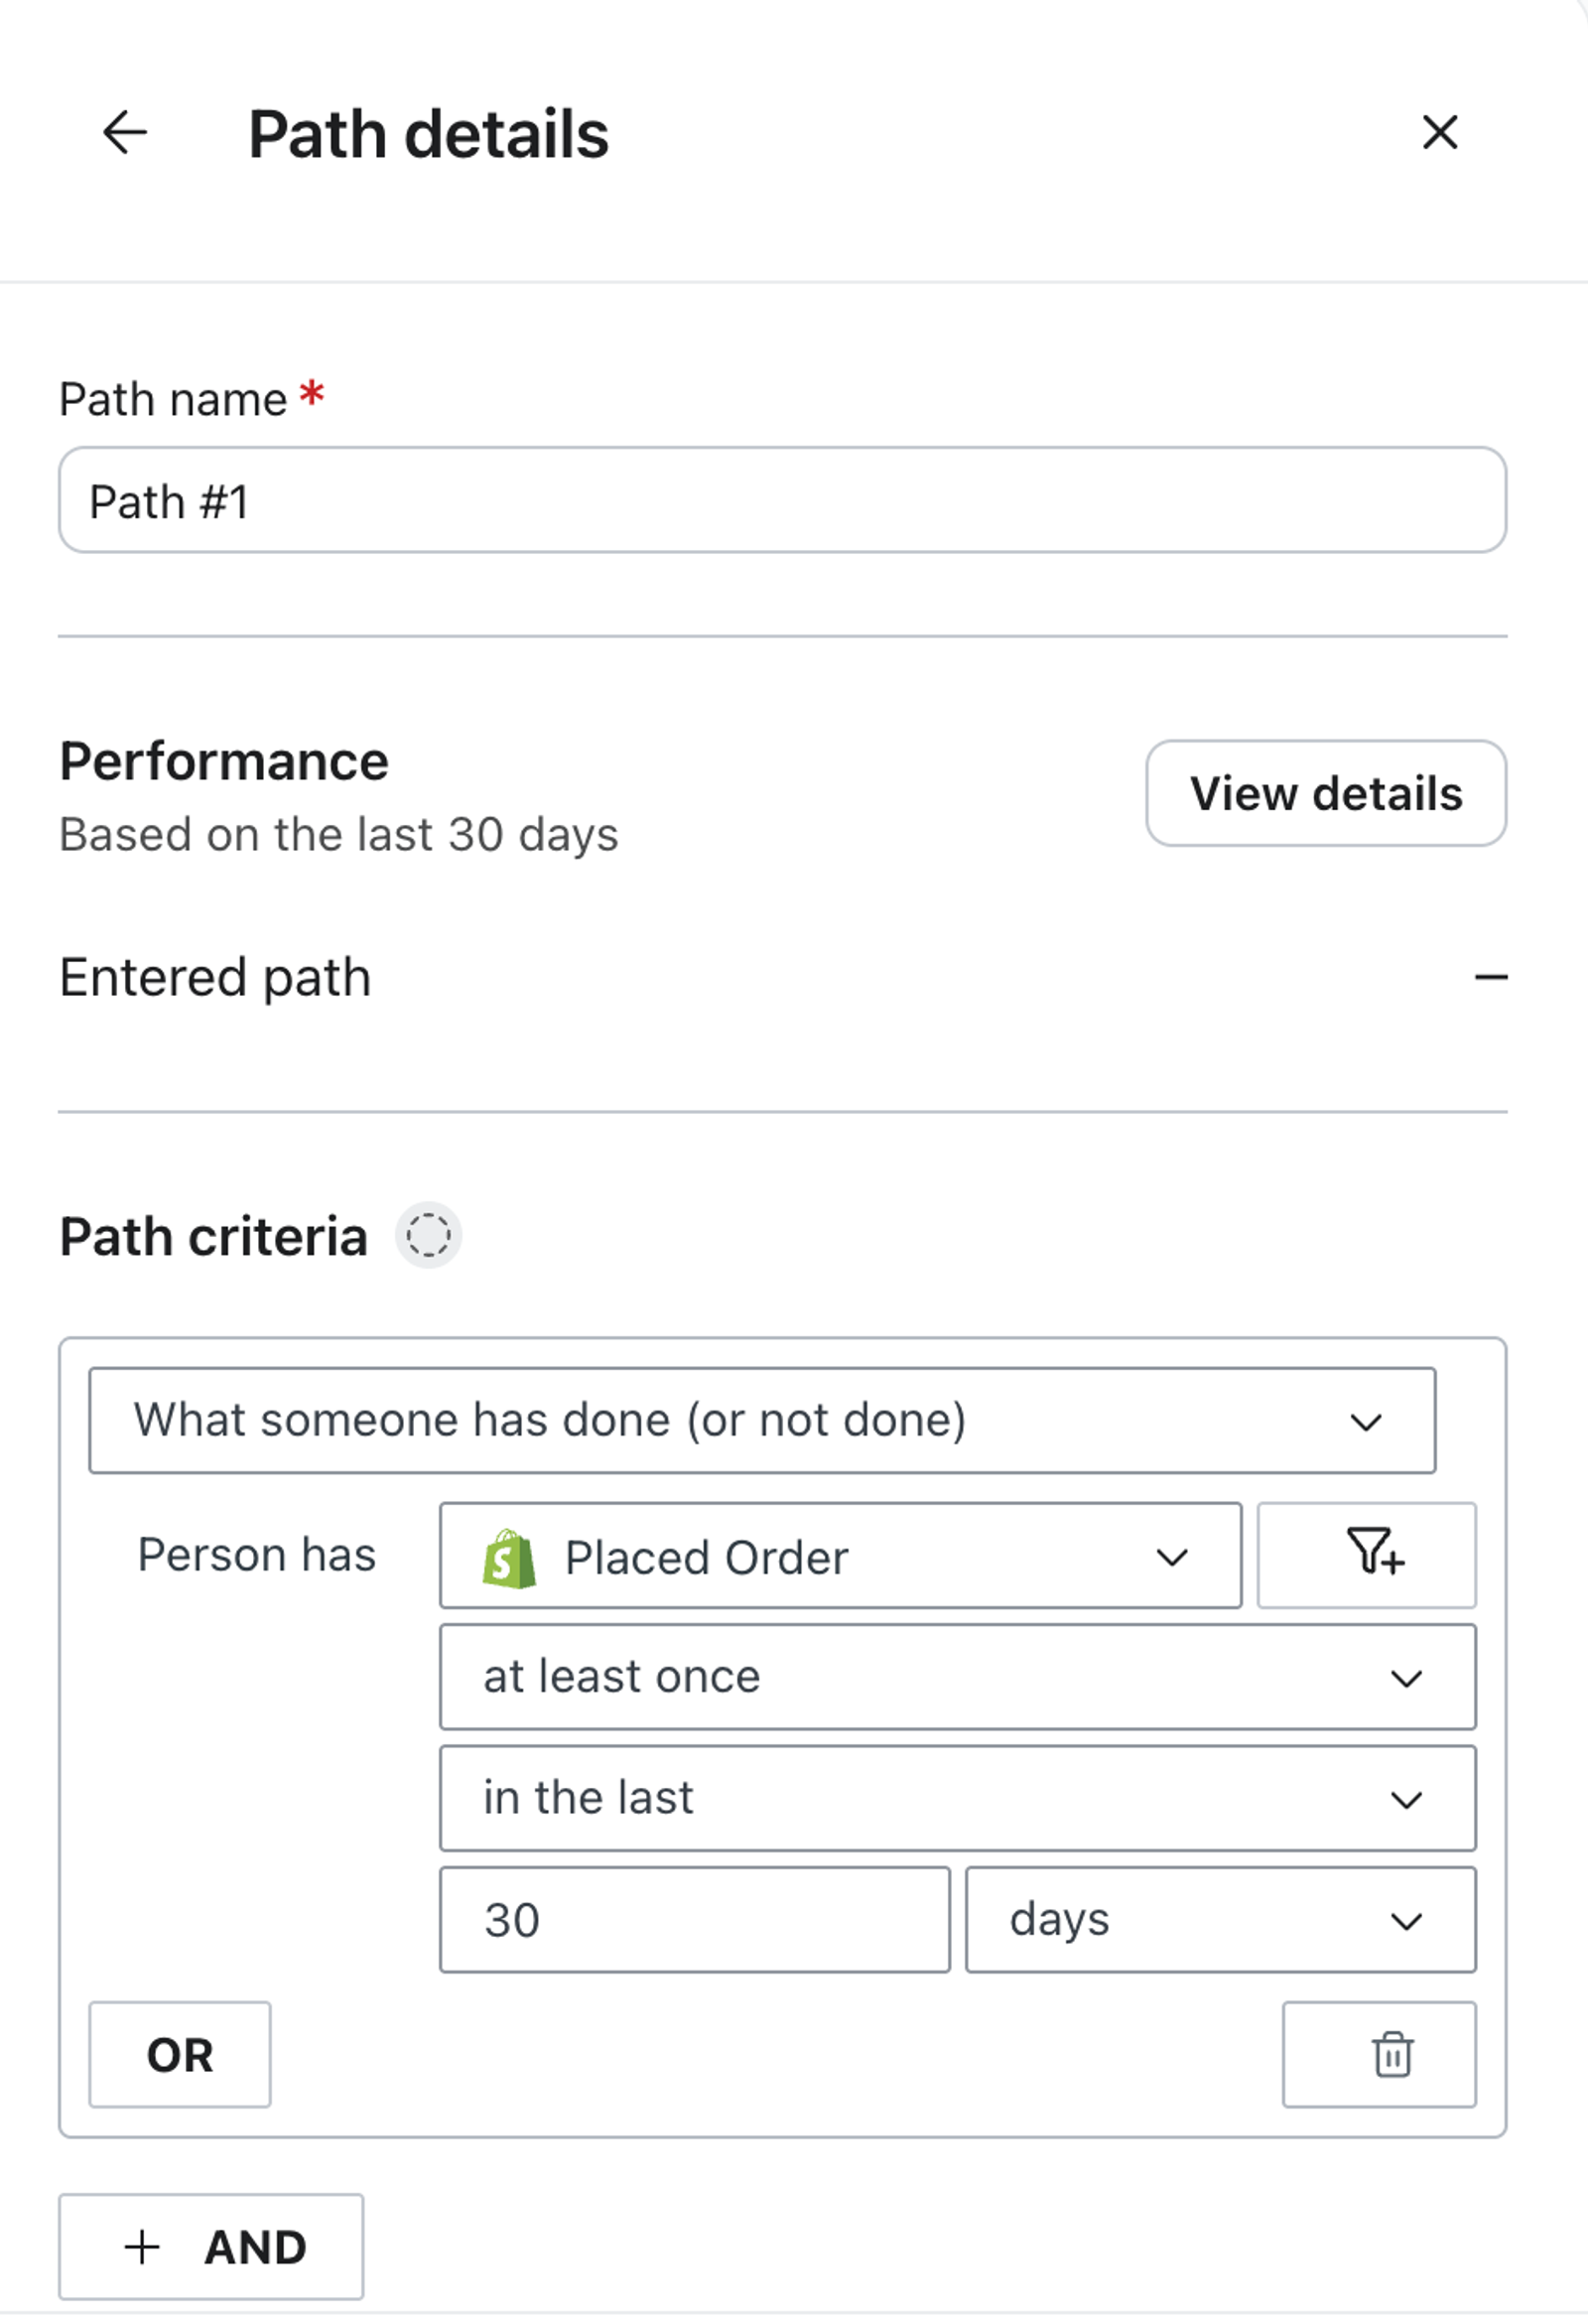
Click on the split to view the settings sidebar. Review the split conditions to confirm that it is set up to check for exactly what you intended. For example, if you want to check if someone has placed an order at any point in the past, make sure the condition is set to over all time and not in the last 30 days, which is the default setup.
Additional resources
Find out more about flows:
- Getting started with flows
Learn how to use flows, also known as automations or drip campaigns, in Klaviyo for personalized and automated communications to your customers, and learn how to set your first flow live.
- Understanding how contacts move through a flow
Learn how contacts move through a flow. Flows are automated Klaviyo workflows that are set in motion by an initial trigger and then include one or more steps. Flows can be built to send timely communications to recipients, or they can simply apply certain actions, like updating a specific field on a profile.
- How to join and disconnect flow paths
Learn how to join and disconnect flow paths in the flow builder to create targeted customer journeys stemming from the same initial trigger. However, as you start to branch your flows, there may be instances when you'd like to bring these separate journeys back together down the same path.
- Multi-Branch Splits
Send profiles down up to 20 paths in a single split, each matched by its own conditions. Learn how multi-branch splits work and how to build one in a flow.