How to test and preview flow messages
You will learn
Learn how to test your flow after you have configured the trigger, filters, and messages. You may want to test the first few messages to make sure they look exactly right, especially if the email or SMS contains dynamic variables. There are two types of tests you can run:
- Preview individual flow emails or SMS messages to verify that the content is correct using built-in tools that allow you to preview with real data from your account.
- Preview your flow trigger and filters to check whether example profiles would qualify to enter the flow. The flow trigger preview tool does not test splits or message-level filters. To see who reaches a message without sending it automatically, use Manual mode as described below.
Test and preview email content
Testing and previewing email content can be quickly and easily done while you're editing each email.
- While editing a flow message, click Preview & test in the upper right.

- Select the event and person you want to use to see a preview directly in Klaviyo, or click Send test to send a preview to your own inbox.
- Optionally, select Inbox testing to preview your email in various inboxes. Learn more about inbox testing.
Test and preview SMS messages
Like emails, testing and previewing SMS messages can be done quickly as you’re editing your message.
- In a flow, click on the SMS message you want to test.
- Click Edit on the right-hand side.
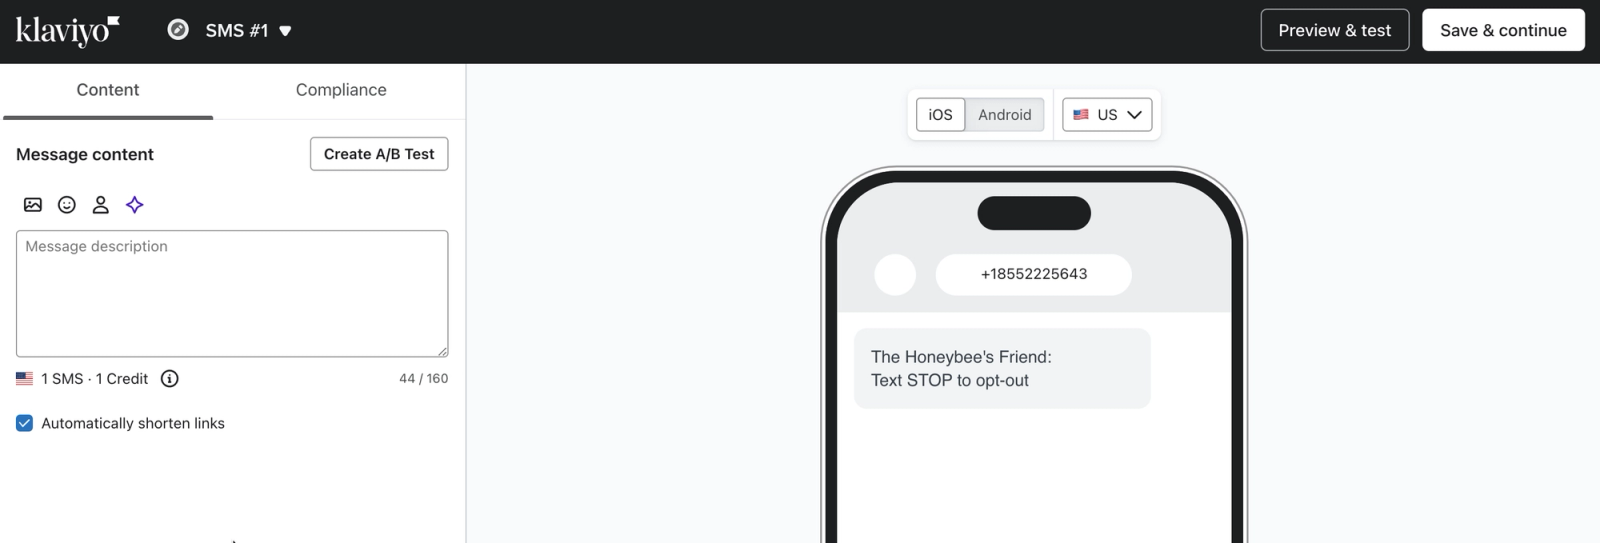
In the SMS editor, there are three important areas:
- Left: A space to configure your SMS content
- Center: A preview of how this message will look upon delivery
- Upper-right: A Preview button to open the preview panel, where you can choose data to preview with and send a test
Content configuration
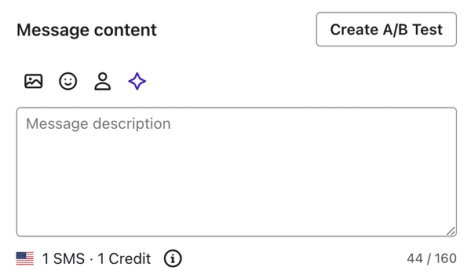
The message count is based on the number of characters in a message. However, multiple messages will appear as a single message unless the recipient's phone or carrier does not support concatenated messages. This is because the underlying technology will send it as multiple messages, but your carrier and phone will reformat the SMS so that it appears as only one.
Use the icons above the message content field to attach an image or GIF (making the message an MMS), add emoji, or select personalization tags. Use the star icon to have AI draft content for you.
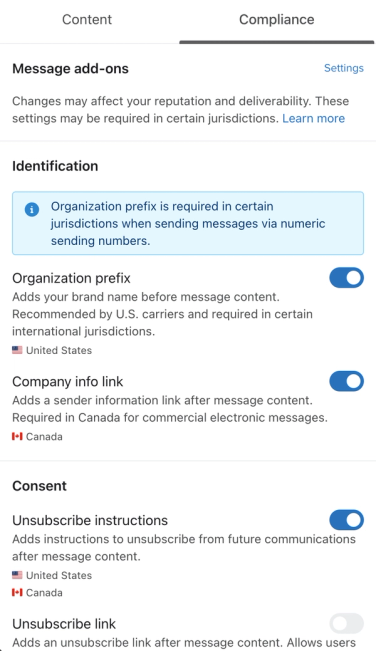
The Compliance tab offers message add-on options, including opt-out language, which is required by some countries and carriers. For US recipients, you can also add an organization prefix to the beginning of the message. As for Canadian recipients, you can add an info link with your contact information, which is required under Canadian law.
The mobile preview
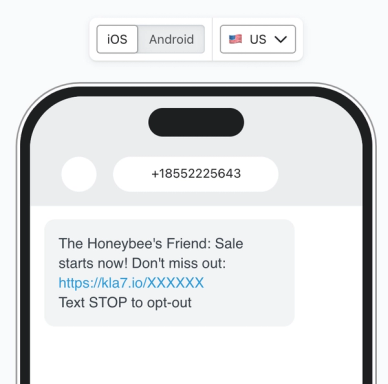
When creating and configuring your message, you can see what it will look like once it’s sent to a mobile device.
The organization prefix comes at the beginning of the message, while opt-out language and the info link are added to the end of the message.
The previewing tab
In the upper right-hand corner, click Preview to choose data for your message preview. For metric-triggered flows, you can navigate between up to 10 recent events for the flow’s trigger (for example, recent Started Checkout events in an abandoned cart flow). For date property flows, the preview defaults to profiles with that date property set. If there are no recent events or profiles to preview with, you can search for a profile.
As for list- and segment-triggered flows, the tab will show those added to the specified list or segment, but you can search for any profile in your account. You can search for someone by name, phone number, or email address. You can preview the message with any profile, meaning you can preview the message as someone even if that person is not in the list or segment that triggers the flow.
For metric-triggered flows, open the All properties menu for information related to the event that triggered the flow, including the event variables. Hover over any line of data and click to copy the variables to your clipboard.
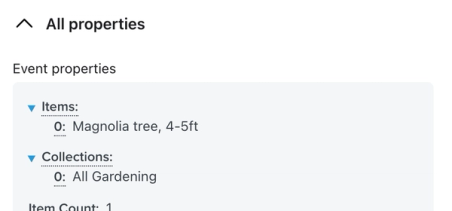
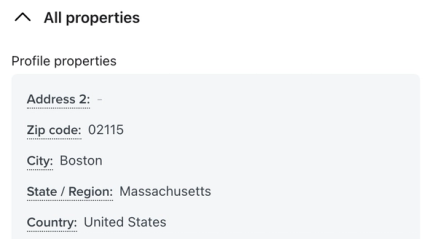
With list-, segment-, or date property-triggered flows, this menu will show details about the profile, including their first and last name, email, location/timezone, and any profile or custom properties. Open the All properties menu to view them. All of the profile properties will appear, even if they are empty on a certain profile, while the custom properties section only displays the custom properties that are applied to that profile. To use any variable for these properties in your text message, simply click to copy the property.
Send test
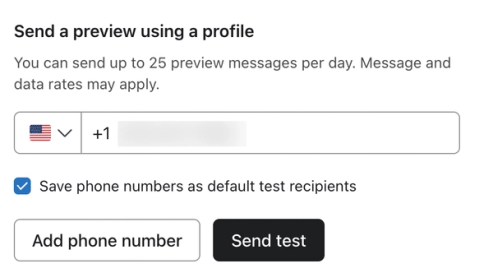
Additionally, you can send a test SMS to yourself to ensure your message looks as expected. The test message will show any images/GIFs, personalization tags, as well as how the link looks when shortened.
- From the editor, click Preview at the top of the screen to open the preview panel.
- Select a country code and type in a phone number.
- Optionally, select Save phone numbers as default test recipients if you plan to use the number again for testing.
- Click Send test. Test sends do not use your SMS credits, but they count toward your daily test-send limit. Message and data rates may apply to the recipient. If you've enabled link shortening, check the received test message to see how its links appear.
If you can't send a test, check that your account has an active sending number for the recipient's country and that your number's registration is complete. A test uses your account's sending number; it cannot be sent from an unregistered number. For US and Canadian toll-free numbers, see understanding toll-free number verification. Otherwise, check your SMS setup in the getting started with SMS course.
Test your flow logic
If your flow has complex filters, review the first few messages before enabling automatic sends. Use the flow trigger preview tool to check whether example profiles would enter the flow and pass its entry filters. This preview does not test splits or filters on individual messages; use Manual mode below to review who reaches a message at send time.
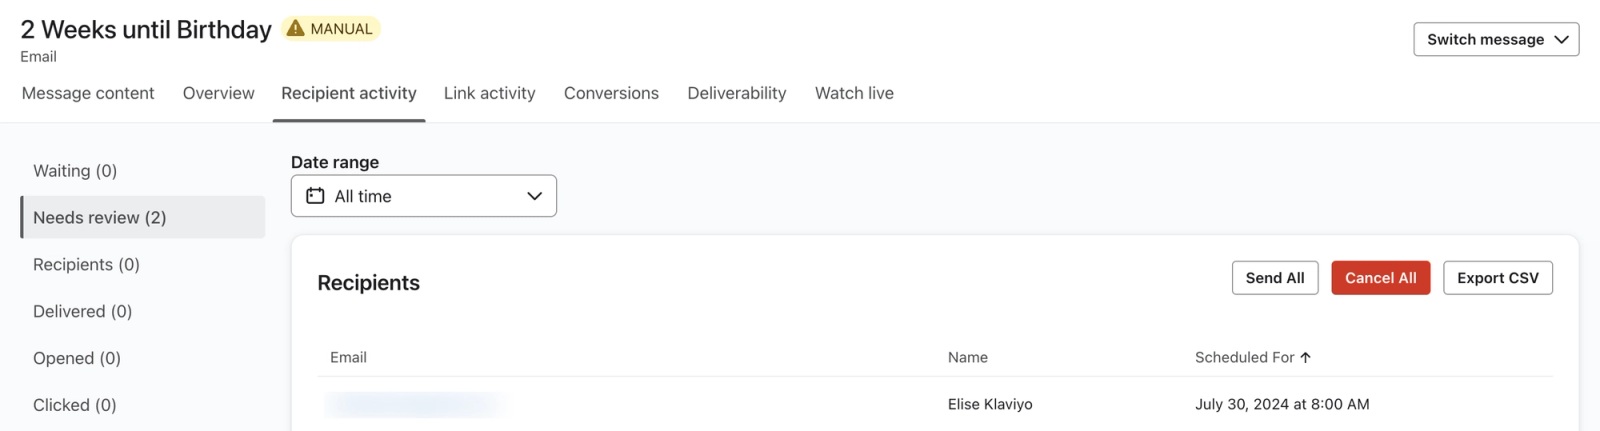
If you would like to test a specific message, you can use another method. First, change the message you'd like to test to Manual mode. Flow messages in manual mode will be scheduled in real-time as if the message were live. However, instead of being sent automatically, the message will be marked for you to manually review.
After you've set your message's status to Manual, you can watch your flow for a set period of time to observe who is queued up in the Needs Review tab. When someone first enters a flow, they will be placed in Waiting until the scheduled send time. At send time, contacts will move from Waiting to Needs Review if they pass your flow's filters.
When messages accumulate in Needs Review, you will have an option to manually send individual messages, manually send all messages, or cancel one or all messages.
Best practices for testing flow logic
There are a couple best practices recommended to ensure your flow behaves as expected:
- If the flow you've created is based on a built-in Klaviyo idea or it's very simple and doesn't need flow filters, for example, a welcome series when someone subscribes to your newsletter, you can set all messages in the flow to live and skip testing the flow logic.
- If you set a flow message to Manual and nobody appears in Needs Review, check whether anyone has triggered the flow and whether your trigger and filters allow them to enter. Recipients may still be in Waiting until the scheduled send time. Use the flow trigger preview tool to inspect entry criteria before changing your filters.
Additional resources
Find more articles on testing flows and their messages:
- How to manually send flow messages to recipients
Learn what manual mode is and how to use it to manually send flow messages. There are several instances where you might want to review a flow message before it sends. For instance, if you want to check who gets your messages or if you are testing a flow. In this case, setting flow messages to manual mode is your best option.
- How to preview a flow trigger setup
Learn how to use the flow trigger setup preview tool to ensure your flow is set up as you intended. This will help you understand how your flow is going to behave based on the trigger and profile filters you've added.
- How to use the preview panel for message personalization
Learn how to use the preview panel to understand the personalization data available for your messages and how to access personalization variables. Use the preview modal as your source of truth for personalization options.