How to add coupon codes to sign-up forms
You will learn
Learn how to add static and unique coupon codes to your sign-up forms to drive higher submission and conversion rates, and encourage customers to spend more on your site.
It’s a best practice to add the coupon code directly to the success message of your form, as it incentivizes sign-ups and allows your shoppers to claim the coupon without leaving your site. If you’re using Shopify and unique Shopify coupons on your sign-up forms, the coupon will be automatically applied to a customer’s cart at checkout when they complete the form.
Before you begin
There are a few types of coupons:
- Unique codes
Unique, also called "dynamic," coupon codes are a random series of numbers or letters that a recipient can use 1 time. Each recipient will receive their own coupon code, and no 2 recipients will have the same code. Unique coupon codes are typically longer and more complicated than static codes. - Static coupon
Static coupon codes are a single code for all customers to use (e.g., Welcome20). Every person will receive the same code to use on your site. Static codes can be shared out; however, they are easier to remember and use.
The process of configuring the coupon will differ depending on the type of coupon you use (i.e., static coupon, unique Shopify coupon, or uploaded unique coupon); however the first 2 sections of this guide should be followed regardless of coupon type.
Banner forms that do not collect email or SMS consent can only include static coupons. Banners that do collect email or SMS consent must include a unique coupon block on the success step.
Prepare your sign-up form
- Select the Sign-up forms tab in Klaviyo's left-hand navigation.
- From here, you have a few options for creating a form with a coupon in it.
- Option 1: choose 1 of your existing forms to edit and add a coupon to.
- Option 2: choose a pre-built template from the form library that has a coupon block already included. To do so, select Create sign-up form in the top right corner, then check the box for in the menu bar to filter your search in the form library.

- Option 3: Create a brand new form from scratch and configure it with a coupon. To do so, select Create sign-up form in the top right corner, then Create new sign-up form.
- Enter the form editor for the sign-up form you plan to add the coupon to.
With any of the options above, you can easily add a coupon block to your sign-up form in the form builder.
Add a coupon block to the success step of your form
Once you're in the editor for your sign-up form, you can add and configure your coupon. Follow these set up instructions for both static and unique coupons:
- In the form editor, select the submit button in the preview.
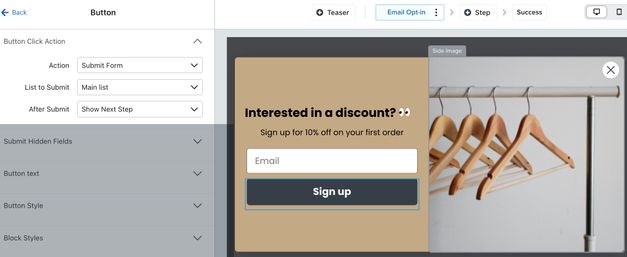
- Configure the Button Click Action settings to the following:
- Action: Submit form.
- List to Submit: Choose your list.
- After Submit: Show Next Step.
- At the top of the page, select Success to open your form’s success step. This is the page that visitors will see when they submit the form.

- On the left side of the Overview page, select the Add Blocks tab.
- Drag and drop a Coupon block (located under Elements) into the preview wherever you'd like it the coupon to appear in your form, if there is not one there already.
- Click Configure Coupon in the form preview.
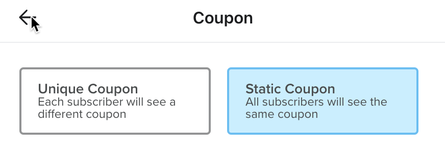
- In the settings menu that appears on the left side, choose to set up either a static or unique coupon in your form.
Set up a static coupon in your form
- At the top of the coupon settings menu, select Static Coupon.
- Type the name of your static coupon code in the textbox (e.g. Welcome10).
- If you do not have an existing static code ready, you will first need to manually create one in your ecommerce platform.
- If you just created a new static code, reload the form builder page before typing it into the textbox.
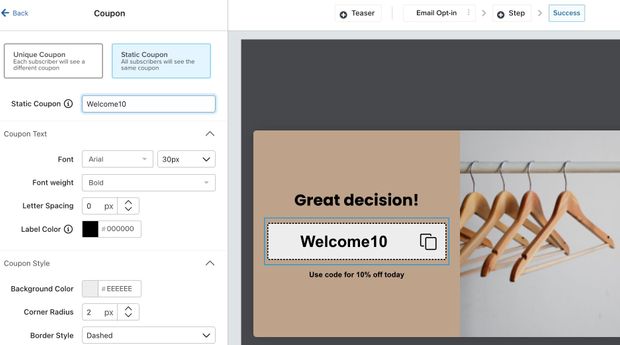
- Edit the block styles (e.g., background color, corner radius, border style, border thickness, and padding) so that the coupon is large and eye-catching.
- When you’re finished editing, click the back arrow to save the coupon.
- Skip to the final section to finish editing and publish your form.
Set up a unique coupon code in your form
At the top of the coupon settings menu, select Unique Coupon. Depending on if you are using a Shopify unique coupon or an uploaded unique coupon, your setup will differ slightly.
The ability to show unique coupon codes in a success message is currently available only for Shopify coupons, uploaded coupons, and API coupons. While it is possible to create unique coupons in Klaviyo for WooCommerce, Magento 2, and PrestaShop, it's not possible to display those codes in sign-up forms at this time. As an alternative, follow the uploaded coupons or API coupons instructions to add unique coupon codes in forms.
Shopify coupons
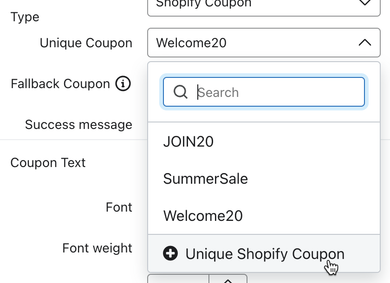
- Choose Shopify Coupon as your Unique Coupon Type.
- Click the dropdown next to Unique Coupon to either choose an existing coupon, or click the (+) Unique Shopify Coupon to create a new one.
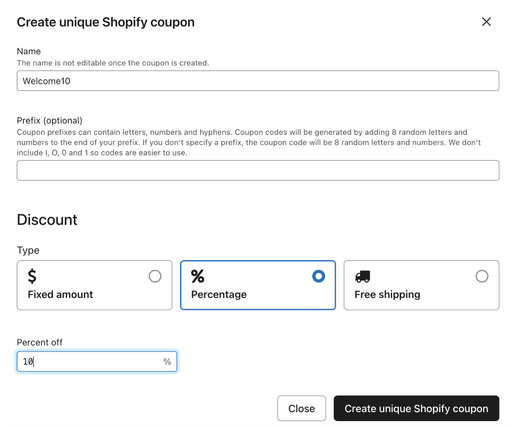
- If you chose to create a new, unique Shopify coupon code, a Create unique Shopify coupon modal will appear asking you to:
- Name your coupon (e.g. 10OFF), and add an optional Prefix.
- Select the type of discount that you would like to offer your customers (fixed amount, percentage, or free shipping).
- Choose the settings for how your coupon will operate (amount, application, activation, and expiration).
- Note that if you select After 1 year or On a specific date for Expiration, Klaviyo will generate an initial batch of 600 unique codes when the coupon is added to the form, and will generate more codes once the number available drops below 400. If you select After a certain number of days/hours, Klaviyo will generate a batch of 600 codes each day.
- Note that if you select After 1 year or On a specific date for Expiration, Klaviyo will generate an initial batch of 600 unique codes when the coupon is added to the form, and will generate more codes once the number available drops below 400. If you select After a certain number of days/hours, Klaviyo will generate a batch of 600 codes each day.
- Click Create unique Shopify coupon in the bottom right corner. This takes you back to the form builder with the newly created coupon code selected to use in the form.
- Add an existing static coupon as a Fallback Coupon. This is a static code that only appears if you run out of unique coupon codes so that your customers can still receive the same discount.
- You will need to create a static coupon in Shopify first to paste into the Fallback Coupon textbox (e.g. 10PERCENT).
- Skip to the final section to finish editing and publish your form.
Uploaded coupons
If you have not already, make sure that you have enabled uploaded coupons. Navigate to Settings > Other > Profile maintenance, then toggle on the Uploaded Coupons option.
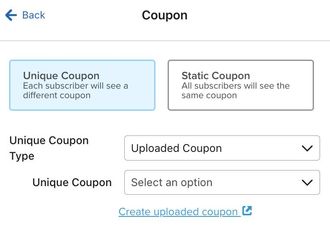
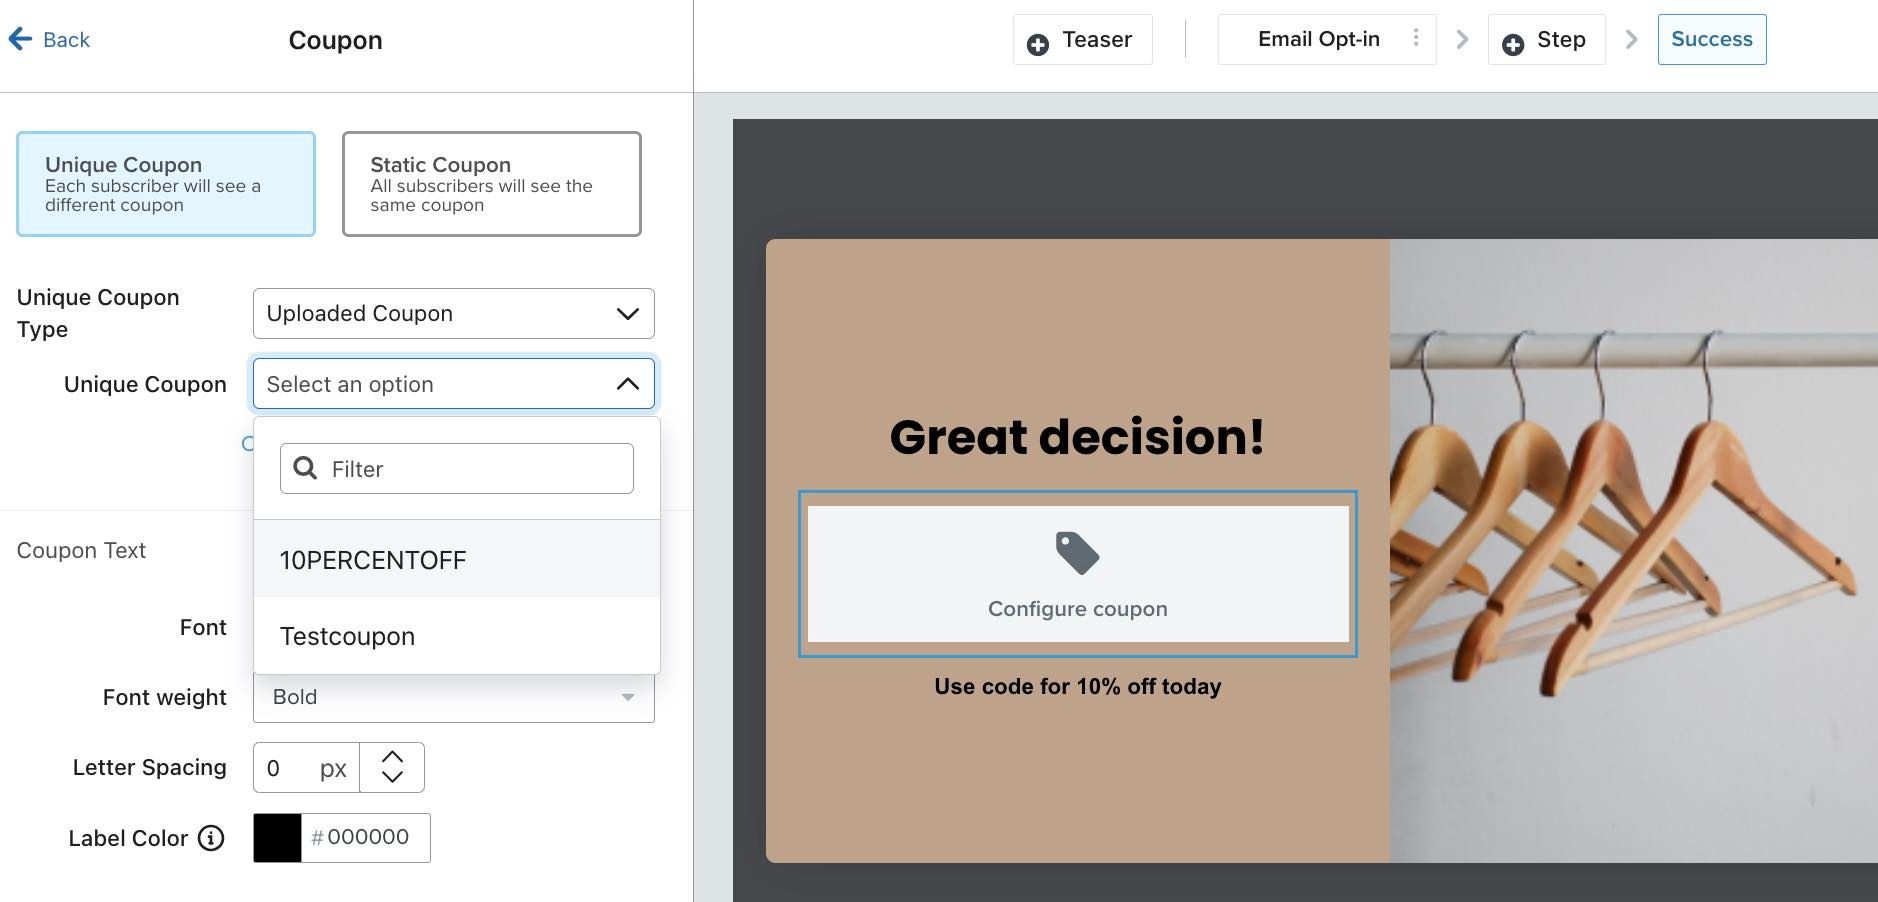
- In your form, choose Uploaded Coupon as your Unique Coupon Type.
- Click the dropdown next to Unique Coupon to either choose an existing coupon, or click the Create uploaded coupon link.
- If you chose an existing coupon, make sure you've uploaded codes to this coupon.
- If you chose to create a new uploaded coupon, the Create Coupon page will open in a new tab. From here:
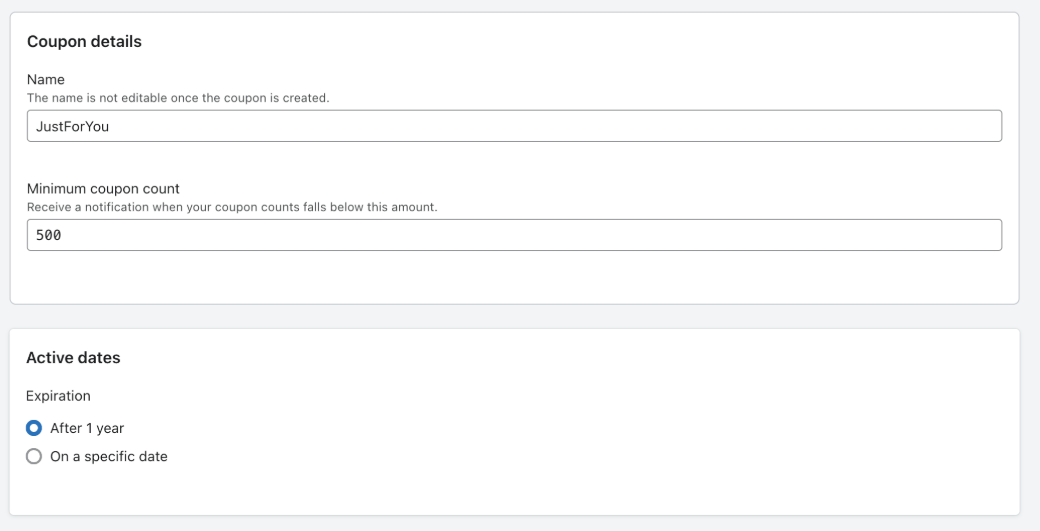
- Configure the following details:
- Name (e.g. JustForYou)
- Minimum coupon count (e.g. 500)
- Configure the following details:
The coupon count must be a value between 100 - 5000. Values outside of that range are not accepted. If no minimum is specified, the default count will be 500.
- Expiration date
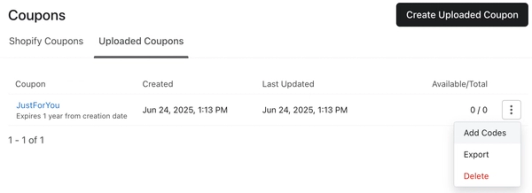
- Click Create coupon in the upper right corner. This will bring you to the Uploaded Coupons page.
- On the Uploaded Coupons page, click the 3 dots > Add codes to the right of the coupon that you would like to use for your form.
- On the Uploaded Coupons page, click the 3 dots > Add codes to the right of the coupon that you would like to use for your form.
- Upload your CSV file to process these codes. You can reference our guide for uploading unique coupons for assistance.
- Navigate back to the sign-up form builder tab and reload the page.
- Select the Success step, then click Configure coupon in the preview.
- Next to Unique Coupon, choose your new uploaded coupon from the dropdown.
- Add an existing static coupon as a Fallback Coupon. This is a static code that only appears if you run out of unique coupon codes so that your customers can still receive some coupon.
- You need to first upload a static coupon into Klaviyo to paste into the Fallback Coupon textbox (e.g. 10PERCENT).
- You need to first upload a static coupon into Klaviyo to paste into the Fallback Coupon textbox (e.g. 10PERCENT).

Finish editing and publish your form
Once you have coupons set up for your form:
- Make any final styling changes to the look and text of your coupon, or the other steps on your form.
- When you're ready to set your form live, click Publish.
- Go to your site and reload the page to see your form appear.
It may take a moment for the form to appear on your site while the unique coupon code generates.
- Fill out the form to test that your coupon has processed correctly. Once it has, customers will receive a coupon code directly in the success message of your form to copy and use on your site.
If you use a Shopify coupon in your sign-up form, it will automatically apply to a customer's Shopify checkout page upon them reaching the form's final step.
Additional resources
- Getting started with coupon codes in Klaviyo
Learn how to create and upload unique and static coupon codes in Klaviyo to incentivize customers to engage with your brand. Offering an incentive can help you improve the customer experience, resulting in higher sales and increased lifetime value.
- How to create unique coupon codes for Shopify
Learn how to create single-use coupon codes for your Shopify store so that each customer receives their own unique coupon code for a given promotion on your site. This feature provides an alternative to creating a generic, also known as a static, coupon code, so you don't have to worry about codes being shared.
- Getting started with Shopify
Learn how to integrate Klaviyo with Shopify in order to bring your customer profile and order data into Klaviyo and reach customers with targeted messaging. Additionally, enable Klaviyo onsite tracking and sign-up forms, and sync data from Klaviyo to Shopify.
- Klaviyo practitioner certificate