Troubleshooting your WooCommerce integration
You will learn
Learn how to solve issues with your WooCommerce integration setup by following the relevant troubleshooting scenario described below. If you are encountering issues not on this list, please reach out on the Community or to our Support Team.
Before you begin
If you have not already, read our guide on getting started with WooCommerce for step-by-step instructions on integrating. If you are looking to upgrade your plugin, check out our article on how to upgrade your WooCommerce plugin.
Troubleshooting scenarios
Consult the following scenarios based on the error message received in-app to resolve your issue.
Please note that if you choose to remove your integration and then re-integrate, your WooCommerce data will not be deleted from Klaviyo.
"To avoid functionality disruptions, you may need to disable the following plugins: Plugin Name(s)"
If you have active caching plugins or redirect plugins in WordPress, these can interfere with Klaviyo’s integration and cause connection issues. We recommend disabling these plugins during the integration setup process.

“We can’t complete your setup”
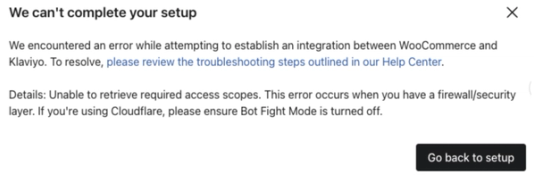
This message means that either your firewall is blocking Klaviyo’s requests, that you have Bot Fight Mode enabled in Cloudflare, or both.
To resolve, we recommend both allowlisting Klaviyo integration traffic and disabling Bot Fight Mode (if you have it enabled).
- Learn how to allowlist Klaviyo integration traffic IP addresses.
- To disable Bot Fight Mode in Cloudflare:
- Log in to the Cloudflare dashboard.
- Select your account and domain.
- Go to Security > Bots.
- For Bot Fight Mode, select Off.
“Ensure your WooCommerce store has https and SSL enabled”

Klaviyo expects your store URL to adhere to HTTPS protocols, meaning that the website has a valid SSL certificate. If your website is in HTTP rather than HTTPS, you may run into issues.
You can check if your SSL certificate is valid at SSL Server Test (Powered by Qualys SSL Labs).
Klaviyo requires that the tests pass with A gradings.
“Unable to access API with provided credentials”
You may receive this error if you have customizations in place to prevent API access for non-logged-in users. Typically, this is a function in the functions.php WordPress file, which triggers a 401 status code response.
If you have a customization like this, delete it or comment it out to eliminate the error. For more information on this error, check out the WooCommerce REST API FAQ.
"Unable to access the orders API, please check connection settings and try again"
This error means that when Klaviyo tries to validate the WooCommerce integration and get an order count, their API doesn’t return a value Klaviyo expects or it returns nothing at all.
Since the integration hasn't officially connected to Klaviyo yet, this means that it needs to be resolved within WooCommerce.
To get more information about this error, you need to make an API call to the order count endpoint, which will provide more insight into what is being passed to Klaviyo. Here is an example cURL request. To use it, fill in your store URL, consumer key, and consumer secret:
curl https://STORE_URL/wp-json/wc/v3/orders \
-u CONSUMER_KEY:CONSUMER_SECRET
“Your Klaviyo plugin is out of date”
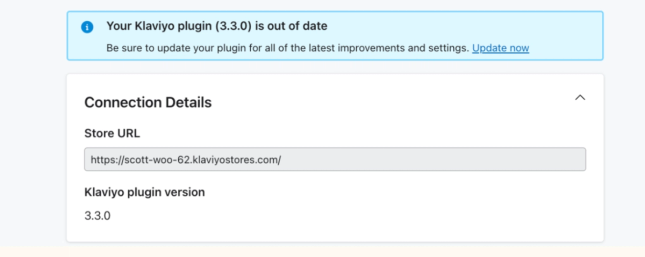
Occasionally, the webhook will be delayed in reaching Klaviyo, temporarily causing you to see the old settings page. This should resolve itself after a few minutes.
404 when connecting to Klaviyo from WordPress
To resolve this, you should confirm that you have Permalinks enabled for your WordPress site. WooCommerce authentication will not work unless Permalinks are enabled.
- Navigate to your WordPress site and go to Settings > Permalinks.
- Under Common Settings, choose any link structure other than Plain.
- Confirm by clicking Save Changes.
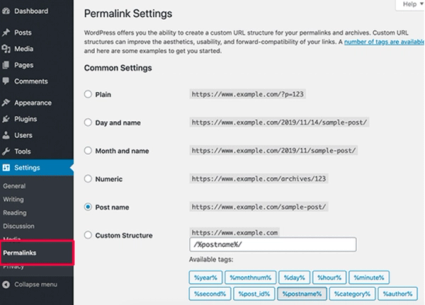
- When you’re done, re-integrate with Klaviyo.
Installation Failed - We were unable to install your extension
You may encounter an "Installation Failed" error when attempting to install the integration via the WooCommerce Marketplace.
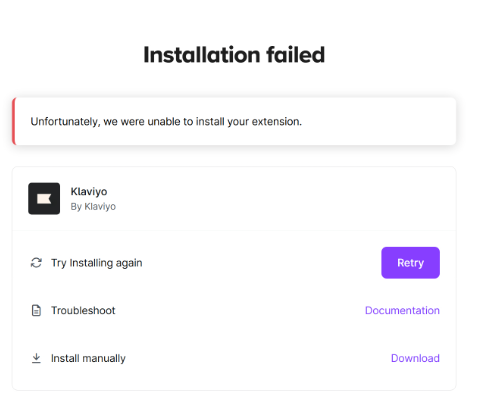
In the event you are unable to successfully install from the WooCommerce Marketplace, you can also install the plugin from your Wordpress plugin admin.
- Navigate to your WordPress admin and go to Plugins.
- Select Add Plugin.
- Search for Klaviyo in Search Plugins.
- Select Install Now.
- Select Activate.
- Select Marketing from the lefthand navigation, then click Klaviyo.
- Click Connect Account to begin, then proceed to Enable the WooCommerce integration in the Getting started with WooCommerce article.
Webhook events aren't reaching Klaviyo
You may notice that WooCommerce events fail to reach Klaviyo. Three issues cause almost every case. If you check all three and the problem continues, contact Klaviyo Support.
1. Your firewall or security plugin blocks the DELETE request
Klaviyo sends a DELETE request to remove an old webhook before it registers a new one. Some firewalls and security plugins block the DELETE method on /wp-json/ requests by default. If your firewall blocks DELETE, Klaviyo cannot complete this step, and webhook authentication fails.
How to check:
- Open your firewall or security plugin.
- Check the request log for blocked DELETE requests to a
/wp-json/URL. - If your host manages the firewall, ask your host to check its logs instead.
How to fix: Allow the DELETE method on /wp-json/wc/v3/webhooks/ in your firewall or security plugin rules. If your host manages the firewall, ask the host to make this change.
2. Cloudflare or another WAF blocks the request before WordPress sees it
If your site sits behind Cloudflare or another web application firewall (WAF), the WAF can block or challenge Klaviyo's API calls before they reach WordPress. A blocked request can return an error like this in your logs:
{"code":"woocommerce_rest_cannot_view","message":"Sorry, you cannot list resources.","data":{"status":403}}
How to check:
- Open your Cloudflare dashboard, or your WAF's dashboard.
- Go to the security event log.
- Look for blocked or challenged requests to a
/wp-json/wc/v3/URL, around the time of the failure.
How to fix: Add an IP Access Rule in Cloudflare (or the equivalent in your WAF) that allows Klaviyo's integration IP ranges, with the action set to Allow. See How to allowlist Klaviyo integration traffic IP addresses for the full IP range list and step-by-step Cloudflare instructions.
3. Your API key does not have write access
Klaviyo uses a WooCommerce REST API key to read store data and to manage webhooks. If this key has Read-only permission, WooCommerce blocks any write action, including webhook registration. The request fails with a rest_forbidden error.
How to check:
- In WordPress, go to WooCommerce > Settings > Advanced > REST API.
- Find the key used for your Klaviyo integration.
- Check the value in the Permissions column.
How to fix:
- Click Edit on the key.
- Change Permissions to Read/Write.
- Save the key.
Do not revoke the key and create a new one. A new key has a new secret. The new secret breaks Klaviyo's connection to your store.
Additional resources
- Getting started with WooCommerce
Learn how to install the Klaviyo WooCommerce extension and enable the WooCommerce integration in your Klaviyo account.
- WooCommerce data reference
This article covers the data that is synced when you integrate your WooCommerce store with your Klaviyo account.