Profile properties reference
You will learn
Learn about the difference between custom and Klaviyo properties, how to use them to track information about your subscribers, how to remove them, best practices, and more.
Profile properties allow you to understand your subscribers on a personal level and segment them based on this knowledge. By the end of this article, you'll gain new insights into your customers and leverage properties in a more strategic and organized way.
Before you begin
Before jumping in, it's important to have your ecommerce store integrated with Klaviyo and profiles in your account to work with. It is also a best practice to publish sign-up forms so that you can gather custom as well as Klaviyo properties about your subscribers.
Sign-up forms are enabled by a code snippet called Klaviyo.js. This snippet is automatically installed through the Klaviyo integration for most ecommerce platforms. Learn more about Klaviyo.js and your ecommerce platform.
Differences of properties used in metric reports
In addition, it's important to note that metric reports record profile properties when they are initially ingested into Klaviyo. In comparison, segments recognize profile properties that are currently present on the profile. This means that if you are building a metric report with a filter for say a location and that individual has since moved, it may not capture this update accurately.
Custom vs. Klaviyo properties
You can find profile properties within any profile in your account. Find a sample of profiles in the Profiles tab of your Klaviyo account. Here, your first 50 contacts will appear.
To see the properties for a profile:
- Click into a profile or search for one directly in the search bar at the top of your page
- View the properties on the right-hand side in the Information section
There are two different types of profile properties: custom properties and Klaviyo properties.
Custom properties
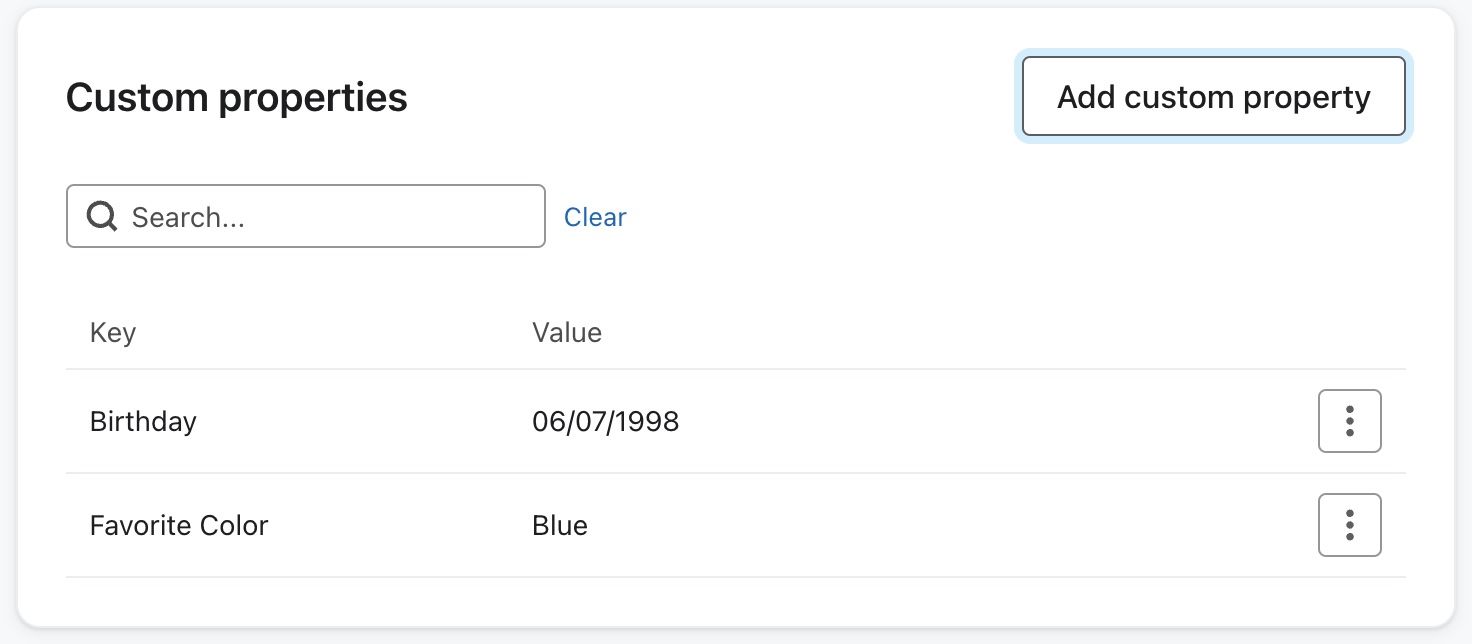
Custom properties are found under the custom properties section in the Information tab of a profile. Custom properties are just that— completely customizable properties that you generate yourself and are specific to your content, brand, and use case.
Custom properties that you may consider gathering include:
- Information about gender, size, interests, and birthdays
- Preferences around email frequency, type of content, etc.
- Responses to a questionnaire
If a profile property has the same name as a Klaviyo property on your account, you will not be able to segment on that custom property. We recommend that you avoid giving custom profile properties the same name as Klaviyo properties for this reason.
Klaviyo properties
Klaviyo properties are default properties in your account, and you can find them listed in various spots within a profile.
When exported in a file, many of them are identified by a dollar sign ($) prefix. This dollar sign prefix is not necessary to add to your CSV when uploading the same properties into Klaviyo as you will be prompted to map the upload with the property of your choice.
Klaviyo properties include:
- Klaviyo ID
- First name
- Last name
- Organization
- Title
- Phone number
- Address
- Address 2
- City
- State / region
- Country
- Zip Code
- Latitude
- Longitude
- Source
- Consent
- SMS consent timestamp
- First active
- Last active
- Profile created on
- Date added
- Last open
- Last click
- $consent_form_id
- $consent_form_version
- $consent_method
- $timezone
- $id
- $locale
- $locale_language
- $locale_country
Shopify's locale field syncs automatically to $locale in Klaviyo.
The First active and Last active properties are displayed on profiles your browser's timezone, but are evaluated in the UTC timezone in segmentation.
Note that the following Klaviyo properties cannot be edited with a CSV import:
- Klaviyo ID
- First active
- Last active
- Profile created on
- Date added
- Last open
- Last click
- $locale_language
- $locale_country
When you export a profile, the last open and click, first and last active, and date added properties do not appear in your CSV.
Using the $id property for identifying profiles is often not best practice. However, if you choose to do so, please refer to our API documentation to learn how to use it for template sends, personal messages, and targeted exports.
As of April 2022, the external id ($id) property has a limit of 64 characters. Any characters over the limit will be truncated.
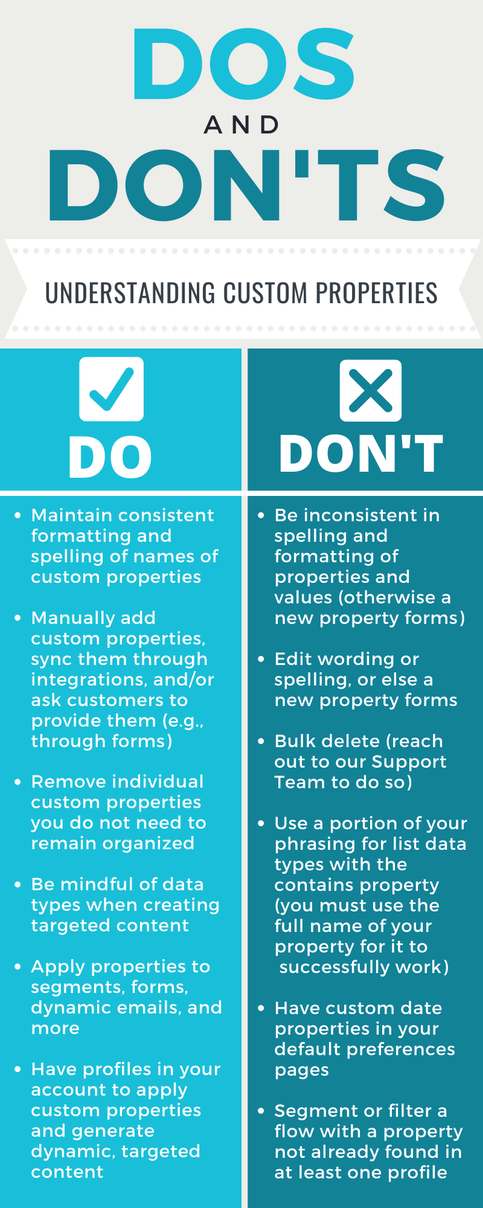
Dos and don'ts for properties
If a profile property has the same name as event data on your account, you will not be able to segment on the event data or view it in drop-downs. Avoid giving profile properties the same name as pieces of event data for this reason. If you remove or rename a custom property that shares a name with event data, the event data will then start showing in drop-downs.
Add custom properties to a profile
There are three ways you can add custom properties to profiles in your account:
- Manually add them (from a list or individually)
- Ask customers for them
- Sync them through your integration
Manually add them
Upload custom properties with a CSV
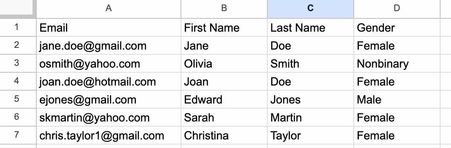
When uploading a list, any column after the first one (i.e., for the email or phone number) in a CSV file can be used to attach a custom property to a profile. For example, you could have a "Gender" column that corresponds with each contact's gender.
- Make "Email" your first column. If you don't have the email, use "Phone Number".
- Use "First Name" and "Last Name" as the next two columns.
- Add your columns for custom properties (e.g., "Gender").
- Add the property value for each person.
If you are uploading a list of values for each custom property, you will need to format the value as an array (e.g., ["value 1", "value 2", "value 3"]).
If you are uploading a date property, you must format dates as either YYYY-MM-DD or MM/DD/YYYY. To set a time, you can use the format HH:MM:SS (e.g., 00:00:00 for midnight).
- Navigate to Audience > Lists & Segments in Klaviyo.
- Choose an existing list or click Create List/Segment > List.
- Click Upload and select your CSV file of email subscribers.
- Map each column from your CSV to an appropriate property in Klaviyo, then click Next.
- If a property doesn't yet exist in Klaviyo, type in a new property name and click Create New Field.
- Click Next.
- In the field that asks Have these subscribers agreed to receive marketing messages?, choose No. This will not change the subscription status of any current subscribers.
- Click Import.
The maximum allowed custom property size is 100KB.
For information on how to format dates so that they upload successfully in Klaviyo, head to our article on formatting dates and timestamps in CSVs.
If any contacts in your list don’t have an existing Klaviyo profile, a new profile will be created for them. Otherwise, any new properties will be added to their existing profile. You can navigate into one of these profiles to see how it appears on their designated page. Any column that already exists on a contact's profile will be overwritten by the current upload. Meanwhile, any column that does not already exist will not affect existing properties, as you can have as many custom properties as you desire in the Information tab of a given profile.
Individually
You can also manually add individual custom properties to a profile, rather than in a list of profiles.
- Navigate to the profile you wish to add a property to
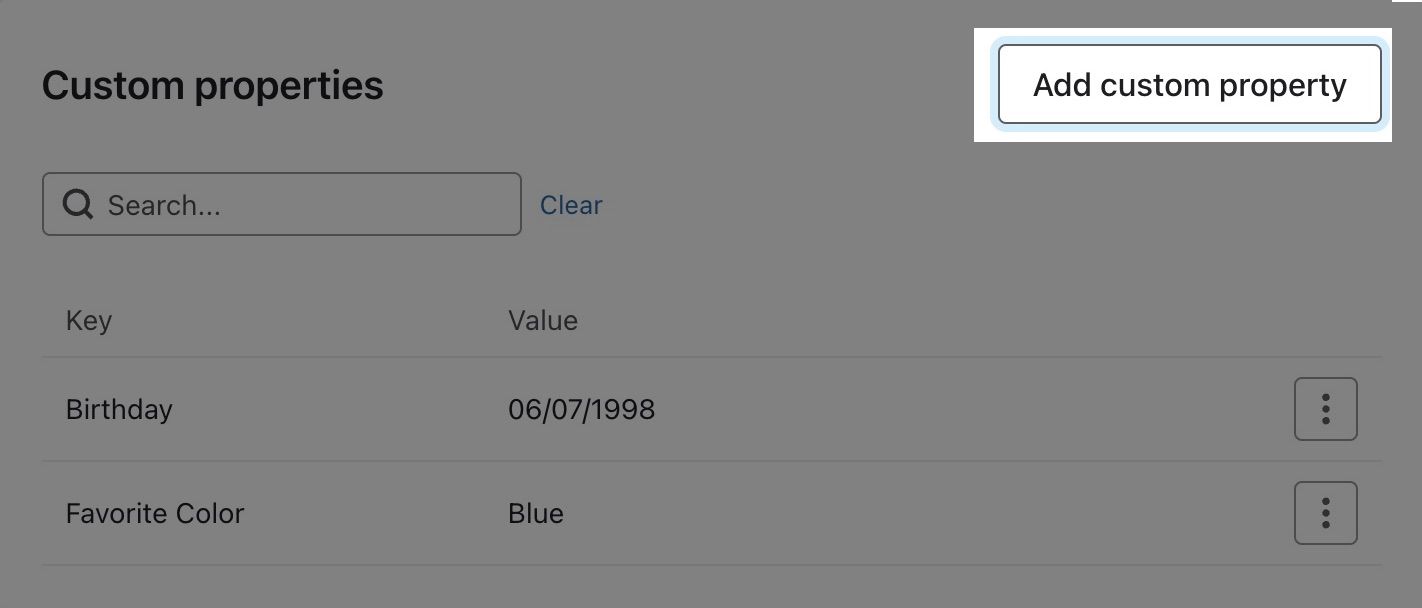
- Select the Add custom property button next to Custom Properties
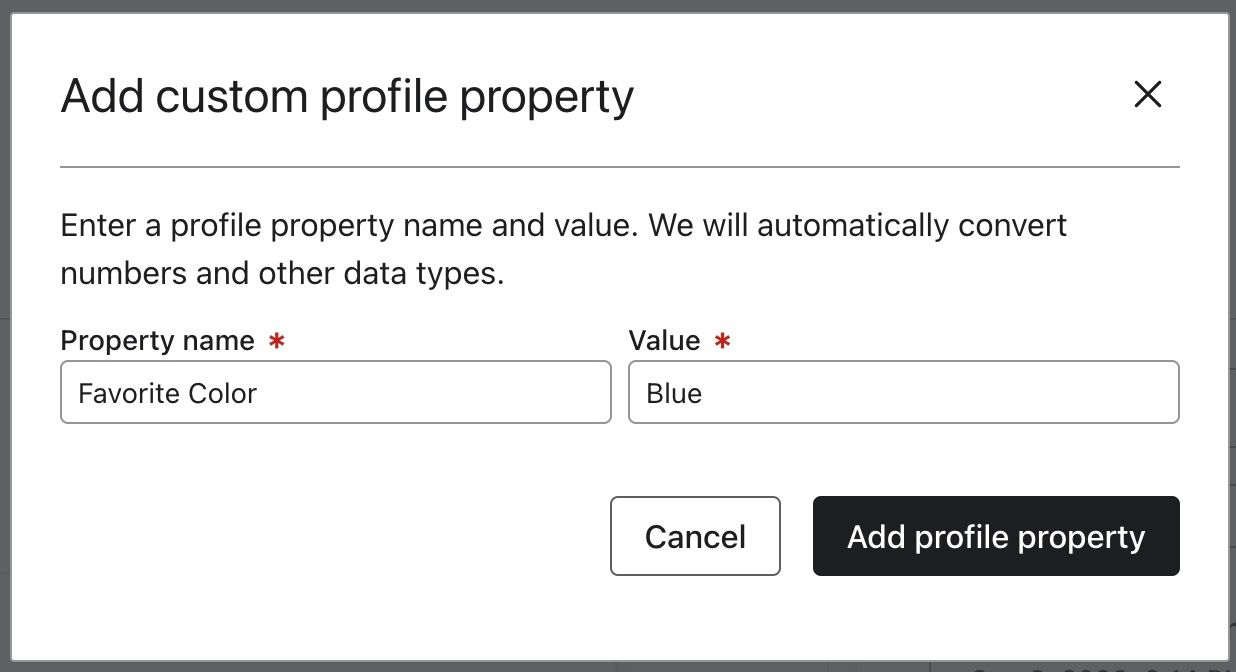
- Add a Property and Value in the modal
- Custom property: Favorite Color
- Value: Blue
- Select Add Property to add this to the profile
Ask customers for properties
The second way to gather custom properties is to ask your customers for this information directly. You can take three possible routes to collect information from customers:
Sign-up form
- Drag and drop a block into the form
- Select the block
- Configure the details of the block, including the text and styling, in the left-hand sidebar
- Select an existing profile property or create a new one
- Add a label and value for the custom property under Property Options
- Save the block
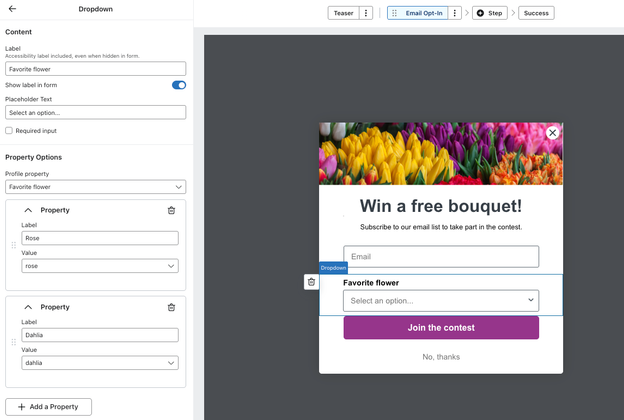
For the example above, a dropdown allows a customer to select their favorite flower. If they select “Dahlia,” this is will be mapped to their profile within your account. If this person already has a value for that property on their profile, when they submit the form, the existing value will be overwritten by their new value.
Form with hidden fields
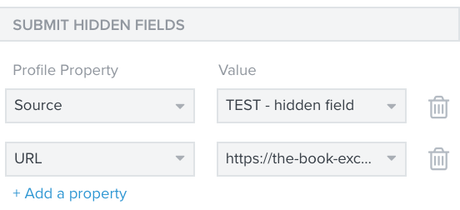
You can also acquire profile properties through hidden fields on a Klaviyo form. Hidden fields collect information discreetly as they are attached to the submit button of your form. They typically collect properties centered around form content or its location on your site. By default, all new sign-ups have a Source property as a hidden field. This identifies where the profile came from in the List Growth Report.
If you add hidden fields that correspond to properties that already exist on someone's profile, they will be overwritten by the new value when someone submits the form.
- Navigate into your button editor
- Select +Add a property under SUBMIT HIDDEN FIELDS
- Choose an existing profile property or create a new one
- Input the value for the property
- Save the button
If you have various forms throughout your website, you may want to add hidden fields to indicate the webpage that a profile was browsing when they submitted your forms. For example, if you own a bookstore with pages dedicated to different genres, you can add a hidden field to your form to collect this URL information. The hidden field then tracks the genre this person is interested in.
Sync them through an integration
The third way to collect custom properties is to sync them directly from your integrations. This happens automatically, and the type of properties that appear depend on what integrations you have. For example, a Shopify integration automatically syncs an Accepts Marketing custom property to Klaviyo.
For more information on the custom properties that are synced through integrations, please refer to the integration documentation on our Help Center.
Manage properties
Name properties
To ensure consistent formatting across profiles, think through the name of a custom property before creating it. Changes to property names and their values, even something as simple as editing the spelling or capitalization, will generate an entirely new property in Klaviyo. Properties and their values must be exactly the same across your account.
For example, changing "gender" with a lowercase g to "Gender" capitalized would result in both inputs becoming their own properties, despite the fact that they are meant to be the same. Keep spelling and formatting consistent for all properties and their values as you add them to profiles over time. "Gender: Male" and "gender: male" would have two different properties and two different values if they were both to be put into your account.
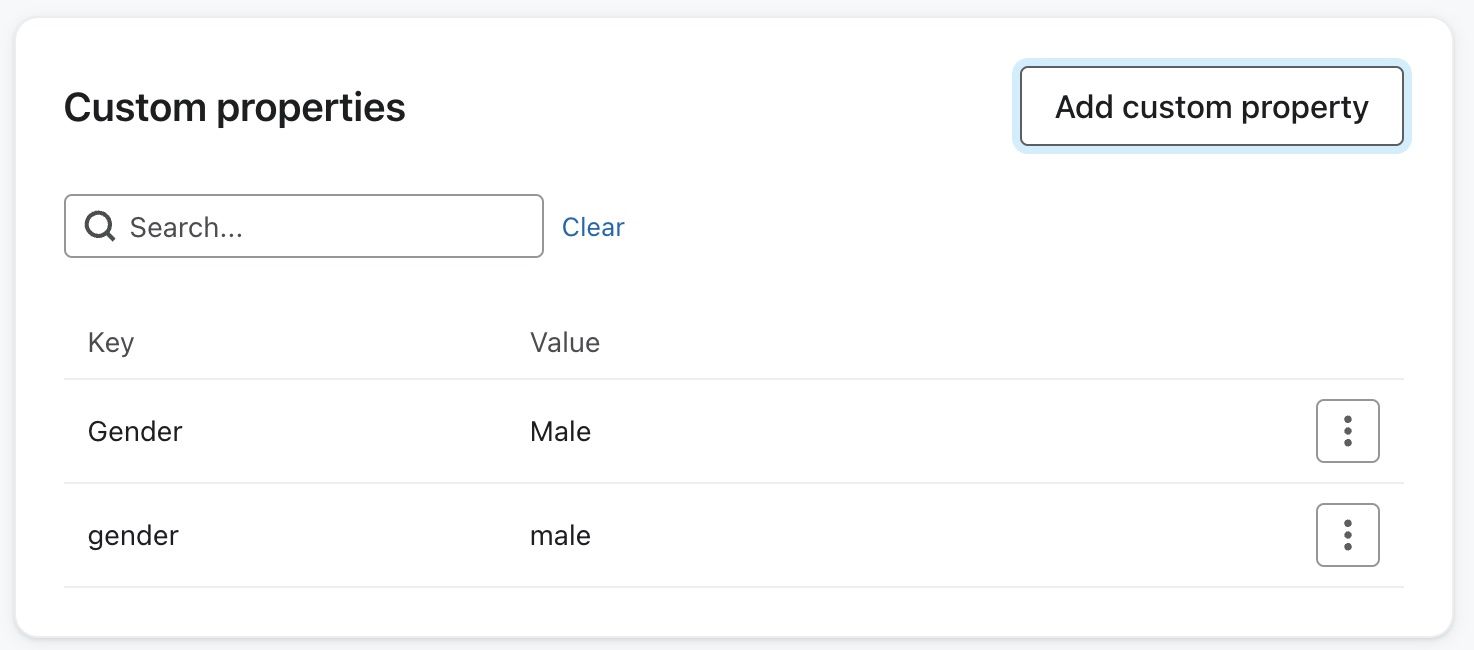
Consider the naming conventions you use beforehand so you don’t end up with extra clutter that you will have to go back and delete. Remember, consistency is key.
You can adjust the name of custom properties if you would like to do so for a small number of profiles. However, custom property names cannot be adjusted in bulk without removing the original property. If you want to rename a property in bulk, first create a segment of profiles with this property and export these customers with their property and value. Next, reach out to our support team and request that we purge the original property from your account and customer profiles. You will then re-upload the profile property and value with the desired name to a list to adjust the property name.
Maintain properties
In general, the goals of property management are to remain organized, cut out superfluous properties that you don’t need, and pay attention to our rules around naming and editing. When naming and editing properties, make sure that the name and value matches across your account as this is case sensitive.
If you decide to edit a property after it has been applied to profiles, it will generate an entirely new property and you will have to go back and delete the previous one. If you do not keep these factors in mind, you will soon have multiple properties for the same information, and your account will become cluttered and disorganized.
Delete properties
It is best practice to clean out properties that are no longer useful to you. You cannot, however, delete Klaviyo properties because they are default Klaviyo properties that are built into the platform. If you want to delete a custom property that you created in your account, you can do so within the profile itself.
If you have many properties that span across profiles, you may need to bulk delete them. Bulk deletion can only be performed by a Klaviyo staff member, so this should only happen when absolutely necessary. If this is the case, reach out to a member of our Support Team. When you do so, you will be prompted to file a support ticket. In that ticket, list all of the properties that you want to be deleted.
To delete a property from a single profile:
- Navigate to that profile
- Head to the Custom properties section of that profile
- Find the custom property.
- Expand the menu for the property and select Delete.

- Select Yes when prompted to confirm you want to delete the property
Note that deleting a property from one profile will not automatically delete it from other profiles. This should only be done when you want to remove properties from a single, or a small, number of profiles.
Use profile properties
You’ve learned what properties are, how to upload them, and how to manage them. Now, the question is: how do you use profile properties? In this section, we'll go through examples of how to use Klaviyo and custom properties in your account.
More specifically, we will outline:
- How to input dynamic properties into Klaviyo emails
- How to use properties to create key segments for advanced targeting
- Best practices around filtering flows base on properties.
You cannot segment or filter a flow with a property until it exists on at least one profile within Klaviyo. For that reason, you may consider having a test profile to add these properties to before creating your designated segments and flows.
Input dynamic properties in Klaviyo emails
To input properties in emails, you can use variable syntax. Variable syntax allows you to customize content to be user-specific by inputting the person variable and adding the lookup filter with your property attached. This will dynamically populate emails with customer-specific content.
Here is an example in which Favorite Color is the desired input.

It's usually a good idea to provide a default value in case someone doesn't have the custom property you're trying to use by including the default filter. It is also important to note that we don't recommend placing a custom date property in your default preference pages in Klaviyo, as you will need to make sure people enter a date in a format we accept.
Use properties to create key segments
A key factor in sending successful email campaigns is to segment your audience. Segmentation allows you to target email recipients with specific content that appeals to them. Moreover, you can use segments to send customers content via social media ads, targeted forms, and SMS.
The example below shows a segment of women who are Patriot's fans. The custom property is brand, and these specific individuals chose the Patriots as their brand of choice.
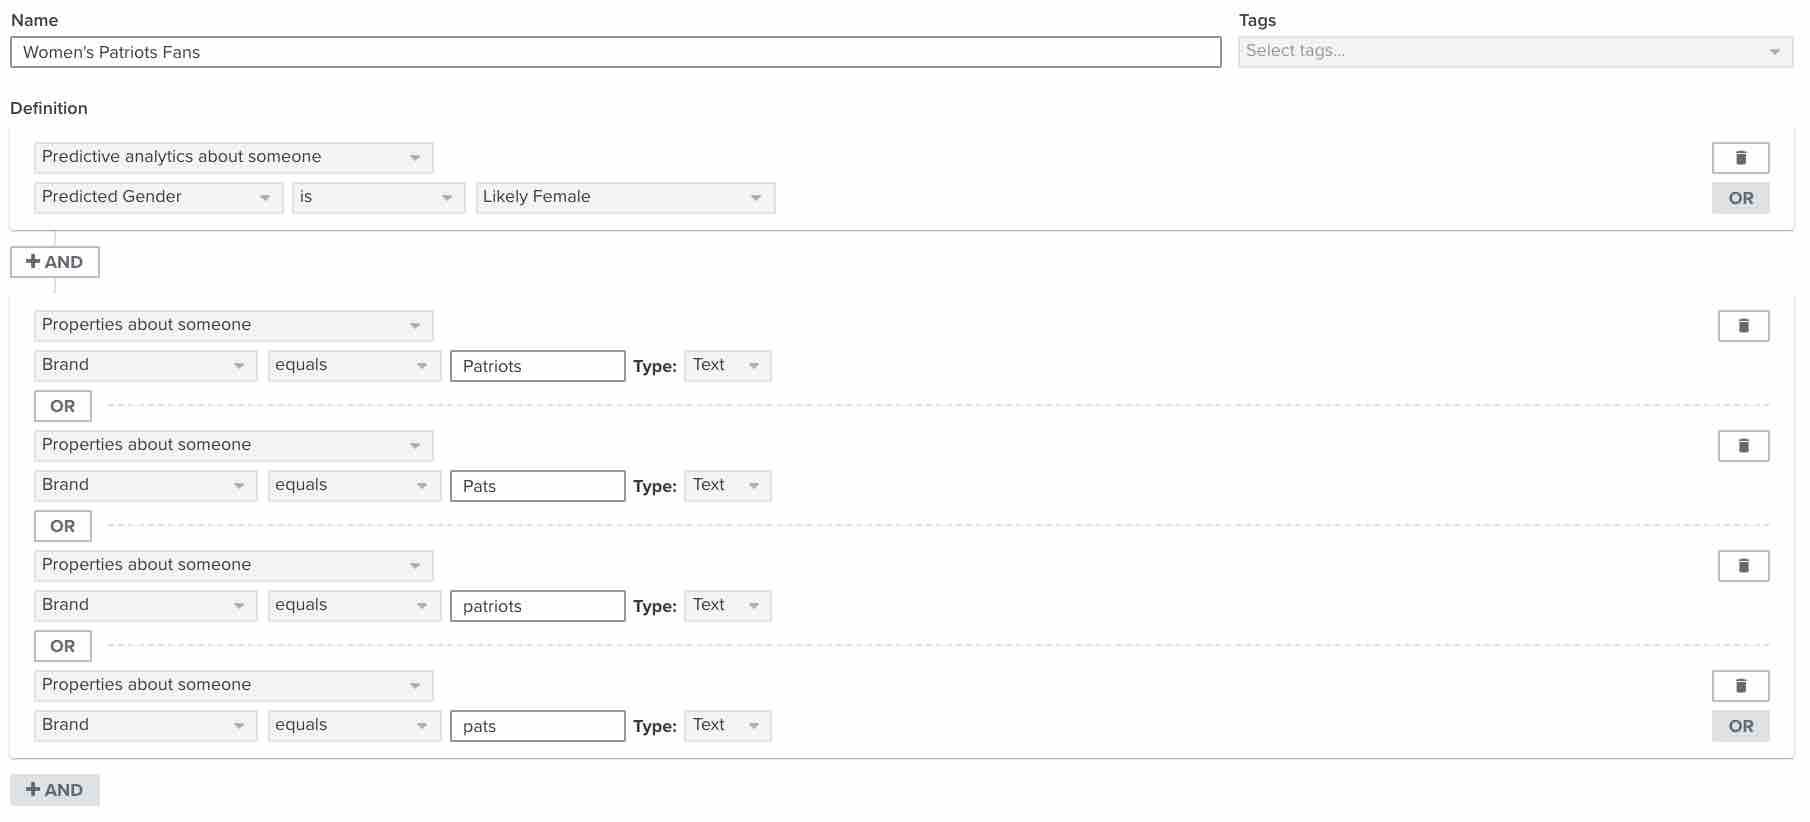
Make sure that all instances of that property value and name are included if you have not remained consistent across profiles. Moreover, customers may add their sports preference differently, in this case with Pats, Patriots, patriots, and pats. Another common instance when this occurs is with country. Someone from the United States may list their country of origin as USA, US, us, United States, etc. All values that you add need to be accounted for, split between OR conditions.
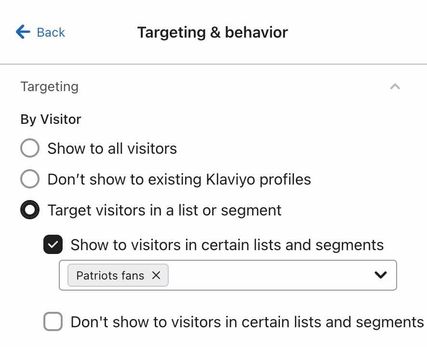
Next, target this segment with a form that informs customers of new deals on women’s Patriots apparel. Instead of having an area to subscribe to marketing, have a link to that page of your website. Likewise, set the form to only target individuals within the chosen segment.
You can also set your segment to include anyone whose property contains a certain value. This means that your segment condition would state: Properties about someone > contains ________.
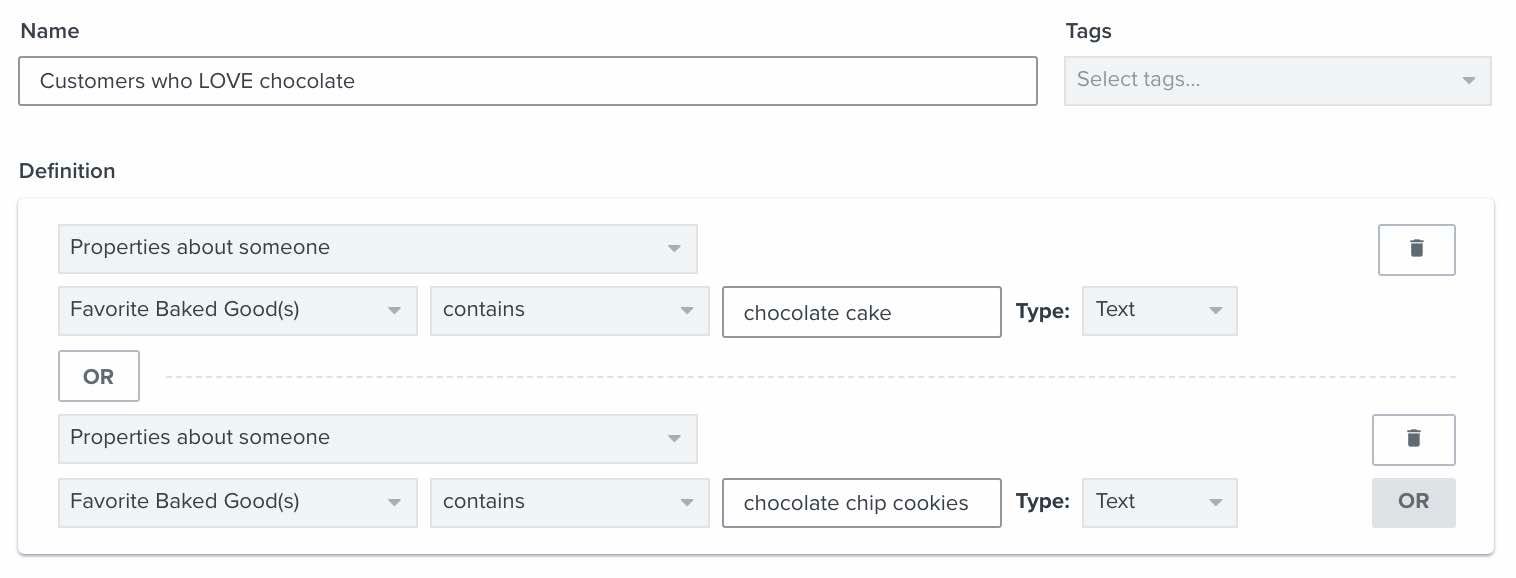
You can only apply contains to list data types. List data types must also have the full value within your condition. They are formatted as an array in your account. For example, if you own a bakery and gather custom properties for your customers' favorite baked goods, you can give them the option to select multiple properties associated with their one profile (e.g., chocolate cake, vanilla cake, chocolate chip cookies, and sugar cookies). These will appear as list data types in your account.
However, you can't simply target "chocolate" when creating the segment condition by stating that the property "contains chocolate." Instead, include the entire property name, written out in full, (such as chocolate cake and chocolate chip cookies) as shown below:
For more information and ideas for segments that you can customize and use to boost sales, check out our Advanced segmentation reference.
Use properties to filter flows
You can use properties to filter flows and target customers with specific information that is relevant to them. An example of this would be a Happy Birthday Flow. You can collect birthdays from customers when they sign up for your newsletter. Then, use this property when creating your flow by having the flow trigger be a Date Property and sending them a coupon or thoughtful message via email or SMS. Have this flow repeat annually and update the timing to match your customers' local times and your own content needs.
Make sure to choose different names for your profile properties and event properties. If an event property has the same name as a profile property, only the profile property will appear in the filter.
By now, you’ve learned how to create, manage, and use custom properties. You will also have a deeper understanding of the differences between Klaviyo and custom properties that you make yourself. Check out our complete list of the do's and don’ts of custom properties at the end of this guide as another resource to add to your Klaviyo toolkit. Then, see how you can use properties to create targeted content that directly pertains to your business. This is just another step in the direction of truly owning your marketing.
Additional resources
- Understanding the information section of a profile
Learn about the information section of a profile in Klaviyo, which contains details such as when and how the profile found you and the last time they were active.
- Advanced segmentation reference
Learn effective advanced segmentation strategies that provide insights into your customer base and create highly personalized experiences for your subscribers.
- Understanding data types
Learn about the different options available for storing your data in Klaviyo, and how to use each one. Klaviyo allows you to harness the data collected about your customers to power data-driven marketing choices that will grow your brand. That being said, it's important to understand the data that's being pulled into your account.